swissmex TURBO 610205 User manual

BN610205-0423NA
R00
Printed in Mexico
MODELS
With this practical mill you will be able to
grind green and dry corn canes as well as
corn grains "Produce the fodder for your
cattle by yourself".
OPERATOR’S MANUAL
TURBO MILL FOR GREEN &
DRY MATERIAL
AGRICULTURAL MILL FOR
GREEN & DRY MATERIAL
PREMIUM
610305 (sin motor)
610375
610385 (sin motor)
610355
610205
Balanced
610205,
610355, 610305,
610375, 610385

1
INDEX
INTRODUCTION
1.
Thank you for buying a Swissmex agricultural mill, we guarantee that the product you have purchased has unsurpassed quality since it
was developed with state-of-the-art technology, following the required quality standards.
This equipment was carefully designed and manufactured to provide maximum performance, economy, and ease of operation. It is
important that the operator knows all the information contained in this manual, read it before operating it, follow the recommendations step
by step and have it on hand to consult it when necessary.
This mill is designed for you to grind fodder for your cattle, since you can grind stubble (dry corn stalk) or green corn stalk,
as well as dry corn grain.
This manual contains important safety warnings: please read it carefully and be aware of any
possible accidents. Keep all stickers on the equipment and replace them when necessary.
SAFETY INFORMATION
2.
Below we will describe the most important points to review for the safety of you and third parties.
2.1 PROTECTIVE EQUIPMENT
- Protective gloves
- Safety glasses
- Close shoes
- Ear plugs
- Overalls / Work Clothes
- Mask
4.
6.
5.
7.
8.
9.
4.2 Starting procedure
4.3 Fodder chopping
Maintenance..................................................................... 7, 8
5.1 Guide for daily maintenance
5.2 Major maintenance
5.3 Maintenance schedule
Trouble shooting……………………………..……….......….. 8
Spare parts…………………………………………….….. .9, 10
Storage…………………………………………………......…. 10
Warranty…………………………………………………......... 11
1.
2.
3.
Introduction…....................................................................... 1
Safety information............................................................ 1, 2
2.1 Protection equipment
2.2 Safety measures
General information….................................................. 3, 4, 5
3.1 Identification plate
3.2 Main components
3.3 Technical data
3.4 Assembly
Operation…....................................................................... 5, 6
4.1 What to do before starting up the equipment

2
2.2 SAFETY MEASURES
Before putting your equipment into operation, read this instruction manual carefully. Incorrect handling by untrained persons can cause
serious accidents.
Do not make adaptations or improvisations; they compromise your equipment and put your security and that of third parties at risk. Any
modifications or adaptations you make are at your own risk and this voids the warranty.
Do not allow the presence of children, the elderly, people with special capacities or animals near the equipment during its use,
maintenance, and even during storage.
Always keep the equipment in perfect condition.
When transporting your equipment, verify that the coupling to the vehicle that will tow it is correct. Do not exceed 25 km/h.
If, due to the needs of your work with this equipment, you need to travel on federal or state highways, follow the road regulations. Keep
hands, feet, and loose clothing away from moving parts.
When disconnecting your equipment make sure it is done on flat and firm ground.
Do not allow the operator of the equipment be under the influence of alcohol, drugs, or medication, it is very dangerous.
Do not operate the equipment in an enclosed area for a long period of time as the engine generates carbon monoxide.
Follow the instructions on the labels affixed to the equipment.
Avoid accidents due to lack of knowledge and not following the safety rules described in this manual.
WARNING!
Engine exhaust gases contain carbon monoxide, which is harmful and can cause death.
Do not run the engine inside a building or an enclosed area.
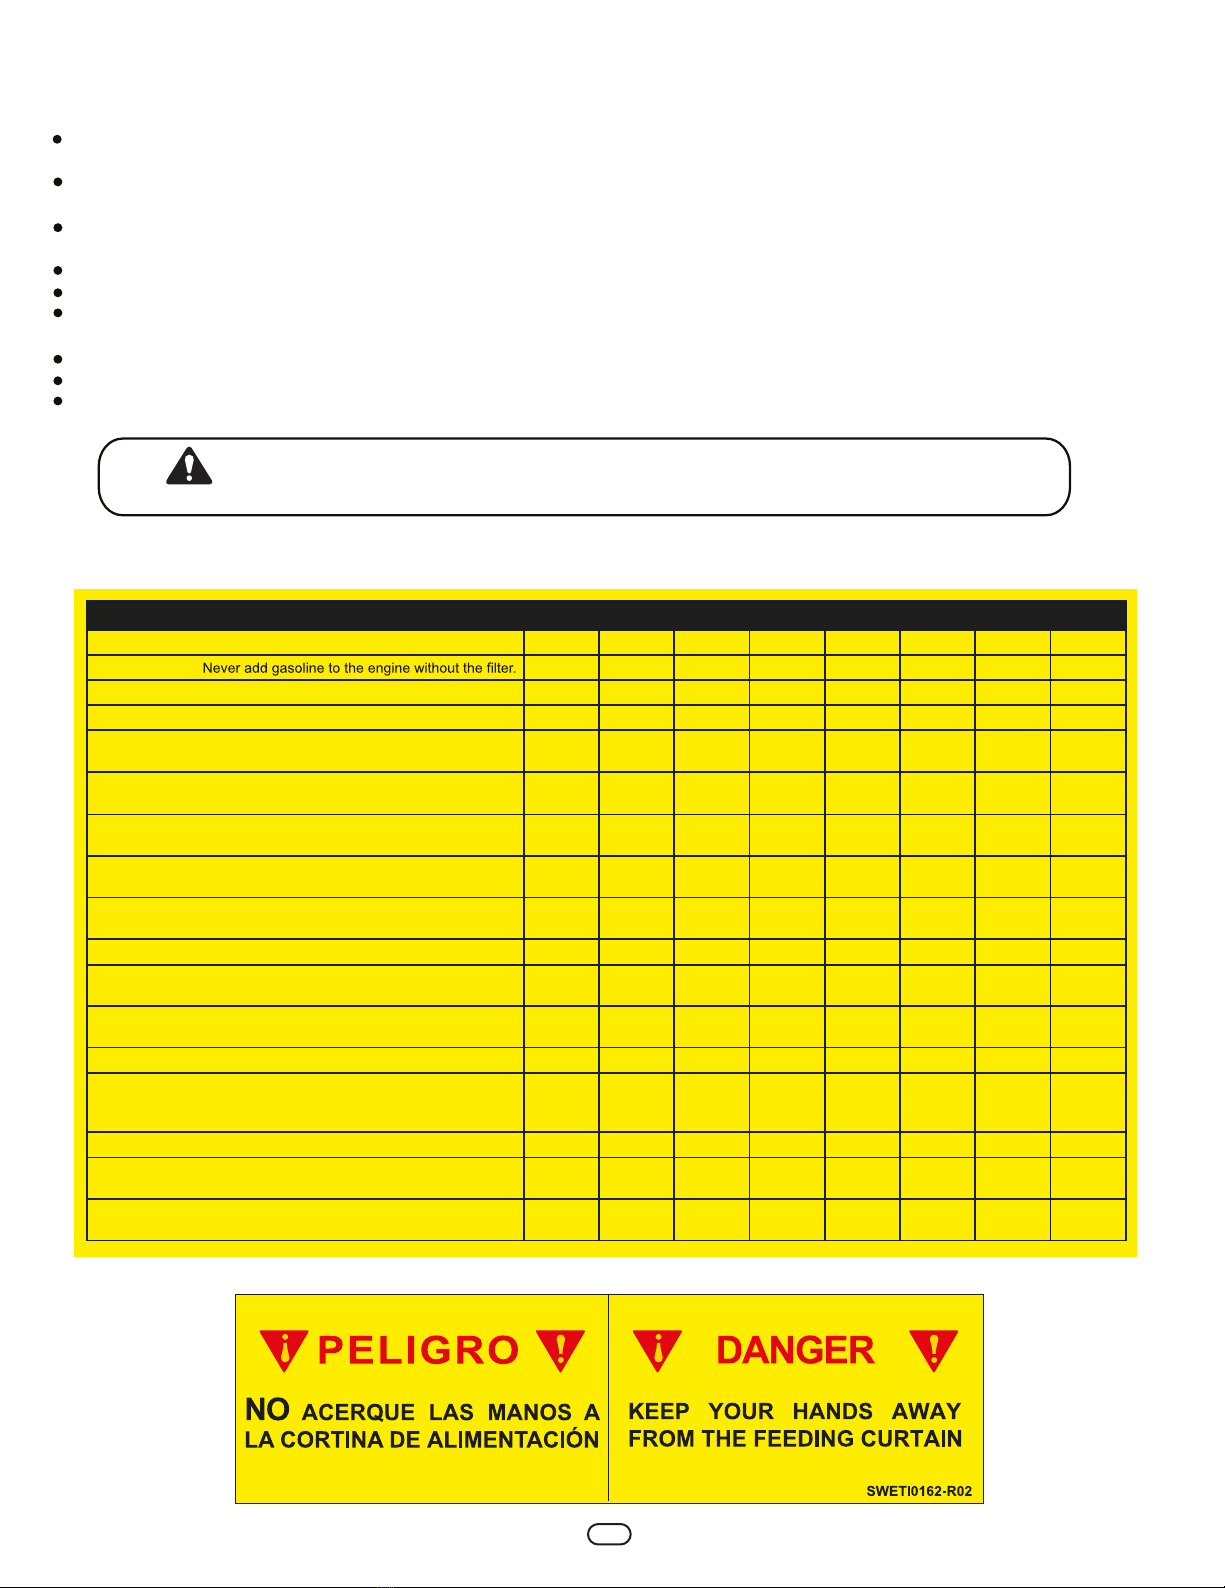
IMPORTANT!
610200 610300 610350 610370 610500 610510 610540 610550
X X X X X X
Never start the engine without checking the oil level. X X X X X X
Do not touch the exhaust protective cover and do not remove it. X X X X X X
Do not work in very windy conditions. Avoid material
covering cooling slots. X XXXXXX
Start the engine with the belts slack and never remove the
protection. XXXXX XX
Never run your engine tilted more than 15º, because
the engine can break down X X X X X X
Do not exceed 540 RPM on the tractor PTO. Always keep the
gearbox level and constantly check that the belts tension is correct. X
Always engage the PTO at low revs and go up
gradually until 540 RPM is achieved. X
It is forbidden to put your hands beyond the feeding curtain. XXXXXXXX
Do not introduce materials not indicated in the user’s manual and
alternate the feeding in both ports to avoid overloading. XXXXXXXX
When grinding dry material, use the feed port on the opposite side
from where the engine is placed. XXXXX XX
Do not use the screens when grinding green material. XXXXXXXX
If you transport the equipment, make sure not to exceed 25 km/h.
Always check the air level in the tires and lubricate the wheel hub
periodically.
XXXXXXXX
Grease the bearings at the end of each working day XXXXXXXX
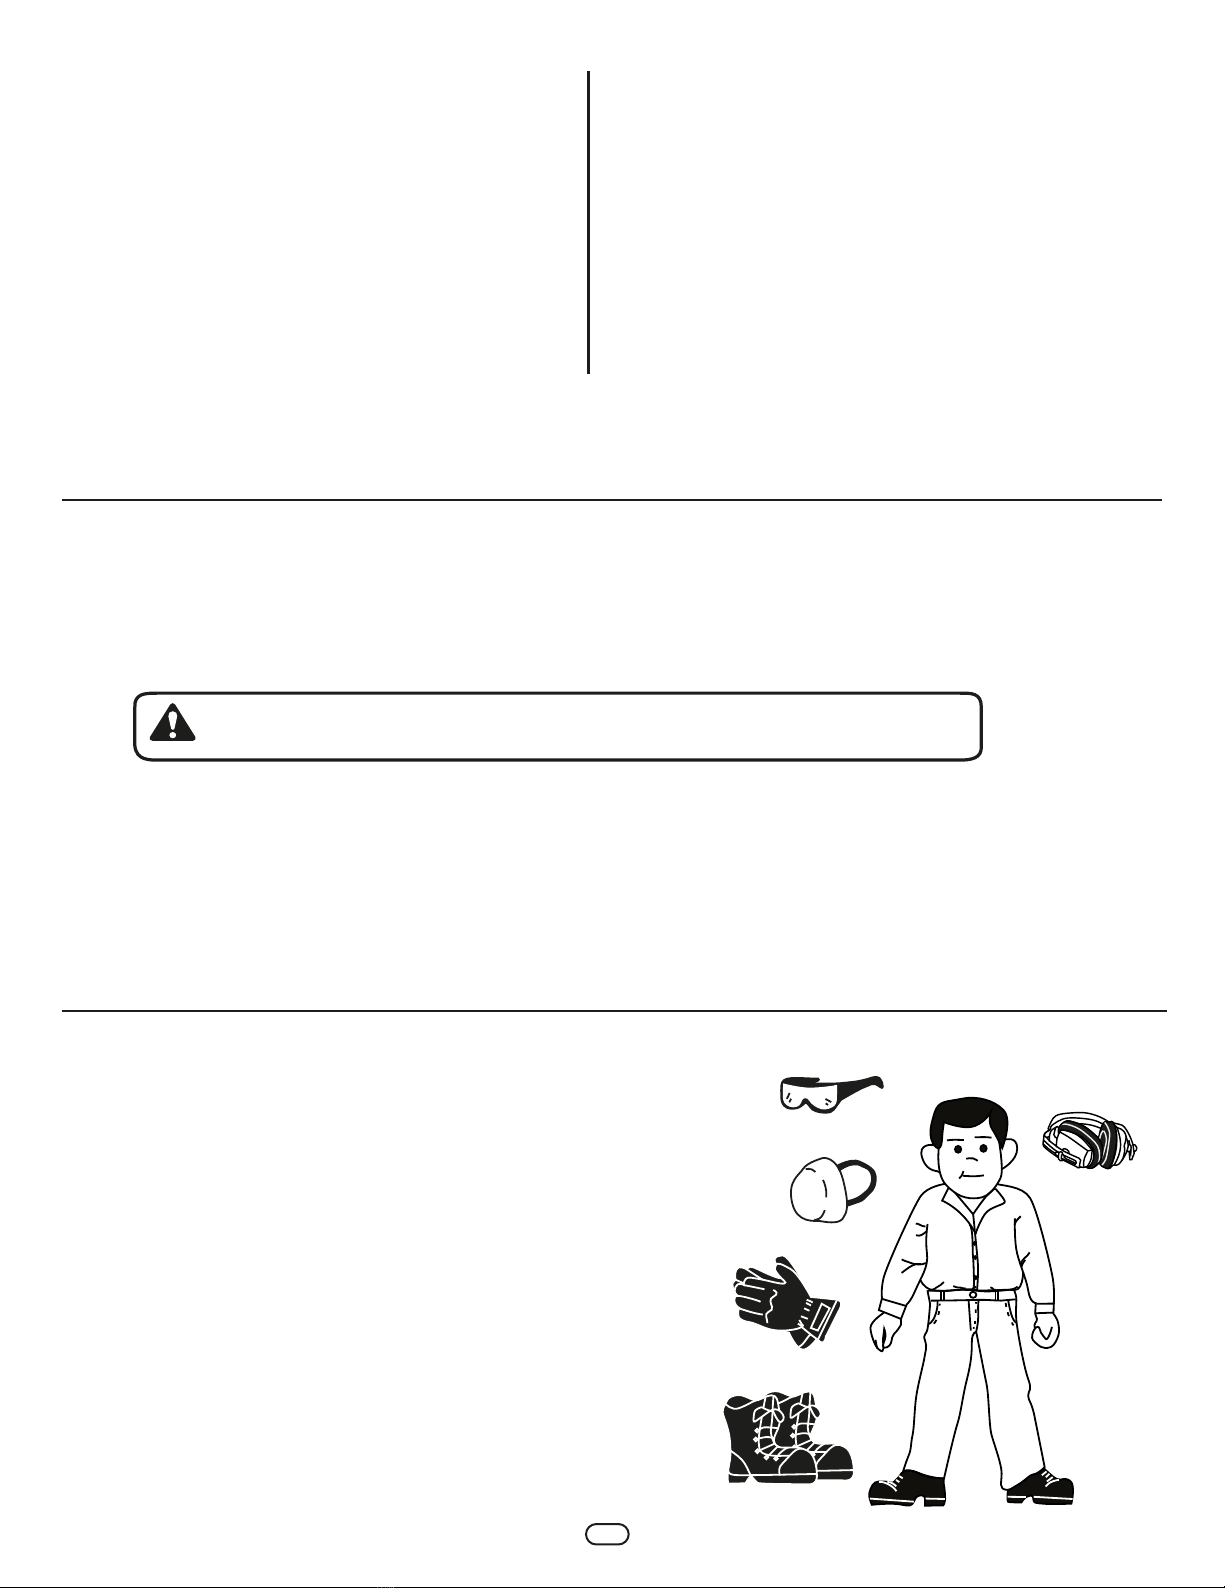
Always use appropriate personal protective equipment. Avoid using
loose clothing XXXXXXXX
Continuous operation of the equipment should not exceed 50
minutes with a 10 minute break. X X X X

3
3.2 MAIN COMPONENTS
GENERAL INFORMATION
3.
1. Chassis
2. Support leg
3. Discharge outlets
4. Feeding ports
5. Engine (610355, 610375 y 610205 models)
6. Grinding chamber
7. Fuel tank (610355, 610375 y 610205 models)
8. Battery (610355, 610375 models)
9. Tires
10. Belt tensioner
11. Belt cover
12. Exhaust
13. Identification plate
14. Screens
15. Folding handlebar
3.1 IDENTIFICATION PLATE
Calle Swissmex No. 500
Col.Las Ceibas
47440 Lagos de Moreno Jalisco
MODEL
SERIAL No.
Your equipment has an identification plate where the model and serial number can be
found. This information will be useful in case of processing a warranty or requiring spare
parts. Write down the data of your equipment so you always have the information at hand.
1
2
10
14
11
12
15
13
57
6
4
8
9
3

4
1. CHASSIS: made of structural iron coated with baked epoxy paint that protects it from corrosion.
2. SUPPORT LEG: keeps equipment stability as a foothold.
3. DISCHARGE OUTLET: allows the output of shredded fodder.
4. FEEDING PORTS: they are tilted so the material slides with the least operator’s effort.
Each port measures 115 X 180 mm with safety gate (for model 610200 it is 110 X 80 mm).
5. ENGINE: Gasoline, 4-stroke with electric starter, 13 HP, air-cooled Zip Star engine (Model 610200 has a 6.5 HP
engine).
6. GRINDING CHAMBER: For chopping green and dry corn cane, it has a 6-blade rotor and 9 crushing hammers, as
well as plates for extracting the material.
7. FUEL TANK: with 6.5 liters capacity (on model 610200 it is 3.6 liters).
8. BATTERY: for the electric starter
9. TIRES: for easy transport, type 165/70R13 (on model 610370 and 610380), 400X8-4 (on model 610300, 610350
and 610200).
10. BELT TENSIONER: The belts are taut with the lever during work and loosened when resting or starting the engine.
11. BELTS COVER: protects the operator from accidents.
12. ROWLOCK: allows safe rotation of the rotor
13. EXHAUST: expels the gases from the internal combustion of the engine, the gas outlet tube is placed in the
opposite direction to the feeding port and grinding chamber in order to avoid accidents.
14. BELTS: long-lasting due to its yarn weft.
15. BLADES: made of special steel treated for high performance and with double life.
16. SCREENS: for dry fodder 1”, 1/2”, 1/4”, for corn 1/8” (in model 610200 they are of 1/4” and 3/4”).
1
3
2
4
5
6
7
8
9
10
11
12
13
14
15
16

5
OPERATION
4.
TECHNICAL DATA3 3.
ASSEMBLY34.
These models are versatile and can be easily transported by their hitch point.
Please check that your equipment is complete. You should receive the following:
-Full equipment with:
-Engine (on models 6103558, 610375 y 610205)
-Battery (on models 610355 y 610375)
-Chassis
-2 belts B65, 2 belts A50 (on model 610205 only)
-1 Pulley 4 screens 1/8, 1/4, 1/2 y 1”
- 1 screen of 3/4”, 1 screen of 1/4” (on model 610205 only)
- Operator’s manual
Before using the equipment, you must unhook and lower the support leg as well as chock the tires to prevent the equipment from moving.
Visually check that all equipment parts are in place such as tight nuts and bolts.
Check if your equipment has enough gasoline and the grease fittings are lubricated.
Check that the tires have the correct air pressure at 28 to 32 PSI.
Check that the support leg is in place and secure.
Before starting the workday, first familiarize yourself with the parts of the equipment and the safety signals.
Be extremely careful when handling gasoline.
Never put gasoline in the engine when it is running.
Check if the equipment is located on a level surface before use.
Keep your hands and feet away of moving parts.
4.1 WHAT TO DO BEFORE STARTING YOUR EQUIPMENT
ATTENTION
Before starting to work with the equipment, you must have it parked in a flat area free of obsta-
cles. You must also have wedged the tires with some object.
DESCRIPCIÓN
610205
610355
BN610300-0617NA
R07
Impresoen México
EQUIPO
MODELO
610300
610350
610370
610380
Con este práctico molino usted podrá
moler caña de maíz tanto verde como
secoasí como granos de maíz “produzca
ustedmismo el forraje para su ganado”.
MANUAL DE OPERADOR
PREMIUM
610300
610350
MOLINOPARA VERDE Y SECO
SPECIFICATIONS DESCRIPCIÓN
MOLINO
Artícle 610305 610355 610375 610385
Chassis Wheelbarrow Wheelbarrow Pull Type Trailer Pull Type Trailer
Feeding Doble boca de 115 x 180 mm con puertas de seguridad
Output 130 X 195 mm
Transmission Double belt b65
Grinding capacity
2000 kg/h approx. (green fodder) 1000 kg/h approx.
(dry fodder) **Not designed to shred tree branches**
Dimensions (mm) 1100 x 1630 x 1000 1100 x 1630 x 1000 1550 x 2000 x 1100 1550 x 2000 x 1100
Tires 400x8-4 400x8-4 165/70R13 165/70R13
Weight 120.0 Kg. Aprox. 152.0 Kg. Aprox. 163.0 Kg. Aprox. 131.0 Kg. Aprox
MOTOR
Model LZX188FE
Not includedNot included
Displacement 389cc
Max. power 13 HP a 3600RPM
Fuel tank 6.5 lts.
Start Electric with recoil cord
610205
Wheelbarrow
110 X 80 mm
180 X 100mm
Double belt A50
845 x 1230 x 950
400 X 8-4
78.0 Kg. Aprox
FC170F
N/A
208cc
6.5 HP
3.6 lts.
Retcoil cord
Battery 12 VDC
NOTE:
Due to interest in technological progress, we reserve the right to make technical changes or modifications without prior notice.
880 kg/h approx. (green fodder)
380 kg/h approx. (dry fodder)
and 380 Kg/h (grain)

6
4.2 STARTING PROCEDURE
4.3 FODDER CHOPPING
To get the engine to start, the belts must be slack, after starting the engine and revving it to the maximum and after 5 minutes you
can tighten the belts by means of the lever, if your engine is internal combustion and tends to shut down at tensing the belts, just rev
the engine.
In case you do not require the use of the two feeding ports, and you
are going to use only one, the other feeding port will help you control
the air intake
Make sure that when installing the screens they enter
through their guides, you should not force them when
entering.
FEEDING PORT
SCREENS
- ELECTRICALLY:
5. Move the throttle lever to full
throttle.
3. Close the choke lever. 4. Pull the recoil cord to start.
2. Move the throttle lever 1/3 of its
travel toward the fast position.
1. Open the fuel tap.
6. Turn the ignition key
and give full throttle.
Follow the steps above but replace step
4 with step 6.
- MANUALLY:
1
ATTENCION:
If the engine is warm, it is not
necessary to do step 3.
NOTE:
Once the engine starts, quickly return
the choke lever to its open position.
NOTE:
-Now you are ready to chop the fodder, for that you must introduce the corn stalks through the feeding port. If you are going to use the
2 feeding ports of the mill, it is recommended that you do it alternately, in this way you will not saturate the engine.
-You will notice that the mill practically sucks the material, it is not necessary to push it continuously.
-The 1” and ½” screens should be used when grinding stubble and the 1/8” and ¼” screens should be used when grinding dry corn grain,
and for model 610200 the 3/4” and 1/4” used to grind dry corn.
-Do not use any screen when you are going to grind green corn cane, it is not necessary since the screen would get clogged and cause
problems.
NOTE:
These steps are for an engine such as the SWISSMEX one. In case you have purchased equipment
without an engine and have installed one yourself, be sure to follow the steps mentioned in the
manufacturer's manual for that engine. Each model varies depending on their features.
*Be sure to return
the key to its original
position in the switch
so you don't run
down the battery.
If you work the engine with low oil
level, the engine may be damaged
and it will not be covered by the
warranty

7
This equipment is easy to use and easy to maintain. If you follow the steps that we mention in this manual, the useful life of your equipment
will be very long.
9. The distance between the blade and the counter blade should be 3.2 mm or 1/8” if you do not have this measure, bring the
counter blade closer.
- Start the engine with the belts slack and never remove the protection.
- Never run your engine more than 15° of incline or the engine will drift.
- When grinding dry material, use the feed port opposite to where the engine is to prevent it
from suffocating with material and causing an accident.
MAINTENANCE
5.
5.1 GUIDE FOR DAILY MAINTENANCE
1. You should not start maintenance until you are sure that the engine has been stopped or turned off.
2. Check that all screws and nuts are tight.
3. Clean the engine air filter.
4. Grease the bearings after each working day.
NOTE: We have repair and maintenance service for
SWISSMEX equipment. Request it if you don't
know how to do it, otherwise go to a professional.
To ensure a better performance use
SWISSMEX-RAPID original spare parts.
NOTE:
NOTE:
Remember that using the equipment with dull blades will reduce
performance and will cause excessive vibration.
8. When the time comes for the blades must be sharpened, you must remove them and take them to a grinding machine to sharpen,
taking care that each blade is brushed in the same amount so the rotor does not lose balance once sharpened, you must install them
again and adjust the counter blade which should have a gap of 3.2 mm between the blade and the counter blade. The mill must be
repaired by an expert mechanic when it presents a major fault.
5. Verify the belts are in good condition and they are tensed. If they are well taut, when applying force should have a
1 cm deviation from each other.
6. Remove any plant debris or sap from inside the grinding chamber.
7. Check that both tires have proper air pressure.
Remove the spark plug wire before any intervention on the engine, to avoid accidents.
When repairing the grinding chamber, block the rotor with a log.
WARNING
WARNING
If you need to adjust the belt
tensioner, you must loosen
the tensioner stop.

8
5.3 MAINTENANCE SCHEDULE
5.2 MAJOR MAINTENANCE
The equipment must be repaired by an expert mechanic when it presents a major fault.
TROUBLE SHOOTING
6.
MAINTENANCE SCHEDULE ACTIVITY
After first 25 hours. Change the engine oil.
Daily. Clean the air filter.
Each 100 hours of use.
- Replace the air filter.
- Change the engine oil.
- Replace the belts.
- Check the tires.
Each 200 hours of use. - Check the spark plug, if it is charred, clean it or replace it.
- Replace the gasoline filter
Each 500 hours of use. - Replace the spark plug.
Every year of before storing the mill. - Change the engine oil.
PROBLEM CAUSE SOLUTION
The engine does not start.
Open the choke by moving the lever.
Speed up the engine to full power.
The choke is not open.
Replace the blades.
The blades are dull.
If the battery discharges, take it to be charged at a specialized workshop.
NOTE:
The engine does not start even
though the gas tank is full.
The engine starts, but it dies in a
few seconds.
The mill shuts down after starting
to feed material.
The belts slip while working with
the mill.
It does not cut material correctly.
The fuel tap from the tank to the
engine is closed.
The engine is not accelerated to its
maximum power
The belts do not have the correct
tension
Open the fuel tap under the tank.
Adjust the belts using the tensioner bolt
or replace when necessary.
1.- The belts are taut.
2.- The battery is NOT charging.
3.- The air filter is clogged.
4.- The engine does not have the
proper oil level and the sensor shuts
down the engine for safety.
5.- The grinder is NOT well anchored
to a level floor and the oil is loaded to
one side and the sensor detects lack
of oil.
6.- The tank does not have fuel.
1.- Slack the belts so that the engine
can start freely.
2.- Charge the battery.
3.- Wash or replace the air filter.
4.- Load oil until obtaining the proper
level, guiding it on the dip stick.
5.- Fix the mill horizontally to the floor.
6.- Load fresh and clean gasoline in
the tank.

9
SPARE PARTS
7.
(model 610355, 610375)
MODELS 610305, 610355, 610375 y 610385
19 3
7 1 3
3
4
7
7
7
5
6
5
7
7
17
15a 16
15 (model
610355, 610375)
12
14
13
24
8
11
20
21
22
23
9
Model
610355
610375
No. Code Description
AWear parts and consumables always available
Hammer
5
7
11
16
17
E2000610345
E2000610341
E2000610346
E2888610302
E2888610004
Angled blade
Blade counterpart
Belt B-65
Screw kit for blade
9
6
2
2
1
1
1
1
1
1
No. Code Description
BMedium-wear Parts available at our discretion
1
3
4
6
8
9
12
13
14
15
15a
19
20
21
22
23
24
1
3
3
6
1
1
1
1
1
1
1
1
1
1
1
1
2
1
1
1
6
1
1
1
1
1
1
1
1
1
1
1
1
1
E2000610337
E2000610340
E2000610344
E2000610343
E2000610326
E3888940002
E2000610388
E2888647137
E2000610316
E2888610300
E2888610303
710005
E2888610304
E2888610305
E2888610240
E2888610252
E4888623004
Extractor
Disc spacer
Hammer holder pin
Spacer bushing
cover cap
Battery
Cover nut
Rowlock 1 1/4”
Engine tensioner
Pulley1”
Pulley 1 1/4”
Engine 188 F-E13 HP (for
models 610350 & 610370)
1/8” screen
1” screen
1/2” screen
1/4”screen
Tire
NOTE:
NOTE:
Due to interest in technological progress, we reserve the right to
make technical changes or modifications without prior notice.
Model 610305 does not include motor or battery
Quantity
per unit
Qty. per
package
Quantity
per unit
Qty. per
package

10
MODEL 610205
12
4
7
6
5
11
1
13
2
9
8
No. Código Description
AWear parts and consumables always available.
E2000610347
E2000610372
E2888612002
E2000610370
E2000610349
Counterpart
Rotor
Belt
Right blade
Left blade
2
3
7
10
11
2
1
2
3
3
1
1
1
1
1
No. Código Description
BMedium-wear Parts available at our
E2888610555
E2888610556
E2000610348
E2888610557
E2000610318
E2000610322
710015
E4888623004
Rowlock
Iron pulley 2A87X1”
Tensor
Iron pulley 2A68X3/4”
Screen 3/4”
Screen 1/4”
Engine FC170F/6.5 HP
Tire
1
4
5
6
8
9
12
13
2
1
1
1
1
1
1
2
1
1
1
1
1
1
1
1
NOTE:
10
3
NOTE:
STORAGE
8.
Always leave your equipment in a covered place so that the sun and rain do not damage it.
After each workday make sure that: the grinding chamber is clean, the belts are loosened, the bearings are lubricated, the gasoline
from the tank has been removed and stored in an appropriate area for fuels. This will extend the useful life of the equipment.
We recommend that you close the fuel tap with the engine running, this way
it will consume all of it and ensure that the engine is not stored with gasoline.
Due to interest in technological progress, we reserve the right to
make technical changes or modifications without prior notice.
Quantity
per unit Quantity
per unit
Qty. per
package Qty. per
package

WARRANTY
9.
Any claim made under this warranty must adhere to the Warranty Policy described below:
The warranty will be granted by SWISSMEX RAPID SA DE CV, free of charge, when the parts and compo-
nents present manufacturing or assembly defects and after conclusive analysis in the plant (Lagos de
Moreno, Jalisco). The warranty consists of replacing damaged parts with new ones or changing the damaged
equipment for a new one once the type of damage to the equipment has been verified and evaluated. It does
not include labor or transportation.
The warranty of your equipment can be PREMIUM, MEDIUM, or BASIC. It is indicated on the cover of your
manual. You can also consult it on the website and in the product catalogues.
WARRANTY TERM:
Premium Line = 12 months
Medium Line = 6 months
Basic Line = 3 months
The warranty does not apply when:
• Causes are not attributable to manufacturing defects or material defects.
• The equipment has been misused or has been given a use other than that established in the standards and
recommendations of the user manual. and/or for which it was designed.
• Damage caused by natural disasters (earthquakes, floods, fires, electrical storms).
• When the product has received accidental or intentional hit or has been exposed to elements
harmful as water, acids, fire, weather or any other similar.
• For damages suffered during transportation, the merchandise travels at the client's risk.
• If the serial number has been removed or erased.
• If original Swissmex spare parts are not used or manufacturer parts in the case of commercialized products.
• Incorrect maintenance, carried out by unqualified personnel or not authorized by Swissmex.
• If the equipment suffered modifications or alterations in its original design.
• Due to abuse, negligence, accident or for using a tractor with a power different from that indicated in the
technical data sheet.
• Incomplete filling out of the warranty.
Swissmex is not responsible for theft, accidents or fatalities caused by the equipment.
Warranty does not cover:
• Consumables and natural wear parts
• Electric parts
• Spare parts in general
• Shipping, transportation, delivery, or packaging expenses.
The warranty must be processed by the client who sold the implement or the end user by email:
For products imported and marketed by Swissmex Rapid SA de CV, the warranty term will be established by
the equipment manufacturer. Check in the manual what term applies to your equipment.
•Client/username:
•Model:
•Serial number:
•Acquisition date:
•Place of acquisition:
Contáctanos:
www.swissmex.com
Calle Swissmex No. 500
Lagos de Moreno Jal. México
Tels: 474 741 22 28 y 741 22 07
800 849 19 92
Client’s signature
& stamp
IF THE CUSTOMER DOES NOT FILL IN THIS INFORMATION THE IMPLEMENT DOES NOT HAVE A WARRANTY
IT IS MANDATORY FOR THE CLIENT TO FILL IN THE FOLLOWING INFORMATION AT THE TIME OF SALE
This manual suits for next models
4
Table of contents
Popular Farm Equipment manuals by other brands

Hoegger Home Farm Products
Hoegger Home Farm Products Milking System Training Series manual

Chore-Time
Chore-Time Chore-Tronics 2 manual

SIP
SIP STAR 360/10 Instruction for work

Kubota
Kubota ROPS Cab F 80 Series installation manual

KMC Controls
KMC Controls 30 Series Operator's manual

Unverferth
Unverferth PARKER 1042 manual