3User manual
English
Tuya Smart APP
Download the Tuya Smart app by accessing Google Play or App Store
or scan the QR codes below:
Android iOS
Add device in Tuya Smart application
1. Open the application, create an account and log in.
2. Add your device by pressing the +icon in the upper right corner of
the screen or by clicking the Add device button (this button appears
when you have no device added to the application).
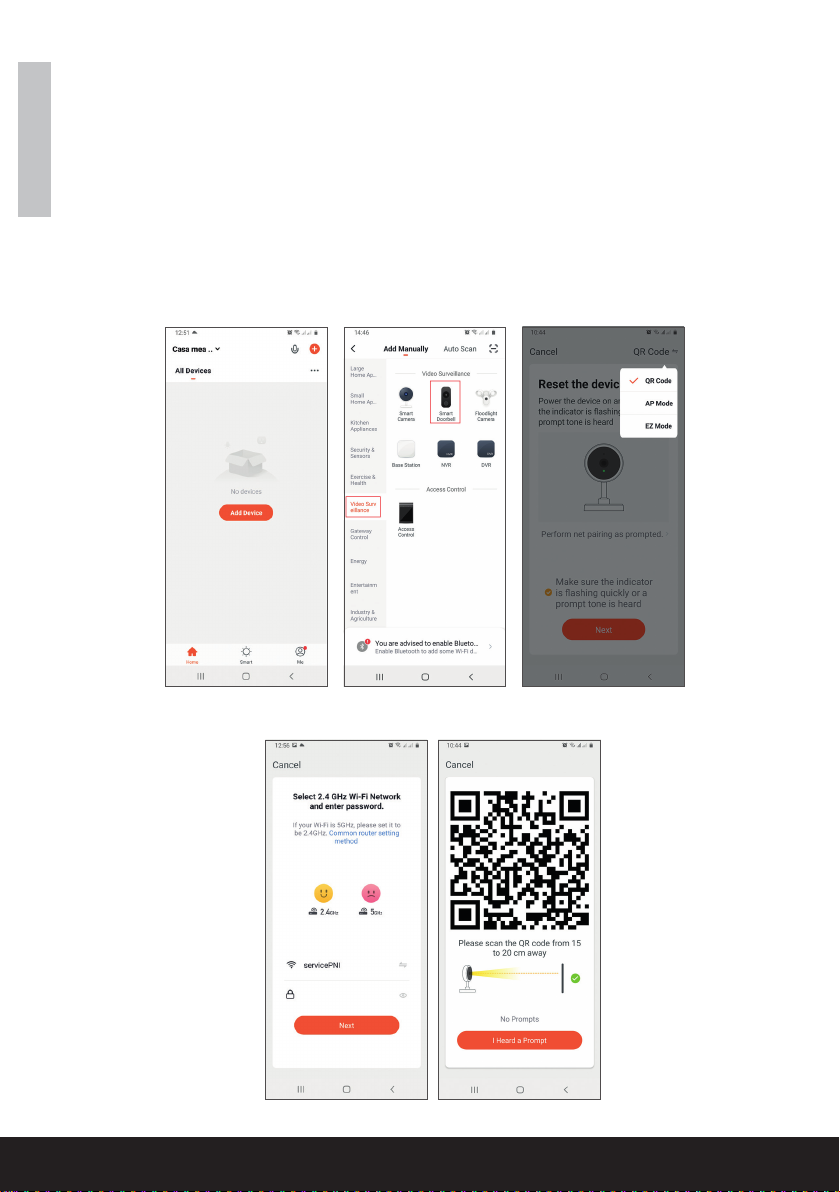
3. Select the option Video surveillance on the left side of the screen.
4. From the list of devices on the right side of the screen, select Smart
Doorbell
5. In the next interface, select the option QR Code from the upper right
corner.
6. Then tick Make sure the indicator is ashing quickly or a prompt
tone is heard. Click Next.
7. Select the WiFi network you want to connect to and add the password.
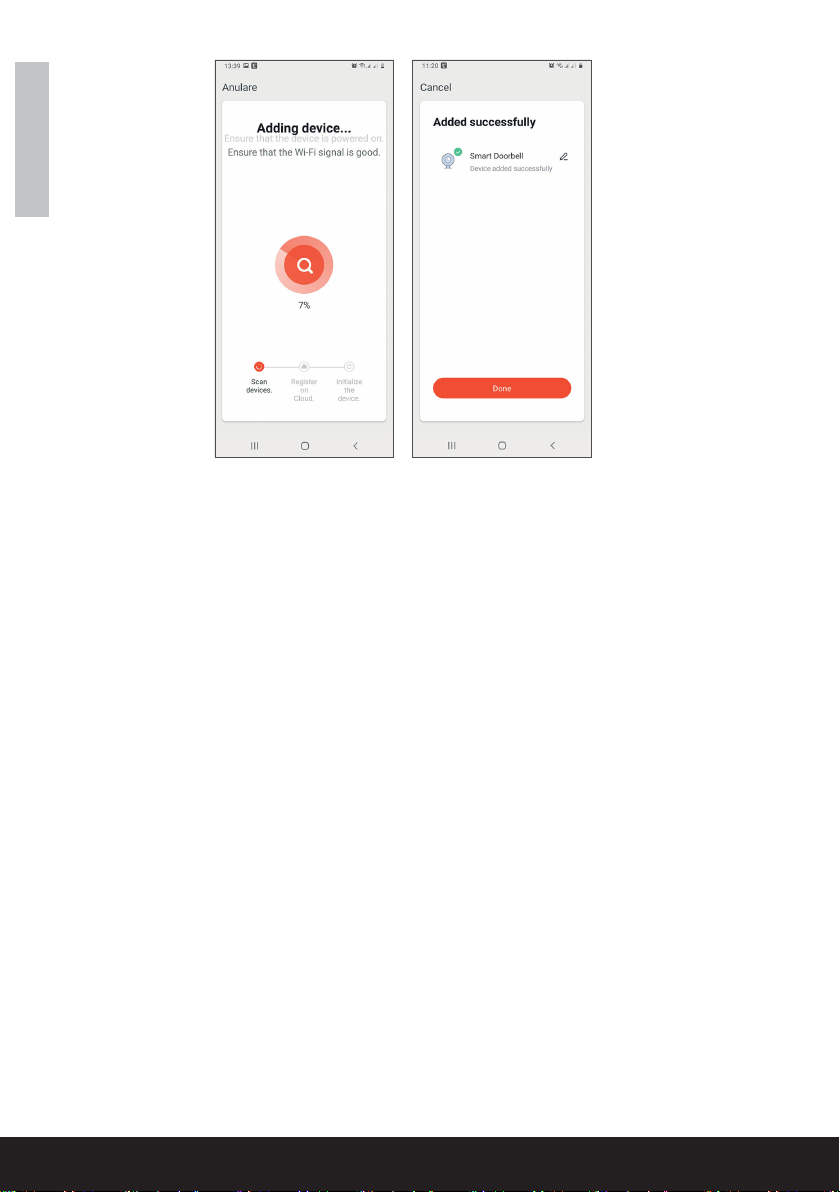
8. Position the smartphone with the QR code in front of the door phone
lens. Wait a few seconds until you hear a conrmation beep, and the
3User manual
English
Tuya Smart APP
Download the Tuya Smart app by accessing Google Play or App Store
or scan the QR codes below:
Android iOS
Add device in Tuya Smart application
1. Open the application, create an account and log in.
2. Add your device by pressing the +icon in the upper right corner of
the screen or by clicking the Add device button (this button appears
when you have no device added to the application).
3. Select the option Video surveillance on the left side of the screen.
4. From the list of devices on the right side of the screen, select Smart
Doorbell
5. In the next interface, select the option QR Code from the upper right
corner.
6. Then tick Make sure the indicator is ashing quickly or a prompt
tone is heard. Click Next.
7. Select the WiFi network you want to connect to and add the password.
8. Position the smartphone with the QR code in front of the door phone
lens. Wait a few seconds until you hear a conrmation beep, and the
www.syco.eu
Nederlands
Tuya Smart APP
Download de Tuya Smart app door naar Google Play of
App Store te gaan, of scan de QR codes hieronder:
Apparaat toevoegen in Tuya Smart App
Download de Tuya Smart app door naar Google Play of App Store
te gaan, of scan de QR codes hieronder:
1. Open de app, maak een account aan en log in.
2. Voeg uw apparaat toe door op het + icoon te drukken in de
rechterbovenhoek van het scherm of door te klikken op de “Add
device” knop (deze knop verschijnt wanneer u geen apparaat heeft
toegevoegdindeapp)
3. Selecteer de optie “Video surveilance” aan de linkerkant van het
scherm.
4. Selecteer uit de lijst met apparaten aan de rechterkant van het
scherm “Smart Doorbell”
5. In de volgende interface, selecteer de optie QR code in de rech-
terbovenhoek
6.Vinkvervolgensaan.“Makesuretheindicatorisashingquickly
or a prompt tone is heard”. Klik op “Next”.
7. Selecteer het WiFi-netwerk waarmee u verbinding wilt maken en
voeg het wachtwoord toe.