manuals.online logo
Brands
  1. Home
  2. •
  3. Brands
  4. •
  5. Symantec
  6. •
  7. Gateway
  8. •
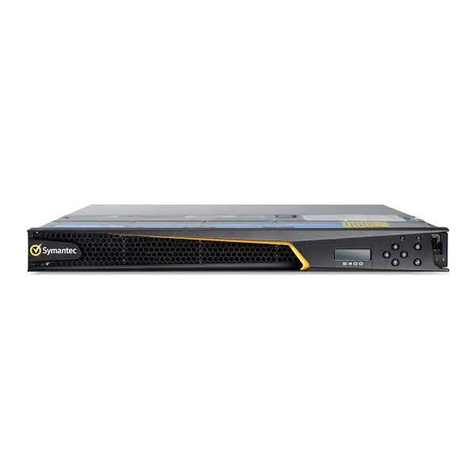
  9. Symantec S450 Series User manual

Symantec S450 Series User manual

Page 1
01 Unpack the Appliance
Verify the contents of the shipping package for the Symantec Messaging Gateway (SMG)
S450 appliance:
• (2) AC power cords
• (1) DB9 to RJ45 serial cable
• Two/four-post slide-rail kit
• Safety and Regulatory Guide
• Quick Start Guide (this document)
• Software License Agreement
• Hardware Warranty Information
02 Connect Cables
Symantec recommends that you plug in cables, verify LEDs, and configure and license the
appliance before rack-mounting. Make sure the appliance is on a flat level surface when you
do the initial configuration. If you would rather rack-mount the appliance before performing
configuration tasks, skip to Step 7—Rack-Mount the Appliance.
The following procedure describes a basic deployment for the SMG S450 appliance with
inbound and outbound email traffic routed to separate Ethernet ports (as shown in the above
illustration). For information on other deployments, see the Symantec Messaging Gateway
Installation Guide for your software version. To find the Guide, go to the following website and
search on Messaging Gateway: https://support.symantec.com/us/en/documentation.html
Note: Network cables are not included with the appliance. Make sure to use only straight-through
Ethernet cables. Category 6A cables are recommended for Ethernet operation.
To connect the cables:
a. Connect the RJ45 end of the included serial cable to the appliance’s rear-panel RJ45 serial
port and connect the other DB9 end of the cable to a serial terminal or workstation with
terminal emulation software. The serial connection is used to perform the appliance’s initial
configuration.
b. Connect an Ethernet cable to the appliance’s MGMT 0:0 port (eth0) and connect the other
end to the incoming Internet mail traffic.
c. Connect an Ethernet cable to the appliance’s MGMT 1:0 port (eth1) and connect the other
end to the outgoing mail traffic.
d. Connect the included AC power cords to the appliance’s power inlets and connect the other
ends to a power source.
03 Power on the Appliance and Verify LEDs
To verify the appliance is operational:
a. Confirm the appliance’s power cords are securely connected to a power source.
b. If the appliance does not automatically power on, press the rear soft power switch.
Note: The state of the appliance’s soft power switch (on or off) is retained when power
is removed. You may need to press the power switch when reapplying power to the
appliance.
c. As the appliance boots, verify the following:
• The Power LED turns amber.
• Near the end of the boot cycle, the Power LED alternates between amber and green,
indicating an unconfigured state.
• Following the initial configuration (see Step4), the Power LED turns green. The OLED display
shows system statistics, which can be scrolled through with the Left/Right Arrows.
The front-panel LEDs indicate the following states:
• Power LED (•) Off: Powered off or no power present
(•) Green: Powered on
• Sys Status LED (•) Off: Powered off or no power present
04 Perform the Initial Configuration
You must have the following network information to initialize the appliance:
• Appliance IP address • Link settings (speed and duplex)
• Primary DNS server IP address • Admin ID and password
• Default Gateway IP address • Subnet mask
To perform the initial configuration for the appliance:
a. Confirm the appliance’s rear-panel RJ45 serial port is connected to a serial terminal or
workstation with terminal emulation software.
b. Open a terminal emulation program such as Microsoft HyperTerminal®, PuTTY, Tera Term, or
ProComm™.
c. Configure the terminal emulation software to use the following settings:
• Baud rate:9600 bps • Data bits:8
• Parity:none • Stop bits:1
• Flow control:none
d. Power on the appliance (if it is not already powered on). When prompted, press Enter
three times.
e. When prompted, log on with the default user name and password: admin | symantec
f. Bootstrap begins. Follow the prompts and enter the following information:
• Type your new password twice.
• Type a fully qualified domain name for this host. Do not use domain name as your
host name.
• Type the number for the time zone. Type ? to see a list of time zones.
• Type the IP address and subnet mask for the Ethernet 1. Add Ethernet 2 if you want.
If you configure multiple Ethernet interfaces, you are prompted to specify the Ethernet
Interface number (either 1 or 2, the default is 1).
• If you want to add a static IP address for routing, type Yes then type the IP address or
CIDR block of the destination host or network.
• Type the IP address of the default gateway (default router).
• Type the IP address of the DNS server. You can add a second if you want.
• Choose a role for this appliance: Scanner only, Control Center only, or Scanner and
Control Center. For Scanner only, when prompted type the IP address of the Control
Center that you intend to use to manage this scanner.
05 License the Appliance
After the appliance is configured for network access, complete the installation by licensing the
appliance.
To license the appliance:
a. Open a browser and enter the appliance’s IP address and port number. The default logon
address is https://<hostname>, where <hostname> is the IP address or host name specified
during the initial configuration.
Note: To use HTTP, you must enable HTTP through the command line interface (CLI) and
specify port 41080.
b. When the security alert message appears, accept the self-signed certificate to continue.
c. On the Control Center logon page, log on as user admin and use the password specified
during the initial configuration. Accept the terms of the license agreement and click Next
d. On the License Information Registration page, click Browse, locate your license file, and
click Open.
e. To register other licenses, repeat the previous steps.
f. When all of the license files are successfully registered, click Next.
g. For instructions on how to complete the installation, see the Configure the Control Center
section in the Symantec Messaging Gateway Installation Guide at:
https://support.symantec.com/us/en/documentation.html
06 Perform a Graceful Shutdown
If you configure the appliance before you install it in the rack, perform a graceful shutdown
before rack-mounting the appliance. You can perform this shutdown from the Control Center or
the command line.
To perform a graceful shutdown from the Control Center:
a. Log on to the Control Center.
b. Click Administration > Hosts > Shutdown.
To perform a graceful shutdown from the command line:
• Log on to the CLI and type: shutdown
Warning: Do not power off the appliance with the soft power switch or by removing the power
cables! Abruptly removing power can result in irreparable data loss. Always use the shutdown
command from the CLI to power off the appliance.
Quick Start Guide
Symantec Messaging Gateway S450
Serial
Terminal
Serial
Port
PSU2PSU1
SMG S450
Deployment
INTERNET
WAN
Router
Messaging
Server
WAN
Switch
eth0
MGMT
(0:0)
eth1
MGMT
(0:1)
Copyright © 2019 Symantec Corp. All rights reserved. Symantec, the Symantec Logo, the Checkmark Logo, Blue Coat, and the Blue Coat logo are trademarks or registered trademarks of Symantec Corp. or its affiliates in the U.S. and other countries. Other names may be trademarks of their respective owners. This document is provided for informational purposes only and is not intended as advertising. All warranties relating to the information in this
document, either express or implied, are disclaimed to the maximum extent allowed by law. The information in this document is subject to change without notice.
THE DOCUMENTATION IS PROVIDED “AS IS” AND ALL EXPRESS OR IMPLIED CONDITIONS, REPRESENTATIONS AND WARRANTIES, INCLUDING ANY IMPLIED WARRANTY OF MERCHANTABILITY, FITNESS FOR A PARTICULAR PURPOSE OR NON-INFRINGEMENT, ARE DISCLAIMED, EXCEPT TO THE EXTENT THAT SUCH DISCLAIMERS ARE HELD TO BE LEGALLY INVALID. SYMANTEC CORPORATION SHALL NOT BE LIABLE FOR INCIDENTAL OR
CONSEQUENTIAL DAMAGES IN CONNECTION WITH THE FURNISHING, PERFORMANCE, OR USE OF THIS DOCUMENTATION. THE INFORMATION CONTAINED IN THIS DOCUMENTATION IS SUBJECT TO CHANGE WITHOUT NOTICE. SYMANTEC CORPORATION PRODUCTS, TECHNICAL SERVICES, AND ANY OTHER TECHNICAL DATA REFERENCED IN THIS DOCUMENT ARE SUBJECT TO U.S. EXPORT CONTROL AND SANCTIONS LAWS, REGULATIONS AND
REQUIREMENTS, AND MAY BE SUBJECT TO EXPORT OR IMPORT REGULATIONS IN OTHER COUNTRIES. YOU AGREE TO COMPLY STRICTLY WITH THESE LAWS, REGULATIONS AND REQUIREMENTS, AND ACKNOWLEDGE THAT YOU HAVE THE RESPONSIBILITY TO OBTAIN ANY LICENSES, PERMITS OR OTHER APPROVALS THAT MAY BE REQUIRED IN ORDER TO EXPORT, RE-EXPORT, TRANSFER IN COUNTRY OR IMPORT AFTER DELIVERY TO YOU.
Page 2
SMG S450 Quick Start Guide
07 Rack-Mount the Appliance
The slide-rail mounting kit included with the SMG S450 appliance allows it to be rack-mounted
in a two- or four-post equipment rack. The kit provides tool-less racking for 4-post racks and
allows the appliance to be installed or removed from either the front or rear of the rack. The
slide-rail kit includes the following parts:
• (2) Inner chassis rails
• (2) Outer rack rails
• (1) Kit for two-post mounting configurations
Note: The following procedure documents how to install the appliance in a four-post equipment
rack. For comprehensive information on rack-mounting the appliance, including two-post
configurations, see the S-Series WebGuide at: http://www.symantec.com/docs/DOC9795.
To install the appliance in a four-post equipment rack:
a. Disassemble the two slide-rail assemblies by fully extending each slide-rail and sliding out
the inner chassis rails.
b. Attach the two inner rails to the appliance. Align each rail to the mounting posts on each
side of the chassis and slide the rails toward the front of the chassis until the mounting
posts snap into place.
c. Attach the rack rails to the rack. Insert the front of each rail in the rack while opening and
then releasing the front latch. Repeat to attach the rear of the rails, extending or retracting
the rails as necessary so they fit. Verify the rack rails are installed at the same rack height.
d. Install the appliance in the rack. Align the inner rails (attached to the appliance) with the
slide-rails in the rack and slide the appliance gently all the way into the rack until it clicks
and locks in place. The appliance can be installed from either the front or rear of the rack.
e. Reconnect the cables as documented in Step 2—Connect Cables and verify the appliance
is functioning as in Step 3—Power On the Appliance and Verify LEDs.
To extend or remove the appliance from the rack:
a. Press the blue rack levers up to disengage the slide rail safety locks.
b. While continuing to press the levers, gently pull or push the appliance so it extends out the
front or rear of the rack.
c. Remove pressure from the levers immediately so the rail safety locks engage in the fully-ex-
tended out position. Take care not to push or pull too far, especially while pressing the blue
levers. Doing so could cause the appliance to fall from the rack.
d. To remove the appliance from the rack while the appliance is in the extended position, press
the blue levers up to disengage the slide rail safety locks.
e. While continuing to press the levers, carefully slide the appliance out the front or rear of the
rack. Make sure to use two persons or a mechanical aid to lift the appliance from the rack.
Technical Support
• Contact Information
https://support.symantec.com/us/en/contact-us.html
• MySymantec
https://www.mysymantec.com
Documentation
Symantec Messaging Gateway Software Documentation
• https://support.symantec.com/us/en/documentation.html
On the Documentation page, type “Messaging Gateway” in the Product
Name field and select 10.7 from the version drop-down menu to see the
available SMG documentation.
Appliance Documentation
• S-Series Maintenance and Upgrade Guide
http://www.symantec.com/docs/DOC9795
• S450 Safety and Compliance Guide
http://www.symantec.com/docs/DOC11363
CAUTION:
Before rack-mounting the appliance:
• Power off the appliance and disconnect all cables.
• Verify that the weight of the system does not exceed the rack’s fully
populated weight limit. For more information, refer to the manufac-
turer’s instructions included with the rack.
• For weight stability, load the rack from thebottomup.
• Read the “Rack Mount Warnings” section of the Safety and
Compliance Guide.
• Take adequate safety and grounding measures to avoid creating an
electrical shock hazard and to prevent bodily injury.
• The appliance is very heavy. A two-person lift or mechanical aid is
recommended to lift the appliance from the carton and install it in
the rack.
• Do not place objects on the appliance or use it as a work surface. Its
mounting hardware does not support additional weight.

Other manuals for S450 Series

2

Other Symantec Gateway manuals

Symantec 4400 Series User manual

Symantec

Symantec 4400 Series User manual

Symantec 360R - Security Gateway SGS User manual

Symantec

Symantec 360R - Security Gateway SGS User manual

Symantec 300 Series User manual

Symantec

Symantec 300 Series User manual

Symantec 460R - Gateway Security Service manual

Symantec

Symantec 460R - Gateway Security Service manual

Symantec 360R - Security Gateway SGS Instruction Manual

Symantec

Symantec 360R - Security Gateway SGS Instruction Manual

Symantec S500 User manual

Symantec

Symantec S500 User manual

Symantec SSP-S410 User manual

Symantec

Symantec SSP-S410 User manual

Symantec 320 Technical manual

Symantec

Symantec 320 Technical manual

Symantec SGM 1600 User manual

Symantec

Symantec SGM 1600 User manual

Symantec Security 5600 Series, Security 5400 Series,Clientless VPN 4400... Instruction Manual

Symantec

Symantec Security 5600 Series, Security 5400 Series,Clientless VPN 4400... Instruction Manual

Symantec 4420 User manual

Symantec

Symantec 4420 User manual

Symantec 5000 Series User manual

Symantec

Symantec 5000 Series User manual

Popular Gateway manuals by other brands

DEUTSCHMANN AUTOMATION UNIGATE EL PROFIBUS DP instruction manual

DEUTSCHMANN AUTOMATION

DEUTSCHMANN AUTOMATION UNIGATE EL PROFIBUS DP instruction manual

Arris Touchstone DG1660 user guide

Arris

Arris Touchstone DG1660 user guide

WEBLE S485 installation instructions

WEBLE

WEBLE S485 installation instructions

ZyXEL Communications Prestige 660H Series user guide

ZyXEL Communications

ZyXEL Communications Prestige 660H Series user guide

Bosch MB LAN 2 installation instructions

Bosch

Bosch MB LAN 2 installation instructions

Proxicast 1xMG-401 quick start guide

Proxicast

Proxicast 1xMG-401 quick start guide

Moxa Technologies MGate 5119 Series user manual

Moxa Technologies

Moxa Technologies MGate 5119 Series user manual

AudioCodes MediaPack 1288 Quick setup guide

AudioCodes

AudioCodes MediaPack 1288 Quick setup guide

RTA 460MSMM-N2EW Product user guide

RTA

RTA 460MSMM-N2EW Product user guide

TCS Ubiquity QD2040b product manual

TCS

TCS Ubiquity QD2040b product manual

Comtrend Corporation CT-6373 user manual

Comtrend Corporation

Comtrend Corporation CT-6373 user manual

Linksys WPG11 user guide

Linksys

Linksys WPG11 user guide

ZyXEL Communications ZyWALL USG 2000 quick start guide

ZyXEL Communications

ZyXEL Communications ZyWALL USG 2000 quick start guide

Option Audio Globe surfer II user guide

Option Audio

Option Audio Globe surfer II user guide

Honeywell Wireless Network Master ETH/WIFI T2 manual

Honeywell

Honeywell Wireless Network Master ETH/WIFI T2 manual

Sengled C01-BR30AU LINK user manual

Sengled

Sengled C01-BR30AU LINK user manual

Current Cost NetSmart Wireless Gateway user guide

Current Cost

Current Cost NetSmart Wireless Gateway user guide

New Rock Technologies HX4E Series user manual

New Rock Technologies

New Rock Technologies HX4E Series user manual

manuals.online logo
manuals.online logoBrands
  • About & Mission
  • Contact us
  • Privacy Policy
  • Terms and Conditions

Copyright 2025 Manuals.Online. All Rights Reserved.