manuals.online logo
Brands
  1. Home
  2. •
  3. Brands
  4. •
  5. Symantec
  6. •
  7. Gateway
  8. •
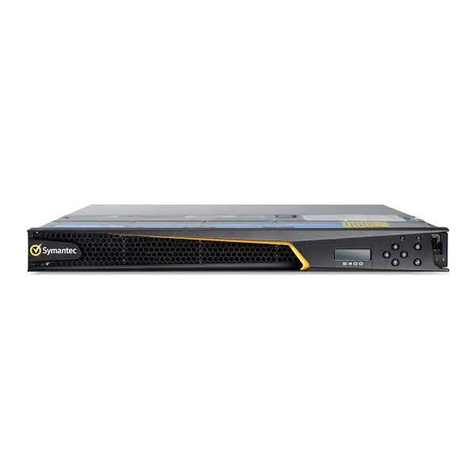
  9. Symantec SSP-S410 User manual

Symantec SSP-S410 User manual

To begin using your Symantec Security Platform (SSP) appliance, complete the
following steps in order. For additional instructions, including safety information,
see the SSP-S410 and ISG guides,available at: techdocs.broadcom.com
1 Unpack the Appliance
Verify the contents of the shipping package for your appliance: (2) C13-to-C14
AC power cords; (1) RJ45-to-DB9 null modem serial cable; slide-rail kit; Quick
Start Guide (this document); Software License Agreement; and Hardware
Warranty Information.
2 Connect Cables
Note: If you would rather mount the appliance before conguring it, skip to
Step 7—Mount the Appliance and then come back and proceed from this step.
a. Connect Ethernet cables from the appliance to the following devices.
• Appliance LAN (2:0) port to WAN router (Internet)
• Appliance LAN (2:1) port to LAN switch (main site)
• Appliance MGMT (0:0) port to management switch (workstation)
b. Connect the RJ45 end of the included null modem serial cable to the appli-
ance’s Console port. Connect the other DB9 end of the cable to a serial ter-
minal or workstation with terminal emulation software (a DB9-to-RJ45 rollover
adapter may be necessary).
c. Connect the included power cords to the appliance’s PSU1 and PSU2 inlets
and connect the other ends to a valid power source.
Note: Ethernet cables are not included with the appliance. Use only straight-
through Ethernet cables, category 5E or better for 1000Base-T operation,
category 6A for 10GBase-T operation.
3 Power on the Appliance and Verify LEDs
a. If the appliance does not automatically power on after connecting to a power
source, press the soft power switch on the front panel.
b. As the appliance boots, verify the following:
• The Power LED turns amber.
• Near the end of the boot cycle, the Power LED alternates between amber
and green, indicating an uncongured state.
• After initialization (see Step 4), the Power LED will turn green.
4 Initialize the SSP Host Appliance
a. Conrm the appliance’s Console port is connected to a serial terminal or
workstation with terminal emulation software.
b. Open a terminal emulation program, such as HyperTerminal®, PuTTY, or Tera
Term and congure it to use the following settings:
• Baud rate: 9600 bps • Data bits: 8 • Flow control: none
• Parity: none • Stop bits: 1
c. When prompted, press Enter three times.
d. To initialize the host appliance, perform the following steps.
• On the Menu screen, press 2to open the Setup Console.
• Enter the IP address, IP subnet mask, IP gateway, and DNS server for
the appliance’s network ports.
• Specify the console password and enable password. Press any key to
activate and return to the serial console.
e. To access privileged commands on the host appliance, enter:
localhost# enable
Enable Password: <host-enable-password>
f. To install a license on the host appliance, perform the following steps.
• On the Menu screen, press 1to open CLI.
• For node-locked licenses, enter: licensing load id <serial-number>
• For ISG application licenses, enter: licensing load id <isg-license>
Note: You can locate your serial number or ISG license in the eFulllment
Letter you received from Broadcom at the time of purchase.
g. To install application images on the host appliance, perform the following steps.
localhost# cong
localhost(cong)# images
localhost(cong-images)# load <url>
Note: Application images have a .bcsi extension and are available for down-
load from: support.broadcom.com/security
5 Add ISG Applications
a. Conrm the appliance’s Console port is still connected to the serial terminal
and that the terminal software is congured as in Step 4.
b. On the Menu screen, press 1to open CLI.
c. To access privileged commands on the host appliance, enter:
localhost# enable
Enable Password: <host-enable-password>
d. To add an ISG application, enter:
localhost# cong
localhost(cong)# applications
localhost(cong-applications)# create <app-type> i m ag e-i d
<app-image> model <app-model> license-id <id> <app-name>
Note: To add a ProxySG application, enter sg as the app-type. To add a
CAS application, enter cas as the app-type. See your eFulfillment Letter
to verify the number and type of ISG applications and models that can be
installed on your host appliance.
e. To start an ISG application, enter:
localhost(cong-applications)# start <app-name>
localhost(cong-applications)# attach-console <app-name>
f. When prompted, press Enter three times.
g. Use the Conguration Wizard to initialize the ISG application.
• Press ato proceed with Manual Setup.
• Enter the IP address, IP subnet mask, IP gateway, and DNS server for
the appliance’s network ports.
• Specify the console password and enable password.
Broadcom, the pulse logo, Connecting everything, Avago Technologies, Avago, the A logo, Symantec, the Symantec logo, the Checkmark logo, Blue Coat, and the Blue Coat logo are among the trademarks of Broadcom and/or its affiliates
in the United States, certain other countries, and/or the EU. Copyright © 2020 Broadcom. All Rights Reserved. The term “Broadcom” refers to Broadcom Inc. and/or its subsidiaries. For more information, please visit www.broadcom.com.
Symantec Security Platform
SSP-S410 Quick Start Guide
h. To add additional ISG applications, enter the following commands to disconnect
from the new application, then repeat the previous steps.
localhost - Blue Coat SG-VA Series> Press C t rl +]
telnet> send escape
6 Perform a Graceful Shutdown
a. Conrm the appliance’s Console port is still connected to the serial terminal
and that the terminal software is congured as in Step 4.
b. On the Menu screen, press 1to open the CLI.
c. To access privileged commands on the host appliance, enter:
localhost# enable
Enable Password: <host-enable-password>
d. To close any open ISG applications, enter:
localhost# congure
localhost(cong)# applications
localhost(cong-applications)# attach-console <app-name>
localhost - Blue Coat SG-VA Series> enable
Enable Password: <app-enable-password>
localhost - Blue Coat SG-VA Series> shutdown
If prompted... “shut down the appliance?” [no,yes] yes
Wait for... “It is now safe to power o the system.”
localhost - Blue Coat SG-VA Series> Press C t rl +]
telnet> send escape
localhost(cong-applications)# stop <app-name>
localhost(cong-applications)# exit
localhost(cong)# exit
e. To power off the host appliance, enter:
localhost# shutdown
When prompted... “shut down the appliance?” [no,yes] yes
Warning: Do not power off the appliance with the soft power switch or by
removing the power cables. Abruptly removing power can result in data loss.
Always use the shutdown command to power off the host appliance.
7 Mount the Appliance
The appliance includes a slide-rail kit that allows the appliance to be mounted
in a four- or two-post equipment rack. For complete instructions, refer to the
mounting instructions included with the slide-rail kit.
Caution: Before mounting the appliance, observe the following cautions.
• Power off the appliance and disconnect all cables.
• Verify that the weight of the system does not exceed the rack’s fully
populated weight limit. For more information, refer to the manufacturer’s
instructions included with the rack.
• For weight stability, load the rack from the bottom up.
• Read the “Rack Mount Warnings” section of the SSP-S410 Appliance
Guide, available at: techdocs.broadcom.com
• Take adequate safety and grounding measures to avoid creating an
electrical shock hazard and to prevent bodily injury.
• The appliance is heavy. A two-person lift or mechanical aid is recom-
mended to lift the appliance from the carton and install it in the rack.
• Do not place objects on the appliance or use it as a work surface. Its
mounting hardware does not support additional weight.
To mount the appliance in a four-post rack:
a. Disassemble the two slide-rail assemblies by fully extending each slide rail
while pressing the release tabs.
b. Attach the two inner chassis rails to the appliance by aligning and inserting the
chassis’s mounting posts in the rail holes, then slide the rails toward the rear of
the chassis until they snap into place. Secure each rail with one M4x4L screw.
c. Attach the two outer slide rails to the equipment rack by unlocking the
rail’s safety latches and inserting the bracket tabs in the post’s square
holes. Lock the safety latches the brackets to secure the rails.
d. Insert the appliance into the equipment rack by aligning the chassis rails
(attached to the appliance) with the slide rails in the rack. Gently slide the
appliance all the way into the rack while pressing the release tabs.
e. Tighten the thumbscrews on the retaining ears to secure the appliance.
f. If applicable, reconnect the cables as in Step 2—Connect Cables, and verify
the appliance is functioning as in Step 3—Power On the Appliance and
Verify LEDs.
M4x4L
a
c
b
d
Broadcom reserves the right to make changes without further notice to any products or data herein to improve reliability, function, or design. Information furnished by Broadcom is believed to be accurate and reliable. However, Broadcom
does not assume any liability arising out of the application or use of this information, nor the application or use of any product or circuit described herein, neither does it convey any license under its patent rights nor the rights of others.
Technical Support
• Go to: support.broadcom.com/security
Licenses and Downloads
• Go to: support.broadcom.com/security
• Click My Entitlements.
• Enter your Username and Password and click Sign In.
• Enter the Serial Number, Site ID, or Email associated
with the appliance.
• For software downloads, click the Downloads icon.
• For licenses and appliance management, click the License
icon.
Documentation
• For S410 documentation, go to techdocs.broadcom.com and
enter and select Hardware Appliances in the search eld,
then on the Hardware Appliances page, click S410 Series
Appliance Guides.
• For ISG documentation, go to techdocs.broadcom.com and
enter Integrated Secure Gateway in the search eld.
Page 2
SSP-S410 Quick Start Guide

Other Symantec Gateway manuals

Symantec 460R - Gateway Security Service manual

Symantec

Symantec 460R - Gateway Security Service manual

Symantec S500 User manual

Symantec

Symantec S500 User manual

Symantec S450 Series User manual

Symantec

Symantec S450 Series User manual

Symantec Security 5600 Series, Security 5400 Series,Clientless VPN 4400... Instruction Manual

Symantec

Symantec Security 5600 Series, Security 5400 Series,Clientless VPN 4400... Instruction Manual

Symantec 4400 Series User manual

Symantec

Symantec 4400 Series User manual

Symantec SGM 1600 User manual

Symantec

Symantec SGM 1600 User manual

Symantec 4420 User manual

Symantec

Symantec 4420 User manual

Symantec 5000 Series User manual

Symantec

Symantec 5000 Series User manual

Symantec 360R - Security Gateway SGS User manual

Symantec

Symantec 360R - Security Gateway SGS User manual

Symantec 300 Series User manual

Symantec

Symantec 300 Series User manual

Symantec 320 Technical manual

Symantec

Symantec 320 Technical manual

Symantec 360R - Security Gateway SGS Instruction Manual

Symantec

Symantec 360R - Security Gateway SGS Instruction Manual

Popular Gateway manuals by other brands

Avaya VSU 10000 Administrator's guide

Avaya

Avaya VSU 10000 Administrator's guide

HRW HPD0440BNMR manual

HRW

HRW HPD0440BNMR manual

Emerson ATCA-8310 manual

Emerson

Emerson ATCA-8310 manual

Zennio KLIC-PA user manual

Zennio

Zennio KLIC-PA user manual

Avaya 3100 Solution Integration Guide

Avaya

Avaya 3100 Solution Integration Guide

Honeywell Notifier MODBUS-GW Installation and operation manual

Honeywell

Honeywell Notifier MODBUS-GW Installation and operation manual

IXXAT CME/PN Hardware manual

IXXAT

IXXAT CME/PN Hardware manual

Lantronix EMG 8500 user guide

Lantronix

Lantronix EMG 8500 user guide

Panasonic Live Production Suite Series operating guide

Panasonic

Panasonic Live Production Suite Series operating guide

RTA 460ECDFM-NNA1 Product user guide

RTA

RTA 460ECDFM-NNA1 Product user guide

Huawei E960 HSDPA user guide

Huawei

Huawei E960 HSDPA user guide

HealthUp OG-BT5UW100 quick start guide

HealthUp

HealthUp OG-BT5UW100 quick start guide

heatapp! T2B instruction manual

heatapp!

heatapp! T2B instruction manual

IFM mobileIoT CR3156 operating instructions

IFM

IFM mobileIoT CR3156 operating instructions

Technica MediaGateway user manual

Technica

Technica MediaGateway user manual

Zte ZXV10 H11X user manual

Zte

Zte ZXV10 H11X user manual

nilan Comfort 250L-350L user manual

nilan

nilan Comfort 250L-350L user manual

NetComm Wireless NF18ACV Setup guide

NetComm Wireless

NetComm Wireless NF18ACV Setup guide

manuals.online logo
manuals.online logoBrands
  • About & Mission
  • Contact us
  • Privacy Policy
  • Terms and Conditions

Copyright 2025 Manuals.Online. All Rights Reserved.