SyxthSense SDC-TS7+ Dimensions

Online store: www.syxthsense.com
Enquiries: T: 0844 840 3100 F: 0844 840 3200 PS CT2.137 2.02 - 1/6
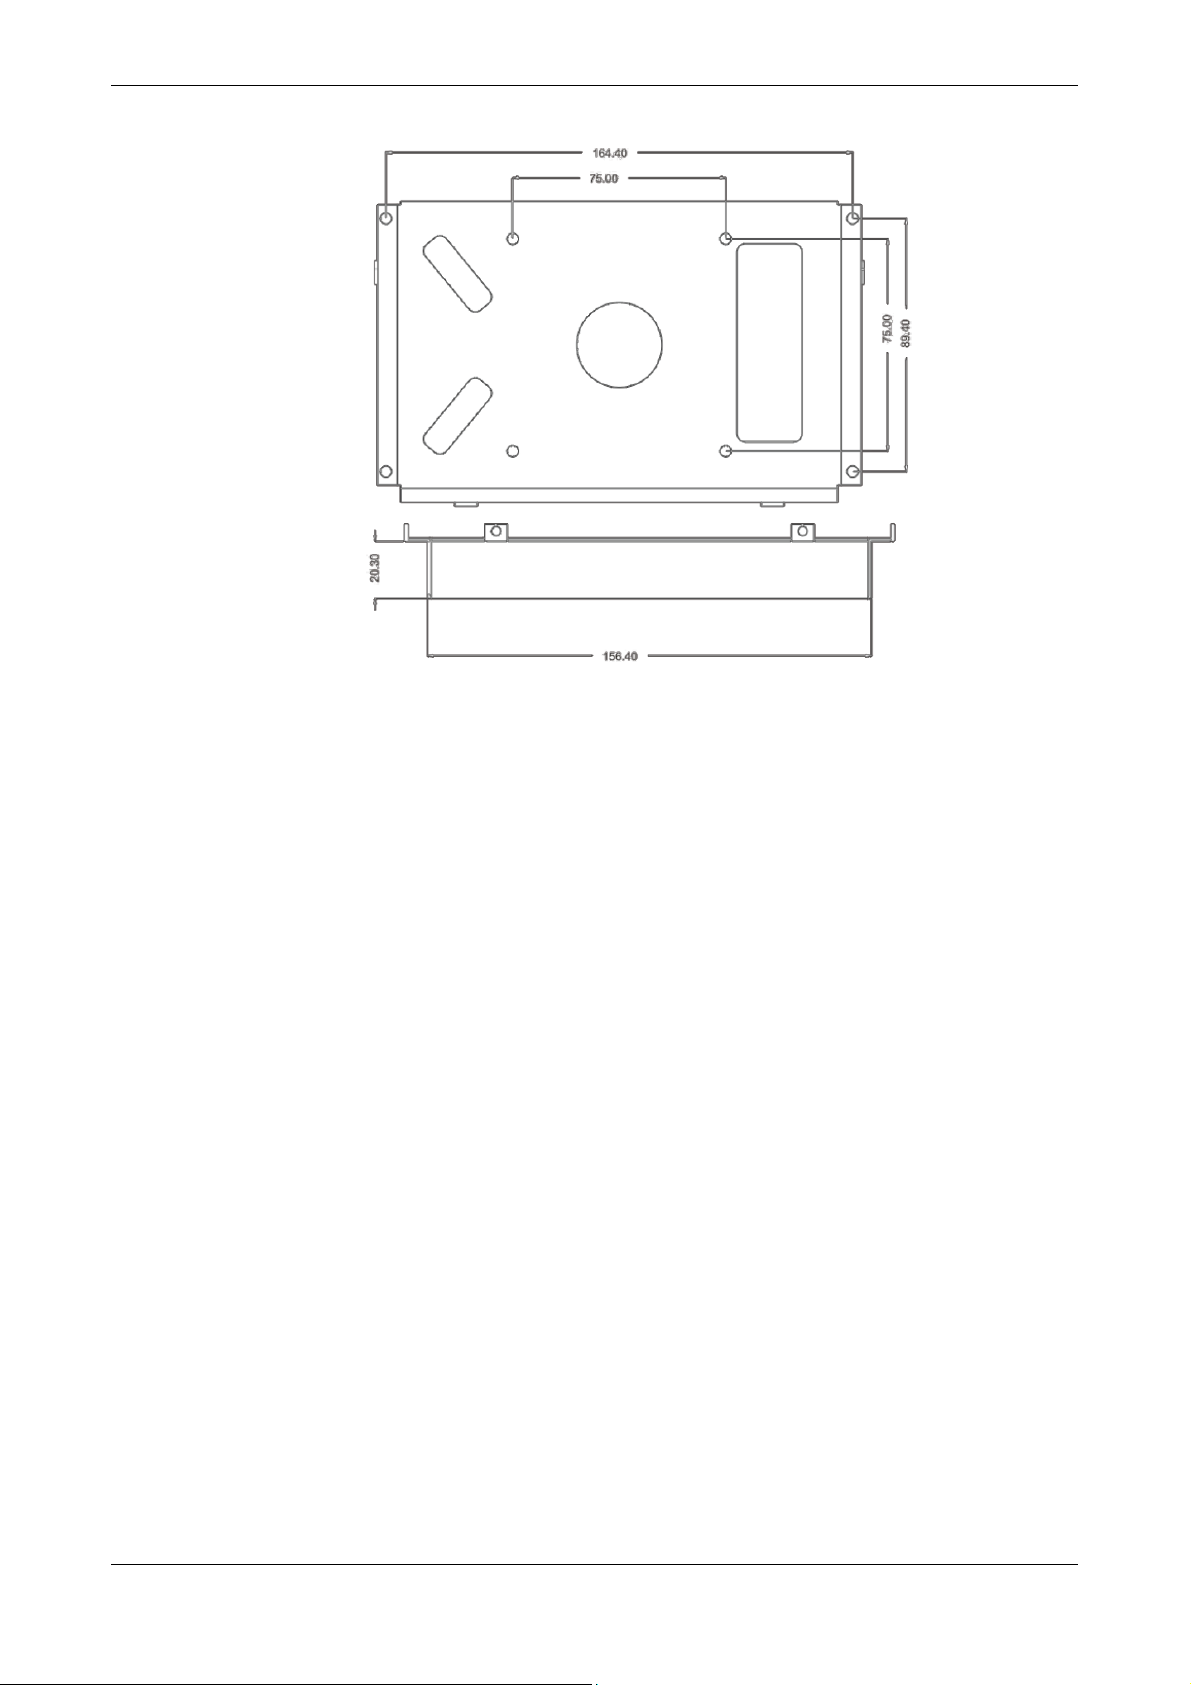
SDC-TS7+Tablet Interface for
Niagara and Sedona FrameworkTM
Devices
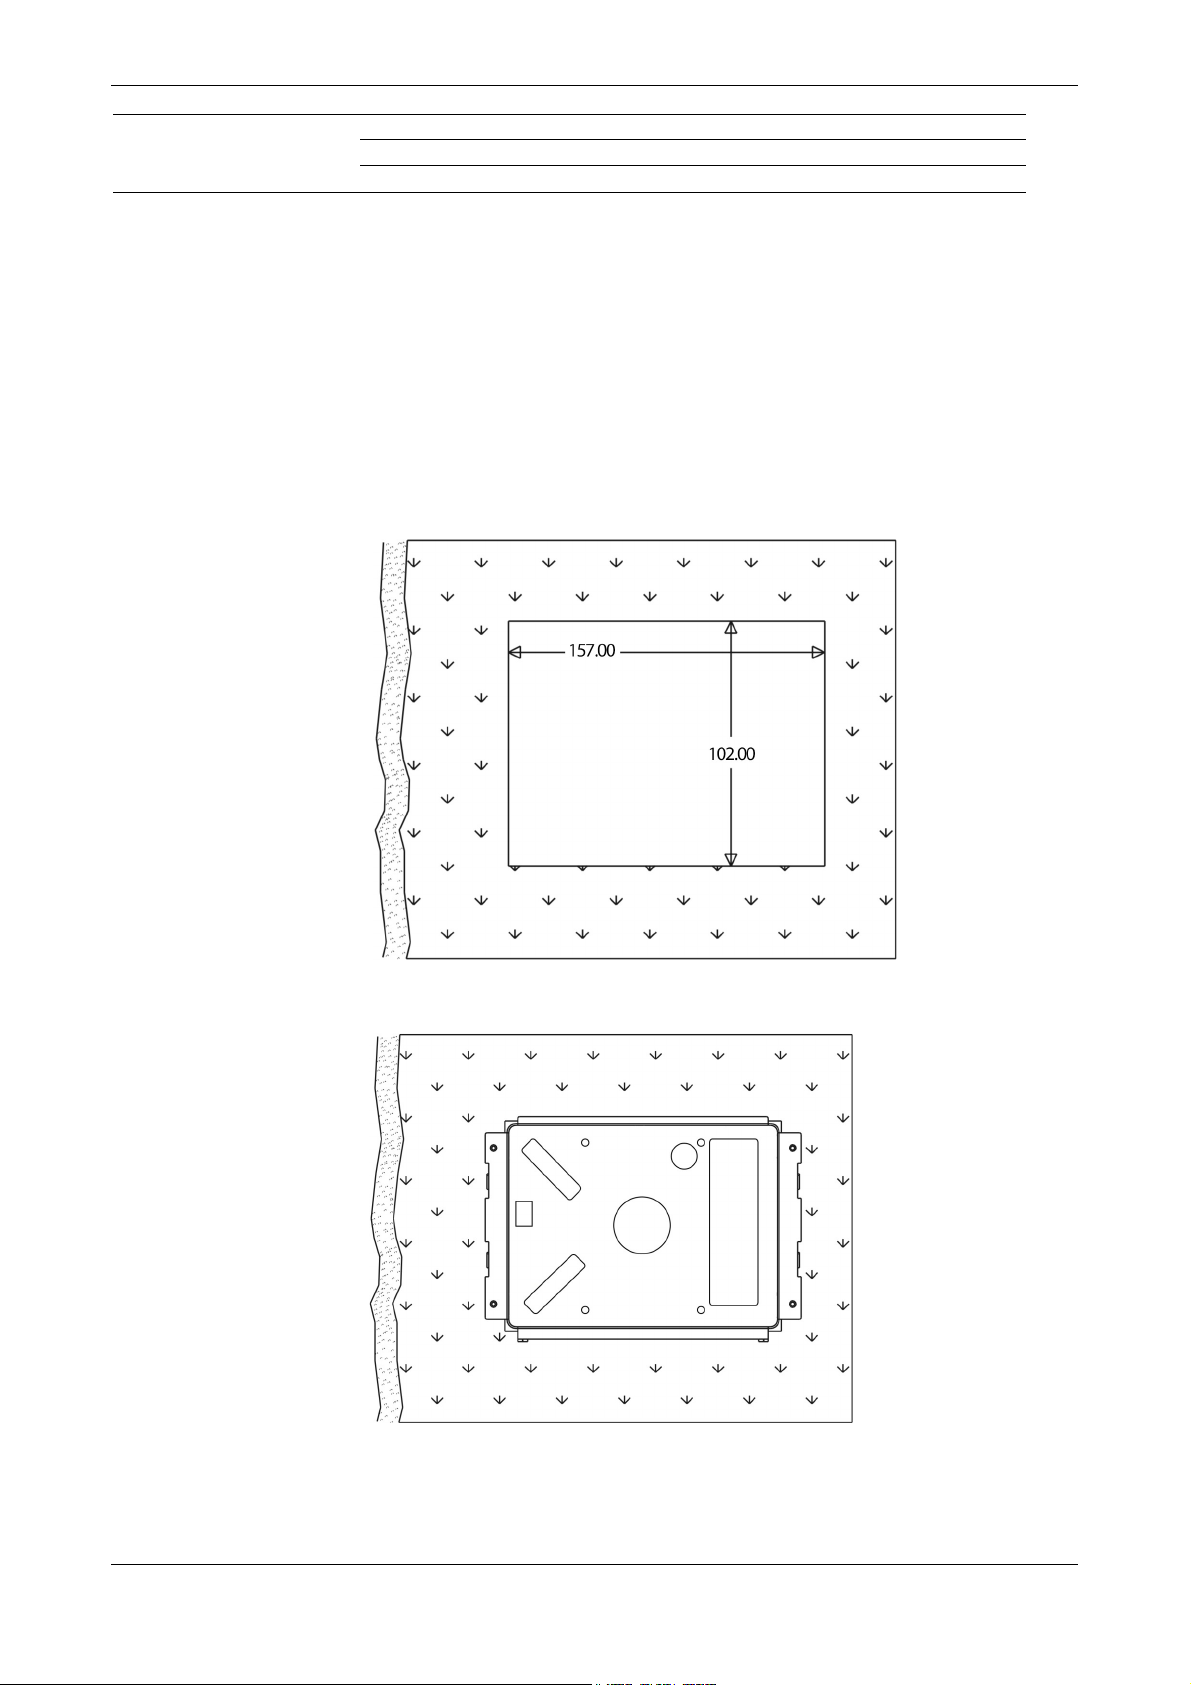
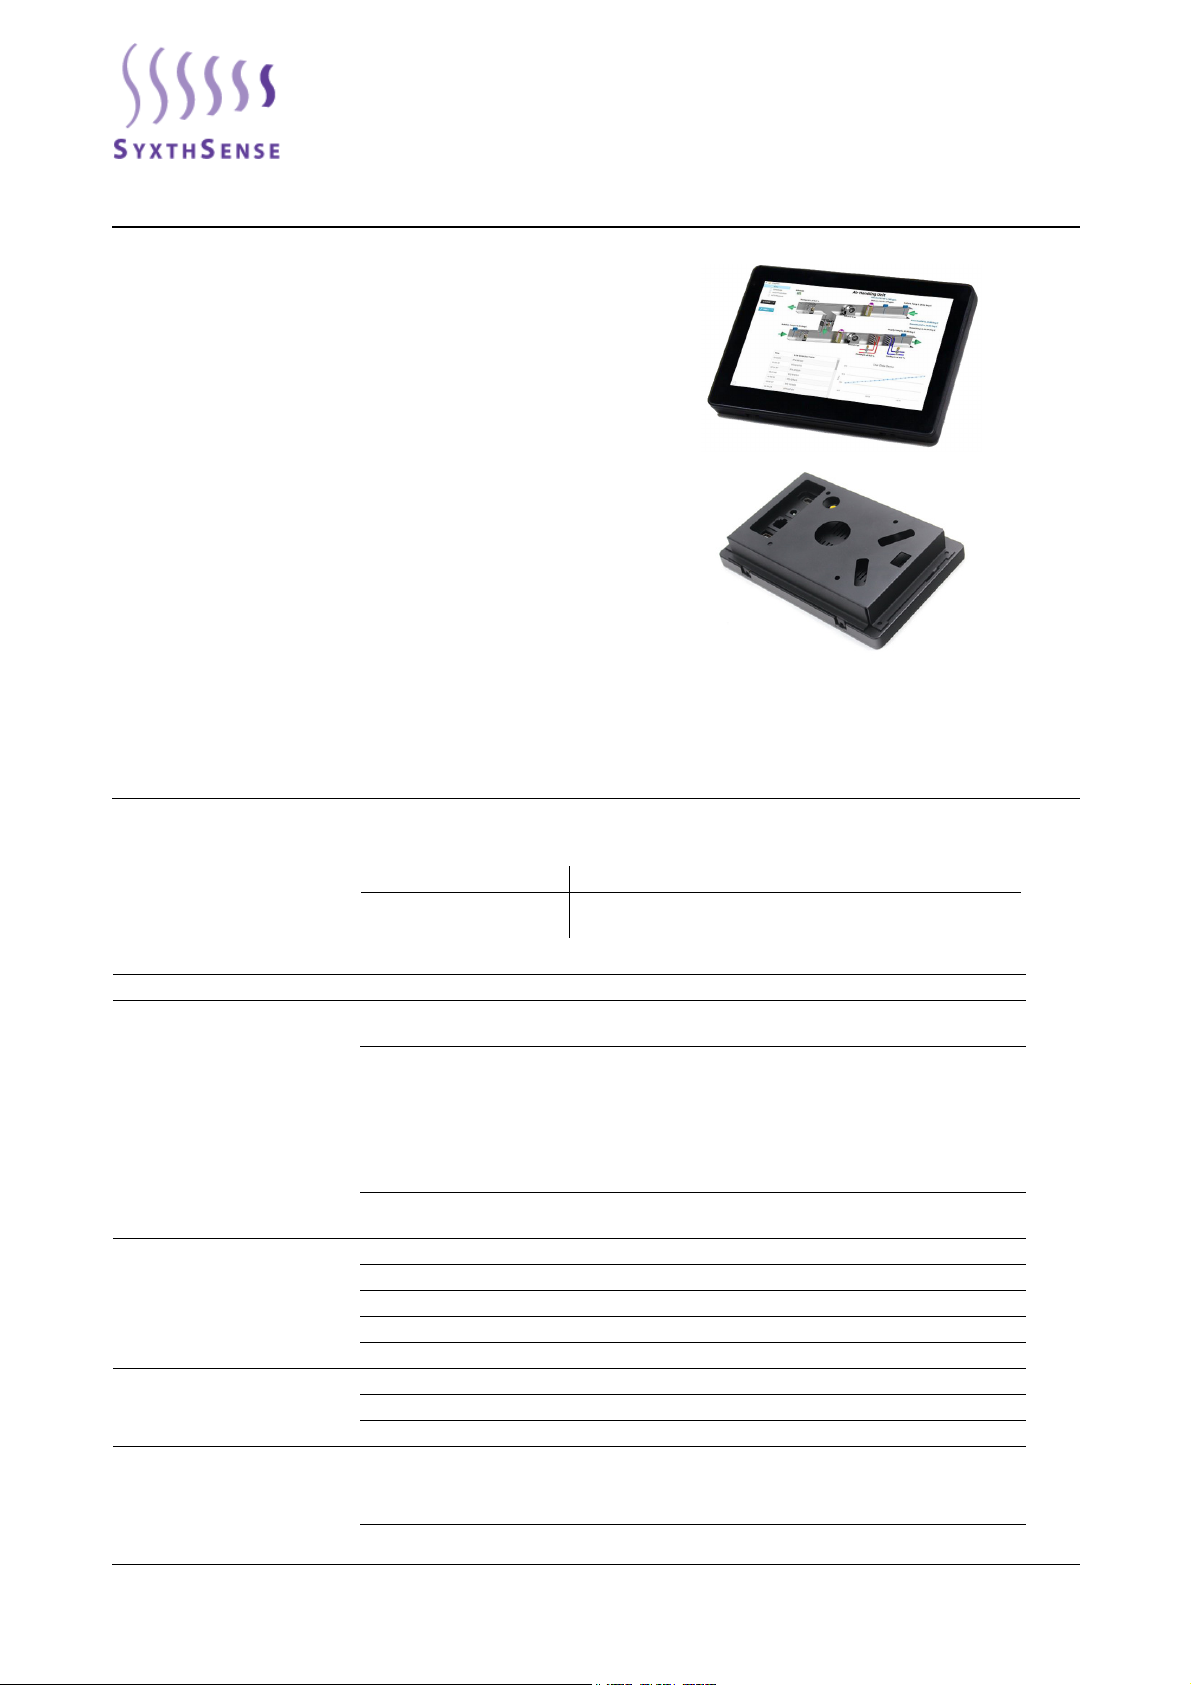
The SDC-TS7+ is 7" tablet PC for visualising plant information
from BMS controllers using a web-browser interface application.
The tablet is connected via Ethernet to the controllers. The device
is equipped with a powerful processor for high speed
performance. The 7 inch capacitive touchscreen provides easy
access to plant monitoring
Features
• 7" Capacitive Touchscreen (1024x600 pixels)
• 100-240VAC to 12VDC Mains Adapter Included (UK Plug)
• Ethernet RJ45 Connectivity
• USB Stick Support (software upgrades)
• Animated Colour Graphics for HVAC Systems
• Auto-Boot Web-Browser
• Android OS
Product sheet CT2.137
Type SDC-TS7+
Model Type Model Description
SDC-TS7plus Tablet PC User Interface for Sedona and Niagara
FrameworkTM Products
Technical Data
Power Supply Power supply 100-240Vac (Mains adapter with UK Plug Supplied)
Display and Audio Display 7 Inch IPS Display, Resolution:1024 x 600, Brightness: 350
cd/m2
Video H.264 2160p video decoding. Multi-format FHD video
decoding, including Mpeg1/2, Mpeg4 SP/ASP GMC, H.263,
H.264, VP6/8, AVS jizun, Jpeg/Mjpeg,etc.
H.264 High Profile 1080p@30fps or 720@60fps encoding
3840 x 1080@30fps 3D decoding, BD/SBS/TAB/FP supported
Complies with RTSP, HTTP, HLS, RTMP, MMS streaming
media protocols
Audio Two Speakers 2 X 1 Watt (Integrated 3W Amplifier For
External Speakers)
Processor, Memory and System Processor Allwinner’s A20 ARM Dual-Core Cortex A7 CPU, 1.2Ghz
RAM 1GB
Nand Flash 4GB
Operating System Android 4.2.2.
Boot Up Auto Boot Up When Power is Applied
Connections Ethernet RJ45
USB USB Connector
HDMI HDMI Output
Environmental Conditions Operating
Temperature 0°C...+40°C
Humidity 0...95%rh (non-cond.)
Degree of Protection IP30

SyxthSense Ltd
Copyright © 2017 SyxthSense Ltd. All rights reserved - 08/2017
PS CT2.137 - 2/6
Online store: www.syxthsense.com
Enquiries: T: 0844 840 3100 F: 0844 840 3200
General Instructions This device is based on Android OS and so there are several settings that device is expecting to get
from the network in order to work properly.
• Date & Time
• IP Address
If you are using the device without connection to Internet / DHCP Router make sure you setup these
properties correctly in order to get the device working correctly.
If connected to Internet, the device picks up the date and time from the Internet on every power up.
Mounting Instructions The tablet is munted to the panel door using the mounting bracket. Fit the mounting bracket to the
panel door and then plug in and secure the touchscreen to the mounting bracket.
Step 1. Make Cutout for the Tablet.
Step 2. Install the mounting bracket to the cutout and secure it.
Housing Mounting Wall or Panel Mounting
Dimensions W182 x H121 x D25mm (Without Mounting Bracket)
Weight 900g

SyxthSense Ltd
Copyright © 2017 SyxthSense Ltd. All rights reserved - 08/2017
PS CT2.137 - 3/6
Online store: www.syxthsense.com
Enquiries: T: 0844 840 3100 F: 0844 840 3200
Step 3. Install the tablet and plug in the cables on the back.
Step 4. Secure the touchscreen to the mounting bracket using the provided screws.
Set Up Procedure The display has been pre-installed with ABAS Controller View application. In normal operation the
ABAS will automatically start on the power-up and open up. The ABAS application uses a built-in
web-browser to retrieve data from the BMS controller using the URL set to the controller in the ABAS
configuration.
Intial Setup
When the device is powered up first time, the screen shows on the first screen two buttons; ABAS and
Launcher.
• ABAS Controller View; application to view the controller graphics
• Launcher; provides acces to the Android system settings
After selecting the application, two options are displayed; "Just Once" or "Always". During the set up
select "Just Once" until the set up is completed. Once Setup has been completed select the ABAS
application and selecte "Always". This means that the display always starts automatically with the
ABAS Controller View.
WARNING: Do not select "Always" until the set up has been completed.

SyxthSense Ltd
Copyright © 2017 SyxthSense Ltd. All rights reserved - 08/2017
PS CT2.137 - 4/6
Online store: www.syxthsense.com
Enquiries: T: 0844 840 3100 F: 0844 840 3200
The setup procedure is as follows:-
1. Configure the Ethernet IP Address of the Tablet and the Date & Time
2. Run ABAS Controller View to configure the IP Address of the controller that is serving the
web-pages e.g. SDC-20G+/32G+/EASYIO-FG20+/EASYIO-FG32+.
3. Once the setup is completed, run ABAS and select "Always" option,
Configure Ethernet IP
Address of Tablet
In order to establish connection to the controller, it is essential to set up the IP address of the tablet. To
do this, select "Launcher" with option "Just Once".
Click Android Settings Icon on the screen to open Android Settings
Go to Settings->More…->Ethernet, enable Use Ethernet and if you connect directly to the Sedona
Controller / web server device open Advanced Configure:
Disable DHCP; untick the DHCP.
Set the IP Address of your SDC-TS7.
Set the Mask Address of your network (normally 255.255.255.0);
Set the GateWay as the IP Address of your Sedona Controller / Web server.
NOTE: It is important to set the display IP addres to be in the same range as the Sedona
Controller / Web-Server IP address. E.g. if the Sedona Controller IP address is 192.168.10.11
then the display IP Address have to be 192.168.10.xx, where xx is not 11 (not to have address
conflict). In other words the first three segments of the IP address have to be the same.
Configure Time Zone, Date
and Time
To have your tablet showing the graphics in the right time you need to make sure you have the date
and time updated. Disable Automatic Time Zone and Select Time Zone of your zone. If the tablet is not
connected to internet, disable Automatic Date & Time, and Set Date and Set Time.

SyxthSense Ltd
Copyright © 2017 SyxthSense Ltd. All rights reserved - 08/2017
PS CT2.137 - 5/6
Online store: www.syxthsense.com
Enquiries: T: 0844 840 3100 F: 0844 840 3200
ABAS Controller View
Application
ABAS Controller View application is used to view the graphics from the web-server. The application
auto-starts on the device power up (once it has been configured as "Always" in the boot screen.
When the ABAS application is first run, a screen prompts to enter the "Web URL" which is the
controller (web-server) IP address. As default the Sedona controller IP address is 192.168.10.11.
This app will disable the screen after 15 minutes, to enable again just touch on the screen.
After entering the Web URL, the ABAS boots back to the boot screen.
Changing the SDC-TS7 IP address / ABAS Web-URL Address
To change the IP address you need to do a long press on the top right of the screen and it will show a
password box. The password is "sibo". After entering the password the unit takes you automatically to
the Android Settings screen to configure the IP Address.
To change the Web URL go to Settings->Apps-->ABAS-->Clear Data. This clears the ABAS Controller
View App data, and when next time the ABAS is run, it prompts to enter the Web URL again.
How to Install a New Version of ABAS Controller View
To install a new version of ABAS Controller View first go to Settings->Apps->ABAS and click on
Uninstall. Then exit the settings using Settings->Apps->Running and click on Settings then stop it.
After this you need to connect an USB stick with the latest app and go to Menu->File
Manager->USB->usbhost1 and click on latest ABAS webview.apk file, do install and after the
installation is done you need to reboot the tablet.
You will find the latest ABAS controller view application file from the www.syxthsense.com Support
Download section.

Dimensions
SyxthSense Ltd
Copyright © 2017 SyxthSense Ltd. All rights reserved - 08/2017
PS CT2.137 - 6/6
Online store: www.syxthsense.com
Enquiries: T: 0844 840 3100 F: 0844 840 3200
Other SyxthSense Recording Equipment manuals
Popular Recording Equipment manuals by other brands

GRASS VALLEY
GRASS VALLEY Kaleido-IP X310 quick start guide

Zefon
Zefon GEMINI Operation manual

Kenwood
Kenwood TK-930 manual

LOVATO ELECTRIC
LOVATO ELECTRIC EXM10 13 manual

Algolith
Algolith Dual SD/HD Frame Synchronizer FRS-1002-MD Installation and operation manual

MadLab
MadLab Bleep-o-tron quick start guide