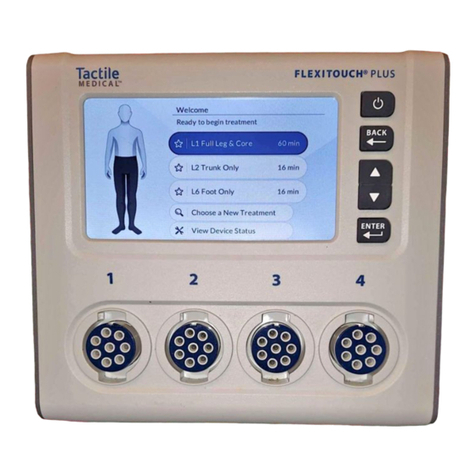
Tactile Medical Flexitouch Plus PD32-G3 User manual

Flexitouch®Plus User Guide
Model PD32-G3

ii iii Customer Service Toll Free: 833.382.2845 (833.3TACTILE)
Determine which garment style you have and follow directions for
that garment: Flexitouch Plus with ComfortEase or Flexitouch Plus.
NOTE: Flexitouch Plus with ComfortEase directions are found on the
gray pages within this User Guide.
Chapter 1 Before You Get Started ........................1
1.1 How to Contact Tactile Medical ..........................1
1.2 Safety Precautions and Explanation of Symbols...........1
1.3 Indications for Use ......................................4
1.4 Contraindications .......................................5
1.5 Unpacking Instructions ..................................6
Chapter 2 The Flexitouch Plus System ...................8
2.1 System Components ....................................8
2.2 Programmed Pressure Levels ............................9
2.3 Treating the Lower Extremity ...........................12
2.4 Treating the Upper Extremity ...........................14
2.5 Treating the Head and Neck ............................16
Chapter 3 Controller Unit Setup .........................17
3.1 Setting Up the Controller Unit ..........................17
3.2 Selecting Your Settings .................................18
Chapter 4 Connecting the Hoses to the
Controller Unit .................................21
4.1 Connecting the Bilateral Port Adapter ...................21
4.2 Connecting Your Flexitouch Plus Lock/Unlock
Style Connectors to the Controller Unit..................23
4.3 Connecting Your Flexitouch Plus Hoses
to the Controller Unit – Ridged Style ....................26
Chapter 5 Trunk Garment Application ..................29
5.1 Applying Your Flexitouch Plus with ComfortEase
Trunk Garment .........................................30
5.2 Applying Your Flexitouch Plus Trunk Garment ...........33
Table of Contents
Chapter 6 Lower Extremity Garment Application.....35
6.1 Flexitouch Plus with ComfortEase Full Leg Garment......36
6.2 Flexitouch Plus Full Leg Garment........................40
6.3 Flexitouch Plus Half Leg Garment .......................43
6.4 Flexitouch Plus EXT Half Leg Garment and
Trunk–Thigh Garment ..................................45
Chapter 7 Upper Extremity Garment Application.....48
7.1 Flexitouch Plus Arm–Shoulder Garment .................49
Chapter 8 Head and Neck
Garment Application
.......52
8.1 Flexitouch Plus Head Garment and the Vest for
Head and Neck ........................................53
Chapter 9 Conducting a Therapy Session ..............58
9.1 Starting the Therapy Session............................58
9.2 Pausing the Therapy Session............................59
9.3 Completing the Therapy Session ........................59
9.4 Turning the Controller Unit O..........................59
9.5 Storing the Flexitouch Plus System ......................59
9.6 Cleaning the Flexitouch Plus System ....................60
Chapter 10 Troubleshooting and Specications ......62
10.1 Troubleshooting .......................................62
10.2 Limited Warranty and Service for Home Use .............66
10.3 Limited Warranty and Service for Facility Use ............67
10.4 Equipment Lifetime ....................................67
10.5 Return Policy...........................................67
10.6 Patents ................................................67
10.7 Technical Information ..................................68
10.8 Device Label ...........................................69
Appendix A ..................................................71
A Clinician-Directed Manual Pressure Adjustment .........71
For Additional Questions ..................................74

12Customer Service Toll Free: 833.382.2845 (833.3TACTILE)
CHAPTER 1
Before You Get Started
Read the entire user guide before attempting to connect or operate
this product. Keep this user guide for future reference.
The Flexitouch Plus system is designed for at-home treatment of
lymphedema, chronic edema and chronic wounds. When used daily,
the Flexitouch Plus system can help you manage your condition,
improve your health and allow you to enjoy a better quality of life.
This user guide provides the information needed to set up and use
your Flexitouch Plus system.
Determine which garment style you have and follow directions for
that garment:
Flexitouch Plus with ComfortEase
(See Figure 1.a.).
Flexitouch Plus
(See Figure 1.b.).
NOTE: Flexitouch Plus with ComfortEase
directions are found on the gray pages
within this user guide.
1.1 How to Contact Tactile Medical
If you have questions about the Flexitouch Plus system or require
service, contact Tactile Medical:
By phone: Customer Service: toll free (U.S. only) at 833.382.2845
(833.3TACTILE), 7 a.m. to 7 p.m. CT, Monday–Friday.
By email: info@tactilemedical.com.
If you have medical questions, please contact your physician or
healthcare provider.
1.2 Safety Precautions and Explanation of Symbols
IMPORTANT: Read Instructions Before Using
Before attempting to connect or operate this product, please read the
entire user guide. Keep this user guide available for future reference.
CAUTION
MANUFACTURER’S PART NUMBER
Rx Only
CAUTION: U.S. Federal law restricts this device to sale by or on
the order of a licensed healthcare professional. The device may only be
used by individuals for whom it has been prescribed.
Consult your physician or other healthcare provider for recommendations
regarding your therapy program, treatment cycles and/or duration
of treatment. Use this product only at the settings prescribed by your
healthcare provider.
Do NOT Dispose with General Household Waste
Tactile Medical complies with the Waste Electric and Electronic
Equipment Directive (WEEE) 2002/96/EC. Contact Tactile Medical at
612.355.5100 or toll-free at 833.382.2845 (833.3TACTILE) (U.S. only),
7 a.m. to 7 p.m. CT, Monday–Friday to get disposal instructions.
Type BF Applied Part
Device Serial Number
Intertek ETL Mark
Product Category: Medical Equipment
Product Category CCN: PIDF
Class II with respect to electrical shock, re and mechanical hazards
only in accordance with EN60601-1
IP21
Flexitouch Plus system complies with IEC60329 regarding degree of protection
against water and particulates.
500421-004-00
FULL LEG
RIGHT SHORT
ITEM ID: 3L-FL-SH-R
500421-004-00
FULL LEG
RIGHT SHORT
ITEM ID: 3L-FL-SH-R
Figure 1.a. Figure 1.b.

34Customer Service Toll Free: 833.382.2845 (833.3TACTILE)
WARNING: Risk of Electric Shock
Do not attempt to service the controller unit. Such attempts could result in injury
or damage to the product, and will void any warranty.
Do not disassemble the controller unit.
Only use the power adapter provided with your Flexitouch Plus system.
Unplug the controller unit when not in use.
The Flexitouch Plus system is to be used indoors only.
Do not use the controller unit near water or while bathing.
Do not reach for the controller unit if it falls into water. Unplug the controller unit
at the electrical outlet immediately.
Do not use the controller unit or garments if they become wet. Dry them o
before use or wait until they become dry.
EMC Precautions
The Flexitouch Plus system is Medical Electrical Equipment that has been tested
and demonstrated to be compatible with electromagnetic compatibility (EMC)
CISPR 11 Class B limits and is therefore suitable for use in hospital, clinic and home
care environments.
WARNING: Although the Flexitouch Plus system has no essential performance
aected by EMC, use of this equipment adjacent to or stacked with other equipment
should be avoided because it could result in improper operation. If such use is
necessary, this equipment and the other equipment should be observed to verify
that they are operating normally.
WARNING: Power cords can be aected by EMC. Use only the power cord provided
by Tactile Medical.
WARNING: Portable RF communications equipment (including peripherals such
as antenna cables and external antennas) should be used no closer than 30 cm
(12 inches) to any part of the Flexitouch Plus system.
WARNING: Risk of Personal Injury
Use the controller unit only for its intended purpose, as directed in this user guide.
Use accessories only if recommended or supplied by Tactile Medical.
Set up the controller unit in a manner that provides easy access to the power cord
should it become necessary to unplug quickly.
Never operate the controller unit if the cord or plug is not working properly, if it has
been damaged or if the controller unit has been dropped into water. Return it to
Tactile Medical for inspection and/or replacement. Do not modify the cord or plug.
Keep the power cord away from heated surfaces.
Never operate the controller unit where the cord or tubing harness will present a
strangulation or tripping hazard.
Strangulation potential: power cord and tubing bundle should never be placed
near or around a person’s neck.
Never smoke while wearing product garments or while operating the product.
1.3 Indications for Use
The Flexitouch Plus system and garments for legs, arms, trunk and
chest are intended for use by medical professionals and patients
who are under medical supervision to increase lymphatic ow in the
treatment of many conditions such as:
Lymphedema
Primary lymphedema
Post mastectomy edema
Edema following trauma and
sports injuries
Post immobilization edema
Venous insuciency
Reducing wound healing time
Treatment and assistance in
healing stasis dermatitis, ve-
nous stasis ulcers, and arterial
and diabetic leg ulcers
Lipedema
Phlebolymphedema
The Flexitouch Plus system and garments for the head and neck are
intended for use by medical professionals and patients who are under
medical supervision for the treatment of head and neck lymphedema.
CAUTION: Risk of Device Damage
Never block the ventilation openings on the sides of the controller unit. Keep the
ventilation openings free of debris such as lint and hair.
Never operate the controller unit on a soft surface, such as a bed, couch or pillow
where the ventilation openings may be blocked.
Never drop or insert any object into any opening of the controller unit.
Never use sharp objects, such as pins, scissors or clasps on or near the Flexitouch
Plus system.
Never use hot devices such as irons or blow dryers on or near the Flexitouch Plus
system.
Keep the product free from debris to avoid valve closed or valve opened failures.
Never place the product in a position or location that would allow the tubing
harness to become pinched or crushed.
PRECAUTION
Theoretically, massage and mechanical compression could mobilize dormant tumor
cells in some patients; however, this is expected to have limited impact on prognosis
such that the benets of reduction in morbid edema will likely outweigh those
theoretical risks.
56Customer Service Toll Free: 833.382.2845 (833.3TACTILE)
1.4 Contraindications
The Flexitouch Plus system should not be used if you have one
or more of the following conditions:
Heart failure (acute pulmonary edema, decompensated acute
heart failure)
Acute venous disease (acute thrombophlebitis, acute deep venous
thrombosis, acute pulmonary embolism)
Severe peripheral artery disease (critical limb ischemia including
ischemic rest pain, arterial wounds or gangrene)
Active skin or limb infection/inammatory disease (acute cellulitis,
other uncontrolled skin or untreated inammatory skin disease)
Any circumstance where increased lymphatic or venous return is
undesirable
During pregnancy (applies only to the Flexitouch Plus trunk garment)
The head garment and the vest for head and neck for the
Flexitouch Plus system should not be used if you have one or
more of the following conditions:
Uncontrolled hyperthyroidism or parathyroidism (for which an
endocrinologist recommends against neck compression)
Carotid sinus hypersensitivity syndrome
Symptomatic carotid artery disease, as manifested by a recent
transient ischemic attack (within 30 days), ischemic stroke or
amaurosis fugax (monocular visual ischemic symptoms or blindness)
Symptomatic bradycardia in the absence of a pacemaker
Internal jugular venous thrombosis (within 3 months)
Increased intracranial pressure or other contraindication to internal
or external jugular venous compression
Acute radiation dermatitis, unhealed surgical scar, unhealed or
open wound(s), surgical ap less than 6–8 week post-operative
Facial or head and neck dermal metastasis
Acute facial infection (e.g., facial or parotid gland abscess)
Any condition in which increased venous and lymphatic return
is undesirable
1.5 Unpacking Instructions
When your Flexitouch Plus system arrives, allow the controller unit
to reach room temperature for one hour before using. It is important
that you carefully unpack the contents and ensure that you have all
the equipment required to begin operation.
Included in the box, you should nd the following:
User Guide
Controller unit
Garments and accessories needed to treat your condition
Power adapter
Bilateral port adapter (if prescribed bilateral treatment)
The garments and accessories you receive will depend upon your
individual therapy requirements.
If you are missing any of the items listed for your prescribed treatment,
please contact Customer Service at 833.382.2845 (833.3TACTILE),
7 a.m. to 7 p.m. CT, Monday–Friday.
Lower Extremity Treatment
The garments and accessories needed for lower extremity treatment
may include the following:
Full leg garment (x-short, short, medium or long)
Half leg garment (regular or EXT)
Trunk garment (small, medium, large or x-large)
EXT trunk–thigh garment
Waist extender(s)

78Customer Service Toll Free: 833.382.2845 (833.3TACTILE)
Upper Extremity Treatment
The garments and accessories needed for upper extremity treatment
may include the following:
Arm–shoulder garment
Trunk garment (small, medium or large)
Head and Neck Treatment
The garments needed for head and neck treatment may include
the following:
Head garment
Vest for head and neck
Labels
The garment label is located where the tubing attaches to the garment
on Flexitouch Plus garments, and where indicated in Figure 1.5.a.
below on Flexitouch Plus with ComfortEase garments. The label
indicates the type of garment you have – Flexitouch Plus with
ComfortEase or Flexitouch Plus – and the body area where the garment
is to be applied (full leg, half leg, trunk, trunk–thigh, arm–shoulder,
head and vest for head and neck) (Figure 1.5.a.).
Figure 1.5.a. Label Examples
500421-010-00
HALF LEG
ITEM ID: 3L-HL-RG-R
500421-004-00
FULL LEG
RIGHT SHORT
RIGHT REG
ITEM ID: 3L-FL-SH-R
500421-017-00
ARM-SHOULDER
ITEM ID: 3U-AS-L2-L
LEFT LONG
SIZE 2
500421-001-00
TRUNK
MEDIUM
ITEM ID: 3A-TR-MD-A
500421-010-00
HALF LEG
ITEM ID: 3L-HL-RG-R
500421-004-00
FULL LEG
RIGHT SHORT
RIGHT REG
ITEM ID: 3L-FL-SH-R
500421-017-00
ARM-SHOULDER
ITEM ID: 3U-AS-L2-L
LEFT LONG
SIZE 2
500421-001-00
TRUNK
MEDIUM
ITEM ID: 3A-TR-MD-A
CHAPTER 2
The Flexitouch Plus System
The Flexitouch Plus system is an advanced pneumatic compression
device clinically proven to stimulate the lymphatic system. The device
helps direct and move excess uid from an impaired lymphatic
region to healthy regions, where uid can be absorbed and processed
naturally by your body.
Flexitouch Plus garment chambers inate sequentially with each
chamber inating before the adjacent distal chamber fully deates.
This creates a dynamic wave of therapy that directs uid into the
lymphatic capillaries while maintaining distal pressure to prevent
distal backow.
NOTE: No special skills, training or knowledge are required to operate
the Flexitouch Plus system.
2.1 System Components
The Flexitouch Plus system consists of two primary components:
Controller Unit
The controller unit is a programmable pneumatic compressor with
four connector outlets. Each connector has eight outow ports to
plug in garment hoses. Air passes through the hoses, delivering
treatment through the sequential ination and deation of up to 32
air chambers in the garments. By selecting the appropriate treatment
program, calibrated gradient pressure is delivered to the chambers
and assists in moving excess uid out of the aected limb(s).
500421-004-00
FULL LEG
RIGHT SHORT
ITEM ID: 3L-FL-SH-R

910 Customer Service Toll Free: 833.382.2845 (833.3TACTILE)
Garments
The air-chambered garments are made of soft pliable fabric. They
are designed to t the contours of your body by wrapping around
the limb(s) and attaching with hook and loop fasteners. A variety of
upper and lower extremity treatment options are available in order
to address your specic needs.
The lower extremity garment(s) are used to treat the leg(s) and core.
Depending on your clinical needs, you may be prescribed a leg
garment (or leg garments), or both a leg garment (or leg garments)
and a trunk garment.
The upper extremity garment(s) and accessories are used to treat the
arm, or arm and core. Depending on your clinical needs, you may be
prescribed an arm–shoulder garment and trunk garment.
The head garment and the vest for head and neck are used to treat the
head, neck and chest. Depending on your clinical needs, you may be
prescribed a head garment and a vest for head and neck.
2.2 Programmed Pressure Levels
Programmed pressure levels in each of the air chambers are based
on physiological principles of how lymph uid moves through the
system. Your healthcare provider will determine what individual
programs are appropriate for you. In certain medical circumstances,
your healthcare provider may wish to increase or decrease the
pressure settings. The Flexitouch Plus controller unit allows for
selection of INCREASED, NORMAL or DECREASED pressure settings.
If additional pressure adjustment is needed, individual treatment
segments may be adjusted manually.
NOTE: Please consult with your healthcare provider before changing the
pressure settings.
Refer to
Appendix A: Clinician-Directed Manual Pressure Adjustment
for
additional information on how to change pressures for the various
treatment segments.
When using the various pressure modes or manually calibrating
segmental pressures, the pressure gradient is maintained throughout
each treatment segment and the most distal garment chambers
hold a level of sustained pressure which is intended to prevent the
distal backow of lymph uid. The treatments are designed to only
deliver clinically appropriate pressures and to maintain pressure
gradients in order to prevent adverse device settings.

11 12 Customer Service Toll Free: 833.382.2845 (833.3TACTILE)
Table 1: Treatment Programs and Therapy Times
Program Program
Display
Body Regions
Treated
Treatment
Time (min.)
Available
Cycles
Lower Extremity—Primary Treatment Programs
L1 Full Leg and Core Trunk, Thigh, Calf
and Foot
60 1
L4 Full Leg Plus Thigh, Calf and Foot 45 1–5
L5 Half Leg Plus Calf and Foot 30 1–5
L7 Half Leg Calf and Foot 30 1–5
L8 Full Leg Thigh, Calf and Foot 45 1–5
Lower Extremity—Supplemental Treatment Programs
L2 Trunk Only Trunk 16 1–5
L3 Trunk and Thigh Trunk and Thigh 30 1–5
L6 Foot Only Foot 16 1–5
Upper Extremity—Primary Treatment Programs
U1 Full Arm and Core Trunk, Chest, Shoulder,
Biceps, Forearm and
Hand
60 1
U4 Arm–Shoulder Chest, Shoulder, Biceps,
Forearm and Hand
50 1–5
U7 Full Arm Arm 30 1–5
Upper Extremity—Supplemental Treatment Programs
U2 Trunk Only Trunk 12 1–5
U3 Trunk and Chest Trunk and Chest 30 1–5
U5 Forearm and Hand Forearm and Hand 24 1–5
U6 Hand Only Hand 12 1–5
Head and Neck—Primary Treatment Program
H1 Head, Neck and
Vest
Head, Neck and Chest 32 1
Head and Neck—Supplemental Treatment Programs
H2 Head Only Head, Neck 13 1
H3 Vest Only Chest 12 1
Treatment Program L1: Full Leg and Core
This treatment option provides the ability to deliver therapy to both
the leg and trunk regions when clinically appropriate. Incremental
proximal clearing of lymphatic uid in the 1trunk, 2thigh, 3calf
and 4foot regions is followed by delivery of the traditional
5full leg and trunk treatment.
Treatment time: 60 minutes.
2.3 Treating the Lower Extremity
Figure 2.3.a. Full Leg and Core
1. Trunk
directs uid from top of the thigh
toward waist
2. Thigh
directs uid from knee toward top
of the thigh
3. Calf
directs uid from ankle toward knee
4. Foot
directs uid from toes toward ankle
5. Full Leg and Trunk
directs uid from toes toward top
of waist in one continuous motion
1
2
5
3
4

13 14 Customer Service Toll Free: 833.382.2845 (833.3TACTILE)
Treatment Program L4: Full Leg Plus
This treatment option provides the ability to deliver therapy to the
leg when clinically appropriate. Incremental proximal clearing of
lymphatic uid in the 1thigh, 2calf and 3foot regions is followed
by delivery of the traditional 4full leg treatment.
Treatment time: 45 minutes.
Figure 2.3.b. Full Leg Plus
1. Thigh
directs uid from knee toward top of
thigh
2. Calf
directs uid from ankle toward knee
3. Foot
directs uid from toes toward ankle
4. Full Leg
directs uid from toes toward top of
thigh in one continuous motion
Treatment Program U1: Full Arm and Core
This treatment option provides the ability to deliver therapy to the
arm, chest and trunk regions when clinically appropriate. Incremental
proximal clearing of lymphatic uid in the 1trunk, 2chest,
3biceps, 4forearm and 5hand regions is followed by delivery
of the traditional 6full arm, shoulder, chest and trunk treatment.
Treatment time: 60 minutes.
Figure 2.4.a. Full Arm and Core
1. Trunk
directs uid from waist toward top
of thigh
2. Chest
directs uid from shoulder toward waist
3. Biceps
directs uid from elbow toward
shoulder
4. Forearm
directs uid from wrist toward elbow
5. Hand
directs uid from ngers toward wrist
6. Full Arm, Shoulder, Chest and Trunk
directs uid from ngers toward the
top of thigh in one continuous motion
2.4 Treating the Upper Extremity
4
1
2
3
3
4
5
1
2
6

15 16 Customer Service Toll Free: 833.382.2845 (833.3TACTILE)
Treatment Program U4: Arm–Shoulder
This treatment option provides the ability to deliver therapy to
the arm and chest regions when clinically appropriate. Incremental
proximal clearing of lymphatic uid in the 1chest, 2biceps,
3forearm and 4hand regions is followed by delivery of the
traditional 5full arm, shoulder and chest treatment.
Treatment time: 50 minutes.
Figure 2.4.b. Arm–Shoulder
1. Chest
directs uid from the shoulder
toward the waist
2. Biceps
directs uid from the elbow toward
the shoulder
3. Forearm
directs uid from the wrist toward
the elbow
4. Hand
directs uid from the ngers toward
the wrist
5. Full Arm, Shoulder and Chest
directs uid proximally from the
ngers up toward the shoulder, then
toward the top of the waist in one
continuous motion
2.5 Treating the Head and Neck
Figure 2.5.a. Head and Neck
1. Chest and Neck
directs uid from the neck and the
chest toward underarm area
2. Head
directs uid from head toward neck
3. Head, Neck and Chest
directs uid from head toward
the underarm area in one
continuous motion
Treatment Program H1: Head, Neck and Vest
This treatment option provides the ability to deliver therapy to
the head, neck and chest when clinically appropriate. Incremental
proximal clearing of lymphatic uid in the 1chest, neck and 2head
is followed by delivery of the full head, neck and chest treatment.
Treatment time: 32 minutes.
3
2
1
5
2
3
4
1

17 18 Customer Service Toll Free: 833.382.2845 (833.3TACTILE)
CHAPTER 3
Controller Unit Setup
The Flexitouch Plus system consists of a controller unit, a garment
set and accessories to treat your condition. In this chapter you will
learn how to set up the controller unit and select the proper settings
prior to receiving therapy. You will learn how to apply the garments
in Chapters 5(trunk), 6(lower extremity), 7(upper extremity) and
8(head and neck).
3.1 Setting Up the Controller Unit
Follow the steps outlined below:
1. Find an appropriate location for the controller unit. Place the
controller unit on a sturdy, at surface near an electrical outlet.
Position the device so you have easy access to the plug.
2. Plug the supplied power adapter into the power adapter inlet on
the back of the controller unit. Then, plug the two-pronged plug
into an electrical outlet (Figure 3.1.a.).
NOTE: There are two 12 VDC power adapter options, so the version
shown below may be dierent from the one you receive.The two
versions are:
• Meanwell GSM36U12-P1JNX
• Fuhua UE36LCP1-120300SPA
3.2 Selecting Your Settings
Follow the steps outlined below to select the settings prescribed by
your healthcare provider:
NOTE: Your controller unit will arrive programmed with your prescribed
treatment saved as the rst preset. You may not need to modify the
preset program(s) unless instructed by your healthcare provider. The
controller unit can, however, store up to three treatment therapies, and
will automatically recall and highlight the last performed treatment.
Turn the controller unit ON.
1. Turn the controller unit on by pressing the button located
in the upper right corner on the front panel (see Figure 3.2.a. on
next page).
Select and start your therapy session.
2. Your prescribed treatment program will be saved as the rst preset
on the home screen, and will be highlighted in blue when the
controller unit is turned ON. To begin your prescribed treatment
session, select the button found on the right-hand side of
the controller unit. Your therapy session will begin, and the time
remaining will be displayed.
Figure 3.1.a. Power Adapter
A plug adapter may
be necessary for use
outside the U.S.
WARNING: RISK OF ELECTRIC SHOCK
Only use the Meanwell GSM36U12-P1JNX or Fuhua UE36LCP1-120300SPA
power adapter with your Flexitouch Plus system. These power adapters are
designed for use with either 120 Volt AC or 230 Volt AC outlets.

19 20 Customer Service Toll Free: 833.382.2845 (833.3TACTILE)
2800_Control_Panel_KL.pdf 1 12/9/16 1:50 PM
On/Off
Back
Up
Down
Enter
Connector
Number
If you are prescribed a supplemental program, it will be saved as
the second preset on your controller unit. To switch to the second
preset and run the treatment program, press the arrow button
until the second preset is highlighted in blue. Once highlighted,
select the button to begin the supplemental therapy.
Your therapy session will begin, and the time remaining will
be displayed.
NOTE: You may PAUSE TREATMENT for up to 15 minutes at any point
during a therapy session by pressing the button. After that time,
the controller unit will automatically shut o, requiring you to restart
your therapy session. To resume your therapy, make sure the RESUME
TREATMENT option is highlighted in blue, and press the button.
To stop treatment, press the arrow button to select STOP
TREATMENT and select .
Figure 3.2.a. Controller Unit Front Panel
Selecting or programming a new treatment.
3. On the home screen, press the arrow button until the
CHOOSE A NEW TREATMENT option is highlighted in blue. Once
highlighted, select the button. Using the / arrow
buttons, and by pressing the button when the appropriate
option is highlighted in blue, complete the following:
1. Select the appropriate TREATMENT REGION.
2. Select the appropriate BODY TREATMENTS.
3. Select the appropriate TREATMENT LOCATION.
4. Select the prescribed TREATMENT PRESSURE.
5. Select the number of TREATMENT CYCLES.
6. Complete the treatment selection. Select DONE WITH SETUP
using the button if the treatment selection is complete.
If you would like to string an additional treatment with the
existing programmed treatment, select ADD ANOTHER
TREATMENT and complete steps 2–5 above.
7. Choose a preset to save the new treatment.
NOTES:
If you have three saved presets, you will need to overwrite one of them
to save the new treatment.
Please consult your healthcare provider before changing or adding
programs to your prescribed treatment.
After you have selected the necessary settings, you are ready to
connect the hoses to the controller unit.

21 22 Customer Service Toll Free: 833.382.2845 (833.3TACTILE)
To remove the bilateral port adapter, move the paddles on both sides
all the way up to the unlock position (Figure 4.1.c.). With the paddles
unlocked, pull the bilateral port adapter away from the face of the
controller unit to remove it.
Figure 4.1.c. Removing the Bilateral Port Adapter
Move paddles up to the unlocked
position, then pull adapter away
from the face of the controller unit
Figure 4.1.b. Bilateral Port Adapter
Attached to the Controller Unit
Once attached, move paddles
to locked position
Figure 4.1.a.
Bilateral Port Adapter
Ensure paddles are
perpendicular to the adapter
before attaching the bilateral port
adapter to the controller unit
CHAPTER 4
Connecting the Hoses to the
Controller Unit
The next step is connecting the hoses to the controller unit. The hose
latches and the ports on the controller unit/bilateral port adapter are
numbered 1 through 4, so when connected properly, latch number 1
will connect to port number 1, and so on.
4.1 Connecting the Bilateral Port Adapter
If you are conducting bilateral therapy, you will have received a bilateral
port adapter that connects to the controller unit (Figure 4.1.a.). The
adapter must be connected to the controller unit prior to connecting
your garments. To connect the adapter, position it so the paddles on
both sides are perpendicular to the adapter and the ports on the back
of the adapter align with the ports on the front of the controller unit
(Figure 4.1.a.). You will hear two clicks, which conrm the ports have
been properly aligned and connected. Once the adapter has been
properly connected, move the paddles on both sides in the down
direction, so they are locked (Figure 4.1.b.). You should not be able to
remove the adapter from the controller unit without unlocking it.
NOTE: One or more of the ports will be capped if your prescribed therapy
does not use the port(s). Do not remove the port cap(s).

23 24 Customer Service Toll Free: 833.382.2845 (833.3TACTILE)
1. Hold the connector with the number facing up. Put your thumb
on the LOCK icon.
2. Line up the numbered latch with the port on the corresponding
controller unit (Figure 4.2.d.).
3. Push the numbered latch forward onto the controller unit until
you hear a “click”. This is how you will know each latch is properly
connected. You may hear two clicks: one for the top and one for
the bottom latch (Figure 4.2.e).
NOTE: If the numbered latch is pushed into the controller unit port very
hard, you may not hear a “click” sound.
4.2 Connecting Your Flexitouch Plus Lock/Unlock Style
Connectors to the Controller Unit
The Flexitouch Plus with ComfortEase has
lock/unlock icons on the connectors
(Figure 4.2.a.).
4.2.d. Corresponding Hose
Connector with
Controller Unit Connector
4.2.e. Properly Connecting
the Latches
4.2.a. Flexitouch Plus with ComfortEase
Connector: Lock/Unlock Style
4.2.b. Lock Icon and
Numbering
4.2.c. Correct and Incorrect Way
to Hold Connector for Hose Connection
FLEXITOUCH PLUS with ComfortEase

25 26 Customer Service Toll Free: 833.382.2845 (833.3TACTILE)
NOTES:
Holding the back of the controller unit may help to stabilize the unit as
you attach the latch connectors. If you are having trouble connecting
the latches, try connecting the bottom latch rst then tipping the top
latch into place.
You may see black numerical markings through the tubing. This is
normal and does not aect performance.
Figure 4.2.f. Fully Attached Hose
Connectors when Full Leg and
Arm-Shoulder Treatments are Prescribed
Figure 4.2.h. Fully Attached Hose
Connectors when Head and
Neck Treatment is Prescribed
Figure 4.2.g. Fully Attached Hose
Connectors when both Extremity and
Core Treatment are Prescribed
Figure 4.2.i. Fully Attached Hose
Connectors when Bilateral Port Adapter
is Attached
4. Repeat these steps for all connectors required for your
prescribed treatment.
4.3 Connecting your Flexitouch Plus Hoses to the
Controller Unit – Ridged Style
The Flexitouch Plus has ridges on
the connectors (Figure 4.3.a.).
3. Align the numbered latch with the notch on the corresponding
controller unit notch (Figure 4.3.c.).
Figure 4.3.b. Hose
Connector
BOTTOM
TOP
Ridges
Connector Collar
Tab Numbered Latch Connector
Figure 4.3.c.
Corresponding Hose
Connector with Controller
Unit Connector
Numbered Controller
Unit Connector
Controller Unit Notch
Numbered Latch
Connector
4.3.a. Flexitouch Plus
Connector: Ridged Style
1. Hold the hose connector by the tabs on the back of the latch
making sure the numbers are facing up (Figure 4.3.b.).
2. Gently squeeze the tabs to widen the front end of the hose
connector.
Do not remove
port cap(s)
FLEXITOUCH PLUS with ComfortEase

27 28 Customer Service Toll Free: 833.382.2845 (833.3TACTILE)
4. Reposition your hand so your thumb and ngers are positioned
on the top and bottom latch ridges. This enables you to slide the
latch (#4 in Figure 4.3.d.).
5. Push the latch forward. It will hook on the top and bottom of the
controller unit connector. You should hear a click when each of
the latches is properly connected. Two clicks will be heard, one
for the top and one for the bottom latch (#5 in Figure 4.3.e.).
6. Repeat for all connectors required for your prescribed treatment
(Figures 4.3.f., 4.3.g., 4.3.h., 4.3.i.).
Figure 4.3.g. Fully Attached Hose
Connectors When Both Extremity and
Core Treatments are Prescribed
Figure 4.3.h. Fully Attached Hose
Connectors When Head and
Neck Treatment is Prescribed
Figure 4.3.i. Fully Attached Hose
Connectors When Bilateral Port Adapter
is Attached
Figure 4.3.f. Fully Attached Hose
Connectors When Full Leg and
Arm–Shoulder Treatments are Prescribed
Do not remove
port cap(s)
NOTES:
Holding the back of the controller unit may help to stabilize the unit as
you attach the latch connectors. If you are having trouble connecting
the latches, try connecting the bottom latch rst then tipping the top
latch into place.
You may see black numerical markings through the tubing. This is
normal and does not aect performance.
You are now ready to apply your garment set as the nal step
before treatment can be delivered.
Figure 4.3.d. Proper Handling of the Hose Connector
Reposition your hand
so it is now pushing
forward with the collar
against the ridges on
the latch
4
Figure 4.3.e. Properly Connecting the Latches
5

29 30 Customer Service Toll Free: 833.382.2845 (833.3TACTILE)
CHAPTER 5
Trunk Garment Application
Prior to starting therapy, it is important to:
1. Be sure you are using the recommended garments and accessories.
2. Choose a time that will limit interruptions that could cause you to
pause therapy. Sessions typically last one hour.
3. Determine the type of garment you have:
Flexitouch Plus with ComfortEase (See 5.1)
Flexitouch Plus (See 5.2)
Refer to the label to determine which garment you have.
5.1 Applying Your Flexitouch Plus with ComfortEase
Trunk Garment
These instructions apply to the trunk garment that looks like
this (Figure 5.1.a.):
CAUTION
The Flexitouch Plus garments should not be placed in direct contact with an
open wound. It is recommended that wounds be properly dressed before the
garment is applied. Contact your healthcare provider if you have any questions.
Take care to avoid overheating when donning or dong garments.
CAUTION
To avoid skin irritation that may result from contact with the nylon material,
wear lightweight, loose-tting (non-elastic) cotton clothing (example: scrubs,
stockinette); for head and neck garments a face mask or balaclava. If skin
irritation develops, consult with your healthcare provider.
It is recommended to wear an undergarment to avoid potentially pinching skin
with zipper.
Lymph uid is moved through the vessels in the skin. It is important to avoid
wearing anything during therapy that may hamper the lymph ow. These
items include:
Belts
Jewelry
Restrictive clothing such as: elastic-banded underwear, compression
bandaging, elastic-banded socks, compression garments, bra
Preparing Your Trunk Garment for the First Time
1. Unfold and place your trunk garment on a bed or sofa so the
thigh aps and pocket closure are facing up and the hose is
coming out to the right side of the trunk garment.
NOTE: The pocket closure is at the top of the trunk garment in the front
and the thigh aps are at the bottom. Locate the zipper on the front of
the trunk garment (Figure 5.1.b.).
Figure 5.1.b.
Figure 5.1.a.
FLEXITOUCH PLUS with ComfortEase

31 32 Customer Service Toll Free: 833.382.2845 (833.3TACTILE)
2. Open the pocket closure labeled 1. Sit down and slide your trunk
garment on as you would a pair of shorts.
3. If your legs don’t t into your trunk garment, slide the trunk
garment o and loosen the thigh tabs labeled 2 through 5 to
allow you to slide your trunk garment on more easily.
4. Slide the trunk garment on and adjust the closure strap on your
left thigh. Apply the pocket closure around your waist from right
to left. Adjust the closure strap on your right thigh. You should be
able to slide two ngers between your trunk garment and your
waist to ensure an ideal t (Figures 5.1.c. and 5.1.d.).
5. Adjust the thigh aps labeled 2 through 5 snugly around your
thighs to get a well contoured t (Figure 5.1.e.).Make sure you
have good contact at the groin area and the top of the trunk
garment is around your abdomen.
6. Once you have achieved a snug t, remove your trunk garment
by simply unzipping the zipper in the front of the trunk garment
and sliding it o like you would a pair of shorts. There is no need
to undo the pocket closure or the thigh tabs.
Figure 5.1.c. Figure 5.1.d. Figure 5.1.e.
Applying Your Trunk Garment for Daily Treatment
7. Sit down and open the zipper on your trunk garment. Slide your
trunk garment on as you would a pair of shorts. For best results,
pull your trunk garment up as high as is comfortable making sure
you have good contact at the groin area. The top of the trunk
garment is around your abdomen (Figure 5.1.f.).
8. Use the zipper to zip up your trunk garment ensuring a
comfortable t (Figure 5.1.g.).
Removing Your Trunk Garment
9. To remove your trunk garment unzip and slide o like you would
a pair of shorts. There is no need to undo the pocket closure or
the thigh tabs.
NOTES:
If your treatment requires the use of a leg garment see Chapter 6.
If your treatment requires the use of a head/neck garment see Chapter 8.
Figure 5.1.f.
Figure 5.1.g.
FLEXITOUCH PLUS with ComfortEase

33 34 Customer Service Toll Free: 833.382.2845 (833.3TACTILE)
5.2 Applying Your Flexitouch Plus Trunk Garment
These instructions apply to the trunk garment that looks like this:
Preparing Your Trunk Garment
1. Unfold and place your trunk garment on a bed or sofa so the
thigh aps and pocket closure are facing up and the hose is
coming out to the right. The pocket closure is at the top of the
garment in the front and the thigh aps are at the bottom.
Figure 5.2.a. Figure 5.2.b.
Applying Your Trunk Garment for Daily Treatment
2. Sit down, then open the pocket closure and slide your garment
on as you would a pair of shorts. Bring the inside ap of your
trunk garment across your waist (#2 in gure 5.2.c.). For best results,
bring your trunk garment up as high as is comfortable – at least
as high as your belly button.
3. Secure your trunk garment using the pocket closure
(#3 in gure 5.2.d.).
4. To get a well-contoured t, undo the thigh aps and wrap the
garment snugly around your thigh (#4 in Figure 5.2.d.).
Removing Your Trunk Garment
5. To remove your trunk garment, simply open the pocket closure
and slide o like you would a pair of shorts.
NOTES:
If your treatment requires the use of a leg garment see Chapter 6.
If your treatment requires the use of a head/neck garment see Chapter 8.
5.2.c. Trunk Garment Application
Thigh
Flaps
Pocket
Closure
2
5.2.d. Securing the Trunk Garment
3
4

35 36 Customer Service Toll Free: 833.382.2845 (833.3TACTILE)
CHAPTER 6
Lower Extremity Garment Application
Prior to starting therapy, it is important to:
1. Be sure you are using the recommended garments and accessories.
2. Choose a time that will limit interruptions that would require you
to pause therapy. The therapy session typically lasts one hour.
3. Determine type of garment you have:
Flexitouch Plus with ComfortEase (See 6.1)
Flexitouch Plus (See 6.2)
Refer to the label to determine which garment you have.
CAUTION
To avoid skin irritation that may result from contact with the nylon material,
wear lightweight, loose-tting (non-elastic) cotton clothing (example: scrubs,
stockinette); for head and neck garments a face mask or balaclava. If skin
irritation develops, consult with your healthcare provider.
It is recommended to wear an undergarment to avoid potentially pinching skin
with zipper.
Lymph uid is moved through the vessels in the skin. It is important to avoid
wearing anything during therapy that may hamper the lymph ow. These
items include:
Belts
Jewelry
Restrictive clothing such as: elastic-banded underwear, compression
bandaging, elastic-banded socks, compression garments, bra
CAUTION
The Flexitouch Plus garments should not be placed in direct contact with an
open wound. It is recommended that wounds be properly dressed before the
garment is applied. Contact your healthcare provider if you have any questions.
Take care to avoid overheating when donning or dong garments.
6.1 Flexitouch Plus with ComfortEase Full Leg Garment
These instructions apply to the full leg garments that looks like this:
(Figures 6.1.a., 6.1.b., 6.1.c.)
Figure 6.1.a. Figure 6.1.b.
Preparing Your ComfortEase
Full Leg Garment
1. Unfold and place your full leg
garment on a bed or sofa so the
foot section is at the bottom and
the tubing cover (which is labeled
DO NOT REMOVE) runs along the
back of your leg (Figure 6.1.c.).
2. If your full leg garment is already shaped like
a boot, ensure the zipper is open, slide the
garment on and proceed to step 4. To reshape
your full leg garment like a boot, apply tabs
1 through 4. Ensure the zipper is open and slide
your garment on just as you would a boot.
Figure 6.1.c.
FLEXITOUCH PLUS with ComfortEase
Table of contents
Other Tactile Medical Medical Equipment manuals

Tactile Medical
Tactile Medical AFFLOVEST Setup guide

Tactile Medical
Tactile Medical Flexitouch Plus User manual

Tactile Medical
Tactile Medical ENTRE PD08-U User manual

Tactile Medical
Tactile Medical Flexitouch PD32-U User manual

Tactile Medical
Tactile Medical Entre Plus User manual

Tactile Medical
Tactile Medical AFFLOVEST User manual

Tactile Medical
Tactile Medical Actitouch User manual
Popular Medical Equipment manuals by other brands

Ultrasound Technologies
Ultrasound Technologies Freeplay FHRM operating manual

Solio
Solio Alfa+ Instructions for use

BioTel Heart
BioTel Heart ePatch quick start guide

Danmeter
Danmeter CSM 2 user manual

laerdal
laerdal Neonatal Resuscitation Baby Directions for use

Medikoel
Medikoel Me126 Instruction manuals