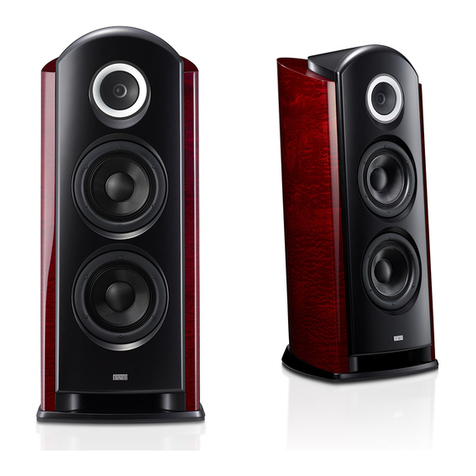
TAD CE1 User manual

2
BEFORE YOU START
Thank you for buying this TAD product. Please read through
these operating instructions so you will know how to operate your
model properly. After you have finished reading the instructions,
put them away in a safe place for future reference.
This speaker system has an impedance of 4 ohms, and
should be connected only to an amplifier designed with a
load impedance of 4 ohms (the amplifier’s speaker output
connector should clearly be labeled “4 ohms”).
In order to prevent damage to the speaker system resulting from
input overload, please observe the following precautions:
Do not supply power to the speaker system in excess of the
maximum permissible input.
Always turn off the amplifier power whenever connecting this
unit or other components to the amplifier.
Be careful not to overload the amplifier by playing at high
sound levels, as the amplifier’s harmonic distortion will be
increased and you may damage the speaker.
Caution: installation
Do not place the speaker on an unstable surface. It could
present a hazard if it falls, as well as potentially damaging the
equipment.
Do not attach these speakers to the wall or ceiling. They may
fall off and cause injury.
Switch off and unplug your AV equipment and consult the
instructions when connecting up components. Make sure you
use the correct connecting cables.
Technical Audio Devices, Inc. is not responsible for any
accidents or damage that result from improper installation,
misuse or modification of the product, or natural disasters.
Caution: in use
Do not allow the speaker to output distorted sound for long
periods of times. This is an indication of using excessive power
and can result in a fire hazard.
Do not sit or stand on the speaker, or let children play on the
speaker.
Do not put large or heavy objects on top of the speaker.
Do not place magnetic objects such as screwdrivers or iron
parts near the tweeter or midrange. Since the speakers use
strong magnets, the objects may be attracted, causing injury
or damaging the diaphragm.
IMPORTANT NOTICE
THE MODEL NUMBER AND SERIAL NUMBER OF
THIS EQUIPMENT ARE ON THE REAR OR BOTTOM.
RECORD THESE NUMBERS IN THE SPACE BELOW
FOR FUTURE REFERENCE.
MODEL NO.
SERIAL NO.
D36-AP9-2_A1_En
For U.S. model
WARNING: This product contains chemicals known
to the State of California and other governmental
entities to cause cancer and birth defects or other
reproductive harm.
D36-P5_C1_En
For European model
If you want to dispose this product, do not mix it with general household waste. There is a separate collection system for used
electronic products in accordance with legislation that requires proper treatment, recovery and recycling.
Private households in the member states of the EU, in Switzerland and Norway may return their used electronic products free of charge to
designated collection facilities or to a retailer (if you purchase a similar new one).
For countries not mentioned above, please contact your local authorities for the correct method of disposal.
By doing so you will ensure that your disposed product undergoes the necessary treatment, recovery and recycling and thus prevent potential
negative effects on the environment and human health.
K058b_A1_En

3
English
CONTENTS
Parts Included
Check that the following items are included:
Accessory folder
This Owner’s Manual x 1
Cleaning cloth x 1
Warranty card (This warranty is valid only in Japan.)
BEFORE YOU START........................................................ 2
Parts Included.........................................................................3
INTRODUCTION ............................................................... 4
TAD Compact Evolution One Features .................................4
INSTALLATION AND CARE.............................................. 5
Installation...............................................................................5
Choosing Where To Place The Speakers..............................6
Speaker care ...........................................................................6
CONNECTING THE SPEAKERS ......................................... 7
Input terminal specifications.................................................7
Single-Wire Connections .......................................................7
Bi-Wire Connections ..............................................................8
Bi-Amplification Connections ...............................................9
Vertical Bi-Amping........................................................................9
Horizontal Bi-Amping.................................................................10
OPTIMIZING THE SYSTEM............................................. 11
Improving Bass Performance..............................................11
Improving Imaging ...............................................................11
Final Optimization ................................................................11
SPECIFICATIONS ............................................................ 12
Accessory parts
Shorting links x 2 (factory installed on speaker)
Note
Included parts may vary slightly by region.
WARNING
Store small parts out of the reach of children and infants.
If accidentally swallowed, contact a doctor immediately.

4
Inspiring the joy of listening
Technical Audio Devices Laboratories, Inc. (TADL) grew from
the spirit to discover technologies to perfectly recreate the pure
sound of life performances with uncompromising craftsmanship.
We have inherited our philosophy from Bart Locanthi –recognized
across the globe as the ultimate sound technologist–who
believed that genuine technology is true to the basic and that
genuine technology places greater importance on sound quality
than on technology for its own sake. At TADL, we are honing our
technology to create equipment that reproduces musical sounds
that evoke both the energy and impact of life music.
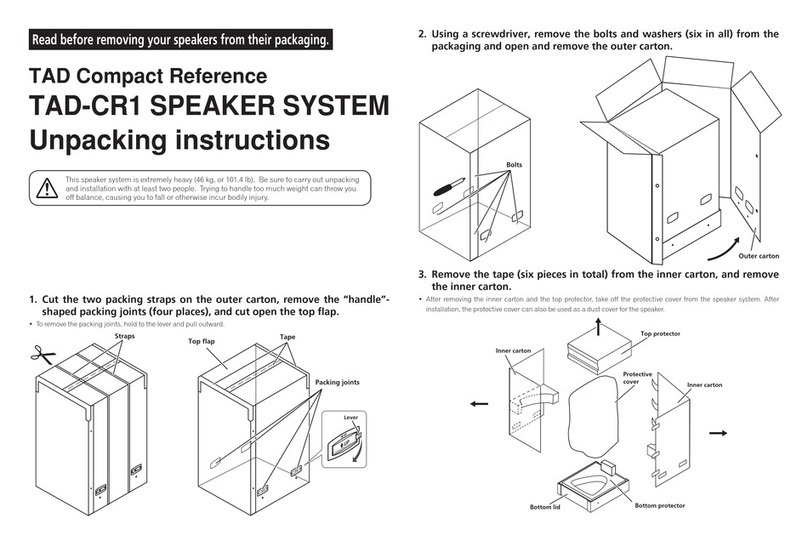
TAD Compact Evolution One Features
TAD-CE1 is the speaker system by using the accumulated
acoustic technology in TAD’s past history and advanced
audio technology in order to realize the emotional sound.
1. Coaxial speaker unit with “CST*1 driver”
The heart of the system is the Coherent Source Transducer
(CST). The tweeter diaphragm is mounted concentrically
within the midrange cone and provides a point source of
sound from 250 Hz to 100 kHz. It results in creating both time
coherency and matched directivity between the midrange
and tweeter, producing superbly-controlled radiation patterns
and ensuring a perfect spectral balance between the direct
and reflected sounds arriving at the listener’s ears. The result
is more consistent sound throughout the listening room and
improved imaging capability. By mounting this unit in the
perfectly shaped enclosure, the CST driver is provided with
optimum conditions for producing the utmost in performance.
2. Beryllium tweeter and magnesium midrange
diaphragms
The tweeter features a light-weight, highly rigid beryllium
diaphragm. Utilizing our proprietary vapor-deposition process.
The combination of stiffness, low mass, and high internal
damping ensures that the diaphragm resonances are well
controlled and placed well above the range of audibilty.
Magnesium is utilized for the midrange diaphragm. It’s
combination of stiffness, low mass and durability ensure
that the midrange is similarly reproduced with freedom from
resonace and distortion.
INTRODUCTION
3. Woofer designed with MACS*2 diaphragm
The woofer is equipped with a MACS diaphragm, constructed
from numerous layers of laminated aramid fibers, producing
low mass and high rigidity. The shell-type one-piece cone/
center-dome construction produces luxuriantly deep bass
with scintillatingly clear mid-range sounds.
4. “SILENT*3 Enclosure” for low resonance
The cabinet is constructed of high-rigidity Baltic birch plywood
combined with MDF for high internal loss, achieving a “SILENT
Enclosure” that combines high strength with low resonance.
In addition, unneeded cabinet vibrations are suppressed by
sandwiching the speakers between 10 mm-thick high-rigidity
aluminum walls.
5. “Bi-Directional ADS *4 port”
The bass reflex port has been integrated into the enclosure
side of the speaker. The port opening is designed as horn-
shaped slits located front-back and right-left, allowing the
speaker to reproduce natural and luxuriant low-frequency
sound even though a compact bookshelf-type speaker design.
By eliminating unnecessary noise from the port and the
influence of internal standing waves, the speaker produces
clear bass sound with excellent response.
*1 CST: Coherent Source Transducer
*2 MACS: Multi-layered Aramid Composite Shell
*3 SILENT: Structurally Inert Laminated Enclosure Technology
*4 Bi-Directional ADS: Bi-Directional Aero-Dynamic Slot

5
English
Installation
Installation on floor or rack
The bottom surface of the speaker system’s cabinet has been
factory installed with slip-resistant insulators, allowing the
speaker system to be installed as is.
Installation using speaker stands (sold separately)
This speaker system has been designed as a “bookshelf” type
speaker. As a result, when mounted directly on the floor, bass
sounds may be amplified as a result of reflection from the floor
surface, potentially creating unpleasant listening effects. In
such cases, a speaker stand can be used to elevate the speaker
from the floor surface. In general, optimum performance will
be produced by mounting the speaker system so that the high-
range speakers (tweeters) are roughly at the listener’s ear level.
In addition, to prevent dangerous tipping or falls, be sure to use
screws to fix the speaker system in place. We recommend the use
of the speaker stand TAD-ST2 for this purpose. For details consult
the TAD-ST2 user manual.
Dedicated Speaker Stand TAD-ST2 (sold separately)
To elicit the best possible performance from the TAD Compact
Evolution One speaker system, TAD has simultaneously
engineered the dedicated speaker stand TAD-ST2 (sold
separately). These stands have been optimized to assure high
damping characteristics and stable barycentric positioning.
INSTALLATION AND CARE
Precautions regarding the
installation location
Do not install the speaker system in areas exposed
to direct sunlight nor near heating appliances. Such
conditions may result in shrinkage of the wood materials
and finish, leading to deformation of the enclosure,
discoloration, or damage to the speakers.
Conditions considered unpleasant by humans are
detrimental to speakers as well. Providing a comfortable
environment for the speakers will assist them in
demonstrating their best performance. Please maintain
the usage environment as follows:
Temperature: 15 °C to 25 °C (59 °F to 77 °F)
Relative Humidity: 35 % to 65 % (winter)
40 % to 70 % (summer)
When using room air-conditioners or stoves to rapidly
cool or heat room spaces, take precautions to avoid
excessive dehumidification.
Avoid placing the speaker near areas such as windows,
as outside air can cause condensation to occur within
the speaker.
Precautions during
installation
The total weight of this speaker system is 30 kg (66 lbs).
Before installing, confirm that the installation location is
fully capable of supporting this weight
Due to the weight involved, installation of the
speaker system should be undertaken by a minimum
of two persons, taking care not to pinch fingers
between the speaker and other objects, and
preventing the speaker system from falling.
Avoid touching the front surface of speaker units,
since you may deform or damage the enclosure mesh
or speaker diaphragms.

6
Choosing Where To Place The Speakers
Speaker placement within the listening room will have a great impact upon the total performance of TAD Compact Evolution One speaker
system in terms of bass performance, tonal accuracy, and imaging. All rooms are different and so this section is intended as a guide only.
Experimentation in your room will yield optimum results.
Begin by placing the rear of the speakers approximately one to two feet in from the front walls and the sides one to two feet in from the
side walls of your listening room, as shown in Figure 1. Your listening position should be roughly equal to the distance between the two
speakers. Also, turn the speakers inward so each axis points toward the listening position.
Next, connect the audio system as described in CONNECTING THE SPEAKERS on page 7. Then, optimize the speaker placement as
described in OPTIMIZING THE SYSTEM on page 11.
Listening Position
(e.g., on couch)
B
12 in. to 24 in.
(305 mm to 610 mm)
12 in. to 24 in.
(305 mm to 610 mm)
12 in. to 24 in.
(305 mm to 610 mm)
AA
• Distance “A” must be greater than distance “B”.
• Each TAD Compact Evolution One is turned toward listening position.
Right
TAD Compact Evolution One
Left
TAD Compact Evolution One
Figure 1. Placement of a pair of TAD Compact Evolution One speakers for stereo music listening
Speaker care
The TAD Compact Evolution One speaker system is crafted with a painted finish. Wipe the cabinet surface gently with the accessory
cleaning cloth to remove dust and fingerprints.
CAUTION
When dusting the cabinet, do not use cleansers, abrasives or chemically impregnated cloths.
Contact with alcohol, benzene, insecticides or other chemicals may cause peeling or discoloration of the finished surface.

7
English
CONNECTING THE SPEAKERS
CAUTION
When connecting speakers or other components, always turn off the power to the amplifier, and disconnect the power cord.
Speaker cables are not furnished with this speaker system, and must be purchased separately.
After connecting the speakers, gently pull on the speaker cables to confirm that each cable wire is connected securely to its
respective terminal. Loose connections may result in interrupted sound or noise.
Do not allow wires from one connector or cable to touch those from another, since excessive load may be applied to the
amplifier, causing the amplifier to stop operating or be damaged.
If the polarity (+/−) of either right or left speaker is mistakenly reversed when connected to the amplifier, the speakers will
be unable to produce proper stereo phase effect.
Input terminal specifications
This speaker system is provided with LF (Low-Frequency) input terminals for the woofer, and HF (High-Frequency) input terminals for CST
(Coherent Source Transducer) connections.
Single-Wire Connections
When adopting single-wire connections, use the furnished accessory shorting links to connect the LF input terminals (for woofer) to the HF
input terminals (for CST).
Use the shorting links to connect the upper/lower HF input terminals to the upper/lower LF input terminals as shown in Figure 2, then
connect the positive (+) speaker wire from the amplifier to either of the speaker’s red connector terminals, and the negative (−) speaker
wire from the amplifier to either of the speaker’s black connector terminals.
HF
LF
SPEAKERS OUTPUT
TAD Compact Evolution One
Terminal Panel
Amplifier
(rear)
(one channel shown)
Shorting links
Figure 2. Connecting a TAD Compact Evolution One speaker in a single-wired system

8
Bi-Wire Connections
When adopting bi-wire connections, the speaker cables from the amplifier are connected individually to the LF input terminals (for woofer)
and the HF input terminals (for CST).
Connect one set of speaker cables to the LF input terminals (for woofer). Then, connect the other set of speaker cables to the HF input
terminals (for CST). Finally, connect the respective speaker cables in pairs to the amplifier’s speaker terminals.
Take care to connect both (+) wires to the (+) amplifier terminals and both (–) wires to the (–) amplifier terminals, as shown in Figure 3.
CAUTION
Remove the shorting links before connecting speaker cables in bi-wiring connections.
LF
HF
SPEAKERS OUTPUT
Amplifier
(rear)
(one channel shown)
Terminal Panel
TAD Compact Evolution One
Figure 3. Connecting a TAD Compact Evolution One speaker in a bi-wired system

9
English
Bi-Amplification Connections
When using a bi-amp configuration, a dedicated amplifier is connected to the LF input terminals (for woofer) and HF input terminals (for
CST). Two connection methods are possible, the “vertical bi-amp” method and “horizontal bi-amp” method.
WARNING
Remove the shorting links before connecting speaker cables in bi-amplification connections. Failure to do so may result in
damage to your amplifiers.
Vertical Bi-Amping
With this configuration, identical stereo amplifiers are used for each speaker. One channel of each amplifier drives the low frequency
section and the other channel drives the high frequency section, as shown in Figure 4. Connect one set of speaker cables between the
amplifier’s Channel 2 (or 1) terminals and the speaker’s LF input terminals (for woofer). Then connect another set of speaker cables
between the amplifier’s Channel 1 (or 2) terminals and the speaker’s HF input terminals (for CST).
Take care to connect both (+) wires to the (+) amplifier terminals and both (–) wires to the (–) amplifier terminals.
HF
LF
SPEAKERS OUTPUT
INPUT
OUTPUT
INPUT
Ch.1 Ch.2
OUTPUT
TAD Compact Evolution One
Amplifier
(rear)
“Y” Adaptor
(Not supplied)
Pre-Amplifier
(rear)
(one channel shown)
Terminal Panel
Figure 4. Connecting a TAD Compact Evolution One speaker in a vertical bi-amplified system

10
Horizontal Bi-Amping
With this connection method, independent stereo amplifiers are used respectively to drive the speaker’s LF circuit (for woofer) and HF
circuit (for CST).
As shown in Figure 5, each channel on one of the amplifiers is used to drive the speakers’ low-frequency range, while each channel of the
other amplifier is used to drive the high-frequency range of the two speakers.
In order to use this method, each of the amplifiers must possess the same gain value. If the two amplifiers have different gain values,
an imbalance will occur between the playback levels of the low-frequency and high-frequency ranges. Consult your dealer for further
information.
LF
HF
SPEAKERS OUTPUT
INPUT
SPEAKERS OUTPUT
INPUT
OUTPUTOUTPUT
Terminal Panel
Amplifier
(rear)
(Use for high frequencies)
Pre-Amplifier
(rear)
(one channel shown)
Amplifier
(rear)
(Use for low frequencies)
(one channel shown) (one channel shown)
TAD Compact Evolution One
“Y” Adaptor
(Not supplied)
Figure 5. Connecting a TAD Compact Evolution One speaker in a horizontal bi-amplified system

11
English
OPTIMIZING THE SYSTEM
Improving Bass Performance
Select a music track with well-recorded bass, such as acoustic
string bass. Listen for all the bass notes having roughly equal
level. If any notes jump out at you more strongly than others, try
moving the TAD Compact Evolution One speaker system until you
get the most even progression of the notes.
Typically, moving them towards the walls will increase low
bass output, but can result in more unevenness higher up the
musical scale. Moving them closer to the side walls will not
produce the same effect as moving closer to the back wall, so try
experimenting moving both ways for the most pleasing sound.
Also listen to drum sounds. The kick drum should sound tight and
fast, without low-frequency boom. Changes in speaker position
of as little as a few inches can have a large effect upon bass
performance, so take time and try many positions.
A useful tip to speed up the process is to have a partner move
around the room while talking. Listen to where the voice sounds
most natural, without added chestiness, and position the speaker
system in that location.
Improving Imaging
Now select music with a strong center image. Listen for that
image to be exactly centered between the speakers, and to be
well-focused. If the image is unclear and spreads wide, the side
walls are probably creating strong reflections. Try moving the
speakers closer together to reduce this effect. If this brings them
too close, try instead toeing in the speakers so that the axis
crosses in front of the listening position. Because of the superior
off-axis performance of the CST driver, the strength of the side-
wall reflections will be reduced, and at the same time, the image
will be stabilized and focused.
Now listen to music with well-recorded acoustics. Check that the
image is wide and deep. Limited depth suggests that the speakers
are placed too close to the front wall. Try moving them forward.
Final Optimization
You may find that as you move the speakers to optimize one
aspect of performance another worsens; for example, trading
improved image accuracy for poorer bass response. If this occurs,
try moving your listening position. Bass response is governed
strongly by both speaker and listening positions, whereas
imaging is mostly determined by the speaker position. Therefore,
you may find that if optimizing for imaging compromises bass,
then changing the listening position will bring back bass
performance.
The room characteristics will also have a profound influence
upon the sound. Live rooms, with few soft furnishings and hard
floors, will impart an artificial sense of spaciousness to the sound
but reduce the intimacy and accuracy. Overly dead rooms, with
lots of furnishing, carpets, and drapes will produce a very dry,
lifeless sound and require lots more power to drive the speaker
system to adequate sound levels. The optimum is somewhere in-
between. Avoid hard, unbroken, parallel walls, especially side
walls, as these impart strong flutter-type echoes and will have a
bad influence on the imaging. Try and break up long expanses of
walls with drapes, wall hangings, or bookshelves, and try not to
introduce too much asymmetry into the room layout, as this will
also affect the imaging.

12
SPECIFICATIONS
Model Name
TAD Compact Evolution One
Model No.
TAD-CE1
Design
Bass reflex, bookshelf-type speaker
Drive units
Bass driver ....................................................18 cm (7 1/16 in.) cone
Midrange/Tweeter
.... concentric 14 cm (5 1/2 in.) cone/ 3.5 cm (1 3/8 in.) semi-dome
Performance Data
Frequency Range.....................................................34 Hz to 100 kHz
Crossover Frequencies......................................... 250 Hz, and 2 kHz
Maximum input power............................................................. 200 W
Sensitivity ..............85 dB @ 2.83 V and 1 m (anechoic conditions)
Impedance .............................................................................. 4 ohms
Physical Data
Weight ........................................................................... 30 kg (66 lbs)
Dimensions
Width ............................................................290 mm (11 7/16 in.)
Height ............................................................. 524 mm (20 5/8 in.)
Depth ............................................................ 446 mm (17 9/16 in.)
Supplied accessories
Accessory folder
This Owner’s Manual x 1
Cleaning cloth x 1
Warranty card (This warranty is valid only in Japan.)
Accessory parts
Shorting links x 2
Note
Included parts may vary slightly by region.
The specifications and construction details in this and related
TAD publications are subject to change without notice. The TAD
logo is a registered trademark of Technical Audio Devices, Inc.
290mm
524mm
520mm
446mm
412mm
206
mm
155mm
Figure 6. Overall dimensions of the TAD Compact Evolution
One speaker system
The cabinet of this speaker system utilizes genuine wood materials.
While each unit displays beautiful depth of color and sheen, the use of woods makes absolute uniformity impossible, so no two units
will appear exactly the same.
Please keep this fact in mind when using the speakers.
Screw hole (M5) for
linking stand to speaker

13
English
The Safety of Your Ears is in Your Hands
Get the most out of your equipment by playing it at a
safe level – a level that lets the sound come through
clearly without annoying blaring or distortion and, most
importantly, without affecting your sensitive hearing.
Sound can be deceiving. Over time, your hearing
“comfort level” adapts to higher volumes of sound, so
what sounds “normal” can actually be loud and
harmful to your hearing. Guard against this by setting
your equipment at a safe level BEFORE your hearing
adapts.
ESTABLISH A SAFE LEVEL:
• Set your volume control at a low setting.
• Slowly increase the sound until you can hear it
comfortably and clearly, without distortion.
• Once you have established a comfortable sound
level, set the dial and leave it there.
BE SURE TO OBSERVE THE FOLLOWING
GUIDELINES:
• Do not turn up the volume so high that you can’t
hear what’s around you.
• Use caution or temporarily discontinue use in
potentially hazardous situations.
• Do not use headphones while operating a motorized
vehicle; the use of headphones may create a traffic
hazard and is illegal in many areas.
S001a_A1_En

2
AVANT DE COMMENCER
Nous vous remercions d’avoir acheté ce produit TAD. Veuillez
lire attentivement ce mode d’emploi de manière à pouvoir utiliser
votre modèle correctement. Après avoir lu ces explications,
conservez-les en lieu sûr pour éventuellement les consulter plus
tard.
Cette enceinte acoustique à une impédance de 4 ohms et elle
doit être raccordée uniquement à un amplificateur conçu en
vue d’une impédance de charge de 4 ohms (le connecteur
de sortie haut-parleur sur l’amplificateur doit être clairement
étiqueté “4 ohms”).
Pour éviter d’endommager les enceintes par une surcharge à
l’entrée, observez les précautions suivantes :
Ne fournissez pas aux enceintes acoustiques une alimentation
électrique dépassant l’entrée maximale autorisée.
Coupez toujours l’alimentation de votre amplificateur avant d’y
brancher cet appareil ou d’autres composants.
Veillez à ne pas surcharger l’amplificateur en utilisant
un niveau sonore élevé, car la distorsion harmonique de
l’amplificateur augmentera et vous risquez d’endommager
l’enceinte.
Précautions : Installation
Ne placez pas l’enceinte sur une surface instable. En tombant,
elle pourrait entraîner des blessures et être endommagée.
Ne fixez pas ces enceintes sur une paroi ou au plafond. Elles
pourraient tomber et provoquer des blessures.
Mettez votre système audiovisuel hors tension et débranchez-
le, puis consultez le mode d’emploi avant de brancher des
composants. Prenez soin d’utiliser correctement les cordons
de raccordement.
Technical Audio Devices, Inc. n’assume aucune responsabilité
en cas d’accidents ou de dégâts, résultant d’une installation
inappropriée, d’une erreur d’utilisation, d’une altération du
produit ou de catastrophes naturelles.
Précautions : Utilisation
Ne permettez pas que l’enceinte produise des sons distordus
pendant une longue période. Ceci serait le signe de l’emploi
d’une puissance excessive qui pourrait provoquer un incendie.
Ne montez pas et ne vous asseyez pas sur les enceintes et ne
laissez pas des enfants jouer sur celles-ci.
Ne posez pas d’objets lourds ou volumineux sur le dessus des
enceintes.
Ne placez pas d’objets magnétiques tels que des tournevis
ou des pièces en fer près du tweeter ou du médium. Comme
ces haut-parleurs utilisent des aimants puissants, ces objets
pourraient y être attirés, provoquant des dégâts aux haut-
parleurs ou endommageant leur diaphragme.
Pour le modèle européen
Si vous souhaitez vous débarrasser de cet appareil, ne le mettez pas à la poubelle avec vos ordures ménagères. Il existe un système de
collecte séparé pour les appareils électroniques usagés, qui doivent être récupérés, traités et recyclés conformément à la législation.
Les habitants des états membres de l’UE, de Suisse et de Norvège peuvent retourner gratuitement leurs appareils électroniques usagés aux
centres de collecte agréés ou à un détaillant (si vous rachetez un appareil similaire neuf).
Dans les pays qui ne sont pas mentionnés ci-dessus, veuillez contacter les autorités locales pour savoir comment vous pouvez vous débarrasser
de vos appareils.
Vous garantirez ainsi que les appareils dont vous vous débarrassez sont correctement récupérés, traités et recyclés et préviendrez de cette façon
les impacts néfastes possibles sur l’environnement et la santé humaine.
K058b_A1_Fr

3
Français
SOMMAIRE
Pièces fournies
Assurez-vous que les articles suivants sont inclus :
Fichier d’accessoires
Ce mode d’emploi x 1
Chiffon de nettoyage x 1
Carte de garantie
(Cette garantie est valable uniquement au Japon.)
AVANT DE COMMENCER................................................ 2
Pièces fournies .......................................................................3
INTRODUCTION ............................................................... 4
Particularités de la TAD Compact Evolution One................4
INSTALLATION ET SOINS ................................................ 5
Installation...............................................................................5
Choix d’un emplacement pour les enceintes ......................6
Entretien des enceintes .........................................................6
CONNEXION DES ENCEINTES.......................................... 7
Spécifications de borne d’entrée ..........................................7
Connexions en mono-câblage...............................................7
Connexions en bi-câblage......................................................8
Connexions pour bi-amplification .........................................9
Bi-amplification verticale .............................................................9
Bi-amplification horizontale.......................................................10
OPTIMISATION DU SYSTÈME ....................................... 11
Amélioration des performances de graves ........................11
Amélioration de l’imagerie ..................................................11
Optimisation finale ...............................................................11
FICHE TECHNIQUE ......................................................... 12
Pièces accessoires
Fiches coupe-circuit x 2 (installées en usine sur les
enceintes)
Remarque
Les pièces fournies varient légèrement selon les régions.
AVERTISSEMENT
Gardez les pièces de petite taille hors de la portée des bébés
et des enfants.
En cas d’ingestion accidentelle, veuillez contacter
immédiatement un médecin.

4
Inspirer les joies de l’écoute
Technical Audio Devices Laboratories, Inc. (TADL) est issu du
désir de recréer le son pur des représentations en direct par
des artisans, refusant tout compromis. Nous avons hérité notre
philosophie de Bart Locanthi, reconnu dans le monde entier
comme le technicien du son par excellence. Il était convaincu
que la technologie véritable consiste à être fidèle aux éléments
fondamentaux et que la véritable technologie accorde plus
d’importance à la qualité sonore qu’à la technologie proprement
dite. Chez TADL, nous peaufinons nos technologies afin de
proposer des équipements qui reproduisent les sons, évoquant à
la fois l’énergie et l’impact de la musique en direct.
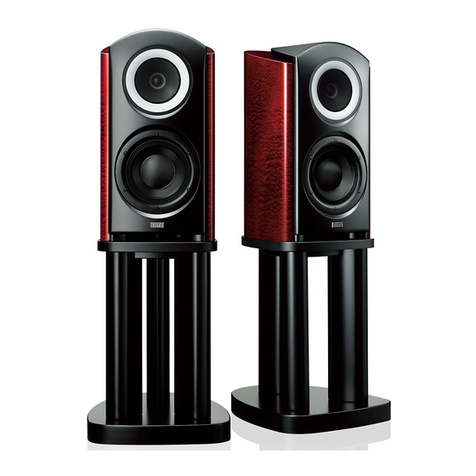
Particularités de la TAD Compact
Evolution One
La TAD-CE1 est une enceinte réalisée en faisant appel à
la technologie acoustique accumulée dans le passé et à la
technologie audio la plus moderne afin de restituer des sons
débordant d’émotion.
1. Haut-parleur coaxial à “CST*1 driver”
Le coeur du système est ce qu’on appelle le Coherent Source
Transducer (CST). Le diaphragme du tweeter est installé de
façon concentrique au sommet du cône du médium et il
fournit une source ponctuelle de sons, allant de 250 Hz à 100
kHz. Il parvient à créer à la fois une cohérence temporelle et
une directicité correspondante dans le médium et le tweeter,
produisant des diagrammes directionnels magnifiquement
contrôlés et assurant un parfait équilibre du spectre entre les
sons directs et réfléchis, arrivant aux oreilles de l’auditeur.
Il en résulte des sons plus consistants dans tout le local
d’écoute et une imagerie améliorée. En installant cet
appareil dans un coffret aux formes parfaites, le pilote CST
remplit les conditions optimales pour restituer les meilleures
performances possibles
INTRODUCTION
2. Tweeter en béryllium et diaphragmes médium
en magnésium
Le tweeter se caractérise par son diaphragme léger et très
rigide en béryllium. Utilisation de notre procédé de dépot en
phase vapeur. L’association de rigidité, de légèreté et d’un
fort amortissement interne garantit que les résonances du
diaphragme sont bien contrôlées et placées bien au-dessus
de la plage d’audibilité. Du magnésium est utilisé pour le
diaphragme du médium. La combinaison de rigidité, de
légèreté et de durabilité fait en sorte que la plage du médium
est restitutée en étant exempte de résonance et de distortion.
3. Woofer conçu avec diaphragme MACS*2
Construit à partir de multiples couches de fibres aramides
laminées, le woofer est doté d’un diaphragme MACS
pour assurer une faible masse et une haute rigidité. La
construction en cône/dôme central d’une seule pièce de type
à coque produit des basses d’une profondeur exubérante avec
des sons médiums d’une clarté scintillante.
4. “Boîtier SILENT*3” pour une faible résonance
Le coffret est réalisé en contreplaqué de bouleau de la Baltique
très rigide, associé à des panneaux MDF en vue d’une forte
perte interne ; on parvient ainsi à un “Boîtier SILENT” qui associe
forte robustesse et faible résonance. En outre, les vibrations
inutiles du coffret sont supprimées en insérant les haut-parleurs
entre des parois d’aluminium très rigides de 10 mm d’épaisseur.
5. Port “Bi-Directional ADS *4“ (ADS bi-directionnel)
Le port bass-réflex a été intégré dans le panneau latéral de
l’enceinte. L’ouverture de l’évent a la forme de fentes en cornet,
situées en avant-arrière et en gauche-droite, ce qui permet à
l’enceinte de reproduire des sons de basse fréquence naturels
et luxuriants, alors même qu’un design compact de type
bibliothèque a été adopté. En éliminant les bruits superflus du
port et l’influence des ondes stationnaires internes, l’enceinte
produit des sons graves clairs avec une réponse excellente.
*1 CST : Coherent Source Transducer
(Transducteur de Source Cohérente)
*2 MACS : Multi-layered Aramid Composite Shell
(Coque composite en aramide multicouches)
*3 SILENT : Structurally Inert Laminated Enclosure Technology
(Technologie de coffret laminé structurellement inerte)
*4 Bi-Directional ADS : Bi-Directional Aero-Dynamic Slot
(Fente aérodynamique bi-directionnelle)

5
Français
Installation
Installation sur le plancher ou dans un rack
La surface du fond du coffret de l’enceinte a été dotée en usine
d’isolants antidérapants, ce qui permet d’installer l’enceinte telle
qu’elle est.
nstallation avec socles d’enceinte (vendus
séparément)
Cette enceinte est du type “bibliothèque” par conséquent,
lorsqu’elle est placée directement sur le plancher, les sons
graves peuvent être amplifiés par la surface du plancher, ce qui
risque de créer des effets désagréables à l’écoute. Dans ce cas,
utilisez un socle pour soulever l’enceinte par rapport à la surface
du plancher. En règle générale, les meilleures performances
seront obtenues en montant l’enceinte de telle sorte que les
haut-parleurs médium (tweeters) se trouvent pratiquement
au niveau des oreilles de l’auditeur. En outre, pour éviter que
l’enceinte ne tombe ou ne se renverse, veillez à utiliser des vis
pour l’immobiliser. Pour cela, nous recommandons l’emploi du
socle d’enceinte TAD-ST2. Pour plus de détails, consultez le mode
d’emploi qui accompagne le TAD-ST2.
Socle d’enceinte dédié TAD-ST2 (vendu séparément)
Pour déployer toutes les performances de l’enceinte TAD
Compact Evolution One, TAD a réalisé simultanément le socle
dédié TAD-ST2 (vendu séparément). Ces socles sont optimisés
pour procurer de hautes caractéristiques d’amortissement et un
positionnement barycentrique stable.
INSTALLATION ET SOINS
Précautions relatives à l’endroit
d’installation
N’installez pas les enceintes dans un endroit en plein
soleil ou proximité d’équipements de chauffage. Un tel
endroit pourrait provoquer une contraction des parties
en bois et de la finition, entraînant une déformation du
coffret, sa décoloration ou des dégâts aux haut-parleurs.
Des situations considérées comme désagréables pour
les êtres humains seront nuisibles également pour les
enceintes. Fournir aux enceintes un environnement
confortable leur permettra de déployer leurs meilleures
performances. Essayez de maintenir l’environnement
suivant lors du fonctionnement :
Température : de 15 °C à 25 °C
Humidité relative : de 35 % à 65 % (hiver)
de 40 % à 70 % (été)
A l’emploi d’un climatiseur ou d’un poêle pour
rafraîchir ou réchauffer rapidement le local, veillez à
éviter un dessèchement excessif.
Evitez de placer l’enceinte dans des endroits comme
à proximité d’une fenêtre, car l’air extérieur peut
provoquer une condensation à l’intérieur du coffret.
Précautions pendant
l’installation
Le poids total de cette enceinte est de 30 kg. Avant de
l’installer, assurez-vous que l’endroit est capable de
supporter un tel poids.
En raison du poids de l’enceinte, son installation doit
être effectuée par deux personnes au moins. Prenez
soin de ne pas vous pincer les doigts entre l’enceinte
et d’autres objets et d’éviter qu’elle ne tombe.
Evitez de toucher la face avant des haut-parleurs,
car vous pourriez déformer ou endommager leur
matériau à mailles ou leur diaphragme.

6
Choix d’un emplacement pour les enceintes
L’emplacement des enceintes dans votre salle d’écoute aura une grande répercussion sur les qualités d’ensemble des enceintes TAD
Compact Evolution One en terme de performances des graves, d’imagerie sonore et de précision tonale. Tous les locaux sont différents
et cette section ne peut donc prétendre qu’à servir de guide. C’est en procédant à diverses expérimentations que vous obtiendrez les
meilleurs résultats.
Placez d’abord l’arrière des enceintes à environ 1 ou 2 pieds des parois avant et leur côté à 1ou 2 pieds des parois latérales de votre
local d’écoute, comme illustré sur la Figure 1. Votre position d’écoute doit être à une distance presque égale à celle qui sépare les deux
enceintes. De plus, orientez les enceintes vers l’intérieur de sorte que leur axe soit dirigé vers la position d’écoute.
Ensuite, raccordez la chaîne audio comme expliqué sous CONNEXION DES ENCEINTES à la page 7. Puis, optimisez l’emplacement des
enceintes comme décrit sous OPTIMISATION DU SYSTÈME à la page 11.
Position d’écoute
(p.ex. sur un canapé)
B
305 mm à 610 mm 305 mm à 610 mm
305 mm à 610 mm
AA
• La distance “A” doit être supérieure à la distance “B”.
• Chaque enceinte TAD Compact Evolution One est orientée
vers la position d’écoute.
Droite
TAD Compact Evolution One
Gauche
TAD Compact Evolution One
Figure 1. Emplacement d’une paire d’enceintes TAD Compact Evolution One pour une écoute en stéréo
Entretien des enceintes
L’enceinte TAD Compact Evolution One est embellie grâce à une finition peinte. Frottez délicatement la surface du coffret avec le chiffon
de nettoyage fourni comme accessoire pour en enlever la poussière et les traces de doigts.
ATTENTION
Pour nettoyer le coffret, n’utilisez pas de produits détergents, d’abrasifs ou de chiffons chimiquement traités.
Un contact avec de l’alcool, du benzène, des insecticides et d’autres produits chimiques peut provoquer un écaillement ou
une décoloration de la finition de la surface.

7
Français
CONNEXION DES ENCEINTES
ATTENTION
Avant de brancher les enceintes ou d’autres composants, mettez toujours l’amplificateur hors tension et débranchez son
cordon d’alimentation.
Les câbles d’enceintes ne sont pas fournis avec cet appareil et ils doivent donc être achetés séparément.
Après avoir branché les enceintes, tirez doucement sur leurs câbles pour confirmer que chacun d’eux est convenablement
branché sur sa borne respective. Des connexions relâchées peuvent provoquer une interruption des sons ou des parasites.
Ne permettez pas que les fils d’un connecteur ou d’un câble touchent ceux d’un autre, car une charge excessive pourrait être
appliquée à l’amplificateur, provoquant l’arrêt de son fonctionnement ou des dégâts.
Si la polarité (+/−) de l’enceinte gauche ou droite est inversée par erreur lors de la connexion à l’amplificateur, les enceintes
ne parviendront pas à produire l’effet stéréo adéquat.
Spécifications de borne d’entrée
Cette enceinte est dotée de bornes d’entrée LF (basse fréquence) pour le woofer et de bornes d’entrée HF (haute fréquence) pour le
branchement du CST (Transducteur de Source Cohérente).
Connexions en mono-câblage
Pour des connexions unifilaires, utilisez les fiches coupe-circuit fournies comme accessoires pour raccorder les bornes d’entrée LF (pour
woofer) aux bornes d’entrée HF (pour CST). Utilisez les fiches coupe-circuit pour raccorder les bornes d’entrée HF supérieure/inférieure
aux bornes d’entrée LF supérieure/inférieure, comme illustré à la Fig. 2 ; raccordez ensuite le fil de haut-parleur positif (+) provenant de
l’amplificateur à une des bornes de connexion rouges du haut-parleur, et le fil de haut-parleur négatif (−) provenant de l’amplificateur à
une des bornes de connexion noires du haut-parleur.
HF
LF
SPEAKERS OUTPUT
Fiches coupe-circuit
Figure 2. Connexion d’une enceinte TAD Compact Evolution One en un circuit unifilaire
TAD Compact Evolution One
Panneau des bornes
(un seul canal est indiqué)
Amplificateur
(arrière)

8
Connexions en bi-câblage
Pour des connexions bifilaires, les câbles de haut-parleur provenant de l’amplificateur sont raccordés individuellement sur les bornes
d’entrée LF (pour woofer) et sur les bornes d’entrée HF (pour CST).
Raccordez un jeu de câbles de haut-parleur sur les bornes d’entrée LF (pour woofer). Ensuite, raccordez l’autre jeu de câbles de haut-
parleur sur les bornes d’entrée HF (pour CST). En dernier lieu, raccordez les câbles de haut-parleur respectif par paires sur les bornes de
haut-parleur de l’amplificateur.
Prenez bien soin de raccorder les deux câbles (+) sur les bornes (+) de l’amplificateur et les deux câbles (−) sur les bornes (−) de
l’amplificateur, comme illustré sur la Figure 3.
ATTENTION
Déposez les fiches coupe-circuit avant de raccorder les câbles d’enceintes en connexions bi-filaires.
LF
HF
SPEAKERS OUTPUT
Amplificateur
(arrière)
(un seul canal est indiqué)
Panneau des bornes
Figure 3. Connexion d’une enceinte TAD Compact Evolution One en un circuit bi-ifilaire
TAD Compact Evolution One
Table of contents
Languages:
Other TAD Speakers System manuals

TAD
TAD Evolution One TAD-E1TX User manual

TAD
TAD GRAND EVOLUTION ONE User manual

TAD
TAD TAD-R1 User manual

TAD
TAD TAD-R1 User manual

TAD
TAD Reference One User manual

TAD
TAD TAD-CR1 User manual

TAD
TAD TAD-CR1 User manual

TAD
TAD TAD-E1 User manual

TAD
TAD Compact Reference One User manual

TAD
TAD TAD-CR1 User manual