3
Speaker Placement and Set-up
1. Select location
It is advisable to plan all aspects of installation before
starting the setup.
Great care should be taken to ensure that all local
building and legal regulations are followed. In case
of any doubt contact a professional TAGA Harmony
installer or dealer.
When placing the speaker, nd the position oering the
best sound coverage throughout the listening area.
When installing more than 1 speaker make sure the speakers are placed at least 2
meters (6.6 feet) from each other what usually gives the best sound eects.
Avoid placing the speaker in a direct path of water sprinklers or where it will be
continually exposed to chlorinated solvents from a pool or spa.
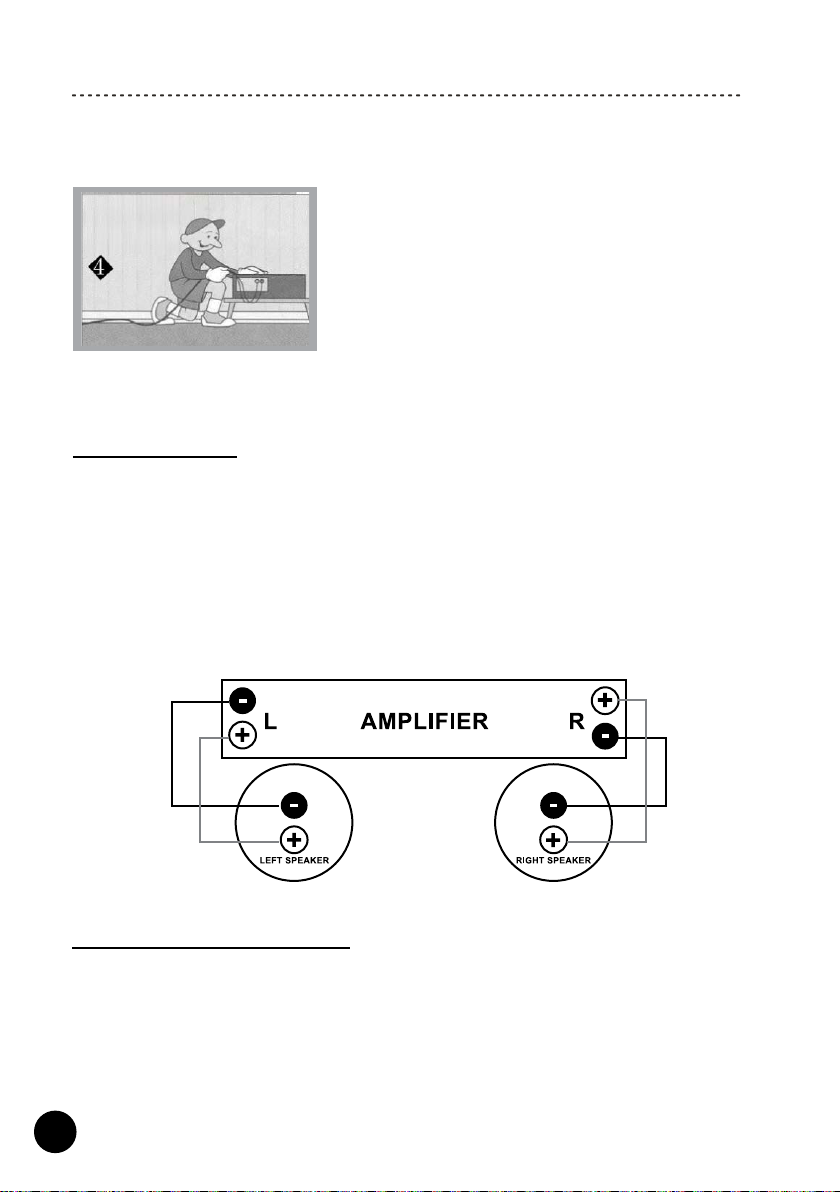
For stereo eect you have to use 2 mono speakers for a single stereo audio source.
The SM (stereo / mono) models ensure high quality, dual-channel sound from a single
speaker. The SM models can provide much wider dispersion than traditional speakers
as well as eliminate sound imbalances which can be heard once listeners move around
the area.
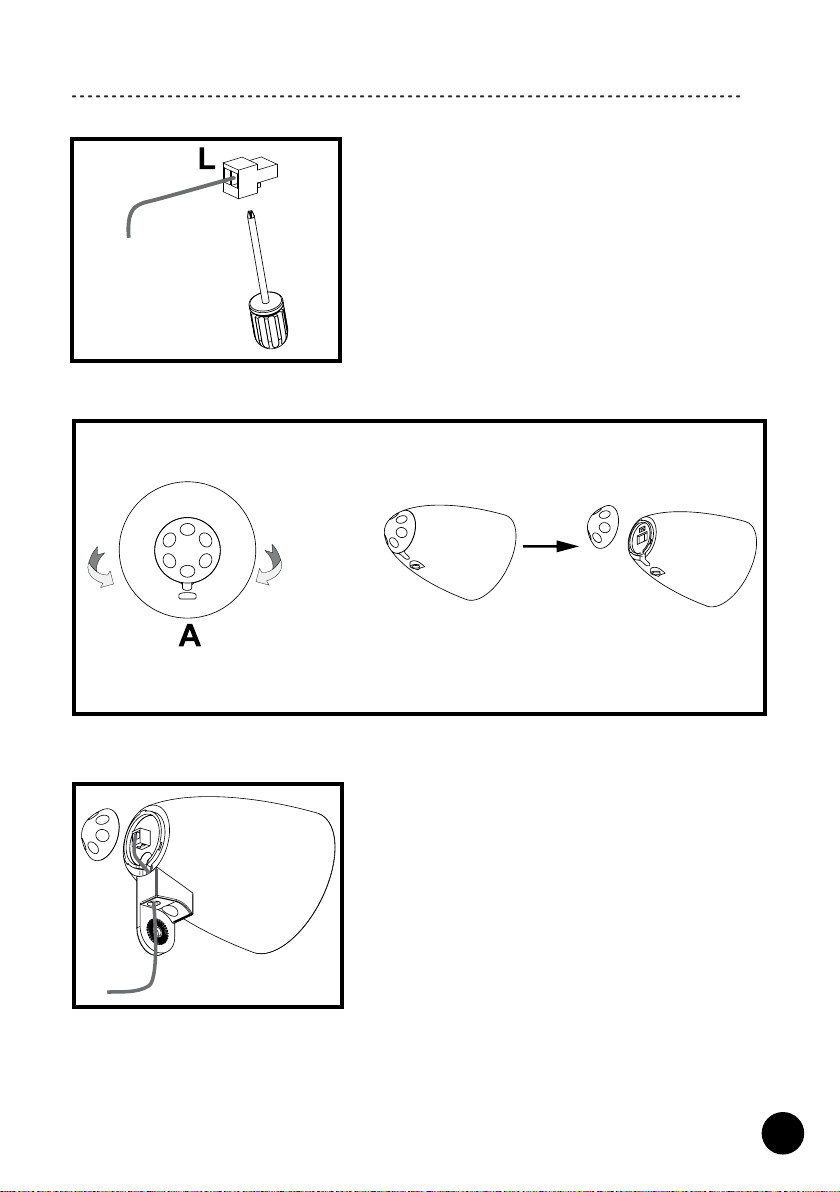
2. Run the speaker cable
Before hiding the cable (digging in etc.), run the
speaker cable from the speaker to the sound source
(amplier, receiver etc.). Ensure to avoid any obstacles
such as walls, electrical cables, water sprinklers and
pipes.
If you use the speaker in the outdoor environment
make sure to use a speaker cable for the outdoor use.
The speaker cable is not supplied with this product.
3. Hide the speaker cable
To avoid accidental interruption or disconnection of the
speaker cable it is recommended to place the cable
approximately 10 cm (0.33 feet) in the ground or x it
to the ground with U type clamps (not supplied with this
product).
To further secure the cable in the ground we
recommend to place it in a PVC / Nylon conduit tube
(not supplied with this product).