Safety P ecautions:
Safety P ecautions:Safety P ecautions:
Safety P ecautions:
WARNINGS:
WARNINGS:WARNINGS:
WARNINGS:
● The AC PLUG must be inse ted di ectly into an outlet, NEVER USE AN
NEVER USE AN NEVER USE AN
NEVER USE AN
EXTENSION CABLE.
EXTENSION CABLE.EXTENSION CABLE.
EXTENSION CABLE.
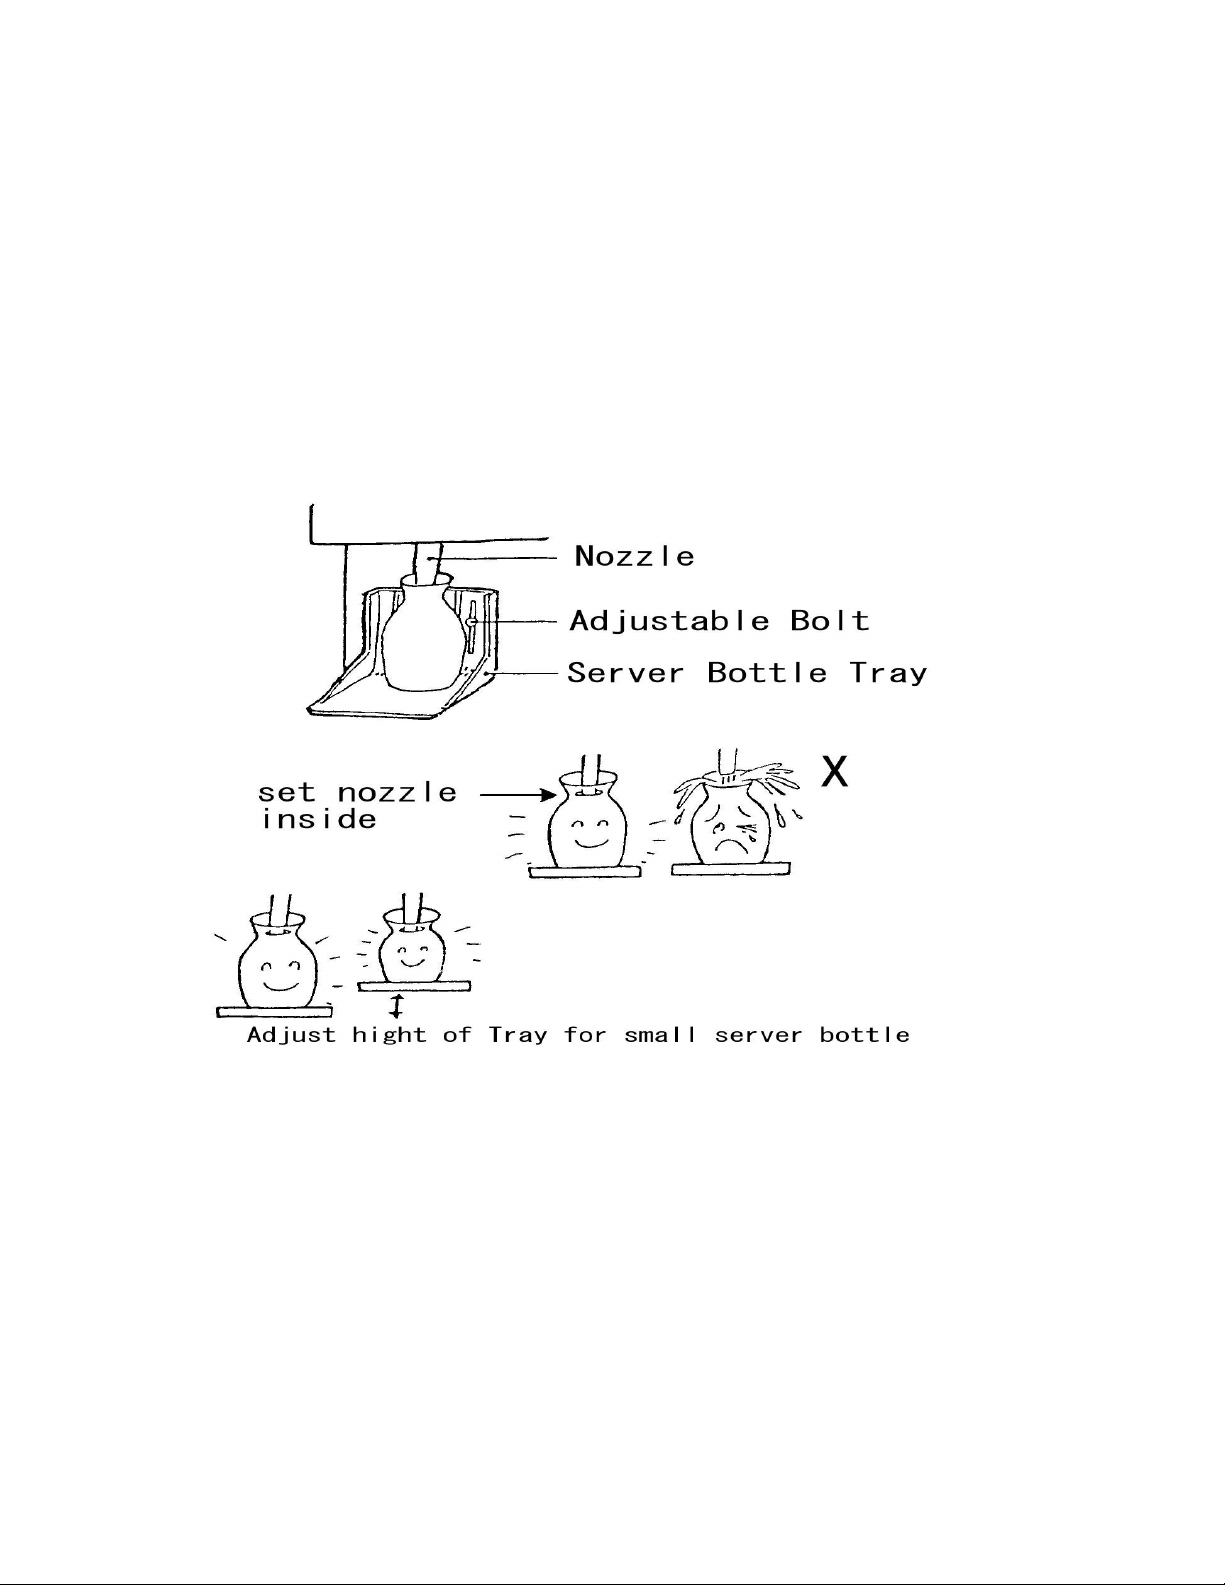
● Put the Sake Wa me Unit on a level, solid wo k su face. If the unit is unstable,
attach an L-shaped suppo t b acket to bottom side of the unit fo attaching to the
table.
● Neve use the Sake Wa me Unit nea flammable mate ials o whe e flammable
vapo s a e p esent.
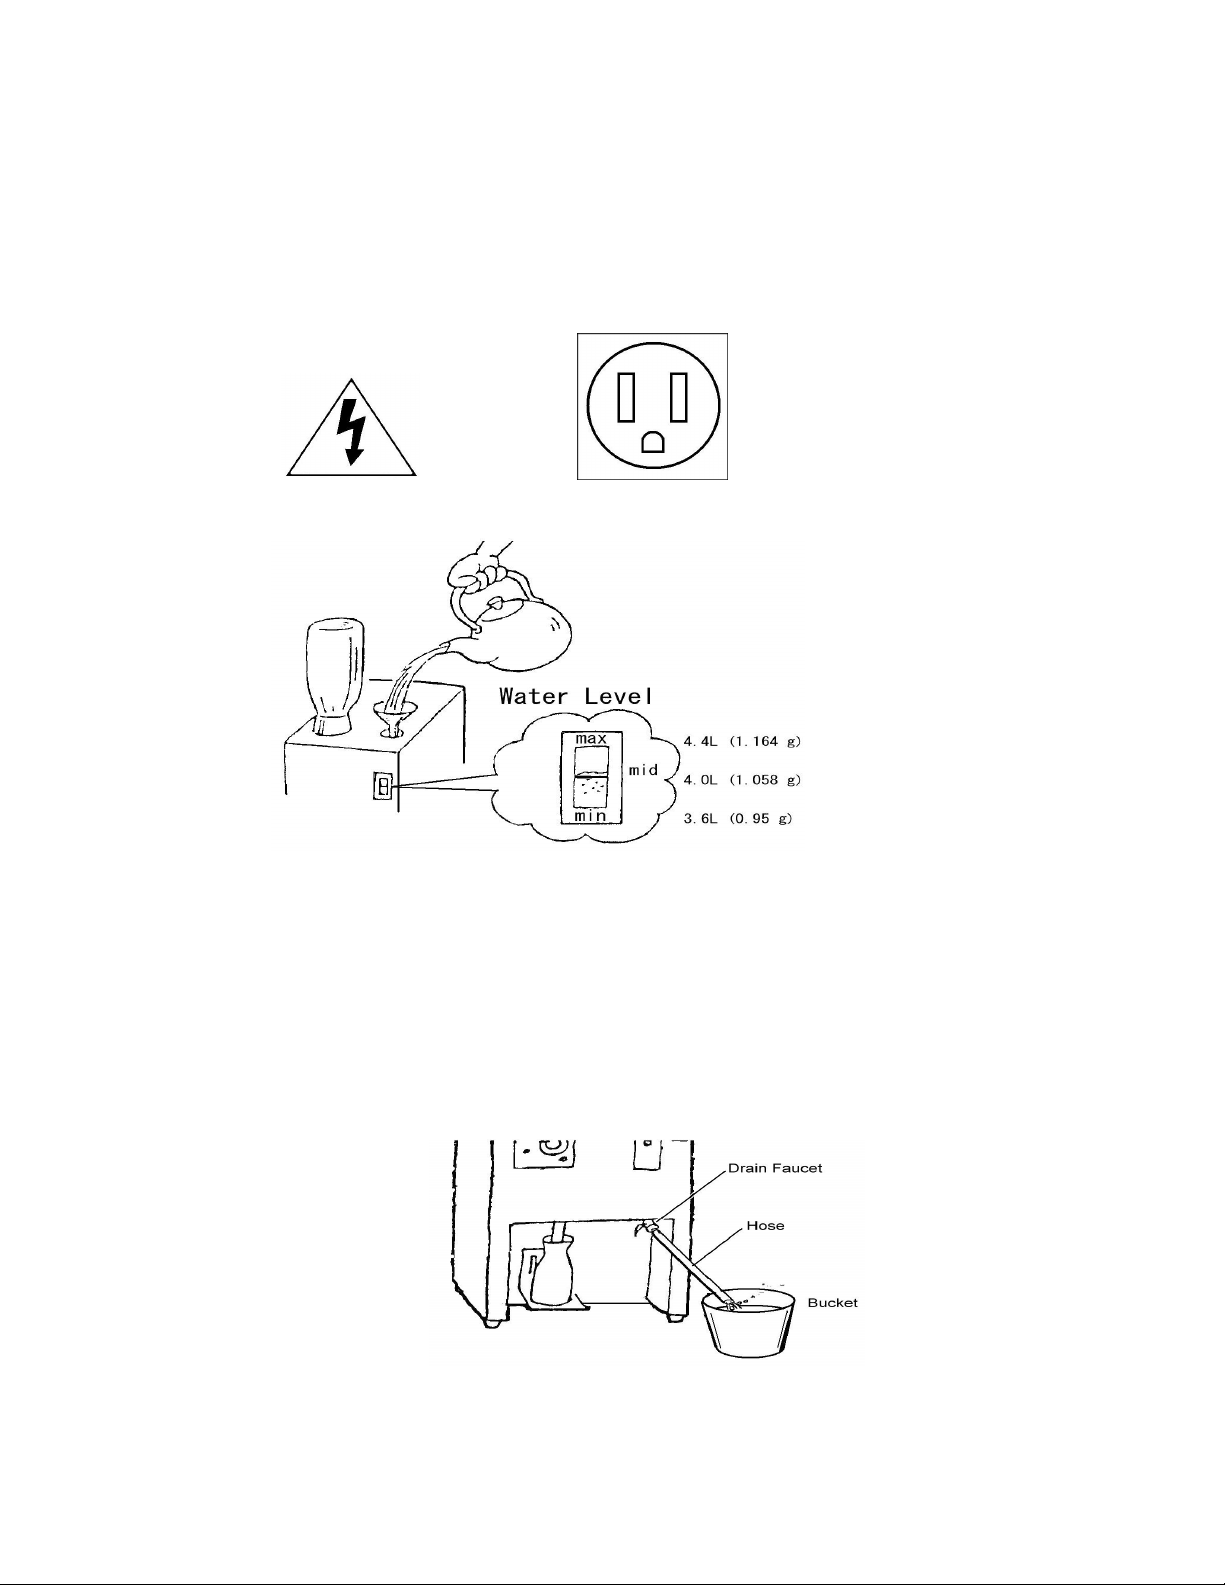
●
Check the wate level indicato befo e tu ning on this p oduct. If the
Check the wate level indicato befo e tu ning on this p oduct. If the Check the wate level indicato befo e tu ning on this p oduct. If the
Check the wate level indicato befo e tu ning on this p oduct. If the
wate level is too low, the Sake Wa me Unit may malfun
wate level is too low, the Sake Wa me Unit may malfunwate level is too low, the Sake Wa me Unit may malfun
wate level is too low, the Sake Wa me Unit may malfunction o the life
ction o the life ction o the life
ction o the life
of the unit will be sho tened.
of the unit will be sho tened.of the unit will be sho tened.
of the unit will be sho tened.
●
Do not disassemble this unit as the e a e no se viceable pa ts inside.
Do not disassemble this unit as the e a e no se viceable pa ts inside. Do not disassemble this unit as the e a e no se viceable pa ts inside.
Do not disassemble this unit as the e a e no se viceable pa ts inside.
Please contact you local dist ibute fo se vicing.
Please contact you local dist ibute fo se vicing.Please contact you local dist ibute fo se vicing.
Please contact you local dist ibute fo se vicing.
CAUTIONS:
CAUTIONS:CAUTIONS:
CAUTIONS:
● Do not ope ate this p oduct if the unit has been damaged.
● This p oduct is designed fo wa ming sake (Japanese ice wine) only.
● To p event inju y du ing ope ation, avoid contact with the hot sake.
3