■Maintenance Precautions
■Transport and Storage Precautions
Do not wash it by exposing it to or submerging it in water.
It may cause electric shock or failure.
When cleaning, use ethanol for disinfection.
Using detergent or disinfectants other than ethanol for disinfection may cause damage,
discoloration, or failure.
Do not sterilize.
It may cause failure or damage.
Always use the storage bag/hard case when storing or carrying. (Refer to 5-7. Storage)
Leaving the product out or carrying it without putting it in the storage bag/hard case may
cause failure or damage. Also, if the heat sink is bent or warped, you may be unable to wear
the product, or the light source unit may get hot and malfunction.
When the product is moved from a warm place to a cold place (and vice versa),
allow it to settle down for a while before taking out of the package.
Taking it out immediately will cause condensation to occur due to sudden change in temperature,
leading to potential failure.
Do not store with the connection cord still connected to the battery unit.
It may cause failure.
Do not carry by the heat sink.
It may cause failure or damage.
Do not drop the storage bag/hard case.
It may cause failure, damage or injury.
CAUTION
NOTICE
NOTICE
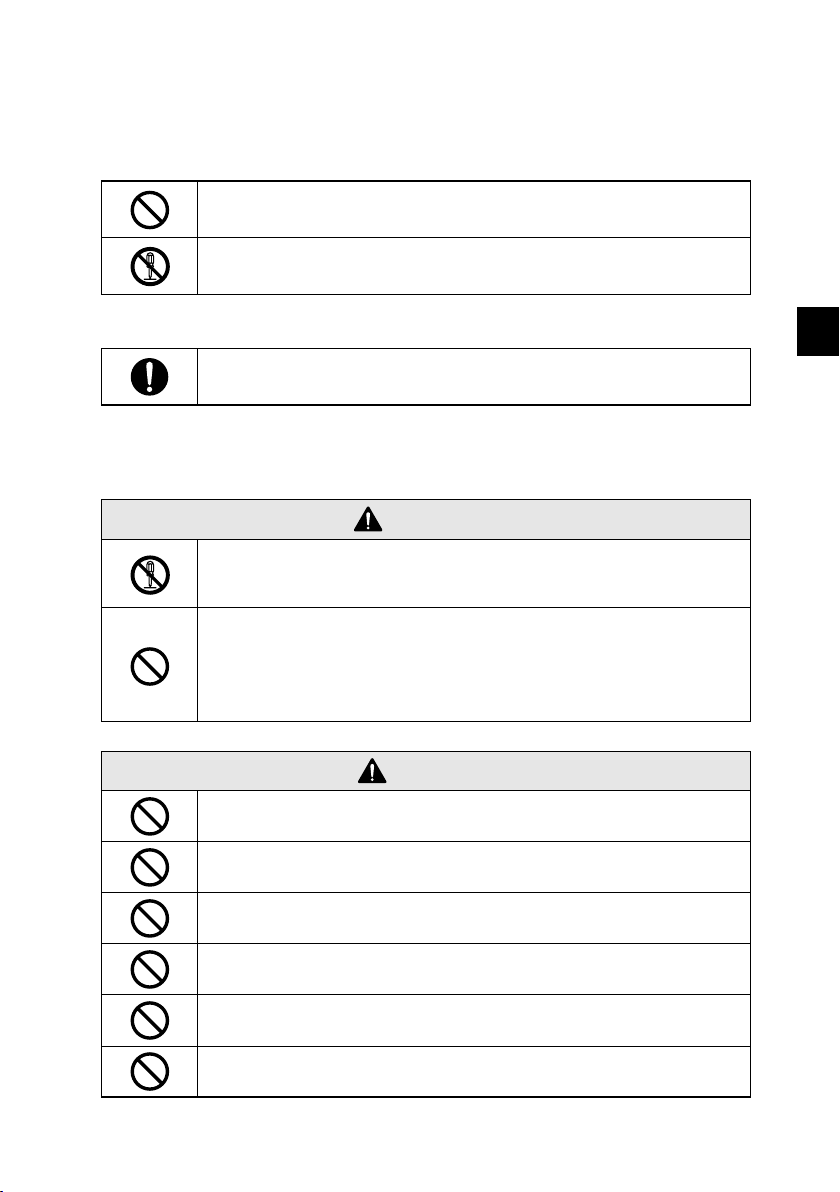
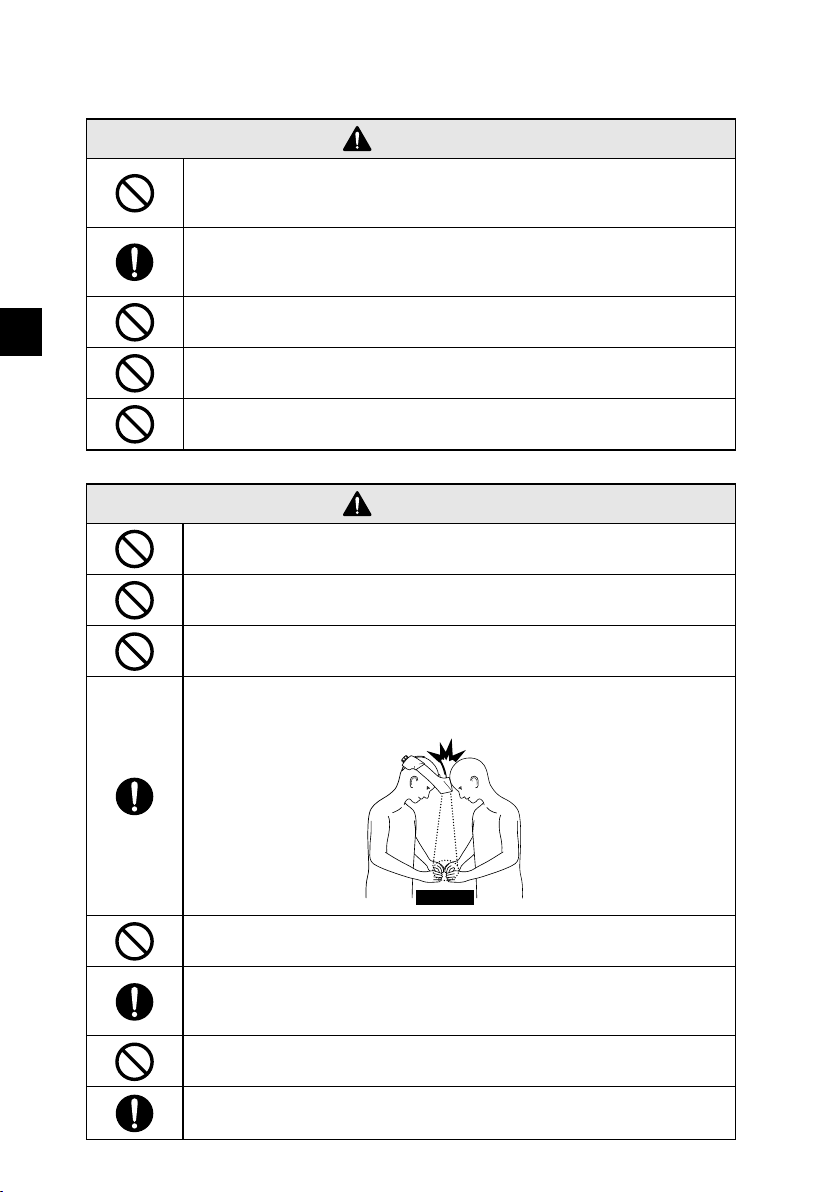
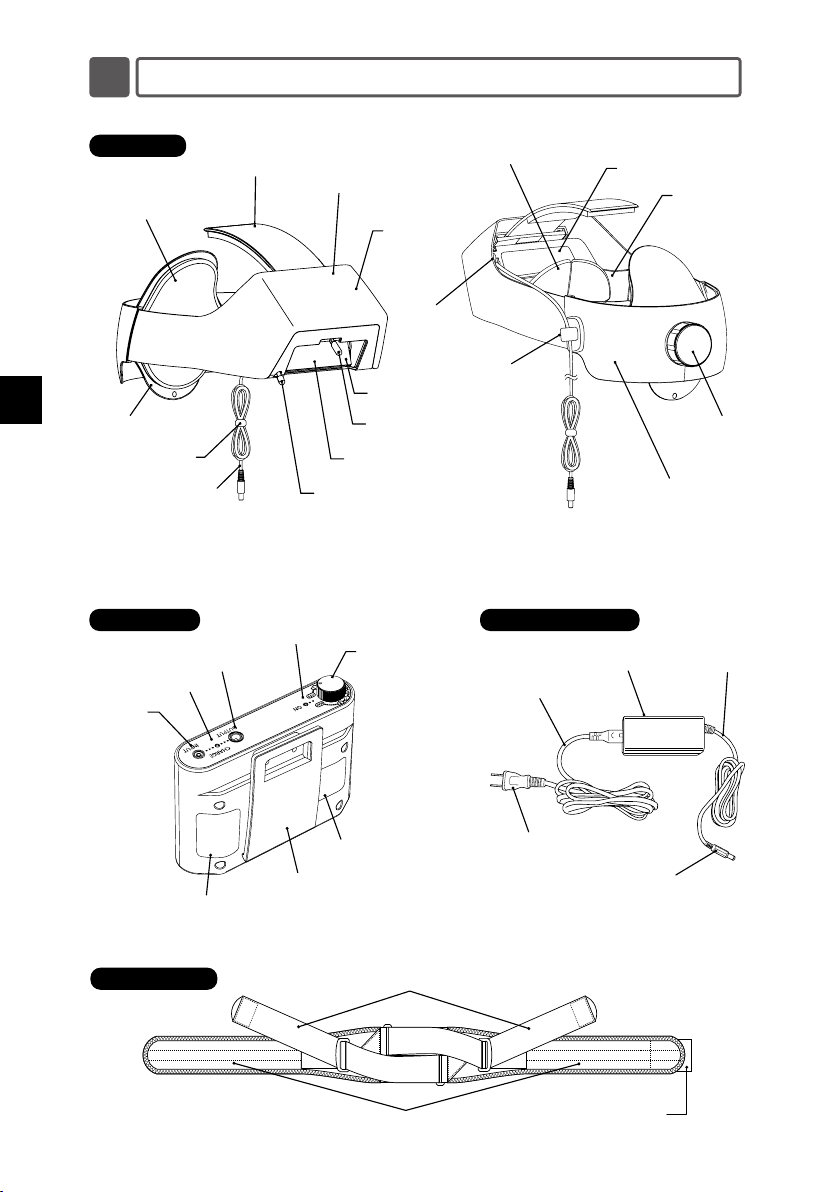
<Image figure>Headsmaybump
Operation table
Others in the vicinityPerson wearing
this product
■Usage Precautions
Avoid direct exposure to the eyes of those in the vicinity.
It may cause damage to the eyes.
Do not look into the light source unit during use.
It may cause damage to the eyes.
Do not cover the light source unit or heat sink with cloth or paper.
The heat will build up and may cause heat generation, ignition, or failure.
Be careful so that your head does not touch others in the vicinity while wearing the product.
It may cause injury, or the product may drop, malfunction, or get damaged.
Do not use the product without wearing it on your head or use while it is secured on a stand.
It may cause an accident such as a fall.
Do not use accessories other than those included with the product.
It may cause battery heat generation, rupture, ignition, electric shock, or failure.
If it has not been used for a long time, check that fluid is not leaking from the battery unit before use.
Touching the fluid may cause burns. Discontinue use, put it in a plastic bag, and contact the distributor.
Place the main unit on the calibration kit instead of directly on a platform or desk.
Otherwise, the illumination position adjustment lever will touch the platform or desk, and may cause it to bend or
cause the protective cap to come off easily. Broken parts can fall into the operating field and cause contamination.
CAUTION
Do not use for ophthalmic procedures.
It may cause damage to the eyes.
Do not use for photosensitive patients or patients who have received photosensitizing agents.
It may cause burns.
Do not use for neonatal transillumination.
It may cause burns.
WARNING
Observe tissue during use of this product.
Heat generated by light energy may cause thermal injury. If thermal injury occurs immediately
discontinue use and take appropriate measures.
Do not use at illumination level higher and at distance closer than necessary.
Heat generated by light energy may cause thermal injury (particularly with prolonged illumination
of a fixed location by multiple light sources, etc.)
6
7
Safety Precautions
■Maintenance Precautions
■Transport and Storage Precautions
Do not wash it by exposing it to or submerging it in water.
It may cause electric shock or failure.
When cleaning, use ethanol for disinfection.
Using detergent or disinfectants other than ethanol for disinfection may cause damage,
discoloration, or failure.
Do not sterilize.
It may cause failure or damage.
Always use the storage bag/hard case when storing or carrying. (Refer to 5-7. Storage)
Leaving the product out or carrying it without putting it in the storage bag/hard case may
cause failure or damage. Also, if the heat sink is bent or warped, you may be unable to wear
the product, or the light source unit may get hot and malfunction.
When the product is moved from a warm place to a cold place (and vice versa),
allow it to settle down for a while before taking out of the package.
Taking it out immediately will cause condensation to occur due to sudden change in temperature,
leading to potential failure.
Do not store with the connection cord still connected to the battery unit.
It may cause failure.
Do not carry by the heat sink.
It may cause failure or damage.
Do not drop the storage bag/hard case.
It may cause failure, damage or injury.
CAUTION
NOTICE
NOTICE
<Image figure>Headsmaybump
Operation table
Others in the vicinityPerson wearing
this product
■Usage Precautions
Avoid direct exposure to the eyes of those in the vicinity.
It may cause damage to the eyes.
Do not look into the light source unit during use.
It may cause damage to the eyes.
Do not cover the light source unit or heat sink with cloth or paper.
The heat will build up and may cause heat generation, ignition, or failure.
Be careful so that your head does not touch others in the vicinity while wearing the product.
It may cause injury, or the product may drop, malfunction, or get damaged.
Do not use the product without wearing it on your head or use while it is secured on a stand.
It may cause an accident such as a fall.
Do not use accessories other than those included with the product.
It may cause battery heat generation, rupture, ignition, electric shock, or failure.
If it has not been used for a long time, check that fluid is not leaking from the battery unit before use.
Touching the fluid may cause burns. Discontinue use, put it in a plastic bag, and contact the distributor.
Place the main unit on the calibration kit instead of directly on a platform or desk.
Otherwise, the illumination position adjustment lever will touch the platform or desk, and may cause it to bend or
cause the protective cap to come off easily. Broken parts can fall into the operating field and cause contamination.
CAUTION
Do not use for ophthalmic procedures.
It may cause damage to the eyes.
Do not use for photosensitive patients or patients who have received photosensitizing agents.
It may cause burns.
Do not use for neonatal transillumination.
It may cause burns.
WARNING
Observe tissue during use of this product.
Heat generated by light energy may cause thermal injury. If thermal injury occurs immediately
discontinue use and take appropriate measures.
Do not use at illumination level higher and at distance closer than necessary.
Heat generated by light energy may cause thermal injury (particularly with prolonged illumination
of a fixed location by multiple light sources, etc.)
6 7
Safety Precautions
Safety Precautions