2
Safety Cautions and Warnings
Signs and Symbols
Before Using This Product
Carefully read through and familiarize yourself with the "Safety Cautions and Warnings".
The precautions indicated here are designed to prevent harm and injury to you and your customers and to facilitate the safe use
of the product.
All are important in maintaining safety and should be strictly followed.
Warning
Caution
Indicates a precautionary items which, if not strictly followed, will result in death or
inserious injury.
Indicates a precautionary items which, if not strictly followed, will result in injury or
physical damage.
General Symbol for Caution,
Warning and Danger
Remove electrical power
plug from outlet.
Possibility of high temperatures
being generated.
General usage precaution
symbol
Do not get wet or use in wet
locations.
Connect ground wire.
Prohibited location
Do not dismantle, attempt to
repair or modify.
Please strictly observe these precautions.
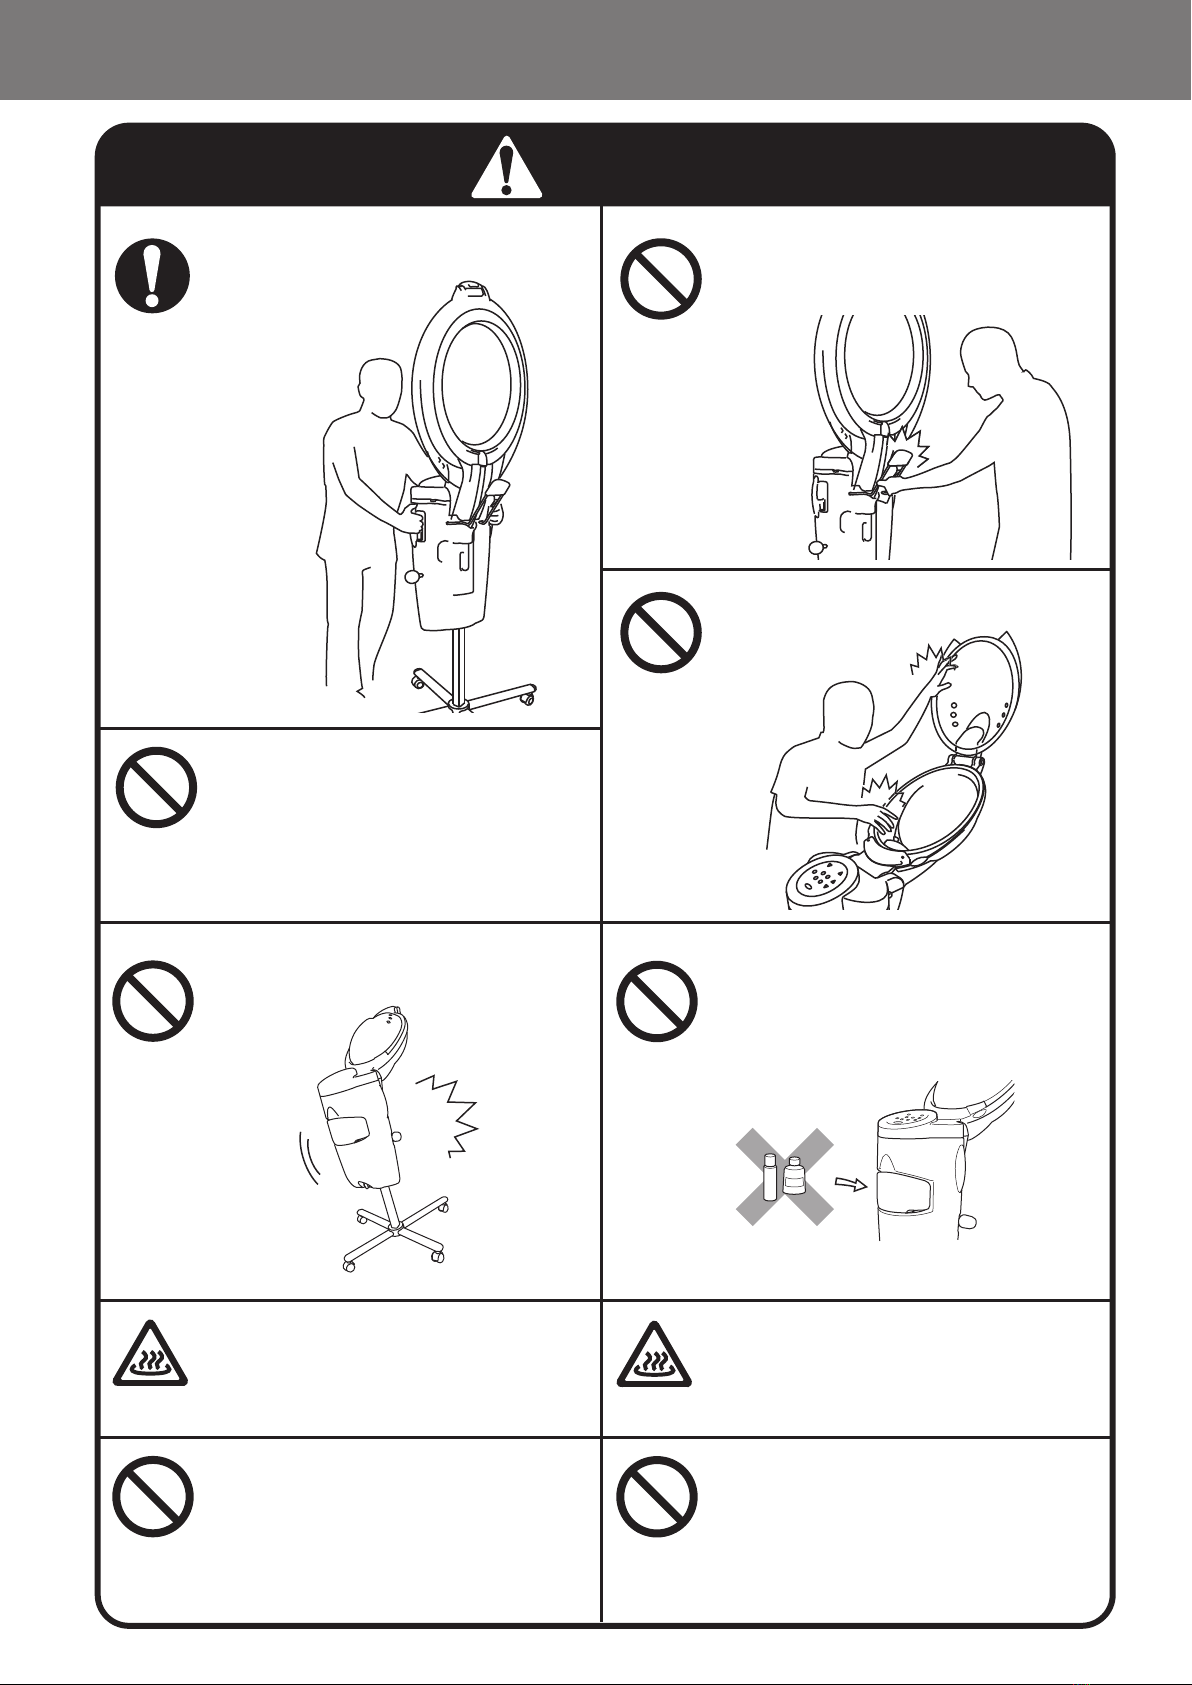
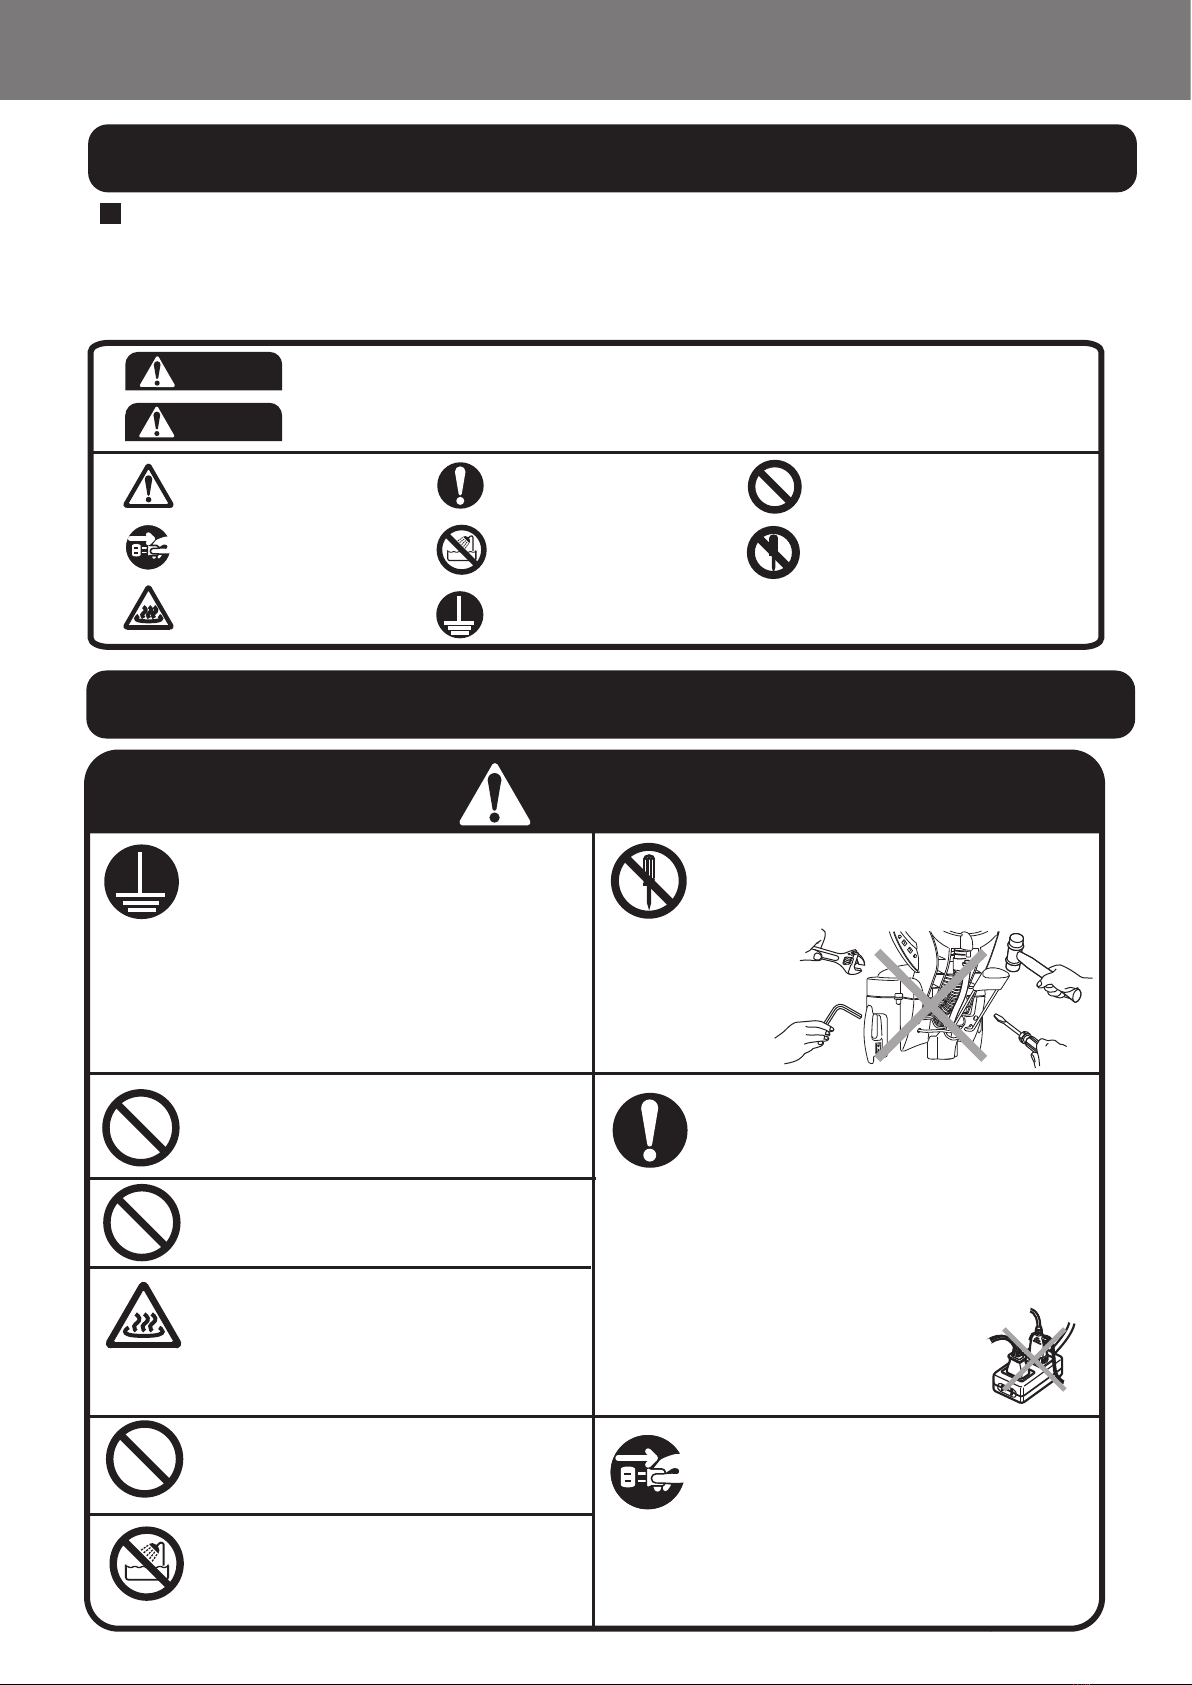
Warning
This unit must be earthed.
This is to prevent electric shock in the case of
malfunctions or short circuits.
Do not climb on the stand or main unit.
Do not lean or climb on the stand or main unit.
Doing so may cause it to tip over and cause injury
or damage.
Do not touch operating parts.
Keep your hands and fingers clear of the operating
sections of the hood and support. Touching them
may cause injury.
Do not put your hands or foreign objects
in the Water Container Holder.
The internal section gets hot during operation and may
cause burns if touched. If a foreign body falls into the
internal section, turn off the power, and contact
our service center or sales office.
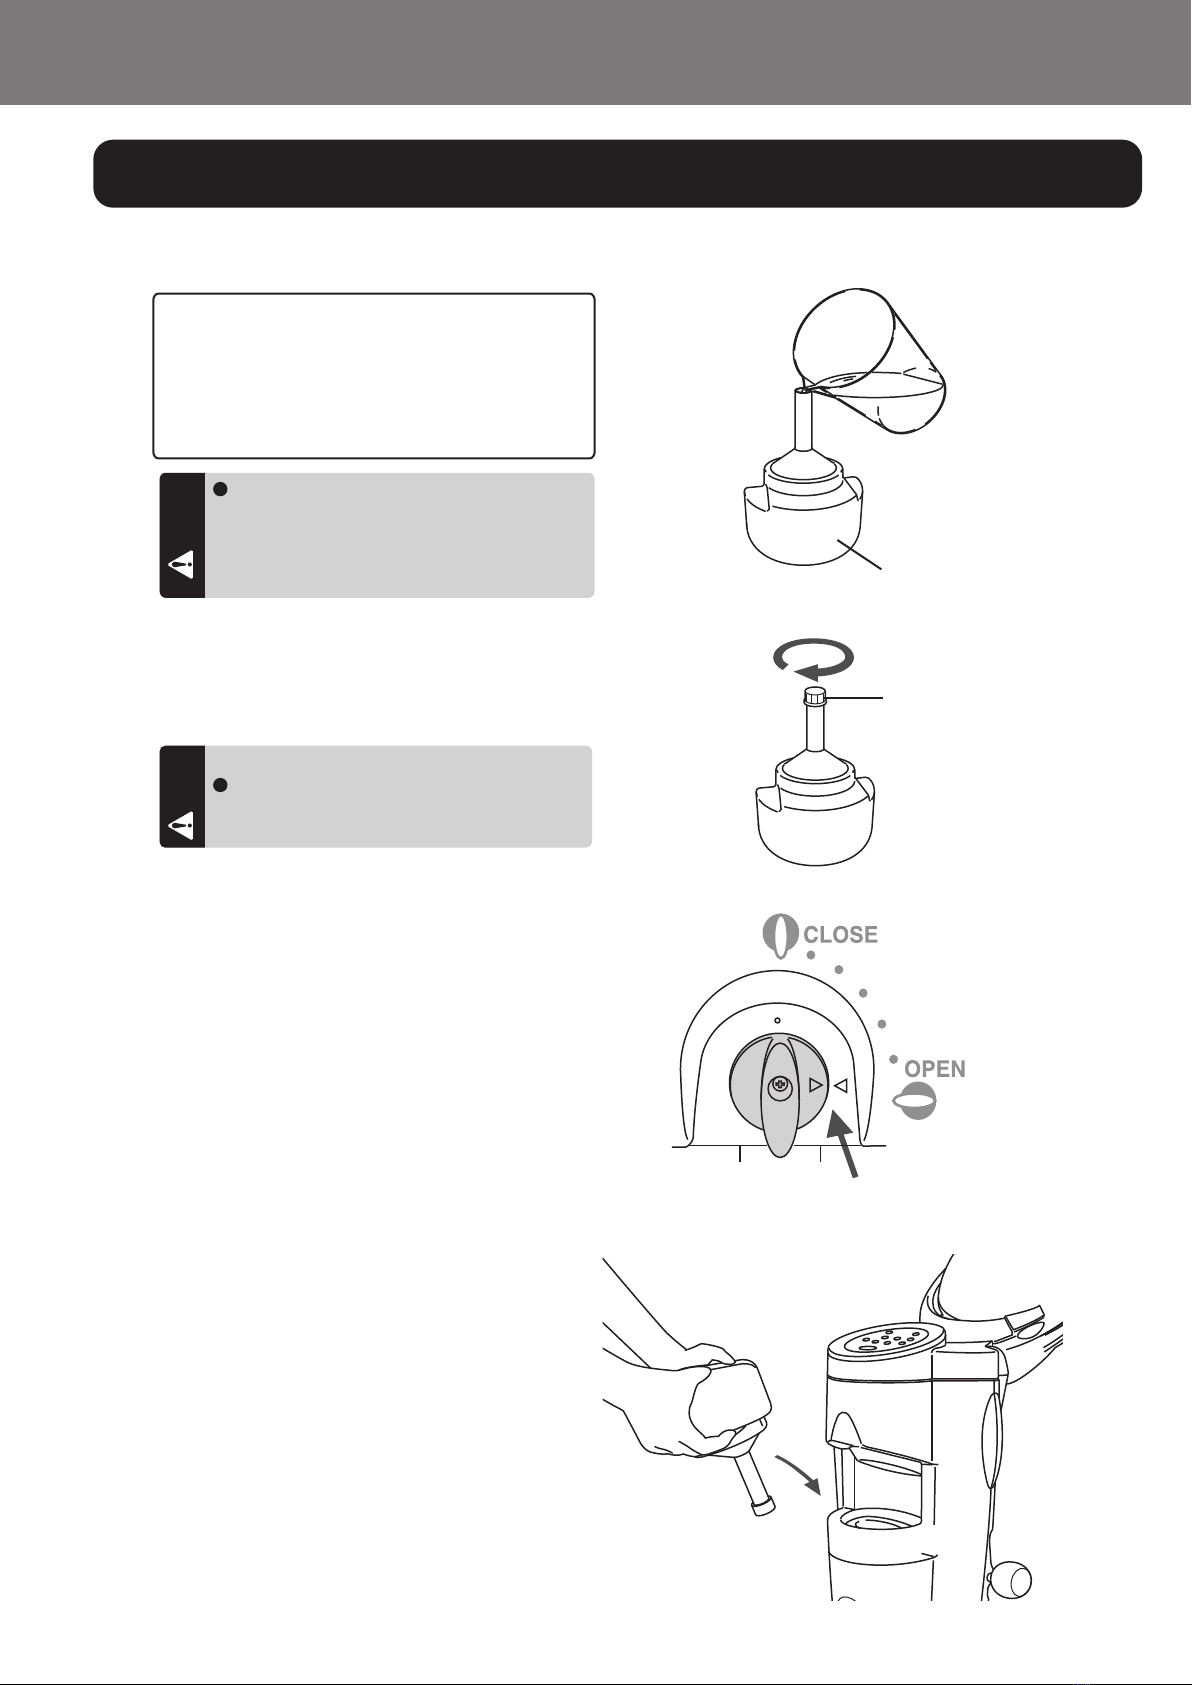
Keep hands and feet away from the
discharge outlet during discharge.
There are cases when boiling water will spray out,
which could result in burns.
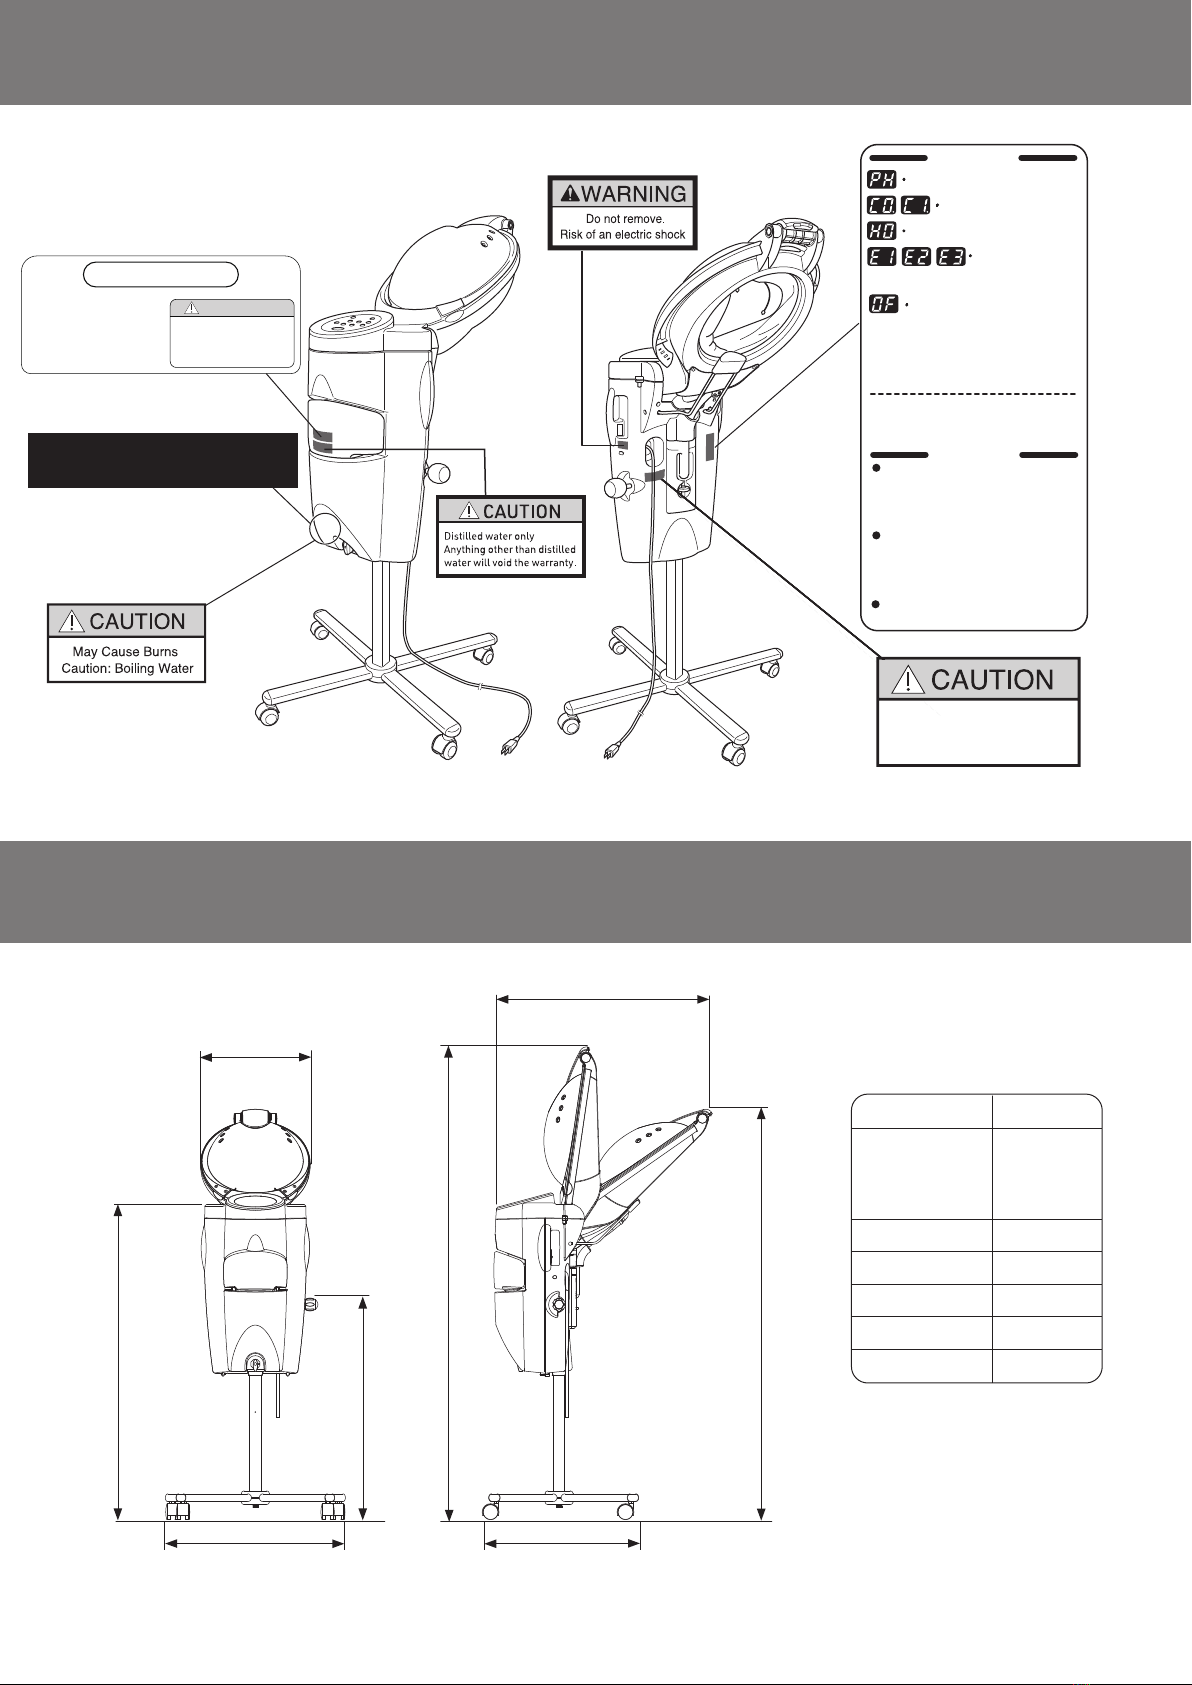
Keep the main unit dry.
Do not wipe the main unit section with wet cloths,
etc. or allow water to come into contact with it.
Doing so may lead to electric shock or malfunctions.
Do not disassemble or attempt to repair.
Disassembly, repair or modifications should only be done by a
qualified repair technician. Attempts at disassembly, repair or
modifications may lead to abnormal operation and accidents.
Follow the rules for handling the power
plug.
・Do not connect another electrical appliance to the
same outlet.
・Push the power plug all the way in to secure it.
・Do not attempt to move the main unit by pulling
on the power cord. This may lead to the unit tipping
over and may cause damage to the cord.
・Do not twist the power cord or place heavy objects
on it. Twisting the cord or putting heavy
objects on it may result in electric shock
or start a fire.
・Do not handle the power cord with
wet hands.This may lead to electric
shock.
Unplug the steamer when it will not
be used for a long time.
Remove the power plug at the end of the workday or
when performing maintenance.Fires started by electrical
shorts may be caused by the degradation of insulation.
If the supply cord is damaged, it must be replaced by
the manufacturer or its service agent or similarly
qualified person in order to avoid a hazard.