TAKARA PCR TP350 User manual

TaKaRa PCR
Thermal Cycler DiceTM
Touch
Code TP350
User’s Manual
for Software version 2.0.1
TAKARA BIO INC.
Attention ・Users are recommended to carefully read the contents of this manual before operating
the TaKaRa PCR Thermal Cycler DiceTM.Touch
・Carefully observe all special Warnings and Cautions outlined in this manual.
・This manual should be stored for reference in a secure and accessible location.

NOTICE
L18 Gradient Thermocycler
This product is licensed under U.S. Patent Nos. 5,525,300; 5,779,981; 6,054,263; 6,962,821, and
corresponding foreign counterparts thereto.
L45 Heated Cover
This product is covered by the claims of U.S. Patent 5,552,580, and their corresponding foreign
counterpart patent claims.
・Thermal Cycler DiceTM is a trademark of TAKARA BIO INC.
・All marks are the property of their respective owners. Certain trademarks may not be registered
all jurisdictions.

TP350 User’s Manual
--- TABLE OF CONTENTS ---
page
Precautions for Using TaKaRa Scientific Instruments --- 2
Chapter 1: Overview ------------------------------------ 7
Chapter 2: Installation Requirements ----------------------- 9
1. Installation Conditions 9
2. Installation 10
3. Moving the System 10
Chapter 3: Names of Parts and Their Functions ------------- 11
Chapter 4: System Operation ---------------------------- 13
1. Introduction 13
2. PCR Profile Creation 15
3. PCR File Manager 22
4. Manual Incubation 24
5. Configuration Tools 25
Chaptur 5: Diagnosis Functions -------------------------- 29
1. Cycle Test 29
2. Up Down Test 31
3. Ramp Test 33
Chapter 6: Troubleshooting and Maintenance --------------- 36
Chapter 7: Specifications -------------------------------- 39
Appendix 1: Accessories list and Packing -------------------- 40
Appendix 2: Consumable list ----------------------------- 41
Appendix 3: Servicing Request and Safety Check ------------- 42
V2.01
1

TP350 User’s Manual
Precautions for Using TaKaRa Scientific Instruments
●Users arerecommended to carefully read the content of this manual before operating the TaKaRa PCR
Thermal Cycler DiceTM Touch.
●After familiarizing themselves withthe information in this manual, users are recommended to store it in
secure and convenient location from which it is always available for reference
Introduction
All Takara scientific instruments are sold strictly for use in research applications and should not be
used by those who are not experts in this field.
Due to ongoing improvements, product specifications and the external appearance are subject to
change without prior notification.
Warranty and Responsibilities
Refer to the Warrantycard included with this product for detailed description of the Warranty
conditions and period.
This product is designed to ultimate safety standards. Nevertheless, should any safety-related issues
arise, users are requested to immediately contact the nearest sales agent.
Precautions (safety and accident prevention) for System Use
(1)DangerWarnings
The various messages and labels provided on the product itself and in the various manuals are
designed to ensure the system is operated safely to prevent personal injury or damage to property.
Users are strongly recommended to read and observe the warnings included with the symbols
shown below.
Warnings indicate incorrect system operation and
handling procedures that can lead to serious
accidents.
Cautions indicate incorrect system operation and
handling procedures that can lead to accidents.
!
CAUTION
!
WARNING
v1.03 2

TP350 User’s Manual
(2)General Precautions Regarding TaKaRa Scientific Instruments
It is important to observe the various precautions described below to ensure optimum system
performance and prevent accidents before they happen. Ensure safe and correct system operation
by carefully reading the precautions.
【Precautions for Installation Location】
Observe the following precautions in order to prevent fires and electrical shocks.
●Do not install the system on an unstable or sloped foundation or any
other location subject unstable conditions.
●If the system tips over or falls, immediately turn off power to the
system and all connected devices and disconnect the power supply
cables.
●Avoid blocking the paths to any air vents included on the product.
Blocked air vents can lead to internal overheating that may result in
physical burns or fire.
●Avoid installing the system in locations subject to dust or strong
vibrations.
●Avoid installing in locations subject to direct sunlight and wide
temperature fluctuations as this may result in internal overheating and
may cause physical burns or fire.
●Do not place objects on top of the system.
●Do not install the system in locations other than research institutions or
related facilities.
【Electrical Precautions】
Observe the following precautions when using electrically powered scientific instruments in order to
prevent electric shocks and fires.
●Avoid operating system with power sources that do not conform to
system power supply specifications.
●Avoid sharply twisting, altering, marking or otherwise damaging the
power supply cable. Avoid applying stress to, heating or placing
objects on the power cable.
●Always ground the system to prevent electric shocks due to leakage
current.
!
WARNING
!
CAUTION
!
WARNING
v1.03 3

TP350 User’s Manual
●Be sure to compare system power supply requirements with the rated
power capacity of the power source to ensure system current
requirements do not exceed power socket capacity. Confirm that the
total power requirements of all connected equipment do not exceed
the rated power supply capacity of the common power source.
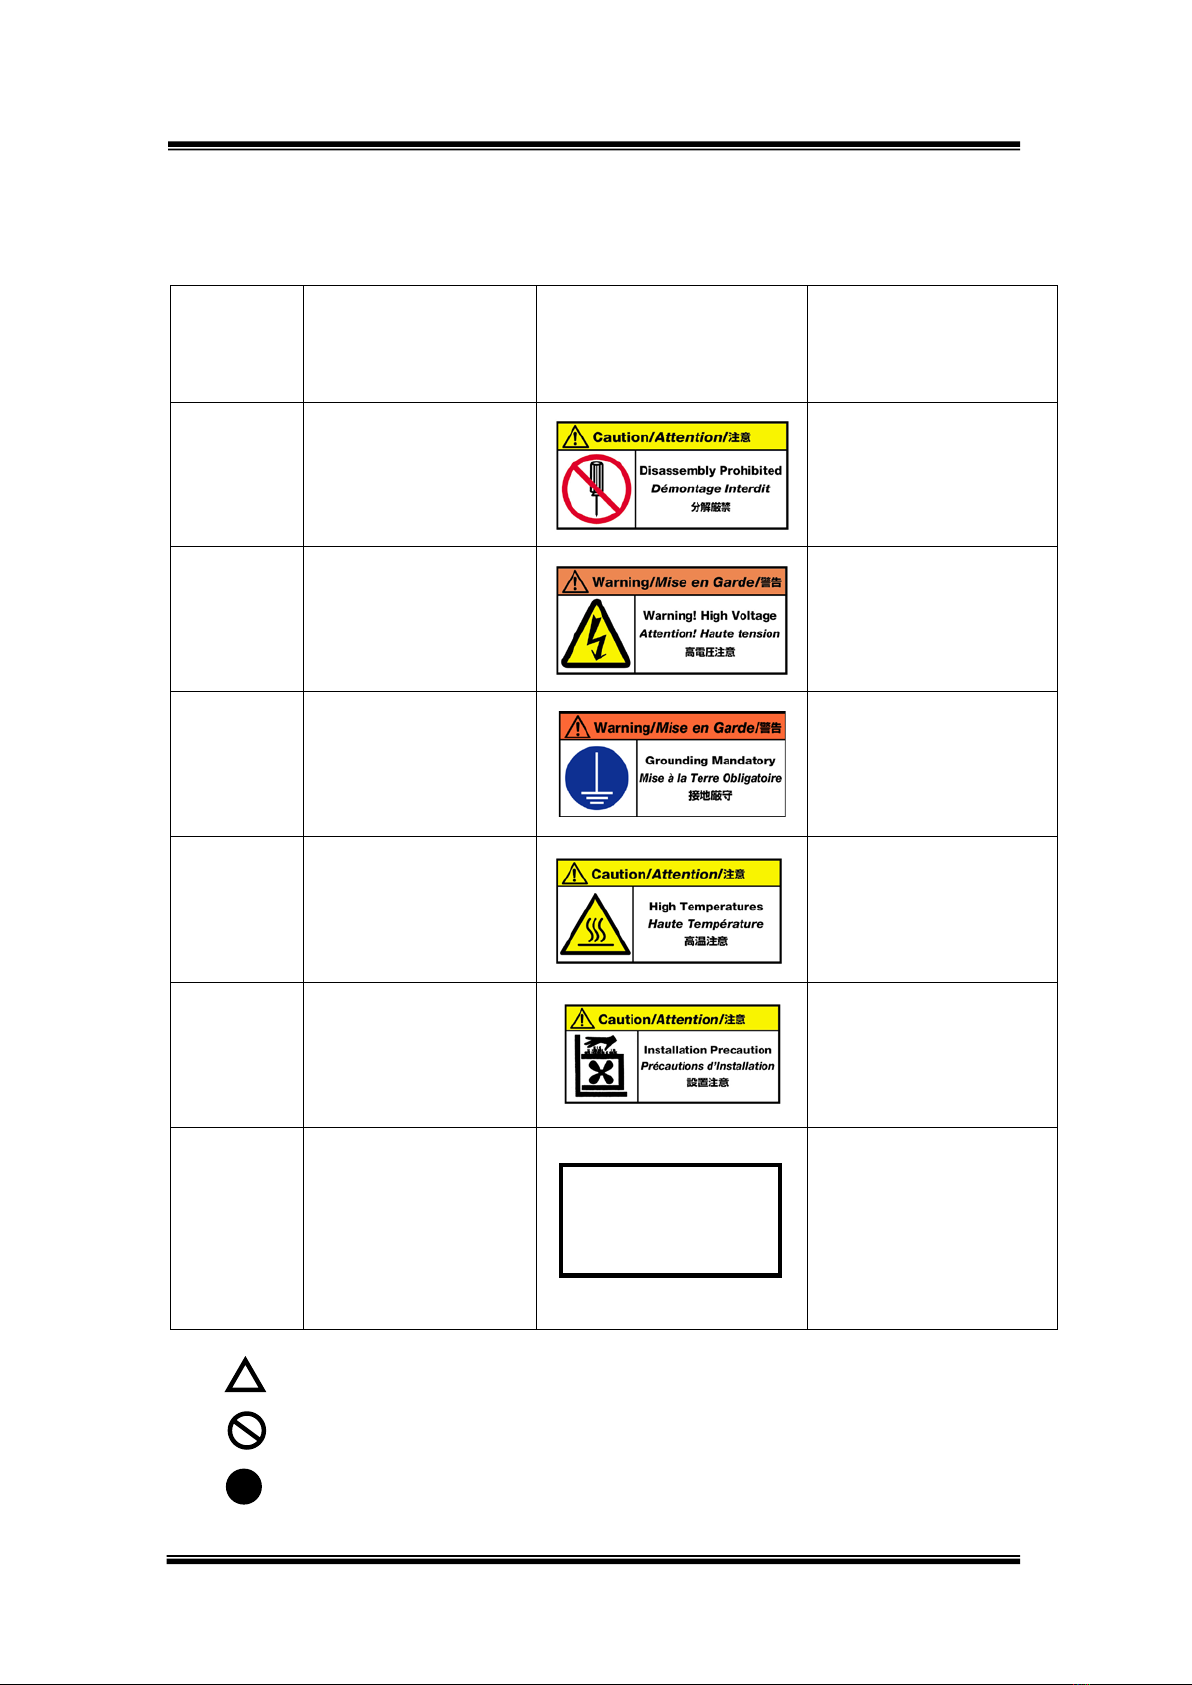
●The system body and power supply cable are subject to high voltage
levels(The maximum voltage is a line voltage AC100V~240V). Avoid
inserting metal or flammable objects inside the system or handling it
with wet hands, as this can result in electric shock and/or other
dangers.
●When moving the system, be sure to first disconnect the power cable
as well as any peripheral devices.
●Be sure to disconnect the power cable prior to cleaning or servicing
the system.
【Other precautions】
Observe the following precautions in order to prevent electric shocks and fires.
●Avoid inserting metal objects, flammable materials or other foreign
objects into the various openings on the system case.
●Never remove the system cover or attempt to alter it in anyway.
●Avoid disassembling or making any direct contact with internal parts of
the system.
●Should noxious fumes smoke or other abnormal signs appear,
immediately terminate operation, turn off system power and
disconnect the power cable.
Wait until conditions stabilize before contacting the nearest sales
agent or the company technical support line.
●Should water or other foreign matter enter the system, immediately
terminate operation, turn off system power and disconnect the power
cable.
Wait until conditions stabilize before contacting the nearest sales
agent or the company technical support line.
●Do not sit on the system.
●Do not disassemble the system
!
WARNING
!
CAUTION
!
WARNING
!
CAUTION
v1.03 4

TP350 User’s Manual
(3)Warning Safety Labels Applied to System Case
Users are advised to avoid accidents by carefully reading the warnings and cautions contained on
warning stickers at key locations on the interior and exterior of the system.
Possible
Danger
Warning Type
Location of Danger
Type d’Avertissement
Localisation du Danger
Warning Label Description of Danger
Electric
shocks and
fires
Disassembly Prohibited
System Interior
Démontage Interdit
Intérieur de l’Appareil
Never disassemble system,
as this maylead to electrical
short-circuits, leakage
current and/or fire.
Electric
shocks
Warning! High Voltage
Power cable
Attention! Haute tension
Cordon d’alimentation
The case and power cable
are subject to high voltage
levels, so take care to avoid
electric shocks.
Electrical
shocks and
fires
Grounding Mandatory
Power cable
Mise à la Terre
Obligatoire
Cordon d’alimentation
Always ground the system
to prevent electric shock
from leakage current.
Burns
High Temperatures
Heat cover
& Heat block
Haute Température
Couvercle Chauffant
Avoid touching the heat
cover, which reaches very
high temperatures and may
cause burns.
Burns and
fires
Installation Precaution
Air vents
Précautions
d’Installation
Prises d’air
Be sure not to block air
vents when installing the
system, as this can cause
internal overheating.
Low accuracy
and/or
Condensation
ALWAYS OPERATE
WITH LID CLOSED
To ensure accuracy and
reduce condensation
Be sure to close the cover
while the system is in
operation as to ensure
accuracy of control
temparature and to reduce
condensation around the
sample block.
This symbol means caution or warning.
This symbol means an action is prohibited.
This symbol means an instruction must be followed.
ALWAYS OPERATE
WITH LID CLOSED
To ensure accuracy and
reduce condensation
v1.03 5

TP350 User’s Manual
Precautions against Transferring or Copying Content of This Document
The content of this document cannot be transferred or copied without the express permission of the
copyright holder.
Copyright holder: TAKARA BIO INC.
Printed in Japan
Contact TAKARA BIO INC.
TAKARA BIO INC.
SETA3-4-1, OTSU, SHIGA, 520-2193, JAPAN
Tel : + 81-77-543-7247
Fax : + 81-77-543-9254
http://www.takara-bio.com
Technical Inquiries (Contact) :http://www.takara-bio.co.jp/english/contact/inquiry_form.htm
v1.03 6

TP350 User’s Manual
●Chapter 1: Overview
Thank you for purchasing TaKaRa PCR Thermal Cycler DiceTM Touch.
TaKaRa PCR Thermal Cycler DiceTM Touch is more small PCR device and easy to
use the big touch panel , that reconfigure TaKaRa PCR Thermal Cycler DiceTM series
as usual.
This page is introduced to the features of TaKaRa PCR Thermal Cycler
DiceTM Touch.
<Feature of device>
Achieve the ultimately miniaturized size of PCR device to reconfigure the TaKaRa
PCR Thermal Cycler DiceTM Touch series as usual.
Size(Rid closed、except the projection): 180 (W) x 285 (D) x 205 (H) mm
Have a 7” color touch screen giving a vibrant and flexible means of run setup
and monitoring.
Utilize six Peltier devices to actively heat and cool the block are arranged into
three zones with independent sensing and control capabilities.
High performance block cycling system configured and optimized for industry
standard 0.2ml individual or strip tubes (domed or flat-capped) or 96 well
plates.
Applications of thermal gradient technology (gradient of between 0~25℃, 12
steps across the block) include the ability to optimize the annealing
temperature of an assay in a single experiment by determining the
temperature of the wells that yield the best result.
<Feature of software>
A powerful thermal profile may contain up to 200 events. Each 4 kinds of
‘event’ can be either a hold a temperature, ramp, pause or 2 to 10 step cycling
with up to 99 repeats,
The Long Range feature enable the time of particular cycling step to be
automatically increased or decreased by a specified range of cycle repeats. It
is most useful for targets longer than about 1kb.
The Touchdown function enables the temperature of a step to be automatically
decrease ( or increase) by a preset amount over a range of successive cycle
repeats.
The Ramp function enables to set the time from initial temperature to end
temperature.
v2.01 7

TP350 User’s Manual
The Pause function allows the user to pause the profile at any number of
pre-programmed points with an audible beep.
The Holds are useful if there is a need to remove tubes at add reagents at a
particular point in a run.
The Auto Restart feature is restart a run if power has been lost for any reason
during cycling.
The Rate Limiting feature is controllable the rate of heating and cooling
between 0.1℃/sec~2.5℃/sec during a run.
Manual Control mode enables the user to set the block to a specific
temperature quickly without creating a thermal profile. This function is useful
for incubating reactions such as DNA digestion or ligation. (The feature is able
to use directly not to save as a program file.)
Save and transfer PCR run files and logs between the default or individual
user directories and a USB memory drive.
A facility has provided to update the software which resides on the TaKaRa
PCR Thermal Cycler DiceTM Touch with USB memory stick.
v2.01 8

TP350 User’s Manual
●Chapter 2: Installation Requirements
1. Installation Conditions
To ensure optimum performance and long and stable product life, observe the
following precautions when selecting an installation location.
Note that installing the system in a location that does not meet the requirements
listed below can result in malfunctions and/or system breakdown. Replacement of
components and system repairs for any deterioration in performance or damage
caused by failure to adhere the following conditions will not be cover by warranty.
1. Install system in a comparatively dust-free location
2. Avoid locations subject to corrosive or flammable gases.
3. Avoid locations subject to either strong shocks or continuing low levels of
vibration.
4. Install the system away from direct sunlight.
5. Install the system as far away as possible from electrical equipment that
generates strong magnetic fields, electrical fields and high frequencies. Avoid
locations near equipment that generate noise caused by electrical motors and
transformers.
6. Choose a flat location capable of withstanding the design weight of the
system.
7. The installation environment must be within 15 to 30℃temperature range and
20 to 80%relative humidity range.
8. Avoid locations subject to sharp temperature fluctuations, exhaust from
air-conditioning systems and condensation caused by sharp humidity
fluctuations.
9. Avoid locations air vents located on the right and left and rear sides. (Leave a
space of the both sides at least 15cm and the backside at least 10cm)
10. Choose an operating location with good ventilation.
11. Do not operate the system in a cold room.
12. Select a room that can provide sufficient power (frequency, voltage and
current) for system operation.
13. Do not attempt to move the system while holding it by the cable of backside,
as this can damage to components. Doing so can also result in personal injury
due to part breakage resulting in the system falling down.
14. Do not open the lid for the PCR reactions. It is expected to decrease the
accuracy of temperature and generate the condensation at the low
temperature (below 10℃)
v2.01 9

TP350 User’s Manual
2. Installation
Use the following procedures when installing system.
1. Confirm that the system power switch is set to off.
2. Connect the system side of the power cable to the power connector on the rear
of the system.
3. Plug theAC power plug of the cable into power outlet.
The system is designed to operate normally with a 100 to 240V AC,50/60Hz
power line. Make sure that the power outlet is designed for a 3-pronged plug
with ground line.
4. Turn on the system power.
5. The software starts as soon as power is applied.
Follow the installation procedures outlined in Chapter 4.System Operation.
3. Moving the System
Follow the procedures described below when moving the system to a new location
after it has been installed.
●New Location Within the Same Site
Follow the precautions listed below when moving the system to a new location
within the same site.
1. Thoroughly clean the system and make sure that there are no tubes or plates
remaining in the sample block.
2. Avoid any shock during movement that can affect the operation of this highly
sophisticated system.
3. When lifting and carrying the system, be sure to place one hand on either side
of the system and lift and carry in a balanced way.
4. Make sure that the new location conforms to the installation requirements
described in section “1.Installation Conditions” in Chapter 2.
5. Follow the installation procedures outlined in section “Installation” in Chapter 2.
●Moving to a New Site
When moving the system to a new site, clean it carefully and repack it in the
packaging in which it was delivered. Note that damage sustained by the system
during transport due to improper packaging will not be covered by Warranty period
is still valid. Follow the instructions provided in this chapter when reinstalling the
system at the new location.
In the interests of safety, and avoiding electric
shocks, be sure to connect the system to a
properly grounded power outlet.
CAUTION
!
v2.01 10

TP350 User’s Manual
●Chapter 3: Names of Parts and Their Functions
Front View
General Description
――――――――――――――――――――――――――――――
①Lid Lock The Lid Lock is slided behind the unit, so that the Lid picks a
Lock.
②Lid Handle The Lid Handle bring up the same as sliding the Lid Lock
behimd the unit, when the Lid open.
③Lid The Lid is designed the Top Heater at the interior side to protect
against evaporation resulting from heating of the reaction tube
and reaction plate.
【Caution】Avoid inserting fingers as the Top Heater (interior) of the
unit reaches very high temperature (up to 115℃) in operation.
④Touch Panel 7 inch, vivid color touch screen controls the program at your tip
of your finger or stylus (touch pen).
⑤USB Port A handy USB port allows for file transfer and save the files, and
also facilitates the direct use of mouse with the unit.
⑥Air Vents (Exhaust :Left and Right sides)Opening used to cool the
interior of the unit.
【Caution】Do not block any of the air vents
⑦Stylus (Touch pen) Used to operate the program on the Touch Panel.
①Lid Lock
③Lid
④Touch Panel
⑤USB Port
⑥
Air vents
(exhaust; Left and
Right sides )
②Lid Handle
⑦
Stylus
(
Touch Pen
)
v.2.01 11

TP350 User’s Manual
Lid Block View
Rear View
General Description
――――――――――――――――――――――――――――――
⑧Top Heater The Top Heater protects against evaporation resulting from
heating of the reaction tube and reaction plate.
【Caution】Avoid inserting fingers as the Top Heater (interior) of the
unit reaches very high temperature (up to 115℃) in operation.
⑨Sample Block Section of the unit in which sample tubes and plates are placed.
【Caution】Do not touch the block as it reaches temperatures up to
99℃
⑩Power Switch The Power Switch is main switch to put on or shut off the power.
⑪Power Cable Connector Socket for power cable
【Caution】Make sure to use the power cable provided with the unit.
⑫Air Vents Intake, Openings used to cool the interior of yhe unit.
【Caution】Do not block any of the air vents
⑬Backside USB Port Do not use this port.
⑬Backside USB Port
⑫Air vents (intake)
⑪Power Cable Connector
⑩Power Switch
⑧Top Heater
⑨
Sample
Block
v.2.01 12

TP350 User’s Manual
●Chapter 4: System Operation
1. Introduction
Plug the unit into a power outlet and power the unit on with the switch located on
the rear of the unit. Do not worry about selecting the correct power voltage for your
country, TaKaRa PCR Thermal Cycler DiceTM Touch is designed to operate in any
country in the world with no charges.
The unit is also designed to be resistant to power surges and drop-outs the occur
in countries with less reliable power grids.
Electrical AC100V~240V, 50/60Hz
Consuming electric power 500VA (5A @100V)
1-1. Power Switch
On Power up the TaKaRa PCR Thermal Cycler DiceTM Touch will display the logo
and take a few moments to initiate the software.
【Caution】Please do not touch the Touch panel and shut down the system until
the main menu appear on the panel screen. That is the cause to the trouble of
apparatus and wrong moments.
1-2. Touch Panel
The TaKaRa PCR Thermal Cycler DiceTM Touch
has a 7” color touch screen
giving vibrant and flexible means of run setup and monitoring. This internal
graphical user interface controller provides a powerful yet intuitive and easy to use
interface, and directly control at your tip of your finger or stylus (touch pen)
attached instrument above the icon and menu on the screen.
【Caution】If you use a sharp tip tool except stylus (touch pen) attached instrument
to operate the Touch panel, that is damaged to the Touch panel depending on the
situation.
v.2.01 13

TP350 User’s Manual
1-3. Home
After power up the unit defaults to the home screen from where all features may be
accessed.
The 4 screen icons provide access the following features:
①PCR Program Editor-is used to create a new PCR thermal profile and initiate
its execution.
②PCR File Manager- is used to load and edit PCR program files.
③Manual Incubation-Allows immediate manual setting of block temperature.
④Configuration -Takes you to the configuration page allowing of machine
options.
v.2.01 14

TP350 User’s Manual
2.PCR Profile Creation
From the ‘home’ screen the ‘PCR Program Editor’ icon will bring you to appear an
initial display of PCR program. Create a new thermal profile using either the initial
display or the Wizard mode to click witch hat icon (worn Wizard) under the screen.
An Active step become blue in a color on the program. Appear continuation of the
program (Not documented on the screen) using a blue arrow on the upper right of
display.
Load File: Load a stored program on the device
Add Step:Add a step file to specify the location of the displayed profile.
・Add to end of Profile :Add a step to end of the displayed profile
・Insert after X :Add a step close behind the active (blue) step
・Insert after X within Cycling :Add a step behind the active step within Cycling
・Insert at start of Profile :Add a step at a start of displayed profile
Delete:Delete a active (blue) step
Step Options:Move a active (blue) step and
Setting of specific function (p.19)
using Advanced Edit
Wizard:Configure the running profile using Wizard Mode
Run File:Run the displayed profile
Save:Save the displayed profile
Home:Return the Home page.
①②③④
①②③④
v.2.01 15

TP350 User’s Manual
2-1. Configure and Edit a new thermal profile
Appear an initial profile that is a default profile or a profile for previous measure-
ment in PCR Program Editor. If you want to display a default profile but not a
profile for previous measurement, you would click hat icon (worn Wizard) under the
screen and open the default profile.
Change a block temperature to click a temperature column.
Change a reaction time to click a time column
Change a number of cycles to a cycle column within Cycling.
Preheat a top heater before commencing the run when click a ‘Preheat’ button on
the upper right corner. Press OK to turn top heater ON or cancel to turn top heater
OFF of the next system message. Change ‘Preheat’ button to ‘Heating’ one.
v.2.01 16

TP350 User’s Manual
2-2. Configure a new profile using Wizard Mode
The TaKaRa PCR Thermal Cycler DiceTM Touch
software includes a Wizard
utility which enables the user to configure easy to moderate complexity profiles in
just moments. To activate select ‘Wizard’ from the PCR or One Step RT-PCR
start-up screen.
The Wizard screen displays each of the steps which occur in a typical range of
profiles. At a usual there are 3 steps, Preheat and then denaturation and anneal
which are cycled. You may enable up to a further 3 steps (cDNA, Extension & post
run hold) by clicking on the corresponding check boxes. Each of the steps will be
executed in the order they are shown arranged down the screen with the
denaturation, Anneal and Extension (if enabled) steps being cycled. After the
amplification run has been completed the temperature may be held at a defined
temperature until the user disables the unit.
‘Hold on Completion’ is checked to hold at 8℃(default) that amplified samples
keep cooling.
To adjust any of the parameters click on the corresponding time or temperature
boxes and keypad will be presented allowing entering of new numbers. The
number of cycles can also be adjusted between 1 (single execution, no loops) and
99 cycles.
【Range of values】
Block temperature:4℃~99℃、Time:1sec~9hour、
Number of cycles:1~99Cycles、Top heater temperature:60~115℃
v.2.01 17

TP350 User’s Manual
2-3. Explanation of functional icons for editing the profile
<Creating a new Event using Add Step>
To create a new event select an ‘Add Step’ icon in the ‘PCR Program Editor’.
The first screen of the Add Event Wizard which will be displayed lets the user
select the type of event.
Change the items ofAdd Event Wizard for setting the point ofAdd Step.
You may choose from 4 event types.
①Cycling x Step – will proceed to generate a multi-step cycling event. The
scroll button to the right allows you to change the number of
steps between 2 and 10 for the cycling event.
②Hold – is a simple hold at given temperature for a set time. It may
be performed either with or without a gradient across the
block. If you wish to hold the temperature infinity, you may
touch the ‘Infinite’ button.
③Ramp – Allows the block temperature to be ramped either up or
down between two set temperatures over a preset length of
time. The block target temperature is updated every second
and with a 0.025 degree minimum step resolution. It may be
performed either with or without a gradient across the block.
④Pause – will hold the temperature at the last set point and pause the
run with an audible warning. This is useful if the operator
needs to perform a certain action of the samples at given
point in the run. The operator clicks OK when complete and
the run will continue with the next event.
①
②
③
v.2.01 18
Table of contents
Other TAKARA Laboratory Equipment manuals
Popular Laboratory Equipment manuals by other brands

Leica
Leica L5 FL user manual

Ametek
Ametek TAYLOR HOBSON TALYROND 500 PRO Operator's guide

Elisabeth Pharmacon
Elisabeth Pharmacon ZEPHYRUS GelCube Illuminator Series Instructions for use

Drummond
Drummond Nanoject III instruction manual

Graco
Graco GL-32 Instructions for use

Air Science
Air Science UV-BOX UVB-15 User's operation manual