Talk To Me Technologies wego A User manual

Grid for wego User Guide
For wego 7, 10 &13A-D Speech-Generating Devices
Find more resources online: talktometechnologies.com (click Support)
WGUG 9.18.20
SymbolStix®, Copyright 2021, SymbolStix, LLC. All rights reserved.


Table of contents
Hardware, buttons and features ..................................2
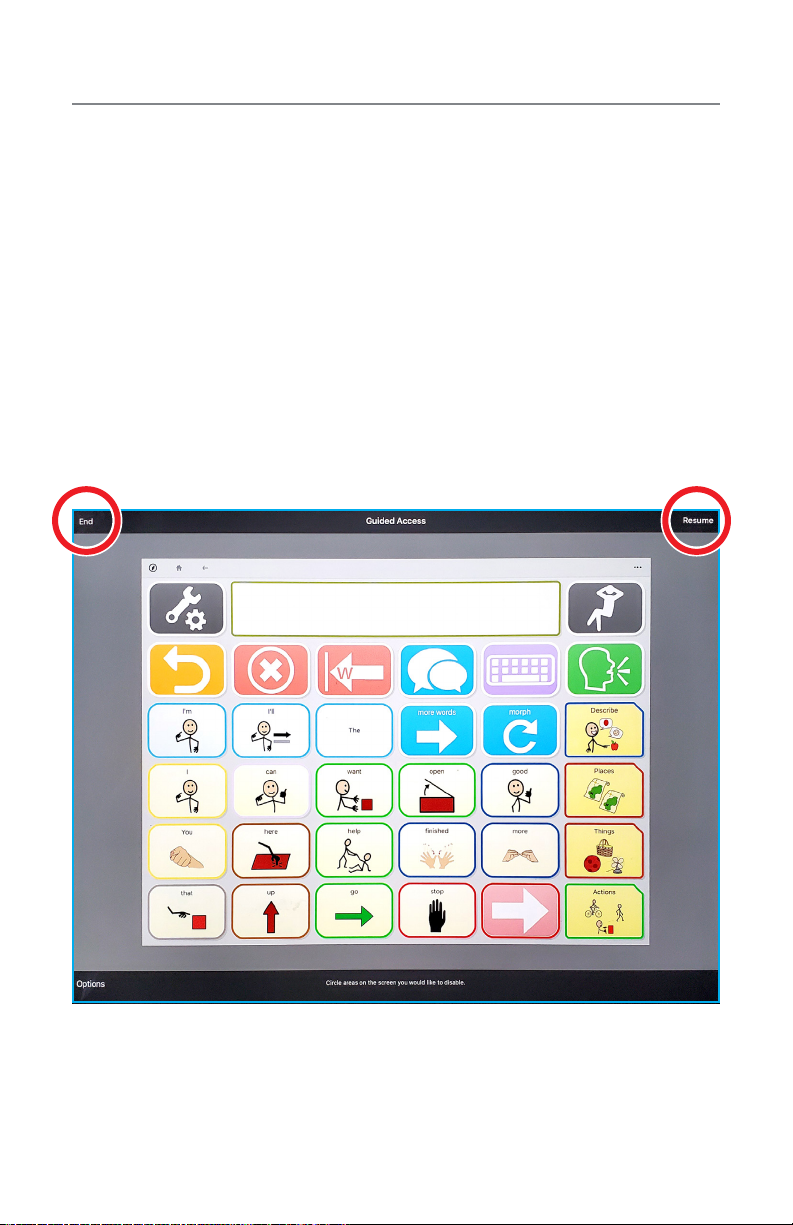
Guided Access ................................................3
User settings .................................................. 4
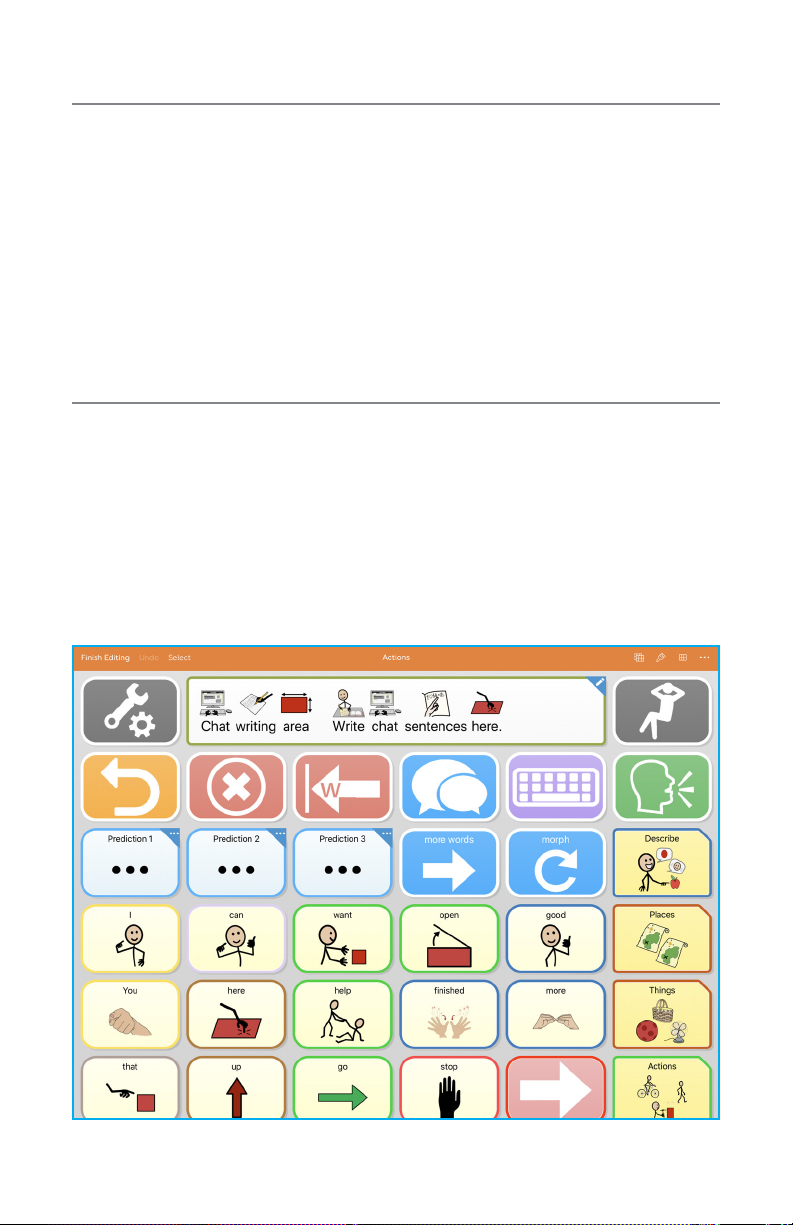
Edit mode ....................................................4
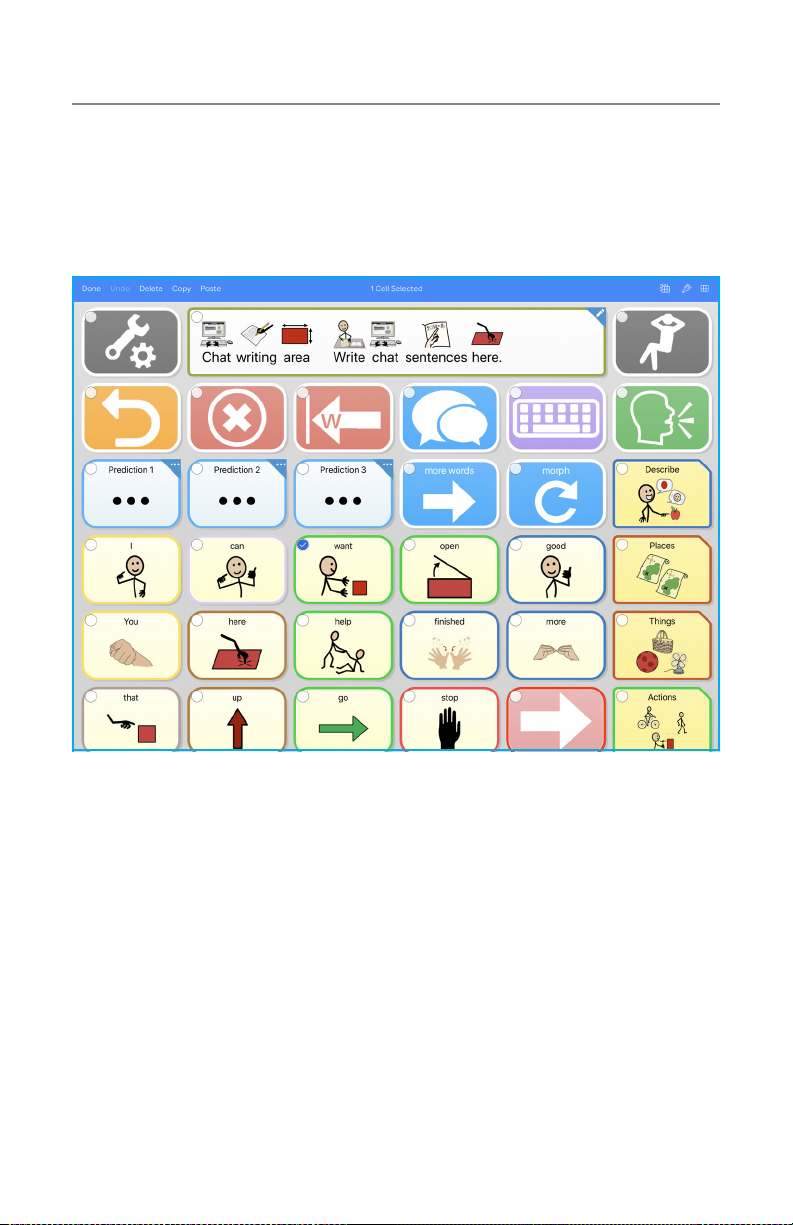
Copy and paste a button ........................................5
Edit word pronunciation ......................................... 6
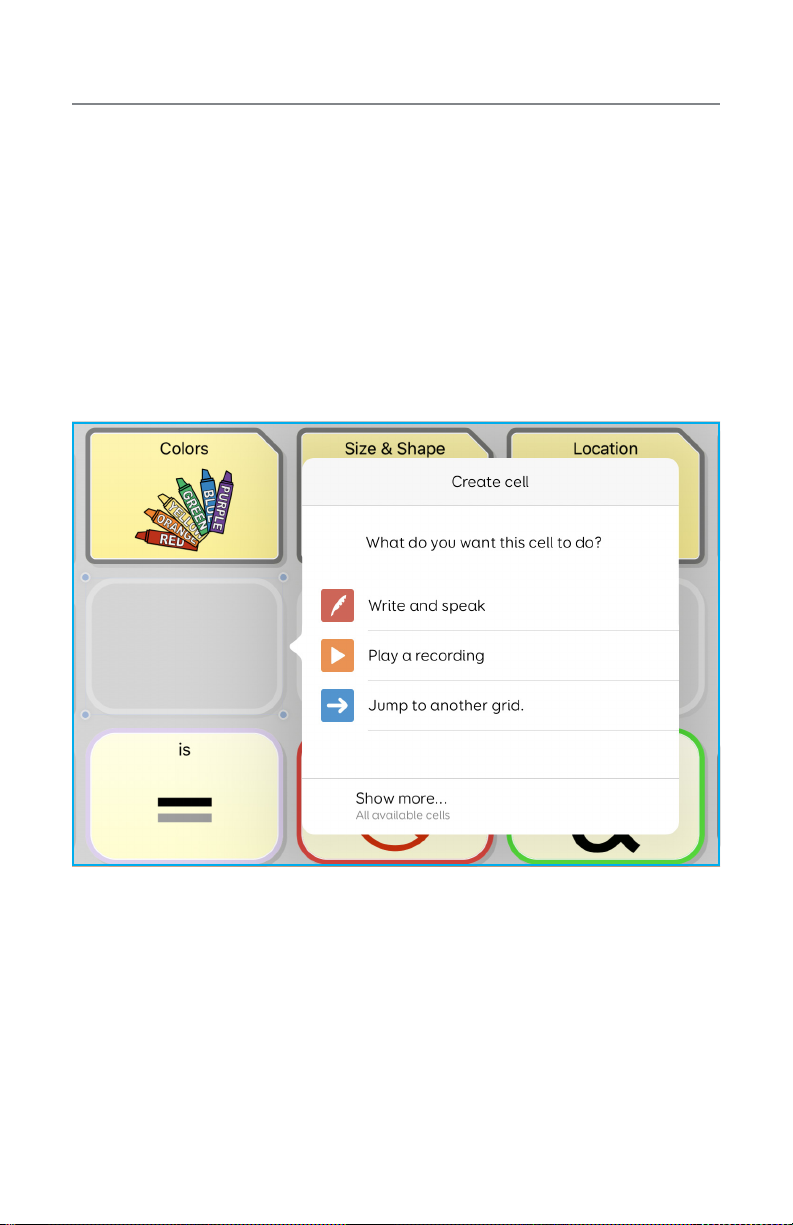
Link/jump to grid/page from new button............................ 7
Link/jump to grid/page from existing button.........................8
Hide/show cells ................................................9
Change button label, image and message (UniversalCORE/QuickStep)........ 10
Change button label, image and message (OnWord/Zoom) ............... 13
Edit/add to word lists (UniversalCORE/QuickStep) . . . . . . . . . . . . . . . . . . . . . . . . . 16
Edit/add to word lists (OnWord/Zoom) ................................ 17
Speech settings .............................................. 18
Change button access ......................................... 19
Take photos to use in a vocabulary set ............................20
Import photos from a computer to your device .....................21
Saved phrases................................................22
Editing with Grid ..............................................23
Back up and recover vocabulary sets .............................23
Pair the TTMT Speaker (SPKR) .................................. 24
Install communication software updates........................... 25
User information, passwords and notes ...........................26
Important Note: If these instructions do not match your current vocabulary set, please
contact Technical Support for assistance.

2
Hardware, buttons and features
wego 7A, 10A & 13A
If your wego A model does not have a Home button,
swipe up from the bottom of the screen.
4
3
1
2
Power
Press and hold this button (plus a volume button on some models) to
turn the device on or off.
Note: Press this button one time while the wego A is on to put it into “Sleep” mode.
This feature will conserve battery life when the wego A is not in use.
1
Volume
Press the volume toggle up or down to adjust volume levels.
2
Home
Tap to return to the home screen. If your wego A model does not have
a Home button, swipe up from the bottom of the screen.
3
Charging the device
Pull down the tab to reveal the device charging port. Charge device
and TTMT Speaker (SPKR) at night or when not in use. Please only
use a TTMT-approved charger with your device.
4

3
Guided Access
1. Start Guided Access by quickly triple-clicking the home button.
Note: If your wego A model does not have a home button, use the Power button as
shown on page 2.
2. Enter all 1’s when prompted for password.
3. Press Resume to continue Guided Access (top right) or press End to
stop Guided Access (top left).
4. Lock Menu (restrict use of the menu bar or specic buttons/pages):
Open Guided Access > use your nger to draw a circle around area/
buttons to restrict.
In addition to being a dedicated communication device, the wego A has
Guided Access, which keeps the user locked into the vocabulary software.
All dedicated devices come with Guided Access enabled, but you may
disable Guided Access after receiving your device. The wego A will remain
dedicated to communication even with Guided Access disabled.

4
User settings
Within Settings there are several features that allow you to customize your
device.
Note: Access to some of these features may be in your customized vocabulary set instead of
within Settings.
To access settings, select … Options > Settings.
• Access (e.g. highlighting and accessibility settings)
• Speech (voice selection, rate/pitch settings, and pronunciation)
• Writing (e.g. chat history)
Tip: Find a detailed explanation for each function by selecting Options > Settings > Help.
Edit mode
Edit Mode allows you to customize or modify vocabulary sets and buttons.
Tasks performed in Edit Mode include: create or edit a vocabulary button,
create and link new vocabulary sets, copy/paste buttons, hide buttons and
more.
1. Start Edit Mode: select … Options > Edit grids. The menu bar will
change to orange when edit mode is turned on.
2. Turn off Edit Mode: If you made edits, the top bar will be blue. You will
need to select Done > Finish Editing. The menu bar will turn back to
grey and it will then be back in user mode.

5
Copy and paste a button
Easily move a button and all its actions in just seconds!
1. Enter Edit Mode by selecting … Options > Edit grids.
2. Press select > Select desired button or buttons > Copy > Done > select
new location(s) > Paste > Done.
Note: Not for Word List pages.
Tip: You can also enter the button selection menu by pressing and holding the desired
button until it is activated.

6
Hide/show cells
If the user appears overwhelmed by too many buttons on a page, consider
hiding some of the buttons. Hide mode only hides buttons, it does not
delete them. In the future, when the individual is ready for more buttons on
the page, simply unhide the buttons.
1. Enter Edit Mode by selecting … Options > Edit grids.
2. Select desired button > Select > select more buttons if desired.
3. Open Style menu by selecting Style > Cell Accessibility > Hidden
> Done.
Note: Not for Word List pages.
Note: When going to change back select Touch and Switch

7
Edit word pronunciation
If the device mispronounces a word, adjust the pronunciation within
the settings and it will then always pronounce that word the way you
programmed it to.
Note: Any changed pronunciation will apply to all occurrences of the word whether in
buttons or typed text.
1. Open Settings by selecting … Options > Settings.
2. Speech > Pronunciation > select +to add new word.
3. In the Word box: type the word with the correct spelling (e.g. fajita).
4. In the Pronunciation box: type the word as you want it pronounced (e.g.
faheeta).
5. Select Test to hear how the word sounds.
6. When nished, select Save > Done.
Tip: Some words will require a bit of creativity to get a correct pronunciation. If this occurs,
try using space between numbers, commas, hyphens, or apostrophes with letters.

8
Link/jump to grid/page from new button
If you want to create a new page that includes new vocabulary, simply
copy an existing template so you do not have to start from scratch. After
you create your page, you can then link it to a button (see Link to a New
Page below).
1. Enter Edit Mode by selecting … Options > Edit grids.
2. Select blank cell > Jump to Another Grid >
a. Select the existing grid/page you want to link/jump to OR…
b. Select Copy Grid > choose “.new page template” > rename grid/page
> Done.
Note: Not for Word List pages.

9
Link/jump to grid/page from existing button
Linking allows existing buttons to open up to a new page with more
vocabulary. For example, a “snack” button can be linked to a new page
that lists out different snack options.
1. Enter Edit Mode by selecting … Options > Edit grids.
2. Select button you want to link/jump from > Edit Cell > Add Command
> Jumps > Jump To >
a. Select the existing grid/page you want to link/jump to OR…
b. Select Copy Grid > choose “.new page template” > rename new grid/
page > Done.
3. Select style > select button and rop down for styles will show > select
jump cell style pertaining to topic.

10
Change button label, image and message (UniversalCORE/QuickStep)
Easily customize your vocabulary sets and images so that it’s personalized.
Add favorite foods, places to go and family member names so that
everyday communication is quick and easy.
1. Enter Edit Mode by selecting … Options > Edit grids.
2. Select button to edit > Edit Cell.
3. Make the button speak by adding OR editing the “Write” command:
a. Add: Add Command > Chat and Writing > Write > type spoken
message > Done.
b. Edit: Select text area within the “Write” command > type the new
spoken message.
Note: Does not work for word list - only a single button.

11
4. Keep the message and label the same or make them different within the
“Write” command:
a. Keep the same: Toggle on Same as Cell Label OR…
b. Make different: Toggle off Same as Cell Label > change the button
label by selecting the current label on the cell > type new label >
Done.

12
5. Change the button image by selecting the current image on the cell >
choose a different symbol or Find Picture for more options > select one
of the following:
a. Symbols: Type label name or word to search symbols > select
desired symbol.
b. Photo Library: Select folder containing image > select desired photo.
c. Web Search: Type label name or word to search > Search > select
desired image.
d. Camera: Select front or back camera > press Capture to take photo.

13
Easily customize your vocabulary sets and images so that it’s personalized.
Add favorite foods, places to go and family member names so that
everyday communication is quick and easy.
Change button label, image and message (OnWord/Zoom)
1. Enter Edit Mode by selecting … Options > Edit grids.
2. Select button to edit > Edit Cell.
3. To change the label of the button, select the label on the cell > type new
label.
To change the picture on a button, select the picture on the cell, select
symbo icon, or nd picture. See page 17.

14
4. To change the picture of the button, select the picture on the cell >
choose a different symbol or Find Picture for more options > select
one of the following:
a. Symbols: Type label name or word to search symbols > select
symbol.
b. Photo Library: Select folder containing image > select desired photo.
c. Web Search: Type label name or word to search web > select image.
d. Camera: Select front or back camera > press Capture to take photo.

15
Independently program the vocabulary without entering Edit Mode.
1. Select Keyboard > type the message you want to save to a button.
2. Select myPhrases > select the category you want to save you message
under.
3. Select Save > touch inside any green button to choose the new buttons
location
Note: To delete, select Delete > touch inside the button you want to delete.
Onward Text Qwerty

16
Saved phrases
If you are using an OnWord or Zoom le, the Saved Phrase function
makes storing phrases extremely easy for the user to do independently.
Typing and saving phrases to buttons is a quick and easy way to prepare
in advance for anticipated conversations, such as doctor visits, shopping
trips, or presentations at school or work.
1. Select Keyboard > type the phrase or message you want to save to the
button > select MyPhrases > select the category or page you want to
store message.
3. Select Save > touch the button on the screen where you want to save
the phrase.
Note: If there are already phrases on that page, the screen will turn green. You can select
a button that already have a phrase in that location. It will add the new saved phrase
there, and the other phrases will shift right. If the page is already full, a more button will
appear on the bottom and it will automatically link/create the next page.
Delete a saved phrase or message
Press Delete > select the word/phrase button you would like to delete.

17
Edit/add to word lists button (UniversalCORE/QuickStep)
Add several words to a category at once.
1. Navigate to the desired grid/page.
2. Enter Edit Mode by selecting … Options > Edit Word List.
3. Select +to add new word.
4. Type the new word into the text box.
5. Select Find Picture to add a symbol or picture to the button.
6. Select Word List to return to main list > Done.
Note: Word list cell colors variate depending on what you are listing. If you are listing an
adjective the cell colors would be gray vs the peach colored which are nouns.

18
Edit/add to word lists (OnWord/Zoom)
Add several words to a category at once.
1. Navigate to the desired grid/page.
2. Enter Edit Mode by selecting … Options > Edit Word List.
3. Select +to add new word.
4. Type the new word into the text box.
5. Select Word List to return to main page > Done.
Other manuals for wego A
13
This manual suits for next models
3
Table of contents
Other Talk To Me Technologies Educational Equipment manuals
Popular Educational Equipment manuals by other brands

Qball
Qball Qball Quick setup guide

Copernicus
Copernicus Royal Inspiration Station Assembly guide

Experia
Experia IRiS Light Wand instruction manual

Digi Sport Instruments
Digi Sport Instruments MADT1 EDU manual

laerdal
laerdal Resusci Anne Advanced SkillTrainer user guide

VICEDO MARTI
VICEDO MARTI PRACTI-BABY PLUS PACK quick start guide