adafruit learning system MatrixPortal M4 User manual
Adafruit MatrixPortal M4
Created by Melissa LeBlanc-Williams
Last updated on 2021-08-09 02:02:07 PM EDT

2
5
9
9
9
10
10
11
11
11
12
12
12
13
13
13
14
14
16
16
17
17
19
21
21
21
24
25
28
28
28
30
30
30
32
32
33
33
33
38
40
41
42
43
47
47
48
48
48
48
48
Guide Contents
Guide Contents
Overview
Pinouts
Microcontroller and Flash
WiFi
HUB75 Connector
RGB Matrix Power
Sensors
Stemma QT Connector
Reset Pin
Debugging Interface
Serial UART Pins
Analog Connector/Pins
Power Pins
Status LED and NeoPixel
USB-C Connector
Buttons
Address E Line Jumper
Prep the MatrixPortal
Power Prep
Power Terminals
Panel Power
Board Connection
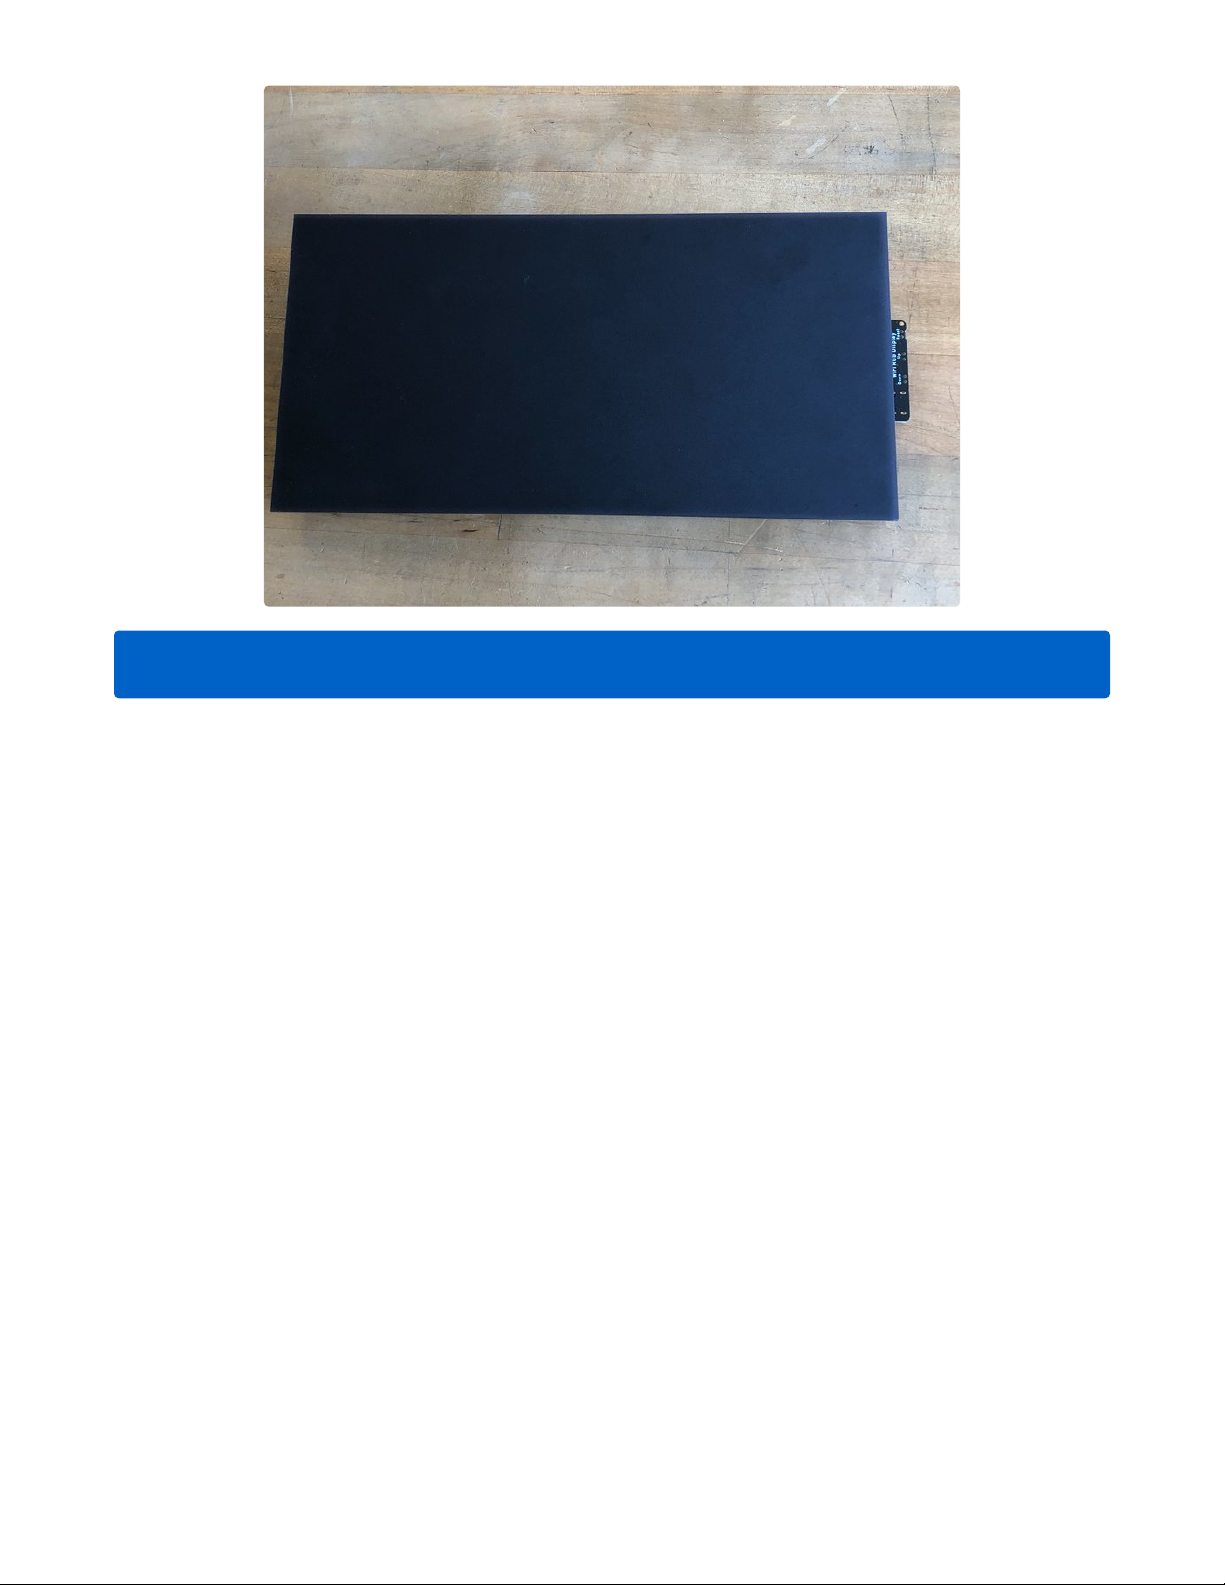
LED Matrix Diffuser
LED Diffusion Acrylic
Measure and Cut the Plastic
Uglu Dashes
Stand
Install CircuitPython
Set up CircuitPython Quick Start!
Further Information
What is CircuitPython?
CircuitPython is based on Python
Why would I use CircuitPython?
CircuitPython Setup
Adafruit CircuitPython Bundle
Internet Connect!
What's a secrets file?
Connect to WiFi
Requests
HTTP GET with Requests
HTTP POST with Requests
Advanced Requests Usage
WiFi Manager
MatrixPortal Library Overview
Network Branch
WiFi Module
Network Module
Graphics Branch
Matrix Module
Graphics Module
© Adafruit Industries https://learn.adafruit.com/adafruit-matrixportal-m4 Page 2 of 96

48
49
50
50
50
51
52
53
54
55
56
57
57
57
57
57
58
58
59
63
64
66
66
67
68
70
71
72
72
73
74
74
74
74
75
75
75
75
76
76
77
78
78
78
80
80
MatrixPortal Module
Library Demos
CircuitPython Pins and Modules
CircuitPython Pins
import board
I2C, SPI, and UART
What Are All the Available Names?
Microcontroller Pin Names
CircuitPython Built-In Modules
MatrixPortal Library Docs
CircuitPython RGB Matrix Library
CircuitPython BLE
CircuitPython BLE UART Example
On-Board Airlift Co-Processor - No Wiring Needed
Update the AirLift Firmware
Install CircuitPython Libraries
Install the Adafruit Bluefruit LE Connect App
Copy and Adjust the Example Program
Talk to the AirLift via the Bluefruit LE Connect App
Arduino IDE Setup
https://adafruit.github.io/arduino-board-index/package_adafruit_index.json
Using with Arduino IDE
Install SAMD Support
Install Adafruit SAMD
Install Drivers (Windows 7 & 8 Only)
Blink
Successful Upload
Compilation Issues
Manually bootloading
Ubuntu & Linux Issue Fix
Arduino Libraries
Install Libraries
Adafruit NeoPixel
Adafruit SPIFlash
Adafruit Protomatter
Adafruit LIS3DH
Adafruit GFX
WiFiNINA
Adafruit ImageReader
Adafruit PixelDust
Using the Protomatter Library
Include Protomatter Library
Setting Up Matrix Pin Usage
Create the Protomatter Object
Begin Protomatter Driver
Draw Shapes & Text Using Adafruit GFX
Adafruit_GFX is the same library that drives many of our LCD and OLED displays…if you’ve done other graphics
projects, you might already be familiar! And if not, we have a separate guide explaining all of the available
drawing functions (https://adafru.it/DtY). Most folks can get a quick start by looking at the “simple” and
© Adafruit Industries https://learn.adafruit.com/adafruit-matrixportal-m4 Page 3 of 96

80
81
83
87
88
88
90
93
94
94
94
94
“doublebuffer_scrolltext” examples and tweaking these for their needs.
Check Refresh Rate
Arduino Sand Demo
Protomatter Library
Using the Accelerometer
Arduino Usage
CircuitPython Usage
Updating ESP32 Firmware
Downloads
Files
Schematic
Fab Print
© Adafruit Industries https://learn.adafruit.com/adafruit-matrixportal-m4 Page 4 of 96

Overview
Folks love Adafruit's wide selection of RGB matrices (https://adafru.it/NAX) and accessories for making
custom colorful LED displays... and Adafruit RGB Matrix Shields and FeatherWings can be quickly soldered
together to make the wiring much easier.
But what if we made it
even easier
than that? Like, no solder, no wiring, just instant plug-and-play? Dream
no more - with the Adafruit Matrix Portal add-on for RGB Matrices , there has never been an easier way to
create powerful internet-connected LED displays.
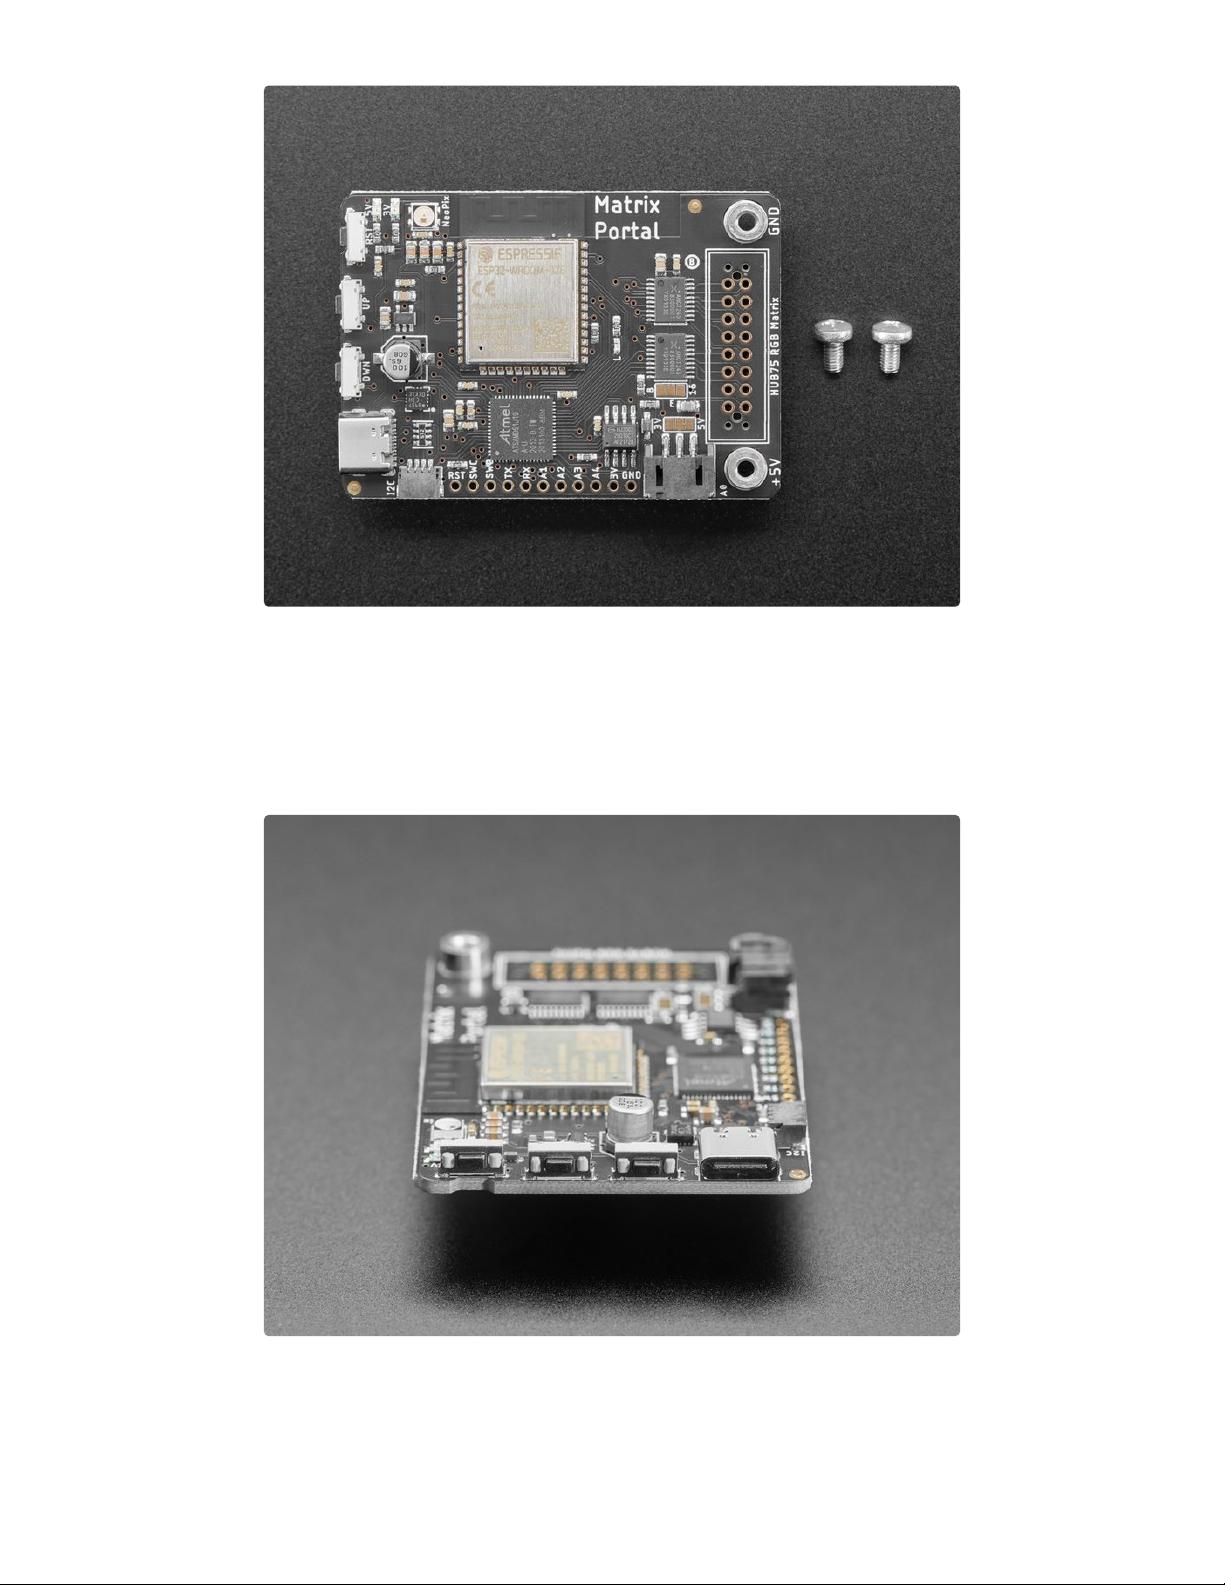
Plug The Matrix Portal directly into the back of any HUB-75 compatible display (all the ones we stock will
work) from 16x32 up to 64x64 (https://adafru.it/NAX)! Use the included screws to attach the power cable to
the power plugs with a common screwdriver, then power it with any USB C power supply. (For larger
© Adafruit Industries https://learn.adafruit.com/adafruit-matrixportal-m4 Page 5 of 96

projects, power the matrices with a separate 5V power adapter)
Then code up your project in CircuitPython (https://adafru.it/L7b) or Arduino (https://adafru.it/MNa), the
Adafruit Protomatter matrix library works great on the SAMD51 chipset, knowing that you've got the wiring
and level shifting all handled. Here's what you get:
ATSAMD51J19 Cortex M4 processor, 512KB flash, 192K of SRAM, with full Arduino or CircuitPython
support
ESP32 WiFi co-processor with TLS support and SPI interface to the M4, with full Arduino or
CircuitPython support
USB Type C connector for data and power connectivity
I2C STEMMA QT connector for plug-n-play use of any of our STEMMA QT devices or
sensors (https://adafru.it/NmD) can also be used with any Grove I2C devices using this adapter
cable (https://adafru.it/Ndk)
JST 3-pin connector that also has analog input/output, say for adding audio playback to
projects (https://adafru.it/Gpf)
LIS3DH accelerometer for digital sand projects or detecting taps/orientation.
GPIO breakouts including 4 analog outputs with PWM and SPI support for adding other hardware.
Address E line jumper for use with 64x64 matrices (check your matrix to see which pin is used for
address E!
Two user interface buttons + one reset button
Indicator NeoPixel and red LED
Green power indicator LEDs for both 3V and 5V power
2x10 socket connector fits snugly into 2x8 HUB75 ports without worrying about 'off by one' errors.
© Adafruit Industries https://learn.adafruit.com/adafruit-matrixportal-m4 Page 6 of 96
The Matrix Portal uses an ATMEL (Microchip) ATSAMD51J19, and an Espressif ESP32 Wi-Fi coprocessor
with TLS/SSL support built-in. The M4 and ESP32 are a great couple - and each bring their own strengths
to this board. The SAMD51 M4 has native USB, so it can show up like a disk drive, act as a MIDI or HID
keyboard/mouse, and of course bootload and debug over a serial port. It also has DACs, ADC, PWM, and
tons of GPIO, so it can handle the high speed updating of the RGB matrix.
Meanwhile, the ESP32 has secure WiFi capabilities, and plenty of Flash and RAM to buffer sockets. By
letting the ESP32 focus on the complex TLS/SSL computation and socket buffering, it frees up the SAMD51
© Adafruit Industries https://learn.adafruit.com/adafruit-matrixportal-m4 Page 7 of 96

to act as the user interface. You get a great programming experience thanks to the native USB with files
available for drag-n-drop, and you don't have to spend a ton of processor time and memory to do SSL
encryption/decryption and certificate management. It's the best of both worlds!
© Adafruit Industries https://learn.adafruit.com/adafruit-matrixportal-m4 Page 8 of 96

Pinouts
There are so many great features on the Adafruit MatrixPortal M4. Let's take a look at what's available!
Microcontroller and Flash
The main processor chip is the ATSAMD51J19 Cortex
M4 running at 120MHz with 3.3v logic/power. It has 512KB
of Flash and 192KB of RAM.
We also include 2 MB of QSPI Flash for storing images,
sounds, animations, whatever!
WiFi
© Adafruit Industries https://learn.adafruit.com/adafruit-matrixportal-m4 Page 9 of 96
The WiFi capability uses an Espressif ESP32 Wi-Fi
coprocessor with TLS/SSL support built-in.
The ESP32 uses the SPI port for data, and also uses a CS
pin ( board.ESP_CS or Arduino 33 ), Ready/Busy pin
(board.ESP_BUSY or Arduino 31 ), and reset pin
(board.ESP_RESET or Arduino 30 )
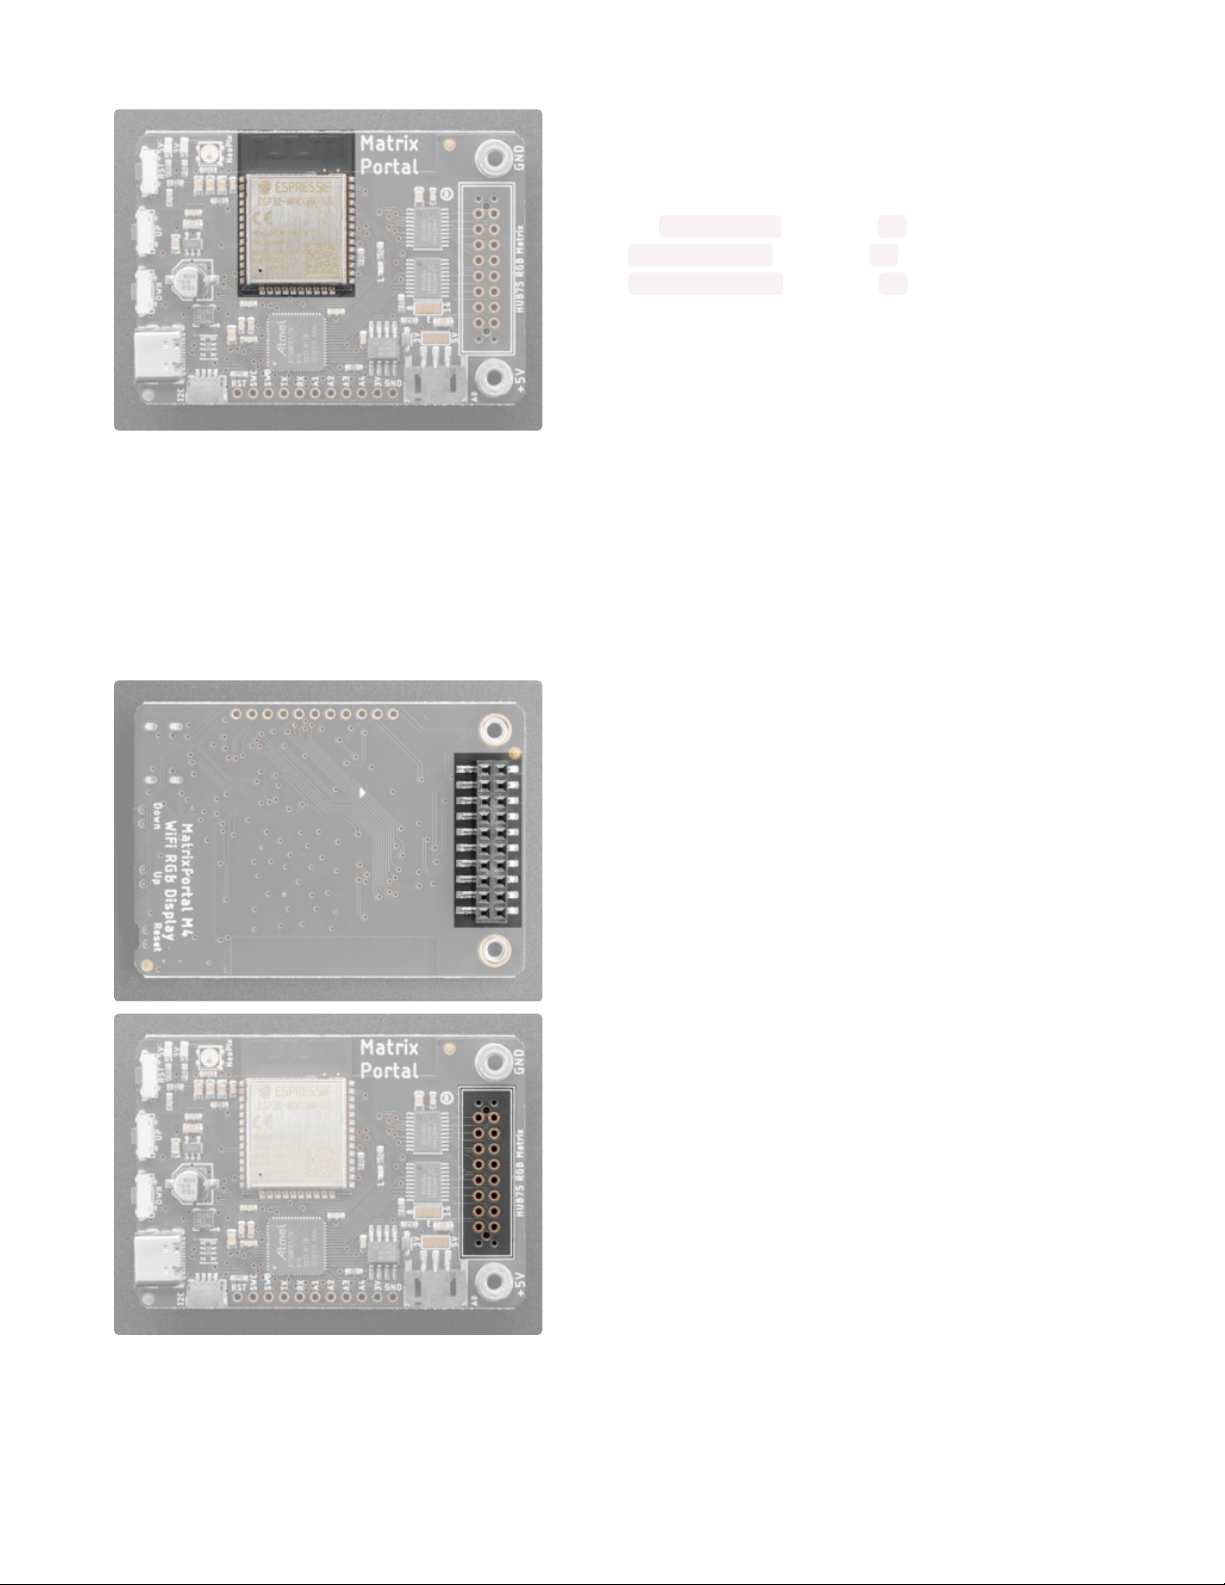
HUB75 Connector
There is a 2x8 pin HUB75 connector on the reverse side
that plugs directly into the HUB75 port on your RGB Matrix.
The socket itself is 2x10 so that it fits snug and lined up in
a 2x8 IDC socket. Otherwise its easy to get it 'off by one'
RGB Matrix Power
© Adafruit Industries https://learn.adafruit.com/adafruit-matrixportal-m4 Page 10 of 96
There are +5V and Ground screw terminals on either side
of the HUB75 connector. These provide power to the RGB
Matrix.
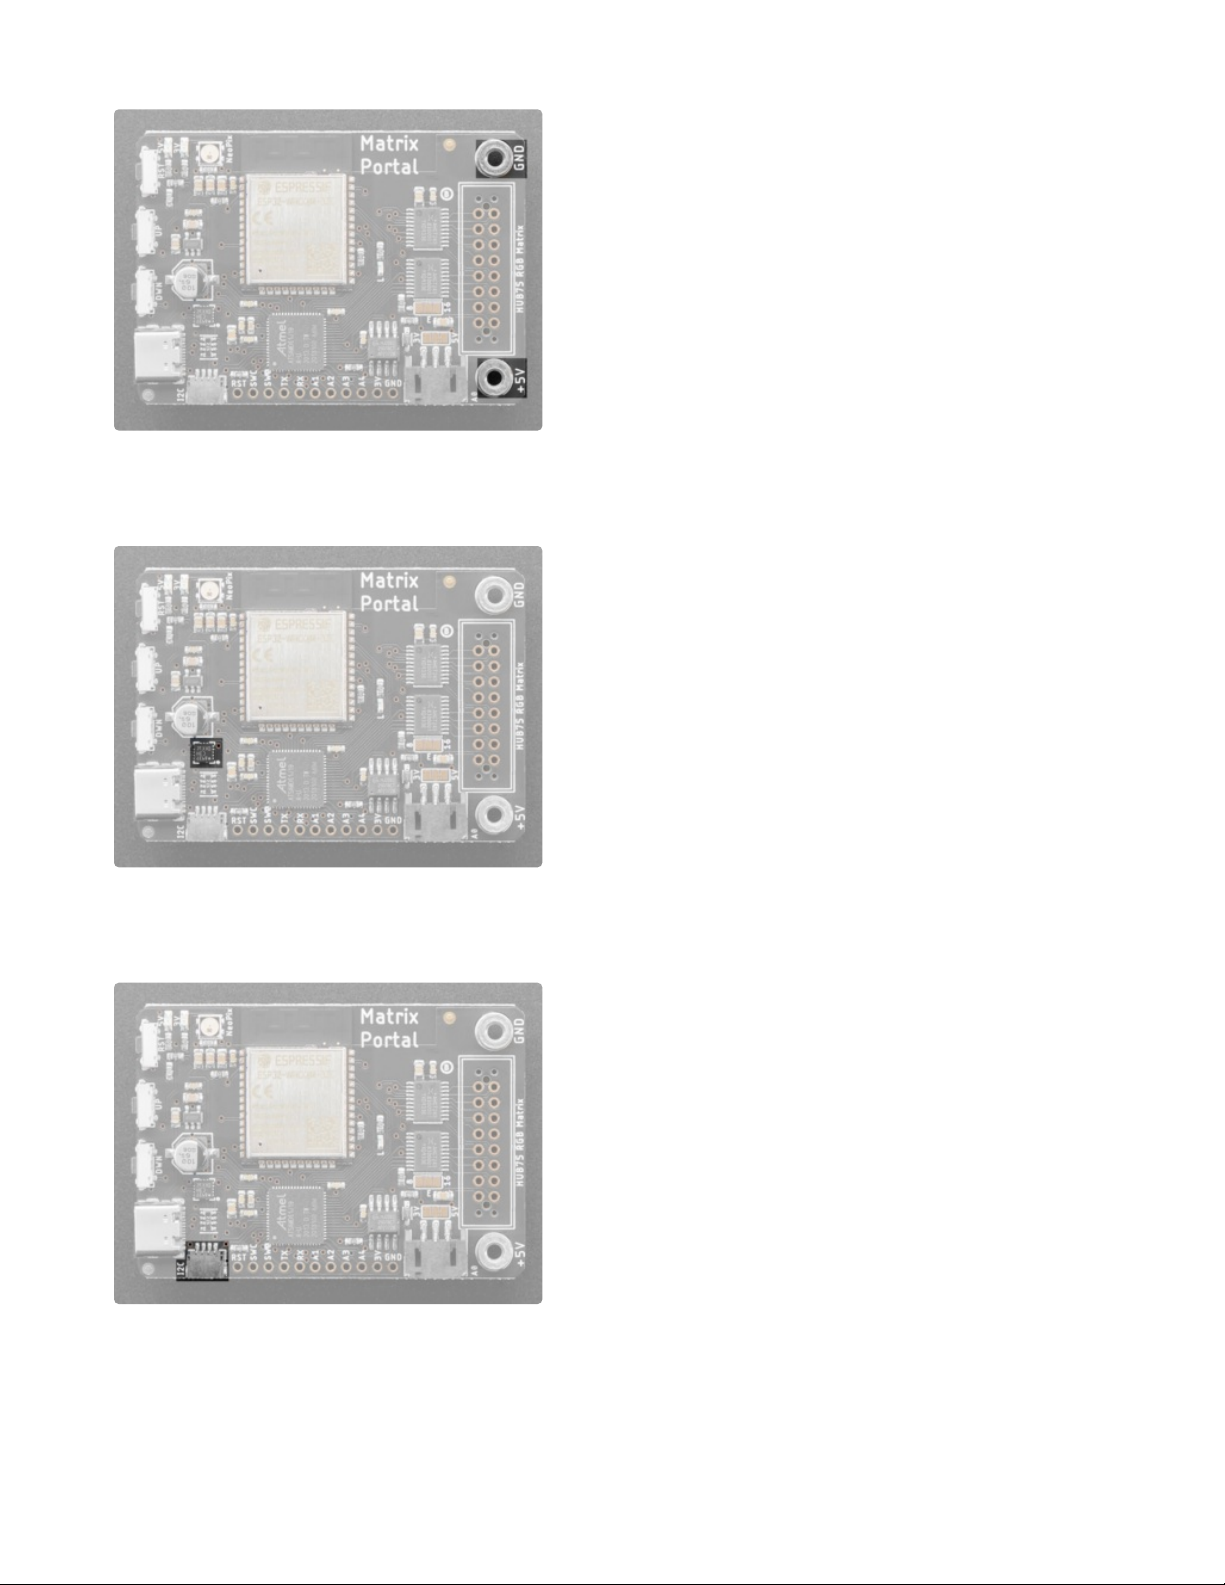
Sensors
The MatrixPortal M4 includes a LIS3DH Triple-Axis
Accelerometer. The accelerometer is connected via the
I2C bus.
Please note the address of the accelerometer is 0x19 not
0x18 which is the default in our libraries.
Stemma QT Connector
There is a 4-pin Stemma QT connector on the left. The
I2C has pullups to 3.3V power and is connected to the
LIS3DH already.
Reset Pin
© Adafruit Industries https://learn.adafruit.com/adafruit-matrixportal-m4 Page 11 of 96

RST is the Reset pin. Tie to ground to manually reset the
ATSAMD51, as well as launch the bootloader manually.
Debugging Interface
If you'd like to do more advanced development, trace-
debugging, or not use the bootloader, we have the SWD
interface exposed.
Serial UART Pins
The TX pin and RX pin are for serial communication with
the SAMD51 microcontroller and can be used to connect
various peripherals such as a GPS.
The RX pin is attached to board.RX and Arduino 0 and
the TX pin is attached to board.TX and Arduino 1.
Analog Connector/Pins
© Adafruit Industries https://learn.adafruit.com/adafruit-matrixportal-m4 Page 12 of 96
On the bottom side towards the right, there is a connector
labeled A0. This is a 3-pin JST analog connector for
sensors or NeoPixels, analog output or input
Along the bottom there are also pins labeled A1 through
A4 .
All of these pins can be used for analog inputs or digital
I/O.
Power Pins
3V is the output from the 3.3V regulator, it can supply
500mA peak.
GND is the common ground for all power and logic.
Status LED and NeoPixel
There are two LEDs on the board.
There is the RGB status NeoPixel labeled "STATUS". It is
connected to board.NEOPIXEL or Arduino 4
As well, there is the D13 LED. This is attached
to board.L and Arduino 13
USB-C Connector
© Adafruit Industries https://learn.adafruit.com/adafruit-matrixportal-m4 Page 13 of 96

There is one USB port on the board.
On the left side, towards the bottom, is a USB Type
C port, which is used for powering and programming both
the board and RGB Matrix.
Buttons
There are three buttons along the left side of the
MatrixPortal M4.
The reset button is located in the top position. Click it
once to re-start your firmware. Click twice to enter
bootloader mode.
The up button is located in the middle and is attached
to board.BUTTON_UP and Arduino 2.
The down button is located on the bottom and is attached
to board.BUTTON_DOWN and Arduino 3.
The up and down buttons do not have any pull-up
resistors connected to them and pressing either of them
pulls the input low.
Address E Line Jumper
This jumper is used for use with 64x64 matrices and is
either connected to pin 8 or pin 16 of the HUB75
connector. Check your matrix to see which pin is used for
address E.
You can close the jumper by using your soldering iron to
melt a blob of solder on the bottom solder jumper so the
middle pad is 'shorted' to 8.
(This is compatible with 64x64
matrices in the Adafruit store. For 64x64 matrices from
other sources, you might need to use 16 instead, check
the datasheet of your display.)
© Adafruit Industries https://learn.adafruit.com/adafruit-matrixportal-m4 Page 14 of 96

© Adafruit Industries https://learn.adafruit.com/adafruit-matrixportal-m4 Page 15 of 96
Prep the MatrixPortal
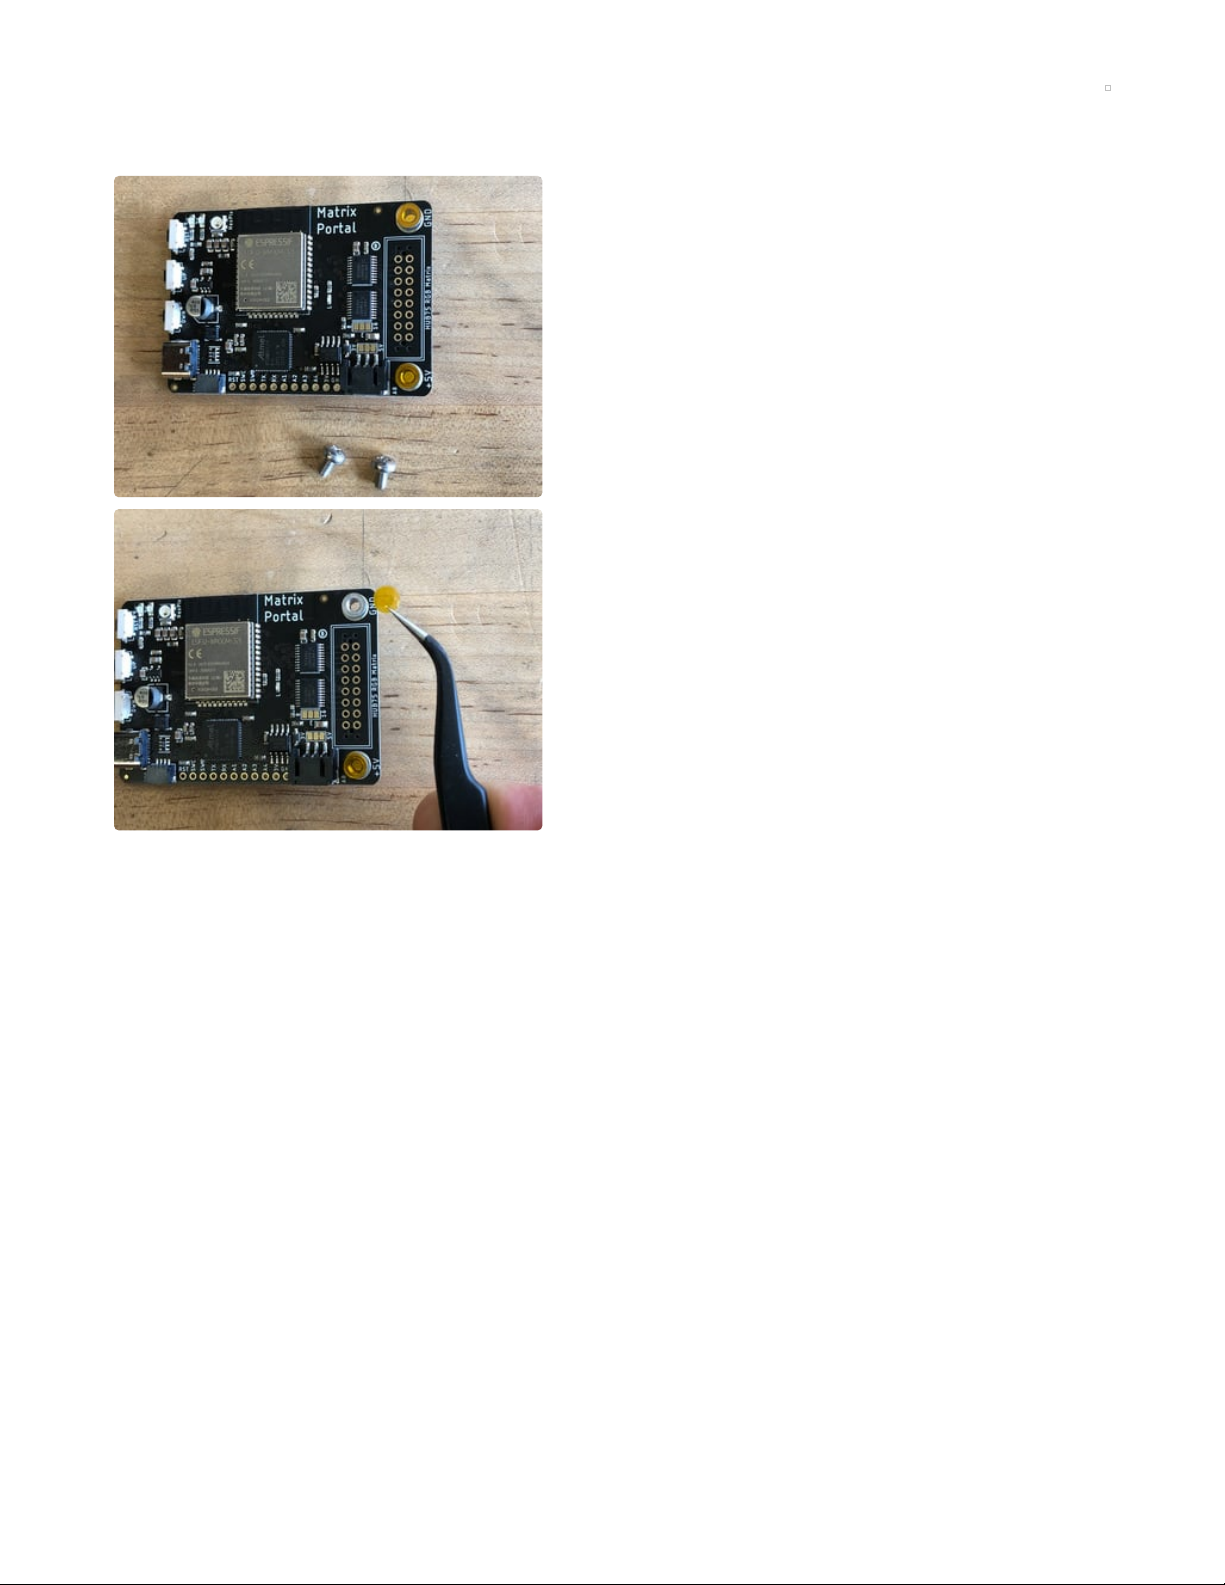
Power Prep
The MatrixPortal supplies power to the matrix display
panel via two standoffs. These come with protective tape
applied (part of our manufacturing process) which MUST
BE REMOVED!
Use some tweezers or a fingernail to remove the two
amber circles.
© Adafruit Industries https://learn.adafruit.com/adafruit-matrixportal-m4 Page 16 of 96
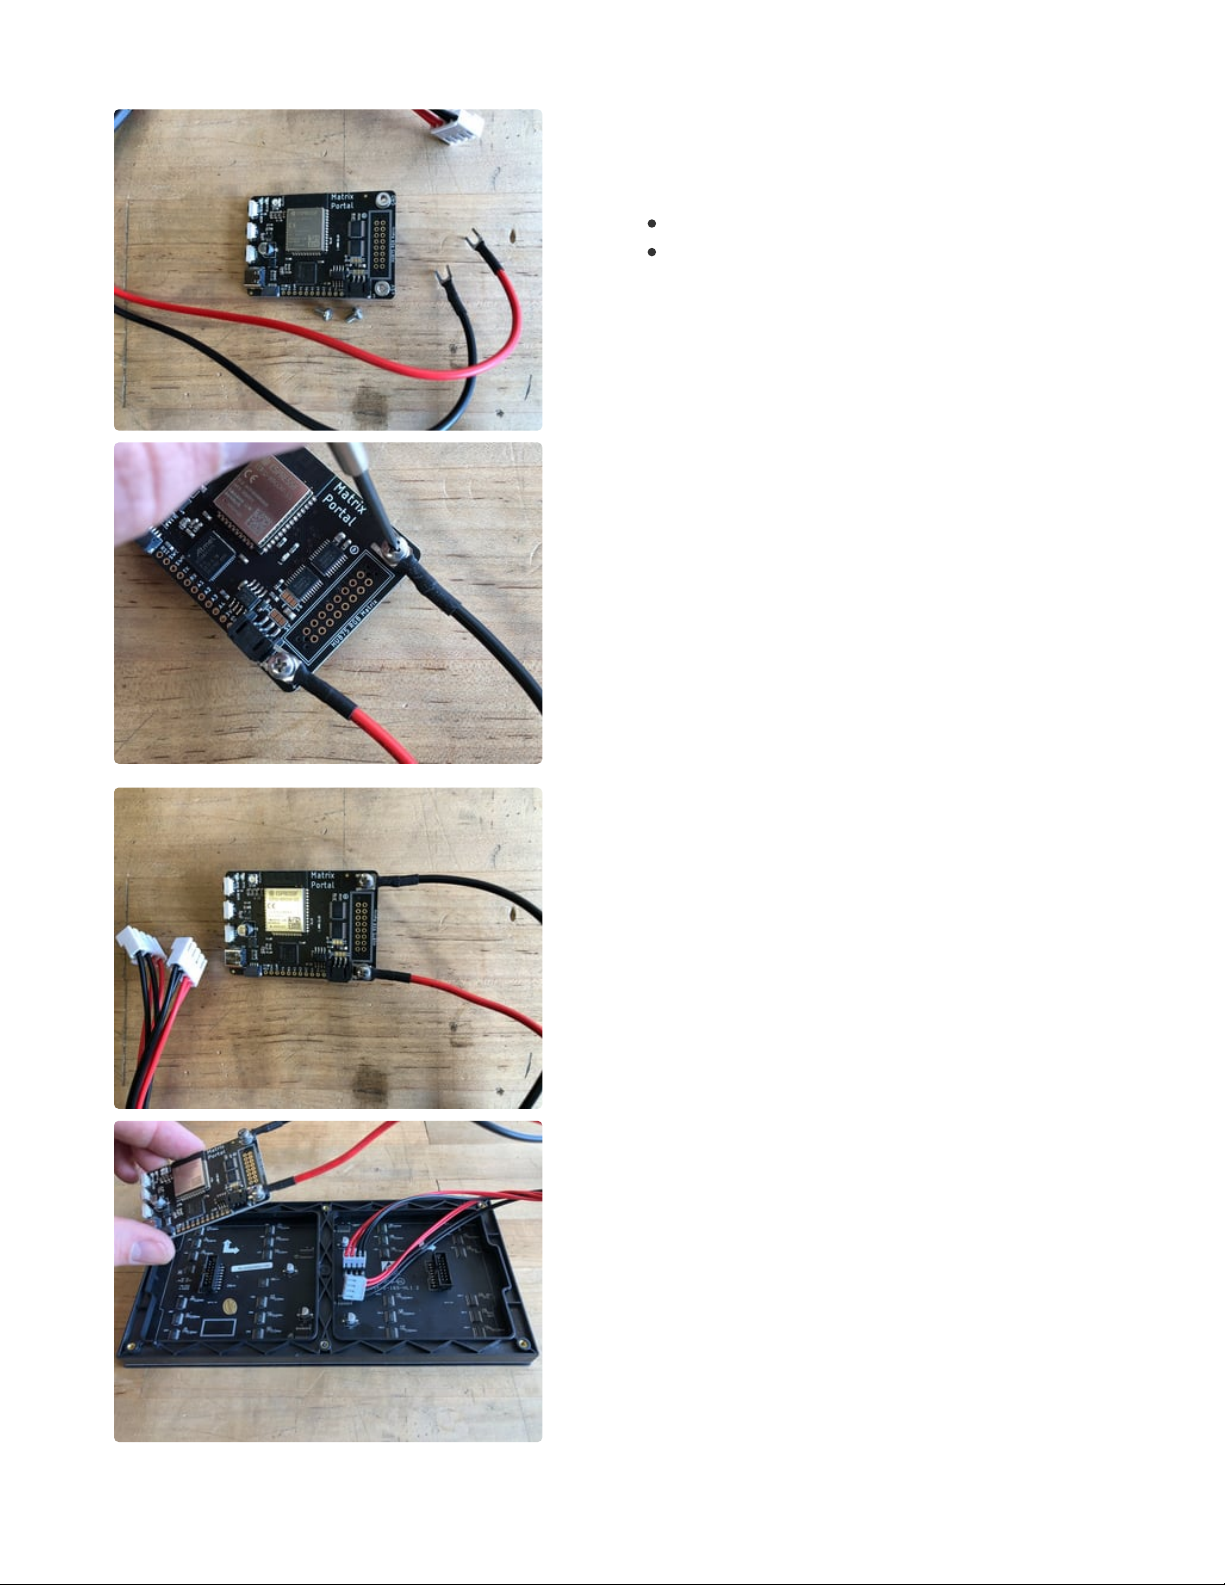
Power Terminals
Next, screw in the spade connectors to the corresponding
standoff.
red wire goes to +5V
black wire goes to GND
Panel Power
Plug either one of the four-conductor power plugs into the
power connector pins on the panel. The plug can only go
in one way, and that way is marked on the board's
silkscreen.
© Adafruit Industries https://learn.adafruit.com/adafruit-matrixportal-m4 Page 17 of 96

© Adafruit Industries https://learn.adafruit.com/adafruit-matrixportal-m4 Page 18 of 96
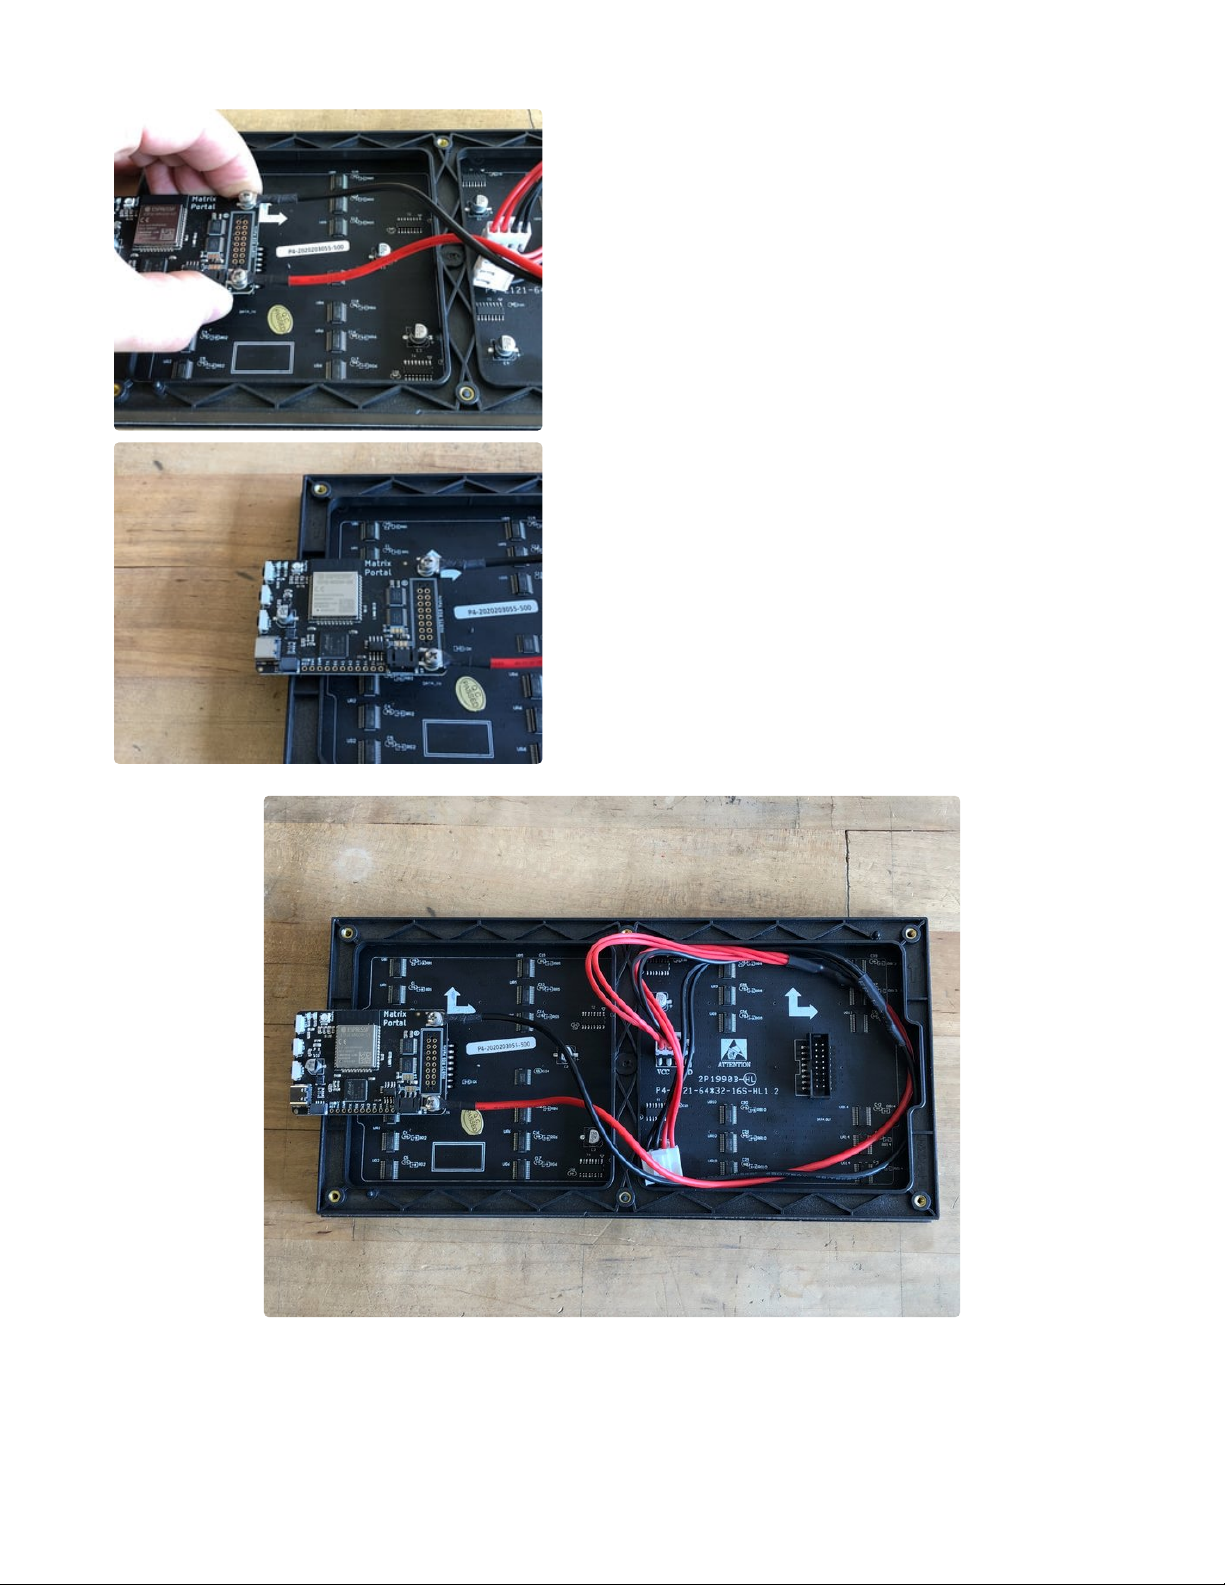
Board Connection
Now, plug the board into the left side shrouded 8x2
connector as shown. The orientation matters, so take a
moment to confirm that the white indicator arrow on the
matrix panel is oriented pointing up and right as seen
here and the MatrixPortal overhangs the edge of the
panel when connected. This allows you to use the edge
buttons from the front side.
Check nothing is impeding the board from plugging in
firmly. If there's a plastic nub on the matrix that's keeping
the Portal from sitting flat, cut it off with diagonal cutters
© Adafruit Industries https://learn.adafruit.com/adafruit-matrixportal-m4 Page 19 of 96
For info on adding LED diffusion acrylic, see the page LED Matrix Diffuser.
© Adafruit Industries https://learn.adafruit.com/adafruit-matrixportal-m4 Page 20 of 96
Table of contents
Other adafruit learning system Educational Equipment manuals


Popular Educational Equipment manuals by other brands


Copernicus
Copernicus LLS100 Assembly guide

Talk To Me Technologies
Talk To Me Technologies wego A user guide

LION
LION GASTRAINER SYSTEM user manual

Oregon Scientific
Oregon Scientific SmartGlobe Explorer AR user manual

Nasco Healthcare
Nasco Healthcare Airway Larry instruction manual

ADEEPT
ADEEPT Ultimate Kit for Arduino MEGA 2560 manual