Promote functional communication!
Promote functional communication!Promote functional communication!
Promote functional communication!
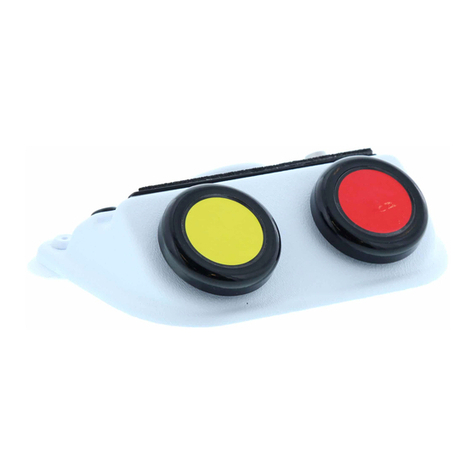
Our two switch communicator has built-in visuals in form of the colored buttons and
mirror to assist and encourage production of utterances followed by auditory
feedback to raise self-awareness The red button allows the user to record 4
messages up to 5 seconds each and a green switch for playback of messages This
provides auditory feedback and promotes functional communication with intent,
encompassing language structure and/or articulation Size: 8"L x 12"W x 12½"H
Requires 4 AA Batteries Weight: 2 lbs
Operation:
Operation:Operation:
Operation:
1 The Language Facilitator requires 4 AA Alkaline batteries to operate Use alkaline
batteries only (e g Duracell or Energizer brand) Do not use rechargeable
batteries or any other type of batteries because they supply lower voltage and the
unit will not perform properly Never mix old and new batteries together or
different brands or types together
2 The battery compartment is located on the bottom of the unit Carefully remove
the small screw from the battery compartment and slide the battery compartment
cover off Observing polarity, install four AA size batteries into the holder Replace
the battery compartment cover and replace the screw
3 Turn the unit on by turning the ON/OFF/VOLUME knob (black knob located on the
back right side) clockwise You will hear an audible click when the unit turns on
4 Next, turn the (message knob with the “1 - 2 - 3 - 4” label next to it) so that the
cut in indicator portion is pointing towards the “1” This indicated that you will be
recording the 1st of four messages
5 To record, simply press and hold the round red “RECORD” button on the front of
the unit While continuing to hold the red button down, speak your message (the
microphone is the small black “fuzzy” circle in between the base and the mirror)
Make sure that your recording is 5 seconds or less Release the red button when
you finish recording
6 To play back your message, press the round green button It is not necessary to
continue holding the green button down while listening to the message The unit
will continue to playback the entire message, even if pressure on the green
button is released
Important Notes:
Important Notes:Important Notes:
Important Notes:
• The memory of this unit is capable of holding up to a total of 20 seconds of
speech information Each message should be 5 seconds or shorter
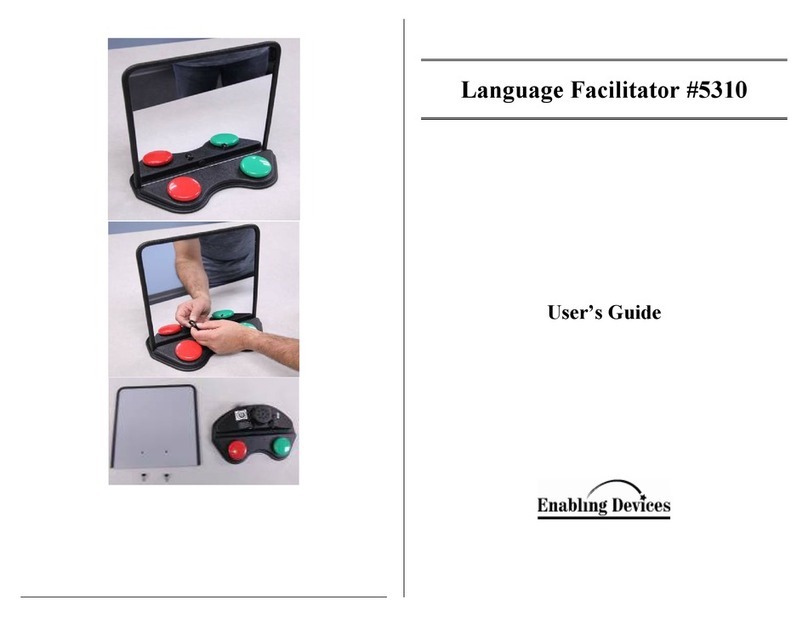
• The mirror is made out of high impact plastic It is held onto the unit via two
thumb screws on the front of the unit See photos on back of guide for removable
and installation Please Note: Do not over-tighten the thumb screws or damage
will occur
7 Now turn the message knob so that the indicator points towards the “# 2 ”
Record your second message the same way Do the same for message #3 and
message #4
8 You do not need to record all four messages if it is not appropriate for your
needs Make sure that all messages you do record are 5 seconds in length or
shorter
9 The unit will retain recorded information indefinitely, even if the batteries are
disconnected Previously stored information will be erased only when a new
recording is performed
Mirror Attachment:
Mirror Attachment:Mirror Attachment:
Mirror Attachment:
The removable mirror is attached to the base with two thumb screws Simply place the
mirror inside the recessed grove in the front of the communicator and line up the two
screw holes in the mirror and the base Next screw in each thumb screw until finger
tight (See photos on back page of this guide)
Troubleshooting:
Troubleshooting:Troubleshooting:
Troubleshooting:
Problem:
Problem:Problem:
Problem: The unit fails to operate, or operates incorrectly
Action #1:
Action #1: Action #1:
Action #1: Make sure that the four AA batteries are fresh and installed according to
proper battery polarity
Action #2:
Action #2: Action #2:
Action #2: Make sure that the unit is turned ON and it turned up to an audible
volume
Action #3:
Action #3:Action #3:
Action #3: Make sure there is no dirt or obstacles between the round plates and the
housing of the unit
Action #4:
Action #4: Action #4:
Action #4: Make sure that you are holding the red RECORD button down while
recording
Action #5:
Action #5: Action #5:
Action #5: Make sure that each message is 5 seconds in length or less
Action #6:
Action #6:Action #6:
Action #6: Disconnect the power by removing one of the batteries for 20 seconds in
order to reset the unit Re-install the batteries If the unit does not work correctly,
replace all the batteries paying careful attention to proper polarity
Care of the Unit:
Care of the Unit:Care of the Unit:
Care of the Unit:
The Language Facilitator can be wiped clean with any household multi-purpose, non-
abrasive cleaner and disinfectant
Do not use
Do not useDo not use
Do not use abrasive cleaners, as they will scratch the surface of the unit
Do not submerge
Do not submergeDo not submerge
Do not submerge the unit, as it will damage the electrical components 5
55
5/31
/31/31
/31/17
/17/17
/17
