T&R Sports CT100BSTX User manual

USER MANUAL
Thank you for purchasing our product.
IN CASE OF MISSING OR BROKEN
PARTS, PLEASE CONTACT PLACE OF
PURCHASE FOR ASSISTANCE.
Warning: The supplier is not liable for any injuries that may
occur when using the trampoline.

CONTENTS
GENERAL SAFETY--------------------------------------------------------------1
SAFE USE INSTRUCTIONS...................................................................................................................1
USE OF TRAMPOLINE...........................................................................................................................2
TIPS TO REDUCE THE RISK OF ACCIDENTS.....................................................................................3
ADVISORY PRECAUTIONS WHILE USING THE TRAMPOLINE.........................................................4
DANGER IDENTIFICATION....................................................................................................................5
TRAMPOLINE TECHNIQUES-------------------------------------------------6
BASIC SKILLS........................................................................................................................................6
ADVANCED SKILLS...............................................................................................................................7
TRAMPOLINE ASSEMBLY----------------------------------------------------8
NET ASSEMBLY----------------------------------------------------------------14
CARE AND MAINTENANCE-------------------------------------------------18
Once a person on the trampoline
Max.User weight 6FT(80kgs) 8FT /10FT(100kgs)
Max.User weight 12FT /13FT/14FT/15FT/16FT(120kgs)

- 1 -
GENERAL SAFETY
SAFE USE INSTRUCTIONS
BEFORE YOU BEGIN USING YOUR TRAMPOLINE: Read and understand the
information provided in this manual. As with all physical sports and activities there is the
risk of participants receiving an injury. To ensure your future enjoyment and the prevention
of injury, be sure to follow appropriate safety rules and tips.
ALWAYS CONSULT A DOCTOR/PHYSICIAN BEFORE PERFORMING ANY KIND OF
PHYSICAL ACTIVITY.
ALWAYS CHECK YOUR TRAMPOLINE BEFORE USE, PAYING SPECIFIC ATTENTION TO
ALL THE BOLTS, JUMP MAT AND PAD POSITION. DO NOT USE IF ANY PARTS ARE M
ISSING OR LOOK LIKE THEY SHOW WEAR AND TEAR.
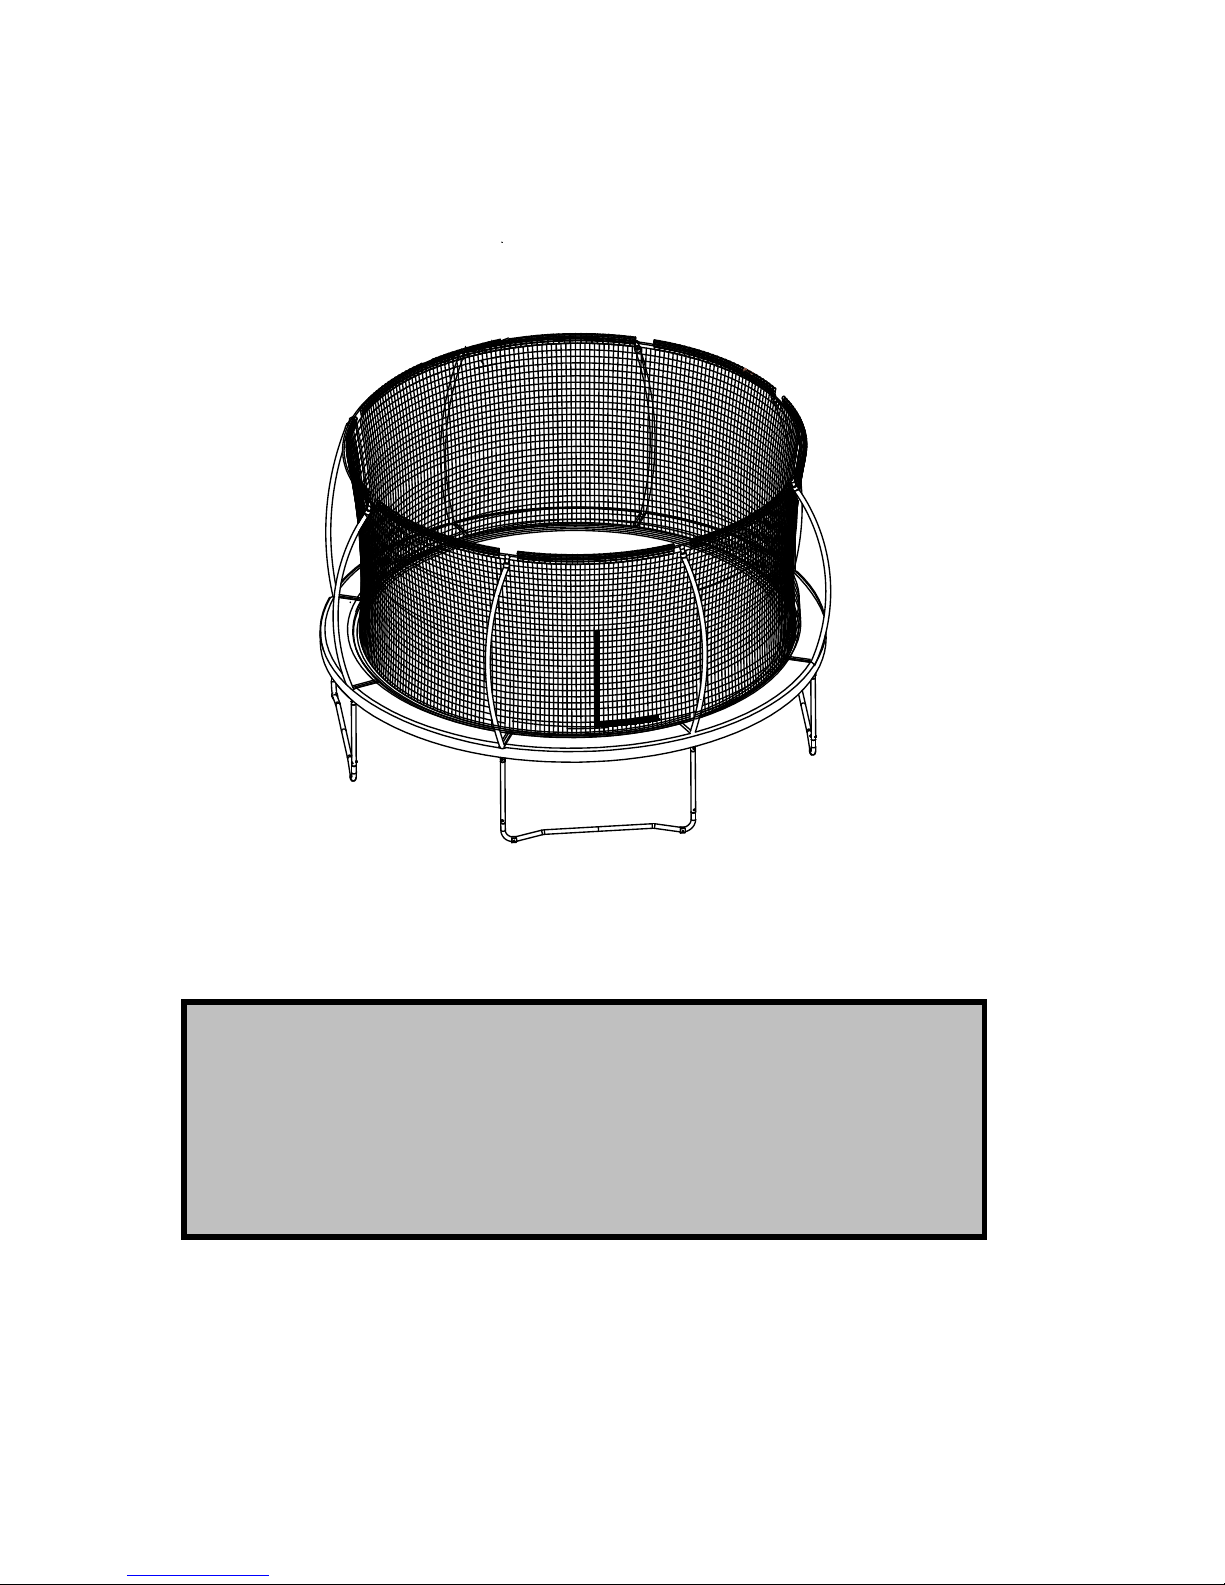
ALWAYS USE THE PROVIDED SAFETY NET AND FRAME PAD WHEN USING THE TRA
MPOLINE.
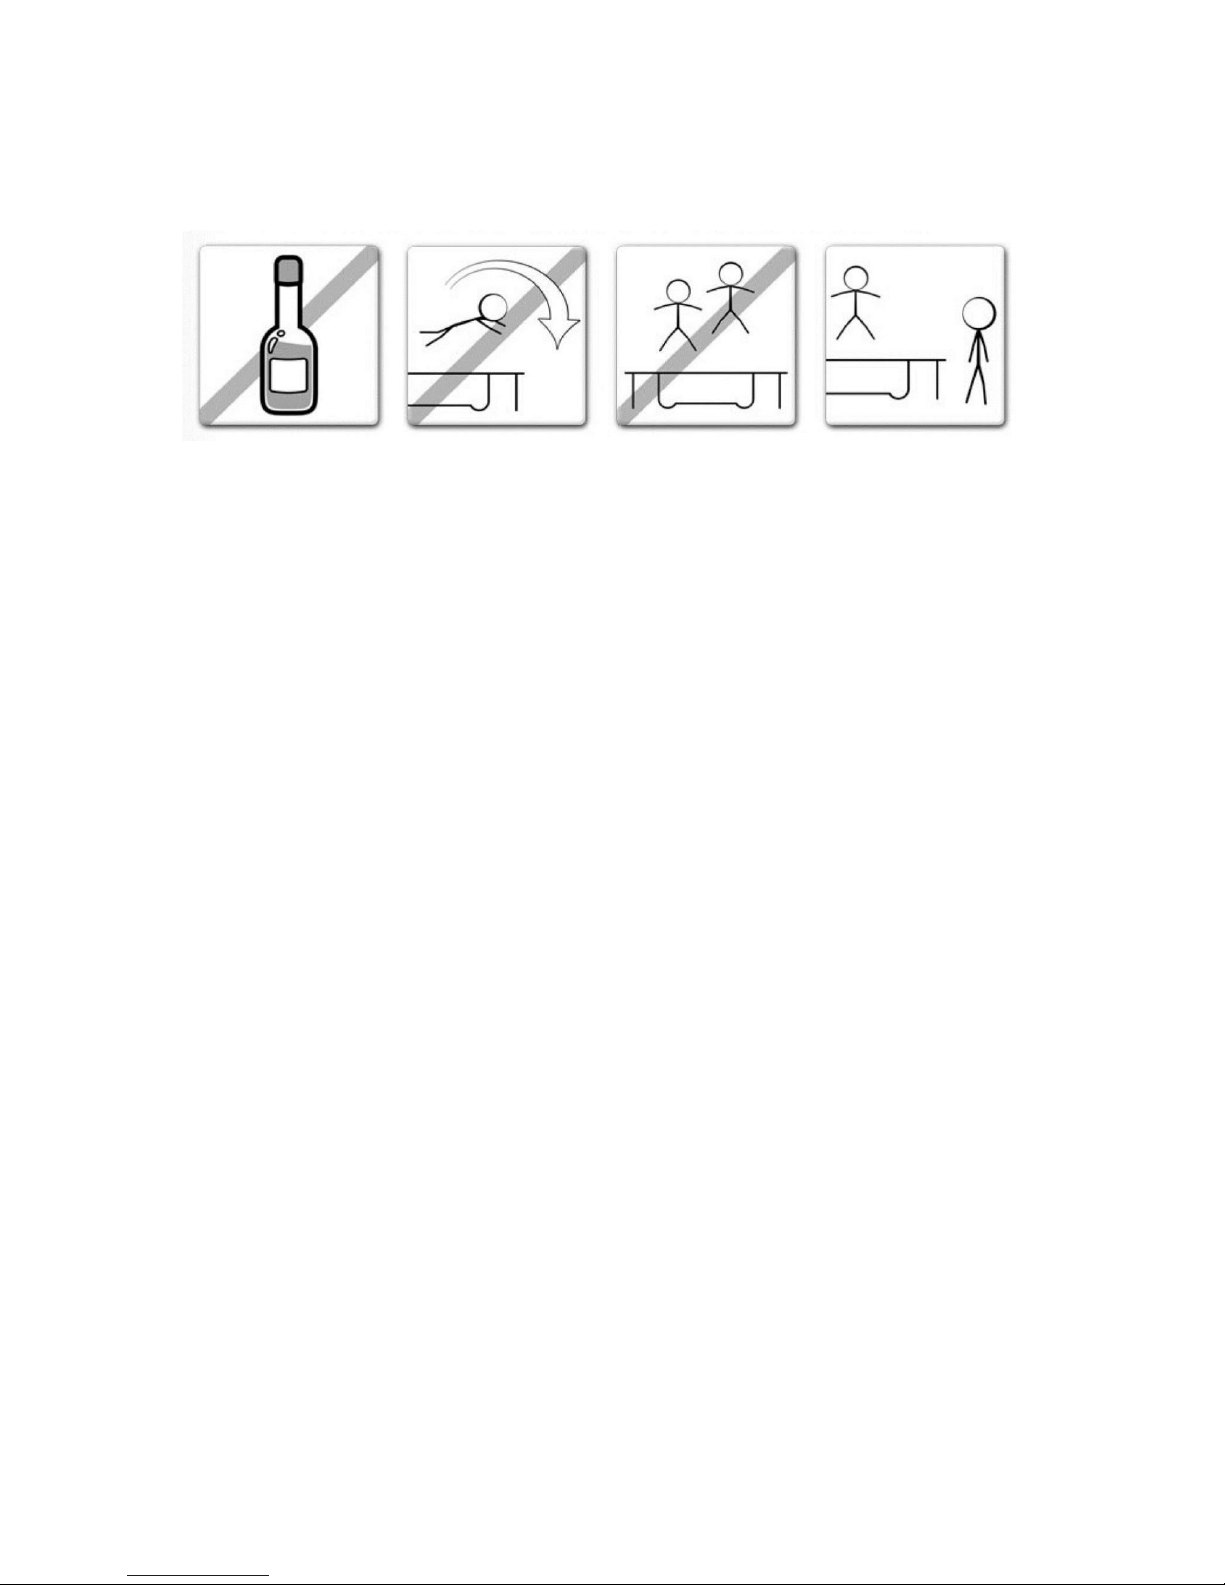
ALWAYS ENSURE THAT THE TRAMPOLINE IS USED BY ONLY ONE PERSON
AT A TIME. USE BY MORE THAN ONE PERSON CAN CAUSE SERIOUS INJURY.
REGARDLESS OF THE SKILL OF THE USER THERE SHOULD ALWAYS BE
KNOWLEDGEABLE AND MATURE SUPERVISION.
Keep away object which could interfere with the user. Maintain a clear area around,
above and under the trampoline.
Learn the fundamental bounces and body positions thoroughly before trying more
advanced skills.
Stop exercising immediately should you feel unwell or if you feel pain in your joints and
muscles. Dizziness is a sign of fatigue. You should stop bouncing and lay down on the
ground should you feel dizzy.
When using this trampoline ensure appropriate clothing is worn, preferably close fitting
sports-wear and socks. NEVER WEAR SHOES ON THE MAT.
Please be aware that because the trampoline is spring based it will allow the user to
jump to a greater height than that on the ground, please bear this in mind and ensure
that you are comfortable bouncing at low heights first.
Proper assembly, care and maintenance of product, safety tips, warnings, and proper
techniques for jumping on your trampoline are included in this manual for your safety
and an extended product life span. All users and supervisors should therefore familiarize
themselves with these instructions. Anybody who chooses to use the trampoline must be
aware of their own limitations with regards to performing skills on this trampoline.
The safety enclosure is there to prevent the user falling off the trampoline, and is not to
be jumped into deliberately.
Trampoline should be assembled on grass or BSI approved safety matting.

- 2 -
GENERAL SAFETY
USE OF TRAMPOLINE
INITIALLY, you should get accustomed to your trampoline and understand how much
spring is in each bounce. The focus at this point should be body position and technique
until each skill can be completed with ease and control.
BEFORE YOU TRY TO JUMP TOO HIGH the technique
for stopping should be learnt as this will help prevent
injury should you feel you are jumping out of control.
As the user lands on the bed knees should be bent so that
they stop and absorb the spring in the mat. The position is
shown in the image to the left. Arms are held out for
increased level of balance.
This skill is used when the trampoline user wishes to stop
bouncing on the trampoline due to fatigue, loss of control,
etc.
Only use trampoline with mature
and knowledgeable supervision.
Do not attempt or allow somersaults.
Do not allow more than one person
on the trampoline at any time.
Do not use the trampoline when wet.
Do not jump onto or off the trampoline.
Do not use a trampoline while under the
influence of alcohol or drugs.
Do not allow any activity underneath the
trampoline.

- 3 -
GENERAL SAFETY
TIPS TO REDUCE THE RISK OF ACCIDENTS
In order to reduce the risk of accident the "TRAMPOLINE USER" should:
Always remain in control of their jumps and body position at all times.
Not attempt to perform skills that are beyond their own level of competence.
Read and understand the jump by taking off and landing in the middle of the trampoline.
Always control their jump by taking off and landing in the middle of the trampoline.
Always jump vertically and refrain from bouncing towards the springs in any direction.
Always consult a professionally certified trampoline instructor before attempting anything
beyond basic techniques.
In order to reduce the risk of accident the "SUPERVISOR" should:
Fully understand and enforce all the safety rules and guidelines.
Advise the trampoline user and provide knowledge in what they are doing right and
wrong to ensure the safety of user.
Be aware and advise the trampoline user of all the safety warnings.
IMPORTANT: If the Trampoline can not be supervised there should be a method for
securing it and preventing anyone from using the product until supervision is
available (e.g. Remove the access ladder or use a padlock in the net zips).

- 4 -
GENERAL SAFETY
ADVISORY PRECAUTIONS WHILE USING THE TRAMPOLINE
Do not use trampoline if you have consumed alcohol or narcotic substances.
You should climb on and off the trampoline in a controlled and careful manner. Never
jump onto or off the trampoline and never use the trampoline as a means to bounce onto
or into another object.
Always learn the basic bounce and master each type of bounce before trying more
difficult types of bounces. Review the basic skills section to learn how to do the basics.
To stop your bounce, flex your knees when you land on your feet.
Always be in control when you are bouncing on the trampoline. A controlled jump is
when you land at the same spot that you took off from. If at any time you feel out of
control, stop bouncing immediately.
Do not jump or bounce for prolonged periods of time or too high for a number of jumps.
Keep your eyes on the mat to maintain control.
Never have more than one person on the trampoline at a time.
ADVISORY PRECAUTIONS WHILST SUPERVISING TRAMPOLINE
IMPORTANT: Familiarize yourself with the basic jumps and safety rules .To prevent and
reduce the risk of injuries, ensure that all safety rules are enforced and the new users learn
the basic bounces before trying more advanced techniques .
ALL USERS need to be supervised, regardless of skill level or age.
Never use the trampoline when it is wet, damaged, dirty or worn out. The trampoline
should be inspected before each use.
Keep all objects that could interfere during use away from the trampoline at all times. Be
aware of what is overhead, underneath and around the trampoline.
To prevent unsupervised and unauthorized use, the trampoline should be secured when
unattended by the owner or supervisor.

- 5 -
GENERAL SAFETY
DANGER IDENTIFICATION
MOUNTING AND DISMOUNTING:
Be very careful when getting on and off the trampoline. DO
NOT mount the trampoline by grabbing the frame pad,
stepping onto the springs or by jumping onto the mat of the
trampoline from an object (e.g. a deck, roof, or ladder).This is
considered highly dangerous. DO NOT dismount by jumping off
the trampoline and landing on the ground. If small children are
playing on the trampoline they may need help in mounting and
dismounting.
USE OF ALCOHOL OR DRUGS:
DO NOT consume any alcohol or take any drugs (this includes
medication that could affect the users co-ordination) when using
this trampoline. This is considered highly dangerous since
these foreign substances impair your judgments, reaction time
and overall physical co-ordination.
MULTIPLE USERS:
If you have multiple users (more than one person on the
trampoline at any one time), you increase the chance of being
injured. Injuries can occur when you fly off the trampoline, lose
control, collide with other jumper(s), or land on the springs.
STRIKING THE SPRING FRAME:
When playing on the trampoline, STAY in the centre of the
trampoline mat. This will reduce the risk of being injured by
landing on the spring frame. Always keep the frame pads
covering the frame of the trampoline. DO NOT jump or step onto
the frame pad directly since it is not intended to support the
weight of a person.
LOSS OF CONTROL:
DO NOT try difficult maneuvers until you have mastered the
basics. If you do not follow these guidelines, you increase the
risk of someone being injured.

- 6 -
TRAMPOLINE TECHNIQUES
BASIC SKILLS
BASIC SKILL 1: The Basic Bounce
Start from a standing position, with feet shoulder width apart head up
and eyes on the trampoline bed.
Swing arms forward and up above head in a circular motion.
Bring legs and feet together in “mid-air ”position and point toes.
Land back on the mat with feet shoulder width apart (same as start
position).
Why not try moving onto the next skill once comfortable and
proficient.
BASIC SKILL 2: The Knee Drop
Start with a low basic bounce (as detailed in BASIC SKILL 1).
Land on knees shoulder width apart, keeping back straight and a
strong body position using arms out to the side or in front to maintain
balance.
Bounce back to basic bounce position by using bounce momentum
and swinging arms above head.
Once mastered at this height try bouncing a little higher, but
remember to always stay in control of your height.
BASIC SKILL 3: The Seat Drop
Start with a low basic bounce (BASIC SKILL 1) in the normal position.
Land with legs out straight in front of you, with hands either side of
your hips and back straight in a strong body position.
Use the bounce momentum aided with a push from hands to return to
a standing position.
Once mastered at this height try bouncing a little higher, but
remember to always stay in control of your height.
IMPORTANT: Please consult a trained trampoline instructor before attempting any more
advanced skills to ensure highest possible safety levels are maintained.

- 7 -
TRAMPOLINE TECHNIQUES
ADVANCED SKILLS
ADVANCED SKILL 1: The Basic Bounce
Start with a low basic bounce (BASIC SKILL1) in the normal position.
Land on your hands and knees at the same time, ensure that back is
horizontal to the bounce mat and hands & legs are shoulder width
apart also.
Use the momentum of bounce and push off hands to regain the
standing position.
Once mastered at this height try bouncing a little higher, but
remember to always stay in control of your height.
Try moving onto the next skill once comfortable and proficient.
ADVANCED SKILL 2: Hands and Knees to Front Drop
Land on your hands and knees at the same time, ensure the back is horizontal to the bounce mat and
hands & legs are shoulder width apart also.
Maintain strong body position with back horizontal to mat and straighten legs behind and fold arms in
front of face in mid-air ready to land on the mat in a lying down position.
Ensure the landing is done with all of body touching the mat at same time.
Push off hands and recover the standing position.
Once mastered at this height try bouncing a little higher, but remember to always stay in control of
your height .Trying moving onto the next skill once comfortable and proficient.
ADVANCE SKILL 3: The Front Drop
Start with a low basic bounce (BASIC SKILL 1) in the normal
position.
Maintain strong body position with back horizontal to mat and
straighten legs behind and fold arms in front of face in mid-air ready
to land on the mat in a lying down position.
Ensure the landing is done with all of body touching the mat at the
same time.
Push off hands and recover the standing position.
Once mastered at this height try bouncing a little higher, but
remember to always stay in control of your height.
IMPORTANT: Should you wish to progress any further and learn more advanced
techniques for trampoline, please consult a qualified and registered instructor.

- 8 -
TRAMPOLINE ASSEMBLY
To be assembled by adults ONLY.
To assemble this trampoline all you need are the tools provided, including our special
spring tool. During periods of non-use this trampoline can be easily disassembled and
stored.
Please read the assembly instructions before beginning to assemble the product.
Please refer to the table below for part descriptions and numbers. The assembly
instructions use these descriptions and numbers as reference.
Before you start assembling make sure you have all parts listed. If you are missing
any parts, please contact our customer service team.
Please use gloves to protect your hands from pinch points during assembly.
When you are ready to start, make sure that you have plenty of space and a
clean dry area for assembly.
SITING INSTRUCTIONS
Adequate overhead clearance is essential. A minimum of 8 m from ground level is
recommended. Allow clearance for wires, tree limbs, and any other possible hazards.
Place the trampoline away from walls, structures, fences, and other play areas.
Maintain a free space of 1.5 m on all sides of the trampoline. This area should not
include concrete, bitumen, brick or other hard surfaces as these can cause serious
injuries.
Keep the trampoline on a level surface.
Use the trampoline in a well-lighted area.

- 9 -
TRAMPOLINE ASSEMBLY
PARTS LIST
Enclosed are the current specifications and product features available at time of
printing, however, changes may be made in equipment, availability, specifications
and features without notice.
1. 2. 3. 4.
5. 6. 7. 8.
9. 10.
Ref.
Number
Part
Number
Description Unit 8' 10' 12' 14' 16'
1 TR800 Trampoline Mat,stitched with
D-Rings Pcs 1 1 1 1 1
2 TR801 Frame Pad Pcs 1 1 1 1 1
3
TR802
Top Frame with leg sockets
Pcs
6
8
8
8
12
4 TR803 Leg Base Pcs 3 4 4 6
5 TR804 Vertical Leg Extension Pcs 6 8 8 8 12
6
TR805
Springs
Pcs
48
64
72
88
108
7 TR806 Safety Instruction Placard Pcs 1 1 1 1 1
8 TR807 spring tool Pcs 1 1 1 1 1
9 TR808 Bolt Pack Pcs 12 16 16 16 24
10 TR809 T Connector Pcs 6 8 8 8 12
6’
1
1
6
3
36
1
1
12
6
4

- 10 -
TRAMPOLINE ASSEMBLY
Frame layout
Lay out all the frame parts as shown in the pictures below.
10’,12',14' Trampolines (4 Legs) 16'Trampoline(6 Legs)
8',10' Trampolines (3 Legs)
ASSEMBLY TIPS
6' Trampoline ( 3 Legs )
Assembly should only be done by adults.
Minimum of two people are needed for the assembly.
You will need an area large enough to turn the trampoline frame over.
For a video of Trampoline assembly please visit our YouTube channel to view
assembly of the Big Bounce Trampoline.

- 11 -
TRAMPOLINE ASSEMBLY
STEP 1: - Top Frame and Leg Extension Assembly
Using one T Connector (TR809) connect two frame
pieces (TR802).
Insert one leg extension pole (TR804) into each leg
socket in the T Section. Secure extension pole using
a bolt washer and nut.
STEP 2: Leg Base Assembly
On the end of the frame assembly made in step
one install another T Connector and Leg
Extension pole.
Insert a leg base (TR803) into the leg
extensions. It should now look like one of the
sections in the image to the left. Secure the leg
base using a bolt washer and nut.
Lay the sections out as shown in Fig 2.
From this point two people are needed to finish
putting the frame together as below.
STEP 3: Trampoline Mat Assembly
WARNING: While attaching springs, the connection between the frame pieces can become
pinch points as the mat and springs tighten the frame connections. With this in mind please
be careful attaching springs to the trampoline mat.
Layout the “Trampoline Mat” (TR800) inside the frame on the ground as picture above.
FIG 2
FIG 1

- 12 -
TRAMPOLINE ASSEMBLY
STEP 4: ATTACHING THE SPRINGS TO TRAMPOLINE MAT
To install the mat the tension needs to be evenly
applied. The diagram on the right shows the
position of the first four springs to be connected.
The table below shows the corresponding location
of the springs depending on trampoline size.
Trampoline
#A
#B
#C
#D
8FT trampoline
1
12
24
32
10FT trampoline
1
14
28
42
12FT trampoline
1
18
36
54
14FT trampoline
1
22
44
66
16FT trampoline 1 27 54 81
HOW TO USE THE SPRING TOOL
Firstly hang one side of spring on the triangle (D
Link) attached to the trampoline mat (TR800), and
use the spring tool (TR807) to hook the other side
of spring (As shown in the top image to the right).
Pull the Spring Tool until the spring hook inserts
into the hole on the top frame then disengage the
spring tool. Repeat process for all springs.
WARNING!! : Please be careful where your
hands and other parts of the body are placed
as the connector points and spring attachments
can cause injury.
6FT trampoline 1 6 12 24

- 13 -
TRAMPOLINE ASSEMBLY
STEP 5 - Safety Placard Attachment
Using the tie wrap, attach the Safety Instruction Placard (7) to the trampoline. The tie
wrap should go around the Vertical Frame joint and the Top Rail to ensure that it doesn’t
slide off the trampoline.
STEP 6-Frame Pad Assembly
IT IS ESSENTIAL THE FRAME PADS ARE ATTACHED TO THE TRAMPOLINE
CORRECTLY PRIOR TO USE.
A. Lay the Frame Pad (2) over the trampoline so that the springs and steel frame are
covered. There are holes in the pad which line up with the tubing coming out the top of the T
Connectors. Push the pad down carefully over these.
B. Tie elastic tape located at the underside of frame pad to the spring triangle.

6/8
- 14 -
Net Assembly
PARTS LIST
STEP 1 -Net Pole Assembly
A. Connect the bottom tube and top tube. Insert these into the black PVC sleeve (see
pictures).
Connecting two tubes PVC sleeve
A. Clip each of the pole assemblies into the T sections on the trampoline.
Ref.
Number
Part
Number
Description Unit 6/8”' 10' 12' 14' 16'
1 TR810 Bottom tube Pcs 6 8 8 8 12
2 TR811 Top tube Pcs 6 8 8 8 12
3 TR812 Top cap Pcs 6 8 8 8 12
4 TR813 Bolts Pcs 12 16 16 16 24
5 TR814 Net Pcs 1 1 1 1 1
6 TR815 Fiberglass rod Pcs 10 8 10 12
7 TR816 Galvanize connector Pcs 10 8 10 12
Top tube
Bottom tube
6/8

- 15 -
Net Assembly
STEP 2 - Top Ring Assembly
A. Assemble two even lengths of fiberglass rods using the galvanize connectors as shown
below.
B. Lie the net flat as shown.
C. Run the two even lengths of the rods through the loops at the top of the net.

- 16 -
Net Assembly
D. Have one person stand on two of the ends of the rods while someone else pushes
forward and connects one side of the net as per picture.
E. To make the last connection have one person stand on the opposite side. Push the rods
towards the centre of the ring until they are in line with each other and make the last
connection. Picture below.

- 17 -
Net Assembly
STEP 3 – Securing Net.
A. Raise the net up into position and clip the ring into the Top Caps.
Top Cap
B. Starting by the door connect one loop to a spring as per the picture below this is point
A.
Using the table and graphic below count the number of loops and springs attach loops
at points B, C and D. This evenly spreads the tension across the net.
Trampoline
#A
#B
#C
#D
6/8FT trampoline
1
7
13
19
10FT trampoline
1
7
13
19
12FT trampoline
1
9
17
25
14FT trampoline
1
9
17
25
16FT trampoline 1 13 25 37
C. The rest of the loops may now be attached to the end of the springs.
#A
#B
#C
#D

- 18 -
CARE AND MAINTENANCE
This trampoline was designed and manufactured with quality materials and craftsmanship. If proper care and
maintenance is provided, it will provide all jumpers with years of exercise, fun, and enjoyment as well as
reduce the risk of injury. Please follow the guidelines listed below:
This trampoline is designed to withhold a certain amount of weight and use. Please make sure that only one
person at any one time uses the trampoline. Jumpers should either wear socks, gymnastics shoes, or be
barefoot when using the trampoline. Please be aware that street shoes or tennis shoes should NOT be worn
while using the trampoline. In order to prevent the trampoline mat from getting cut or damaged please do not
allow any pets onto the mat. Also, jumpers should remove all sharp objects from their person prior to using the
trampoline. Any type of sharp or pointed objects should be kept off the trampoline mat at all times.
Always inspect the trampoline before each use for worn, abused or missing parts. A number of
conditions could arise that may increase your chances of getting injured. Please be aware of:
Punctures, holes, or tears in the trampoline mat
Sagging trampoline mat
Loose stitching or any kind of deterioration of the mat
Bent or broken frame parts, such as the legs
Broken, missing, or damaged springs
Damaged, missing, or insecurely attached frame pad
Protrusions of any types (especially sharp types) on the frame, springs, or mat
IF YOU FIND ANY OF THE PREVIOUS CONDITIONS, OR ANYTHING ELSE THAT YOU
FEEL COULD CAUSE HARM TO ANY USER, THE TRAMPOLINE SHOULD BE
DISASSEMBLED OR SECURED FROM USE UNTIL THE CONDITION(S) HAS BEEN
RESOLVED.
WINDY CONDITIONS
In severe wind situations, the trampoline can be blown about. If you expect windy weather conditions, the
trampoline should be moved to a sheltered area or disassembled. Another option is to tie the round, outside
portion (top frame) of the trampoline to the ground using ropes and stakes. To ensure security, at least three
(3) tie downs should be used. Do not just secure the legs of the trampoline to the ground because they can
pull out the frame sockets.
MOVING THE TRAMPOLINE
If you need to move the trampoline, two people should be used. All connector points should be wrapped
secured with weather resistant tape, such as duct tape. This will keep the frame intact during the move and
prevent the connector points from dislocating and separating. When moving, lift the trampoline slightly of the
ground and keep it horizontal to the ground. For any type of other move, you should disassemble the
trampoline.
This manual suits for next models
2
Table of contents
Popular Accessories manuals by other brands

Goalsetter Systems
Goalsetter Systems EXTREME SERIES Installation and owner's instructions

Walchem
Walchem WebMaster instruction manual

Tescoma
Tescoma GrandCHEF Instructions for use

IFM Electronic
IFM Electronic efector 300 SI5004 operating instructions

Orno
Orno OR-AE-1303 manual

SANKI
SANKI S-CON FRAT BF Operating and service manual