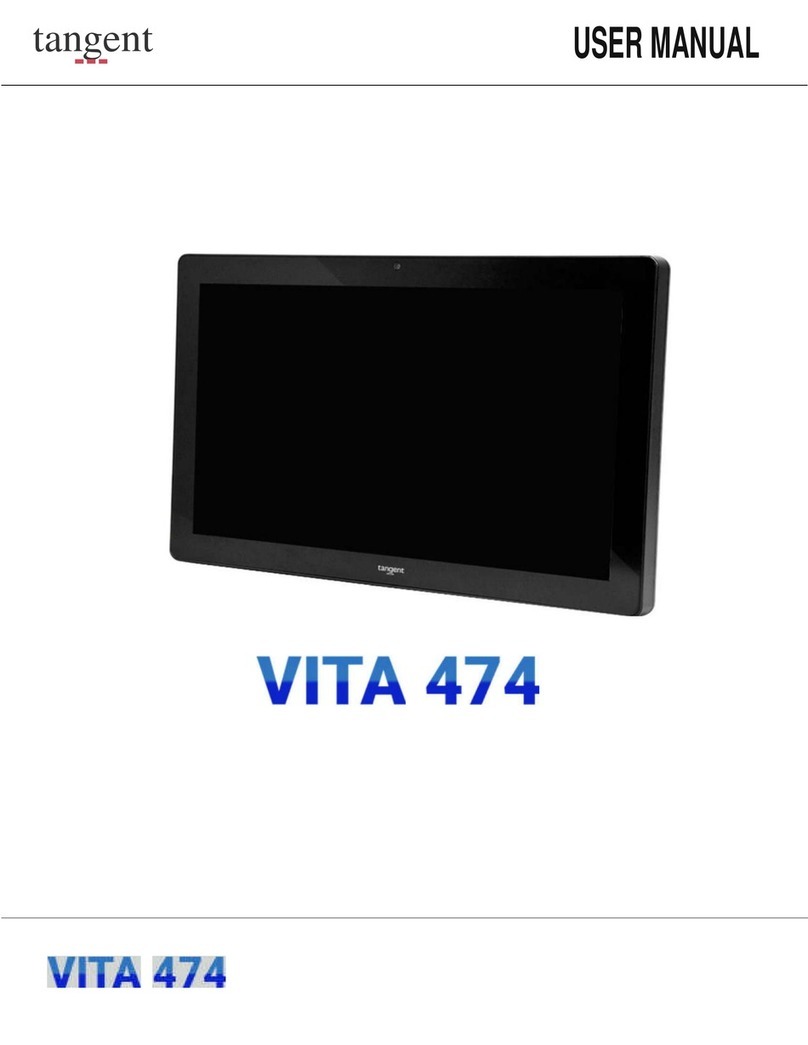
Tangent Medix 1700SF User manual

Medix 1700SF
Medical Grade Panel PC
USER’S MANUAL
Copyright ©2008. All rights reserved
All brand names are registered trademarks of their respective owners.

Medix 1700SF User’s Manual
2
Setup
Thank you for purchasing the Medix 1700SF. Designed with
durability and reliability in mind, the Medix 1700SF meets the
demands in medical environments. Please follow all instructions
to ensure maximum unit performance.
Unpacking
After opening the carton, there will be a Monitor display unit with
an accessory box. Examine the contents to see if there are
damages to the unit and if all accessories are present.
Setting Up
Please read this manual carefully and keep it for future reference.
Safety Instructions & Cleaning
The unit has undergone various tests in order to comply with
safety standards. Inappropriate use of the open frame unit may
be dangerous. Please follow all instructions to ensure your safety
during the installation and operating process.
Transporting & Placement of Unit
1. When moving the unit on a cart; be very cautious. Quick stops,
excessive forces and uneven surfaces may cause the cart to
overturn and risking the unit to fall.
2. If the Monitor display unit does fall on the ground, immediately
turn the power off and disconnect cords. Then contact a service
technician for repairs. Continual use of the unit may cause a fire
or electric shock. Also, do not attempt to repair the unit yourself.
2. Having two or more people transporting the display unit is
recommended. In addition, when installing the unit by
suspending it also requires two or more people.
3. Before suspending the unit, make sure the material used for
suspension is sturdy and stable. If not properly suspended, the
display unit may fall and cause serious injury to people standing
nearby as well as to the unit itself.
4. The display unit may be mounted – only use the mounting
hardware recommended by Tangent.

Medix 1700SF User’s manual 3
Electrical and Power Source
1. The Monitor display unit must operate on a power source as
shown on the specification label. If you are not sure what type of
power supply is used in the area, consult your dealer or local
power supplier.
2. The power cords must not be damaged. Applied pressure,
added heat, and tugging may damage the power cord.
3. The power cord must be routed properly during setup. This
precaution is needed to prevent people from stepping on the
cords or while the unit is suspended to prevent flying objects from
getting tangled with the unit.
4. Do not overload the AC outlets or extension cords. Electrical
shocks or fires may occur from overloading.
5. Do not touch the power source during a thunderstorm.
6. If your hands are wet, do not touch the plug.
7. Use your thumb and index finger, grip firmly on the power cord
to disconnect from the electrical socket. Pulling the power cord
may cause damage.
8. If the unit is not going to be in use for an extended period of
time, remember to disconnect the unit.
9. The Monitor display unit uses voltage between 90-264VAC.
Connect the unit to a power source with the same numerical
value. Please use only the power cord provided to ensure safety
and EMC compliance.
External Environment
1. Do not insert objects into the openings.
2. Do not allow liquids to seep into the internal areas of the
Monitor display unit.
3. Allowing liquids to seep in or inserting objects into the unit may
result in electric shocks and/or short circuit of the internal parts.

Medix 1700SF User’s Manual
4
4. Do not place the Monitor display unit in high moisture areas.
5. Do not install the Monitor display unit in a wet environment.
6. Do not place near unit near heat generating sources.
7. Do not place the unit in a location where it will come in contact
with fumes or steam.
8. Remember to keep the Monitor display unit away from the
presence of dust.
9. If water has flowed in or seeped in, immediately disconnect the
open frame unit. Then contact a service technician for repairs.
Ventilation Spacing
1. Do not cover or block the openings on the top and back sides of
the display unit. Inadequate ventilation may cause overheating
thus reducing the lifespan of the unit.
2. Unless proper ventilation is present, do not place unit in an
enclosed area; such as a built-in shelf. Keep a minimum distance
of 10 cm between the display unit and wall.
Cleaning the Unit
(1) Remember to turn off the power source and to unplug the
cord from the outlet before cleaning the unit.
(2) Carefully dismount the unit or bring the unit down from
suspension to clean.
(3) Moisten a soft cloth with diluted neutral detergent to clean the
unit.
(4) Take a dry cloth and wipe the unit dry. Remember to avoid
having liquids seep into the internal components and areas of the
Monitor display unit.
Servicing, Repairing, Maintenance & Safety Checks

Medix 1700SF User’s manual 5
1. If the unit is not functioning properly, observe the performance
level of the display closely to determine what type of service may
be needed.
2. Do not attempt to repair the Monitor display unit on your own.
Disassembling the cover exposes users to high voltages and
other dangerous conditions. Notify and request a qualified service
technician for servicing the unit.
3. If any of the following situations occur, turn the power source
off and unplug the unit. Then contact a qualified service
technician
(a) A liquid was spilled on the unit or objects have fallen into the
unit.
(b) The unit is soaked with liquids.
(c) The unit is dropped or damaged.
(d) Smoke or strange odor is flowing out of the operating unit.
(e) The power cord or plug is damaged.
(f) The unit has become dysfunctional.
4. When replacement parts are needed for the Monitor display
unit, make sure service technicians use replacement parts
specified by Tangent, or those with the same characteristics and
performance as the original parts. If unauthorized parts are used
it may result in starting a fire, electrical shock and/or other
dangers.

Medix 1700SF User’s Manual
6
Table of Contents
Introduction..........................................................7
Product Description .......................................... 7
Package list..................................................... 8
Features ..........................................................9
Specifications .................................................10
Dimension......................................................12
System View ..................................................13
BIOS Setup..........................................................16
Appendix.............................................................36

Medix 1700SF User’s manual 7
Introduction
Product Description
The Medix 1700SF Medical Panel PC is based on Intel Core 2 Duo
processor which delivers a performance improvement of more than 100
percent compared to systems running traditional single-core processors.
With two cores, or computing engines, Medix 1700SF can simultaneously
execute two computing tasks. It accommodates one 2.5” SATA hard disk
drive and up to 2GB DDR SODIM.
The high brightness LCD, low noise solution, integrated multimedia
functions and extensive expansion options make them the perfect
platform upon which to build computing applications.
The Medix 1700SF combines all the features of a powerful computer into
a slim and attractive chassis. The Medix 1700SF has a 17” 400 nits TFT
display with 1280 x 1024 resolution.
The Medix 1700SF is a compact, Giga LAN and selectable WLAN network
compatible PC with full safety and medical approval. Combining the
Medix 1700SF into your computing environment can result in cost
savings and efficient improvements.
Common applications include Surgical, Radiology, PACS (Picture
Archiving Communication Systems), LIS (Lab Information Systems) and
Electronic Medical Record. The Medix 1700SF is designed for the medical
environment.

Medix 1700SF User’s Manual
8
Package list
Before you begin installing your Medical Station, please make sure that
the following items have been shipped:
•The Medix 1700SF Medical Panel PC
•One CD containing user manual, Tangent drivers
•Power Cable x 1
•Power Adapter x 1
•Touch pen x 1
•Screw x 4 (VESA 75/100 use)

Medix 1700SF User’s manual 9
Features
Intel Core 2 Duo Mobile CPU Solution
17” 400 nits high brightness
High performance and low power system solution
Integrated Compact Flash card reader
Integrated PCMCIA type I/II slot support
Integrated TV tuner with capture card (optional)
Integrated 1.3M pixel Web-CAM (optional)
802.11 b/g wireless LAN Module (optional)
VESA 75/100 compliance Desktop Stand (optional)
VESA 75/100 compliance Wall Mount (optional)
Resistive touch screen (optional)
Plastic construction with medical outlook color

Medix 1700SF User’s Manual
10
Specifications
[
Hardware Specifications
Display 17” 420 nits SXGA color TFT LCD
CPU Support Medix 1700SF: Intel® Core 2 Duo T7500 2.2GHz
Medix 1700SF (fanless): Intel® Core 2 Duo Ultra Low
Voltage U75001.06GHz Processor
Disk Drive Space 2.5” Hard Disk Drive (SATA-150)
Compact Flash Card reader
Expansion One Mini PCI slot; One PCI expansion,
One CF card slot expansion (optional)
One PCMCIA type I/II slot expansion (optional)
Button Brightness: “+” / ”-“; Sound: “+” / ”-“; Power SW
I/O
3 RS-232 ports (1 RS-232/422/485 port)
8 USB 2.0 ports
4 x internal for Web-CAM, touch screen (optional)
4 x on rear bracket
1 DC-in w/ lock function
1 PS/2 keyboard and 1 PS/2 mouse
2 Gigabit LAN RJ-45 Connectors
Sound:
1 x Line-in
1 x line-out
1 x Mic-in
2 x 2W Speakers on back side
1 x PCI slot
LCD Specifications
Model Name Medix 1700SF
Display Type 17” color TFT LCD
Max. Resolution 1280 x 1024
Contrast Ratio 500 : 1 (Typ)
Pixel Pitch (mm) 0.264 (per one triad) x 0.264
Luminance (cd/m2) 420 (TYP)
140°(H)
Viewing Angle 130°(V)
Operating Temperature 0°C~ 40°C (32°F~104°F)
Brightness Control Yes

Medix 1700SF User’s manual 11
Note:
All Tangent LCD products are manufactured with High precision
technology. However, there are a small number of defective pixels in all
LCD panels that are not able to change color. This is a normal occurrence
for all LCD displays from all manufacturers and should not be noticeable
or objectionable under normal operation. LCD panels are qualified for
industry standard under the following conditions: total 7 dead pixels on
a screen or if there are 3 within 1 inch square area of each other on the
display.
Mechanical Specifications
Architecture Close-frame
Front Bezel Plastic bezel with resistive touch screen
Color Medical-white
Mounting / Holder VESA 75/100mm
Construction 3mm ABS + PC TYPE Plastic housing
Dimension (WxHxD) 16.5” x 14.2” x 3.2” (420mmx 360mm x 83 mm)
Net Weight 15.62 lb (7.0 kg)
Packing Filler PE
Environmental Specifications
Operating Temperature 0°C to 40°C (32°F ~104°F)
Storage Temperature -20°C to 60°C (-4°F ~140°F)
Storage Humidity 5% to 95%@ 40°C, non-condensing
Vibration 0.5G / 5 ~ 500Hz (Random) / operation
Shock
Operating: 15g/0.53 oz, 11 ms, half sine wave
Non-operating: 50g/1.76 oz, 11 ms, half sine wave
Drop 3 feet (1 Corner, 3 Edge, 6 Surface)
EMI / Safety CE / FCC Class B/UL 60601-1/EN 60601-1
IP Front bezel, IP-65 Certified
Noise Medix 1700SF: Under 35 db (full operation)
Medix 1700SF (fanless): less than 20 db
Input Power Rating AC90~264 V, 47 ~ 63 Hz
Power Consumption Medix 1700SF:79.50W
Medix 1700SF (fanless):46.50W

Medix 1700SF User’s Manual
12
Dimensions

Medix 1700SF User’s manual 13
System View
Front View
Control button at front panel
From left to right
1. Brightness down
2. Brightness up
3. Power
4. Volume down
5. Volume up
Webcam (Optional)

Medix 1700SF User’s Manual
14
Rear View
I/O parts
VESA 75/100

Medix 1700SF User’s manual 15
Side view

Medix 1700SF User’s Manual
16
BIOS Setup
BIOS Introduction
The Award BIOS (Basic Input/Output System) installed in your
computer system’s ROM supports Intel processors. The BIOS
provides critical low-level support for a standard device such as
disk drives, serial ports and parallel ports. It also adds virus and
password protection as well as special support for detailed
fine-tuning of the chipset controlling the entire system.
Medix 1700SF BIOS Set up
The Award BIOS provides a Setup utility program for specifying
the system configurations and settings. The BIOS ROM of the
system stores the Setup utility. When you turn on the computer,
the Award BIOS is immediately activated. Pressing the <Del> key
immediately allows you to enter the Setup utility. If you are a
little bit late pressing the <Del> key, POST (Power On Self Test)
will continue with its test routines, thus preventing you from
invoking the Setup. If you still wish to enter Setup, restart the
system by pressing the ”Reset” button or simultaneously
pressing the <Ctrl>, <Alt> and <Delete> keys. You can also
restart by turning the system Off and back On again. The
following message will appear on the screen:
Press <DEL> to Enter Setup
In general, you press the arrow keys to highlight items, <Enter>
to select, the <PgUp> and <PgDn> keys to change entries, <F1>
for help and <Esc> to quit.
When you enter the Setup utility, the Main Menu screen will
appear on the screen. The Main Menu allows you to select from
various setup functions and exit choices.

Medix 1700SF User’s manual 17
Phoenix - Award BIOS CMOS Setup Utility
Standard CMOS Features Frequency/Voltage Control
Advanced BIOS Features Load Fail-Safe Defaults
Advanced Chipset Features Load Optimized Defaults
Integrated Peripherals Set Supervisor Password
Power Management Setup Set User Password
PnP/PCI Configurations Save & Exit Setup
PC Health Status Exit Without Saving
ESC : Quit : Select Item
F10 : Save & Exit Setup
Time, Date, Hard Disk Type…
The section below the setup items of the Main Menu displays the
control keys for this menu. At the bottom of the Main Menu just
below the control keys section, there is another section, which
displays information on the currently highlighted item in the list.
Note: If the system cannot boot after making and
saving system changes with Setup, the Award
BIOS supports an override to the CMOS
settings that resets your system to its default.
Warning: It is strongly recommended that you avoid
making any changes to the chipset defaults.
These defaults have been carefully chosen by
both Award and your system manufacturer to
provide the absolute maximum performance
and reliability. Changing the defaults could
cause the system to become unstable and
crash in some cases.

Medix 1700SF User’s Manual
18
Standard CMOS Setup
“Standard CMOS Setup” choice allows you to record some basic
hardware configurations in your computer system and set the
system clock and error handling. If the motherboard is already
installed in a working system, you will not need to select this
option. You will need to run the Standard CMOS option, however,
if you change your system hardware configurations, the onboard
battery fails, or the configuration stored in the CMOS memory is
lost or damaged.
Phoenix - Award BIOS CMOS Setup Utility
Standard CMOS Features
Date (mm:dd:yy) Wed, Apr 28, 2004 Item Help
Time (hh:mm:ss) 00 : 00 : 00 Menu Level >
IDE Channel 0 Master None
IDE Channel 0 Slave None
IDE Channel 1 Master None
Change the day, month,
Year and century
IDE Channel 1 Slave None
Drive A 1.44M, 3.5 in.
Drive B None
Video EGA/VGA
Halt On All Errors
Base Memory 640K
Extended Memory 129024K
Total Memory 130048K
At the bottom of the menu are the control keys for use on this
menu. If you need any help in each item field, you can press the
<F1> key. It will display the relevant information to help you. The
memory display at the lower right-hand side of the menu is
read-only. It will adjust automatically according to the memory
changed. The following describes each item of this menu.
Date
The date format is:
Day : Sun to Sat
Month : 1 to 12
Date : 1 to 31
Year : 1999 to 2099

Medix 1700SF User’s manual 19
To set the date, highlight the “Date” field and use the PageUp/
PageDown or +/- keys to set the current time.
Time
The time format is: Hour : 00 to 23
Minute : 00 to 59
Second : 00 to 59
To set the time, highlight the “Time” field and use the <PgUp>/
<PgDn> or +/- keys to set the current time.
IDE Channel Master/Slave
The onboard PCI IDE connector provides Primary and Secondary
channels for connecting up to two IDE hard disks or other IDE
devices.
Press <Enter> to configure the hard disk. The selections include
Auto, Manual, and None. Select ‘Manual’ to define the drive
information manually. You will be asked to enter the following
items.
CYLS : Number of cylinders
HEAD : Number of read/write heads
PRECOMP : Write precompensation
LANDING ZONE : Landing zone
SECTOR : Number of sectors
The Access Mode selections are as follows:
CHS (HD < 528MB)
LBA (HD > 528MB and supports
Logical Block Addressing)
Large (for MS-DOS only)
Auto
Remarks: The main board supports two serial ATA ports and are
represented in this setting as IDE Channel 0.
Drive A / Drive B
These fields identify the types of floppy disk drive A or drive B that
has been installed in the computer. The available specifications
are:
360KB
5.25 in.
1.2MB
5.25 in.
720KB
3.5 in.
1.44MB
3.5 in.
2.88MB
3.5 in.

Medix 1700SF User’s Manual
20
Video
This field selects the type of video display card installed in your
system. You can choose the following video display cards:
EGA/VGA For EGA, VGA, SEGA, SVGA
or PGA monitor adapters. (default)
CGA 40 Power up in 40 column mode.
CGA 80 Power up in 80 column mode.
MONO For Hercules or MDA adapters.
Halt On
This field determines whether or not the system will halt if an
error is detected during power up.
No errors The system boot will not be halted for
any error that may be detected.
All errors Whenever the BIOS detects a
non-fatal error, the system will stop
and you will be prompted.
All, But Keyboard The system boot will not be halted for
a keyboard error; it will stop for all
other errors
All, But Diskette The system boot will not be halted for
a disk error; it will stop for all other
errors.
All, But Disk/Key The system boot will not be halted for
a key-
board or disk error; it will stop
for all others.
Table of contents
Other Tangent Touch Panel manuals
Popular Touch Panel manuals by other brands

Advantech
Advantech PPC-150 Series manual

Beckhoff
Beckhoff CP6700-0001-00 0 Series Installation and operating instructions

DFI
DFI VP070-M8M Quick installation guide

PAT America
PAT America DS 350 Operator's manual
Ltech
Ltech DX4 Installation instruction
FabiaTech
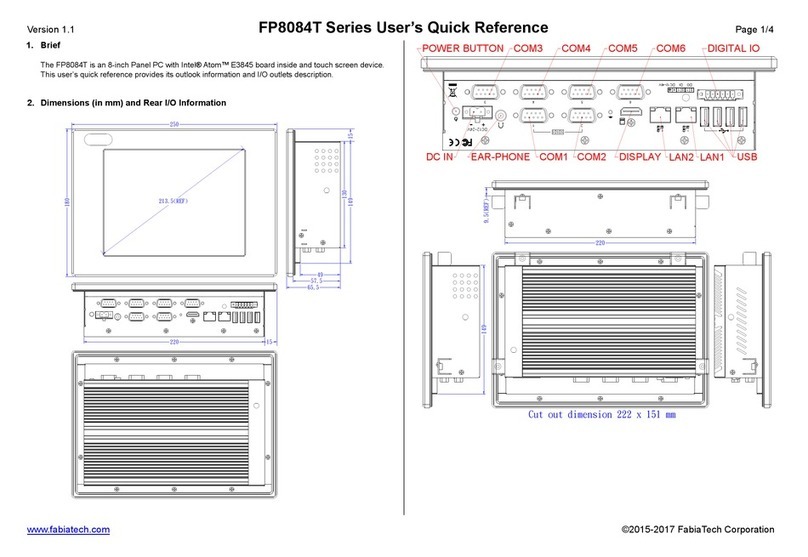
FabiaTech FP8084T Series Users Quick Reference
