manuals.online logo
Brands
  1. Home
  2. •
  3. Brands
  4. •
  5. Delta
  6. •
  7. Touch Panel
  8. •
  9. Delta DOP-B03 User manual

Delta DOP-B03 User manual

DOP
-B03
High Color‧Wide Screen‧
User-Friendly HMI Products
No.18, Xinglong Rd., Taoyuan City
33068, Taiwan
B03S210 Instrunction Sheet
(1) Preface
Thank you for purchasing DELTA’s DOP-B series. This instruction sheet will be helpful in
the installation, wiring and inspection of Delta HMI. Before using the product, please
read this instruction sheet to ensure correct use. You should thoroughly understand all
safety precautions before proceeding with the installation, wiring and operation. Place
this instruction sheet in a safe location for future reference. Please observe the following
precautions:
Install the product in a clean and dry location free from corrosive and
inflammable gases or liquids.
Ensure that all wiring instructions and recommendations are followed.
Ensure that HMI is correctly connected to a ground. The grounding method
must comply with the electrical standard of the country (Please refer to NFPA 70:
National Electrical Code, 2005 Ed.).
Do not disassemble HMI, modify or remove wiring when power is applied to
HMI.
Do not touch the power supply during operation. Otherwise, it may cause
electric shock.
If you have any questions during operation, please contact our local distributors or Delta
sales representatives.
The content of this instruction sheet may be revised without prior notice. Please consult
our distributors or download the most updated version at http://www.delta.com.tw/ia.
(2) Safety Precautions
Carefully note and observe the following safety precautions when receiving, inspecting,
installing, operating, maintaining and troubleshooting. The following words, DANGER,
WARNING and STOP are used to mark safety precautions when using the Delta’s HMI
product. Failure to observe these precautions may void the warranty!
Installation
Comply with quick start for installation. Otherwise it may cause
equipment damage.
Do not install the product in a location that is outside the stated
specification for the HMI. Failure to observe this caution may result in
electric shock, fire, or explosion.
Do not install the product in a location where temperatures will exceed
specification for the HMI. Failure to observe this caution may result in
abnormal operation or damage the product.
Please note that this equipment has obtained EMC registration for
commercial use. In the event that it has been mistakenly sold or
purchased, please exchange it for equipment certified for home use.
Do not use this product as an alarm device for disaster early warning
that may result in personal injury, equipment damage, or system
emergency stop.
Wiring
Connect the ground terminals to a class-3 ground (Ground resistance
should not exceed 100Ω). Improper grounding may result in
communication error, electric shock or fire.
Operation
The users should use Delta Screen Editor Software to perform editing in
Delta's HMI product. To perform editing and confirming HMI programs
without using Delta Screen Editor software in Delta's HMI product may
result in abnormal operation.
To prevent the personal injury and equipment damage, when designing
HMI programs, please ensure that a communication error occurred
between Delta’s HMI product and the connecting controller or
equipment will not result in system failure or malfunction.
Please be sure to backup the screen data and HMI programs in case
they are lost, accidentally deleted or worse.
Do not modify wiring during operation. Otherwise it may result in electric
shock or personal injury.
Never use a hard or pointed object to hit or strike the screen as doing
this may damage the screen and let the screen has not respond at all,
and then cause HMI to work abnormally.
Maintenance and Inspection
Do not touch any internal or exposed parts of the HMI as electrical shock
may result.
Do not remove operation panel while power is on. Otherwise electrical
shock may result.
Wait at least 10 minutes after power has been removed before touching
any HMI terminals or performing any wiring and/or inspection as an
electrical charge may still remain in the HMI with hazardous voltages even
after power has been removed.
Turn the power off before changing backup battery and check system
settings after finishing change. (all data will be cleared after changing
battery).
Be sure the ventilation holes are not obstructed during operation.
Otherwise malfunction may result due to bad ventilation or overheating
troubles.
Wiring Method
Do not use a voltage that will exceed specification for the HMI. Failure
to observe this caution may result in electric shock or fire.
Remove the terminal block from the HMI before wiring.
Insert only one wire into one terminal on the terminal block.
If the wiring is in error, perform the wiring again with proper tools. Never
use force to remove the terminals or wires. Otherwise, it may result in
malfunction or damage.
For the power line that forced to take out, ensure to check wiring again
and restart.
Communication Wiring
Comply with communication wiring specification for wiring.
Wiring length should comply with the stated specification for the HMI.
Proper grounding to avoid bad communication quality.
To avoid noise and interference, the communication cable, all power
cables, and motor power cable should be placed in separate conduits.
(3) Pin Definition of Serial Communication
DOP-B03S210 COM1 Port
COM Port PIN MODE1 MODE2 MODE3
RS-232 RS-485 RS-422
1 D+ TXD+
2 RXD
3 TXD
4 RXD+
5 GND GND GND
6 D- TXD-
7 RTS
8 CTS
9 RXD-
Note1: Blank = No Connection.
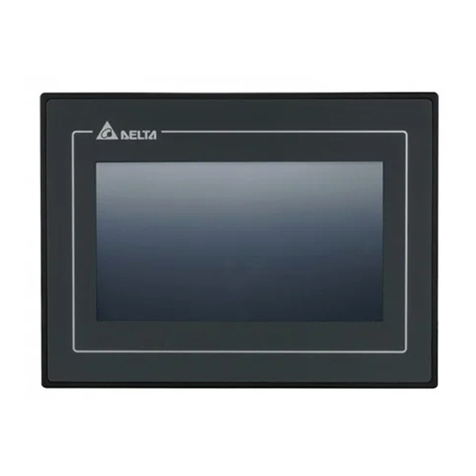
(4) Parts Names
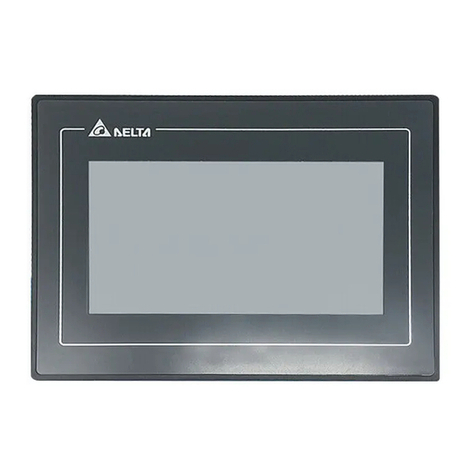
DOP-B03S210 (Front View)
A Touch Screen / Display
B Power LED Indicator ( )Note: Lights in green when HMI works normally.
DOP-B03S210 (Rear View)
A System Key B USB Slave
C Power Input Terminal D COM1
PIN1
A
B
A
D
B
C
上海菱本电子科技有限公司
服务热线:400 821 3454
上海菱本电子科技有限公司
服务热线:400 821 3454
(5) Dimensions
DOP-B03S210
129(5.08")
103(4.06")
+1.0
118.8 0 (4.68" )
+1.0
92.80 (3.65" )
T
29.5(1.16")
91(3.58")
Note:
T=1.6mm(0.063")~6mm(0.24")
+0.04"
0
+0.04"
0
(6) Specifications
MODEL DOP-B03S210
LCD MODULE
Display
Type 4.3" TFT LCD (65536 colors )
Resolution 480 x 272 pixels
Backlight LED Back Light (less than 20,000 hours half-life at 25oC) (Note 1)
Display
Size 95.04 x 53.856mm
Operation
System Delta Real Time OS
MCU 32-bit RISC Micro-controller
NOR Flash
ROM
Flash ROM 8 MB
(OS System: 2MB / User Application: 6MB)
SDRAM 64Mbytes
Backup
Memory N/A
Buzzer Multi-Tone Frequency (2K ~ 4K Hz) / 85dB
USB 1 USB Slave Ver 2.0
Serial
COM
Port
COM1 RS-232(supports hardware flow control)/RS-422/RS-485
Cooling
Method Natural air circulation
Safety
Approval CE / UL (Note 3)
Waterproof
Degree IP65 / NEMA4 (Note 3)
Operation
Voltage (Note2) DC +24V (-10% ~ +15%) (please use isolated power supply)
Voltage
Endurance
AC500V for 1 minute (between charging (DC24V terminal)
and FG terminals)
Power
Consumption
(Note 2)
1.7W
Backup Battery N/A
Backup Battery
Life N/A
Operation
Temperature 0oC ~ 50oC
Storage
Temperature -20oC ~ +60oC
Ambient
Humidity 10% ~ 90% RH [0 ~ 40oC], 10% ~ 55% RH [41 ~ 50oC], Pollution Degree 2
Vibration IEC 61131-2 compliant 5Hz≦f<8.3Hz = Continuous: 3.5mm, 8.3Hz≦f≦
150Hz = Continuous: 1.0g
Shock IEC 60068-2-27 compliant 15g peak for 11 ms duration, X, Y, Z directions
for 6 times
Dimensions
(W) x (H) x (D)
mm
129 x103 x 39
Panel Cutout
(W) x (H) mm 118.8 x 92.8
Weight Approx. 230g
NOTE
1) The half-life of backlight is defined as original luminance being reduced by 50% when the
maximum driving current is supplied to HMI. The life of LED backlight shown here is an
estimated value under 25oC normal temperature and humidity conditions.
2) The value of the power consumption indicates the electrical power consumed by HMI only
without connecting to any peripheral devices. In order to ensure the normal operation, it is
recommended to use a power supply which the capacity is 1.5 ~2 times the value of the
power consumption.
3) Some models are in the process of application to certification. For more information, please
consult our distributors.
4) The content of this instruction sheet may be revised without prior notice. Please consult our
distributors or download the most updated version at http://www.delta.com.tw/ia/.
上海菱本电子科技有限公司
服务热线:400 821 3454
上海菱本电子科技有限公司
服务热线:400 821 3454
DOP
-B03
高彩‧宽屏幕‧友好人机界面
No.18, Xinglong Rd.,
Taoyuan City 33068, Taiwan
B03S210 安装说明
(1) 一般注意事项
感谢您使用本产品,本人机界面安装说明书提供 DOP-B 系列人机界面的相关
资讯。在使用之前,请您仔细详读本说明书以确保使用上的正确。此外,请妥
善将其放置在明显的地点以便随时查阅。下列事项在您尚未读完本说明书前,
请务必遵守:
安装的环境必须没有水气,腐蚀性气体及可燃性气体。
接线时,请依接线图说明施工。
接地工程必须确实实施,接地时须遵照国家现行相关电工法规的规定施
行(请参考 NFPA 70: National Electrical Code, 2005 Ed.)。
在通电时,请勿拆解人机界面或更改配线。
在通电运作时,请勿接触电源处,以免触电。
如果您在使用上仍有问题,请咨询经销商或者本公司客服中心。由于产品精益
求精,当内容规格有所修正时,请咨询代理商或至台达网站
(http://www.delta.com.tw/ia/)下载最新版本。
(2) 安全注意事項
安装、配线、操作、维护及检查时,应随时注意以下安全注意事项。
安装注意
依照手册指定的方式安装人机界面,否则可能导致设备损坏。
禁止将本产品暴露在有水气、腐蚀性气体、可燃性气体等物质的
场所下使用,否则可能会造成触电、火灾或爆炸。
请勿将人机界面安装在超过规格范围的温度环境中,否则可能造
成人机界面无法正常运作或损坏。
本产品为 KCC Class A(商用设备)产品且通过试验认证,其设
计的目的是在商业或是工业环境使用,而非家庭环境中使用。若
在此情况下不小心购买或售出人机界面产品,请将其更换为有符
合KCC Class B(家用设备)认证的产品。
请勿将人机界面用于可能会造成人员伤亡、设备损坏或系统停机
等警报机台。
配线注意
请将接地端子连接到 class-3(100Ω以下)接地,接地不良可
能会造成通讯异常、触电或火灾。
操作注意
人机界面需配合编辑软件规划画面,未经规划或确认的人机界面
可能会导致不正常运转结果。为避免操作人身伤害或设备损坏,
规划人机画面时,要确保人机界面及其连接控制器或设备之间的
通讯故障不会造成设备功能无法正常运作。
为避免意外遗失程序,请务必备份规划好的人机界面画面程序。
不得在开启电源情况下改变配线,否则可能造成触电或人员受
伤。
请勿以尖锐物品碰触面板,否则可能导致面板凹陷,进而无法使
人机界面正常运作。
保养及检查
禁止接触人机界面内部,否则可能会造成触电。
电源启动时,禁止拆下人机界面面板,否则可能会造成触电。
电源关闭 10 分钟内,不得接触接线端子,残余电压可能造成触电。
更换备用电池时,应切断电源再进行,并在更换后重新检查系统设
定值。
人机界面在操作时,排气孔不可封住,否则人机容易因为散热不良
而造成故障。
配线方法
请勿使用超过人机界面规格范围的电压,否则可能会引起触电或
火灾。
配线时请将快速接头从人机界面的本体上拆下来。
快速接头的一个电线插入口,请仅插入一根电线。
对于错误强行拔出电线的动作,请重新检查连接电线再启动。
通讯电路的配线
请依标准规格采用通讯配线线材。
通讯线材长度需在符合规定内。
采用正确的接地回路,以避免通讯不良。
为防止较大的噪声干扰引起人机界面无法正常运作,请用单独的
配线槽将人机界面的通讯电缆和所有电源线及电机动力线分开。
(3) 通讯脚位定义
DOP-B03S210 COM 定义
COM Port 示意图 脚位 MODE1 MODE2 MODE3
RS-232 RS-485 RS-422
1 D+ TXD+
2 RXD
3 TXD
4 RXD+
5 GND GND GND
6 D- TXD-
7 RTS
8 CTS
9 RXD-
注1:空白=不需连接
(4) 各部位说明
DOP-B03S210 (正面)
A操作/显示区域 B 电源指示灯
PIN1
AB
上海菱本电子科技有限公司
服务热线:400 821 3454
上海菱本电子科技有限公司
服务热线:400 821 3454
DOP-B03S210 (背面)
A 系统键 B USB Slave
C 电源输入端子 D COM 1
(5) 开孔尺寸
DOP-B03S210
129(5.08")
103(4.06")
+1.0
118.8 0 (4.68" )
+1.0
92.80 (3.65" )
T
29.5(1.16")
91(3.58")
Note:
T=1.6mm(0.063")~6mm(0.24")
+0.04"
0
+0.04"
0
(6) 硬件规格
型号 DOP-B03S210
显
示
器
面板种类 4.3" TFT LCD(65535 色)
分辨率 480 x 272 pixels
背光灯 LED Back Light(常温 25oC下半衰期>2 万小时)(Note 1)
显示范围 95.04 x 53.856mm
作业系统 Delta Real Time OS
中央处理器 32-bit RISC Micro-controller
存储器 ROM Flash ROM 8 MB
(OS System: 2MB / User Application: 6MB)
内部存储器 64Mbytes
断电保持存储器 N/A
蜂鸣器 Multi-Tone Frequency(2K ~ 4K Hz)/85dB
USB 1 USB Slave Ver 2.0
串行通
讯口 COM1 RS-232(支持流量控制)/RS-422/RS-485
冷却方式 自然冷却
安规认证 CE / UL (Note 3)
面板防水等级 IP65 / NEMA4 (Note 3)
工作电压 (Note2) DC +24V(-10% ~ +15%)(请使用屏蔽式电源供应器)
绝缘耐力 DC24V 端子与 FG 端子间:AC500V, 1 分钟
型号 DOP-B03S210
消耗功率 (Note 2) 1.7W
存储器备份电池 N/A
备份电池寿命 N/A
操作温度 0oC ~ 50oC
储存温度 -20oC ~ +60oC
工作环境 10% ~ 90% RH【0 ~ 40oC】,10% ~ 55% RH【41 ~ 50oC】,
污染等级 2
耐震动
IEC61131-2 规定连续震动 5Hz~8.3Hz 3.5mm,
8.3Hz~150Hz 1G
耐冲击
IEC60068-2-27 规定耐冲击 11ms, 15G Peak, X, Y, Z 方向
各6次
尺寸
(W)x(H)x(D)
mm
129 x103 x 39
开孔尺寸
(W)x(H)mm
118.8 x 92.8
重量 约230g
NOTE
1) 背光模组半衰期的定义:最大驱动电流下,背光亮度衰退到最大亮度的一半
时,即为半衰期。所标示的寿命时间为 25 oC常温常湿工作环境下的预估值。
2) 消耗功率为无外接周边设备时,人机本体所消耗的功率。建议选用的电源供
应器容量为标示消耗功率的 1.5~2 倍,以确保人机工作正常。
3) 部份机种认证申请中,详细认证机种请咨询各区域代理商。
4) 本人机界面安装手册内所记载的规格若有变更,本公司恕不另行通知。当内
容规格有所修正时,请咨询代理商或至台达网站
http://www.delta.com.tw/ia/。
A
B
C
D
上海菱本电子科技有限公司
服务热线:400 821 3454
上海菱本电子科技有限公司
服务热线:400 821 3454

This manual suits for next models

1

Other Delta Touch Panel manuals

Delta DIAVH-IPC003100 User manual

Delta

Delta DIAVH-IPC003100 User manual

Delta DOP-W127B User manual

Delta

Delta DOP-W127B User manual

Delta DOP-110DS User manual

Delta

Delta DOP-110DS User manual

Delta DOP-H07 Series User manual

Delta

Delta DOP-H07 Series User manual

Delta DOP-107EG User manual

Delta

Delta DOP-107EG User manual

Delta DOP-107SV User manual

Delta

Delta DOP-107SV User manual

Delta Vivitek NovoTouch EK653i User manual

Delta

Delta Vivitek NovoTouch EK653i User manual

Delta Vivitek NovoTouch EK653i User manual

Delta

Delta Vivitek NovoTouch EK653i User manual

Delta DIAVH-PPC193100 User manual

Delta

Delta DIAVH-PPC193100 User manual

Delta DOP-B10 Series User manual

Delta

Delta DOP-B10 Series User manual

Delta TP70P-211LC1T User manual

Delta

Delta TP70P-211LC1T User manual

Delta DOP-A User manual

Delta

Delta DOP-A User manual

Delta DOP-103WQ User manual

Delta

Delta DOP-103WQ User manual

Delta DOP-110IS User manual

Delta

Delta DOP-110IS User manual

Delta TP04G-AL User manual

Delta

Delta TP04G-AL User manual

Delta DOP-B08 User manual

Delta

Delta DOP-B08 User manual

Delta DOP-107H User manual

Delta

Delta DOP-107H User manual

Popular Touch Panel manuals by other brands

Bartec Polaris Remote 15" user manual

Bartec

Bartec Polaris Remote 15" user manual

RS Automation AnyTouch V8 Plus Series operating instructions

RS Automation

RS Automation AnyTouch V8 Plus Series operating instructions

HELVAR 924 installation guide

HELVAR

HELVAR 924 installation guide

Dantherm DanX 1 Installation & user manual

Dantherm

Dantherm DanX 1 Installation & user manual

Eaton HMI04BU quick start guide

Eaton

Eaton HMI04BU quick start guide

PureAire Monitoring Systems 99091 manual

PureAire Monitoring Systems

PureAire Monitoring Systems 99091 manual

Advantech PPC-150T-RT manual

Advantech

Advantech PPC-150T-RT manual

COMFILE CPCV5-070WR Hardware manual

COMFILE

COMFILE CPCV5-070WR Hardware manual

Koala Pad TouchTablet owner's manual

Koala Pad

Koala Pad TouchTablet owner's manual

Poly TC8 user guide

Poly

Poly TC8 user guide

Elsner Corlo Touch KNX WL 70252 Installation and operation

Elsner

Elsner Corlo Touch KNX WL 70252 Installation and operation

Advantech PPC-177T user manual

Advantech

Advantech PPC-177T user manual

Beckhoff CP7709 Installation and operating instructions

Beckhoff

Beckhoff CP7709 Installation and operating instructions

Protech Systems SP-6555 Quick reference guide

Protech Systems

Protech Systems SP-6555 Quick reference guide

Beckhoff CP6700-0001-00 0 Series Installation and operating instructions

Beckhoff

Beckhoff CP6700-0001-00 0 Series Installation and operating instructions

Christ Touch-it CE Series operating instructions

Christ

Christ Touch-it CE Series operating instructions

Panasonic FZ-G1A Series Step-by-step guide

Panasonic

Panasonic FZ-G1A Series Step-by-step guide

Legamaster e-Screen PTX-9800UHD Quick setup guide

Legamaster

Legamaster e-Screen PTX-9800UHD Quick setup guide

manuals.online logo
manuals.online logoBrands
  • About & Mission
  • Contact us
  • Privacy Policy
  • Terms and Conditions

Copyright 2025 Manuals.Online. All Rights Reserved.