19
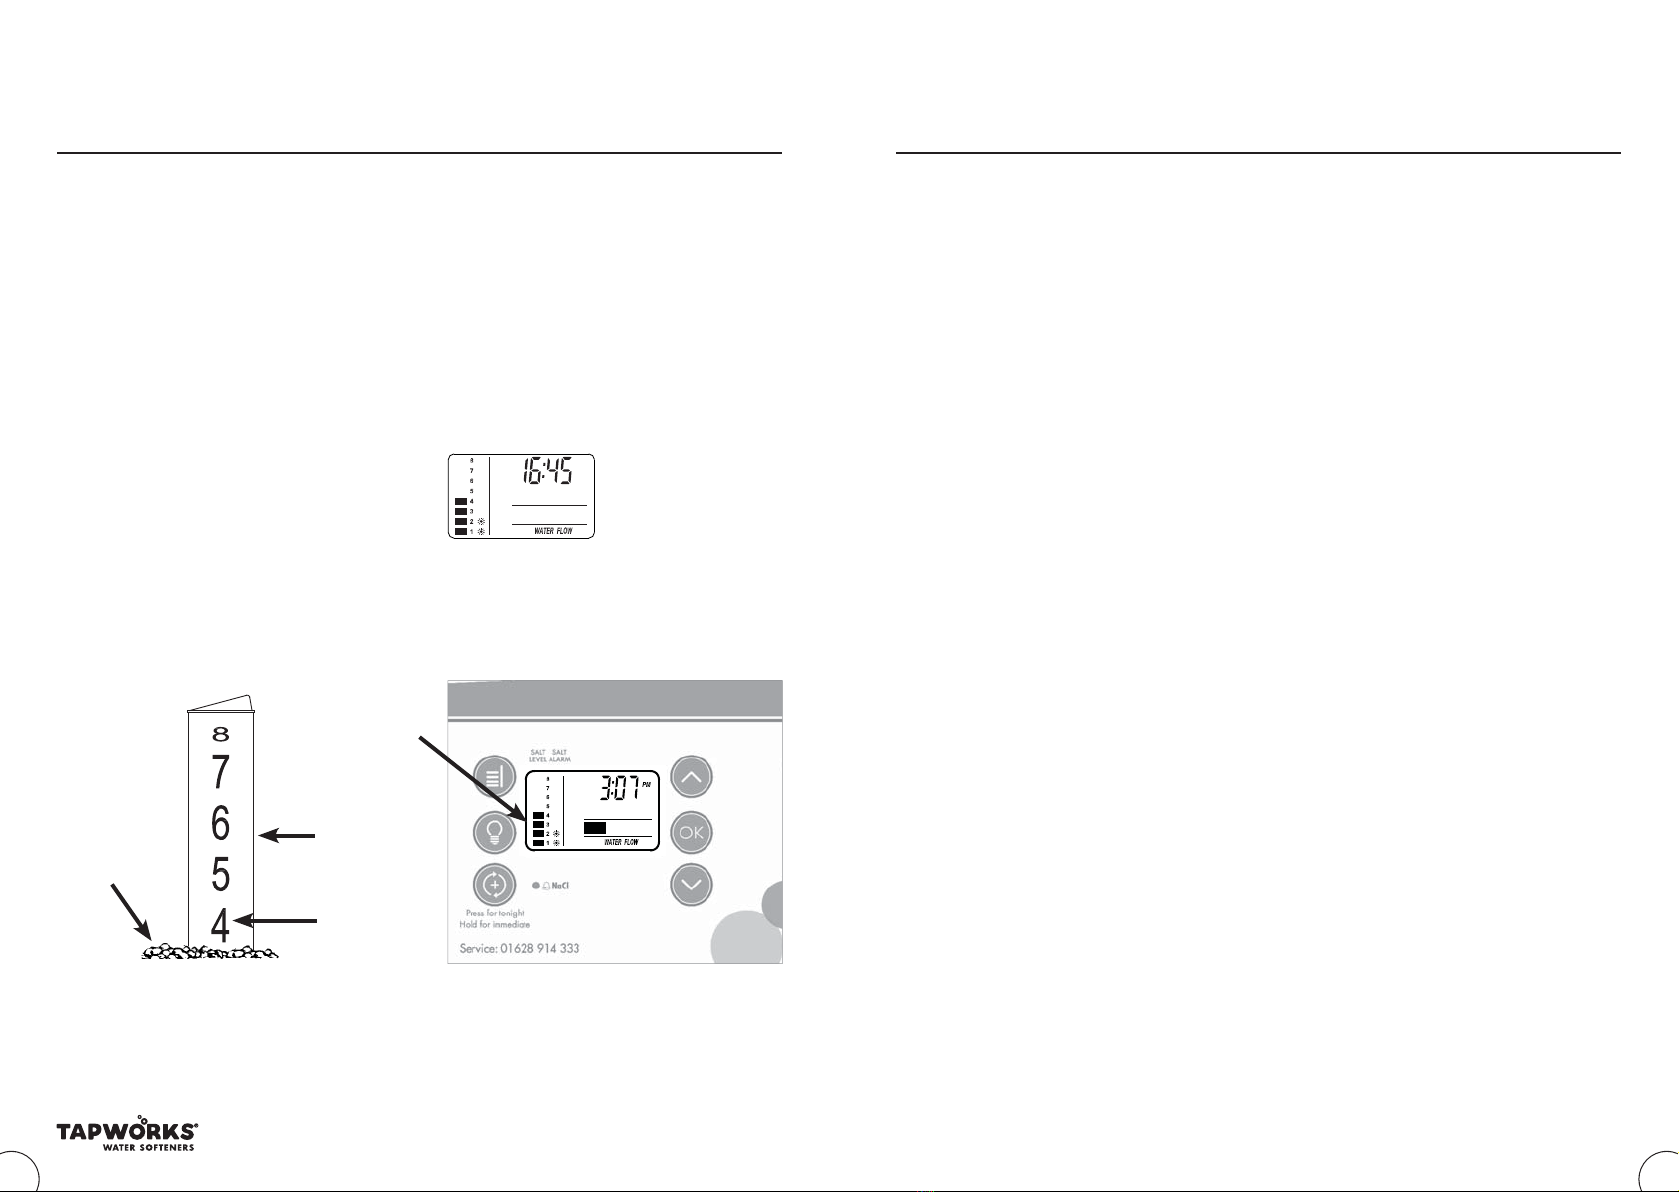
Please Remember – Only use tablet or pellet salt in your softener!
18
Problem solving
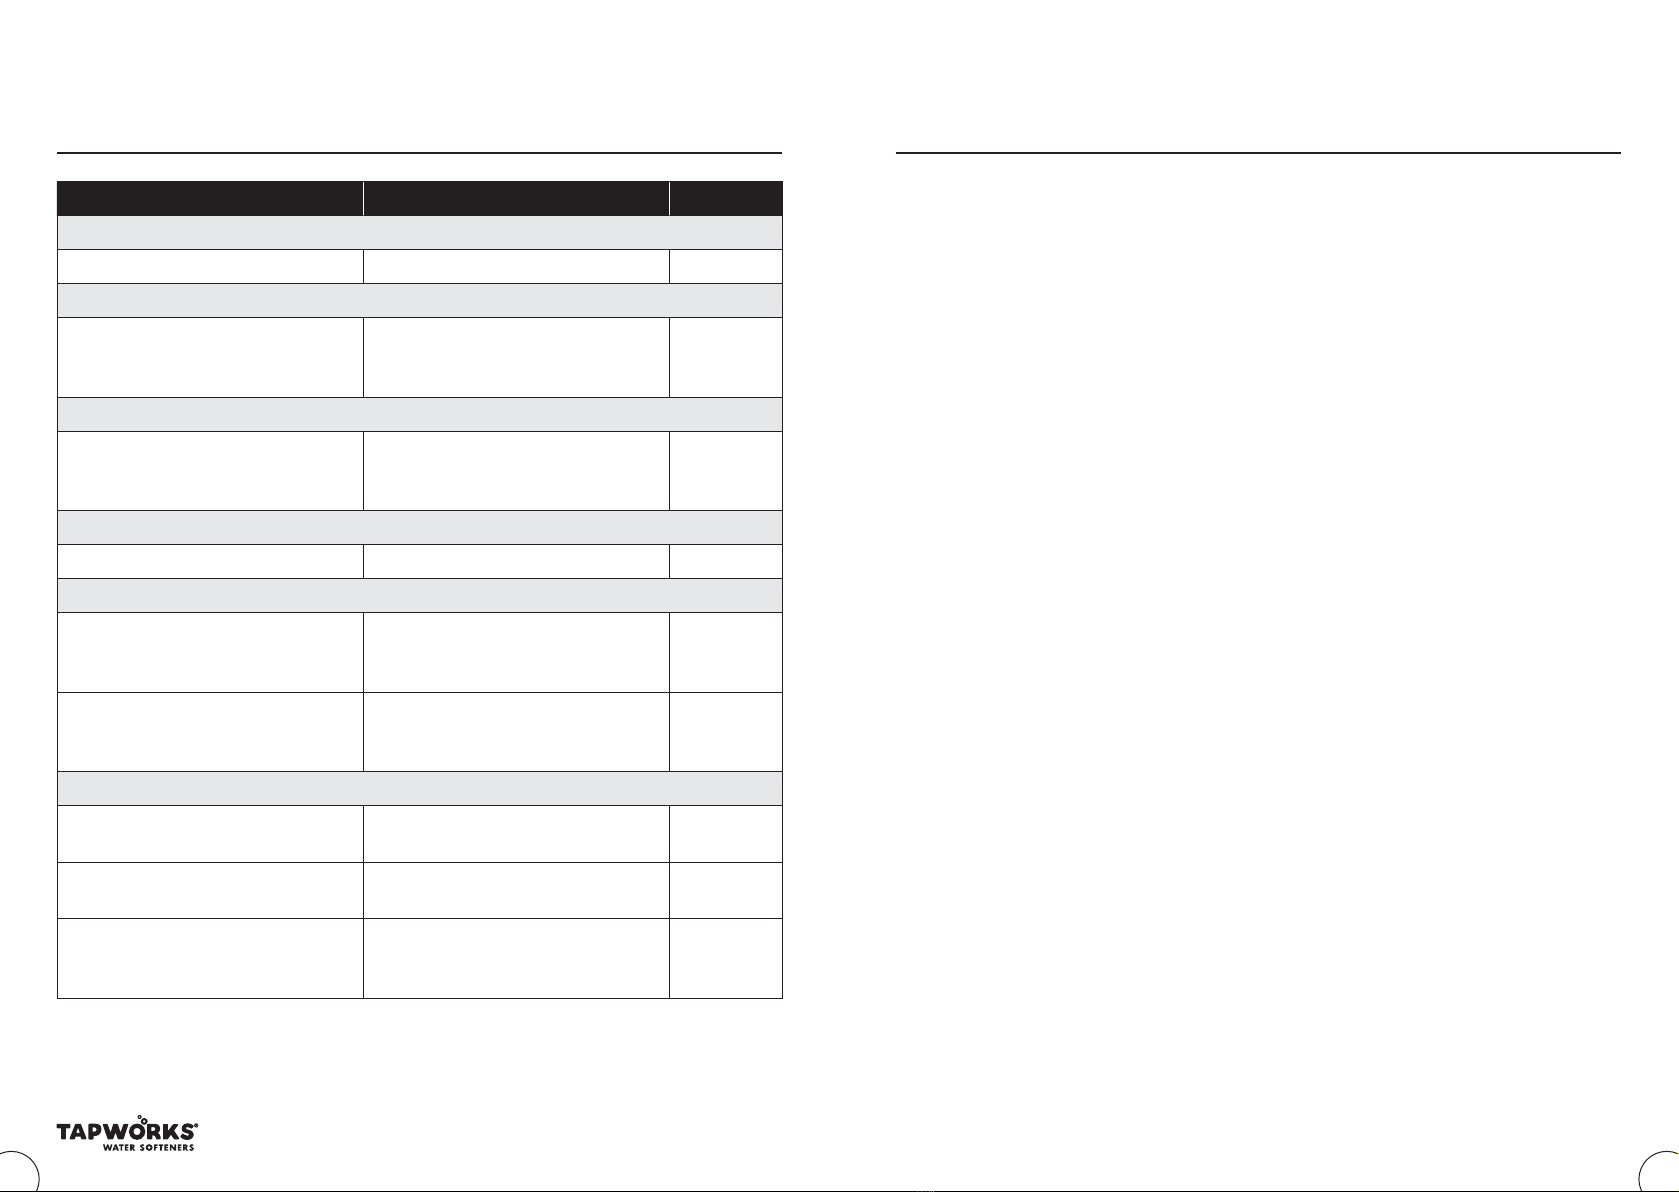
CHECKLIST SOLUTION PAGE NO.
PROBLEM: Excessive salt usage
1. Check the hardness. 1. Reduce the unit setting if incorrect. 11
PROBLEM: No water in cabinet or very low
1. This is quite normal. Unlike conventional
water softeners only a few inches of
water is at the bottom of the cabinet.
1. No action necessary.
PROBLEM: High water level in cabinet
1. Is the water level in the salt
cabinet high?
1. Initiate an immediate recharge.
If the problem does not return,
there is nothing wrong.
PROBLEM: Water running down the overflow
1. Is the unit in recharge mode? 1. If yes, no action is required.
PROBLEM: Water running down the drain line constantly
1. Is the unit in recharge mode? 1. If yes, wait until it finishes, check the
present time and recharge time settings,
and adjust if incorrect.
11 & 12
2. Does an error code appear,
e.g. ‘ERR 01’?
2. Check all electrical connections are
secure. Turn the power off for ten
seconds, and then switch back on.
PROBLEM: Electronic faceplate
1. Is the faceplate blank? 1. Check the power is turned on and all
connections are secure.
2. Is the display stuck on one function? 2. Turn the power off for ten seconds and
then switch back on.
3. Does an error code appear,
e.g. ‘ERR 03’?
3. Check all connections are secure.
Turn the power off for ten seconds
and then switch back on.
Warranty terms and conditions
general information
All Tapworks Domestic Water Softeners are fully
covered by one year parts and labour warranty
against manufacturing defects from the date of
installation. Proof of purchase may be required.
No maintenance visit will be provided during this
period unless it is the result of an operation fault.
This warranty does not affect the
statutory rights of the consumer.
We undertake that within 12 months of the date
of installation* of the Tapworks Domestic Water
Softener if it is proved to be defective by reason
only of faulty materials or manufacturing defects,
we will at our discretion repair or replace the
same free of any charge for labour, materials or
carriage on condition that:
•The unit is properly sized and purchased through
an authorised Tapworks agent.
•The unit has been correctly installed in
accordance with the manufacturer’s installation
instructions and operating specification including
water pressure and water flow.
•The unit has been used for normal domestic
purposes only using municipal water.
•The unit has been maintained in accordance
with instructions.
•The unit has not been serviced, maintained,
repaired, taken apart or tampered with by any
person not authorised by us.
•All service work under this guarantee must be
undertaken by an authorised service centre.
•Any unit or defective part replaced shall become
the Company’s property.
The guarantee does not cover:
•Damage resulting from transportation, improper
use or neglect, including not being filled with
tablet salt, using the incorrect salt.
•Any defect or damage occasioned by fire,
lightning, power surge, explosion, flood, storm,
tempest, impact or other extraneous causes.
•Units not installed in accordance with local
regulations.
•Units installed in such a way that access for
service is restricted.
•Resetting the programmer in the event of: power
failure or incorrect programming, or when the
influent water hardness or number of people in
the household changes.
•Units which are improperly installed, faulty
plumbing or faulty electrics.
•Units installed outside UK mainland.
•Units installed in commercial premises.
Any faults which are not attributable
to the water softener but to faulty
installation or operation will be
chargeable.
*The guarantee period will commence from date of installation,
unless the installation is made more than six months from the
date on which the product was purchased, in which case the
guarantee period will commence six months from the date of
purchase.
The guarantee provided is applicable to the country in which
the product was purchased. If the product is taken abroad the
guarantee may be invalidated.
DATA PROTECTION INFORMATION
We want to ensure that we keep the details we hold about you up to date and communicate with you fully in
accordance with your wishes. Your data will be used for customer service and to make our services available
to you. This information will only be used within this company or passed to an authorised service agent.
Our communication and marketing activities are by post, e-mail, telephone or text message, unless you
indicate otherwise. If at any time your details change or you wish to add to or remove from the list of
communications sent to you then please contact us.