Brita PURITY 450 Quell ST Guide

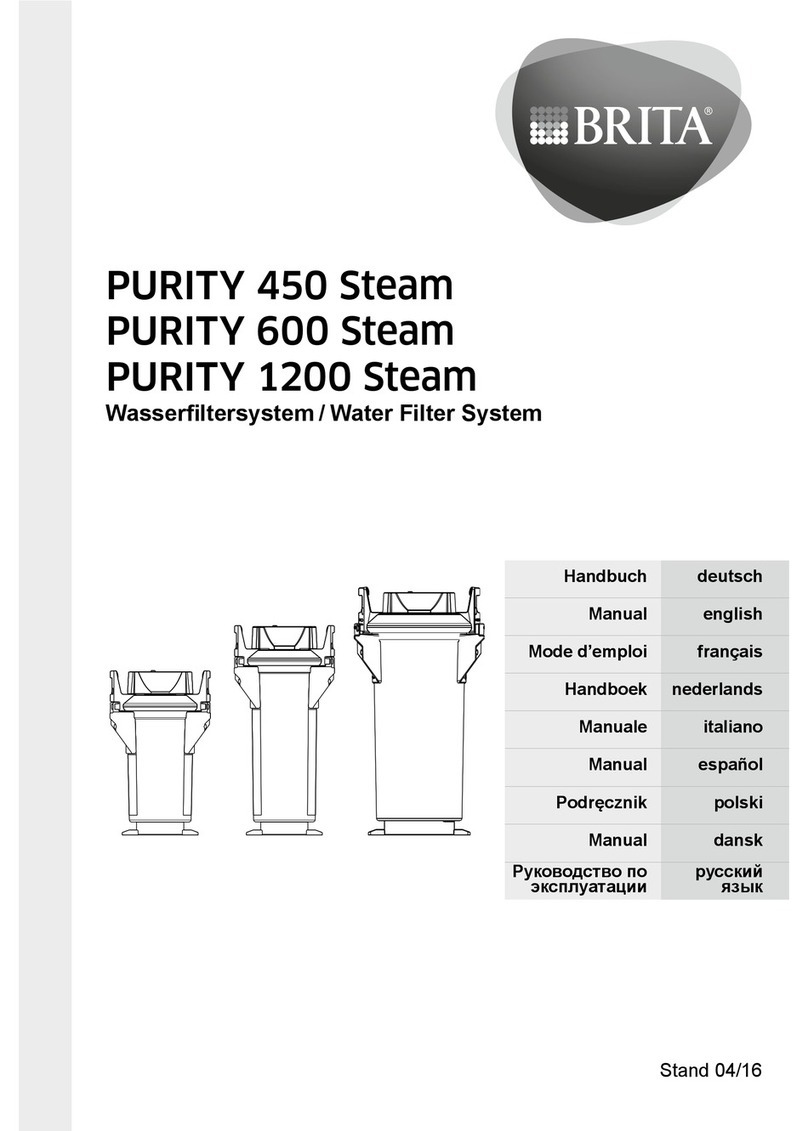
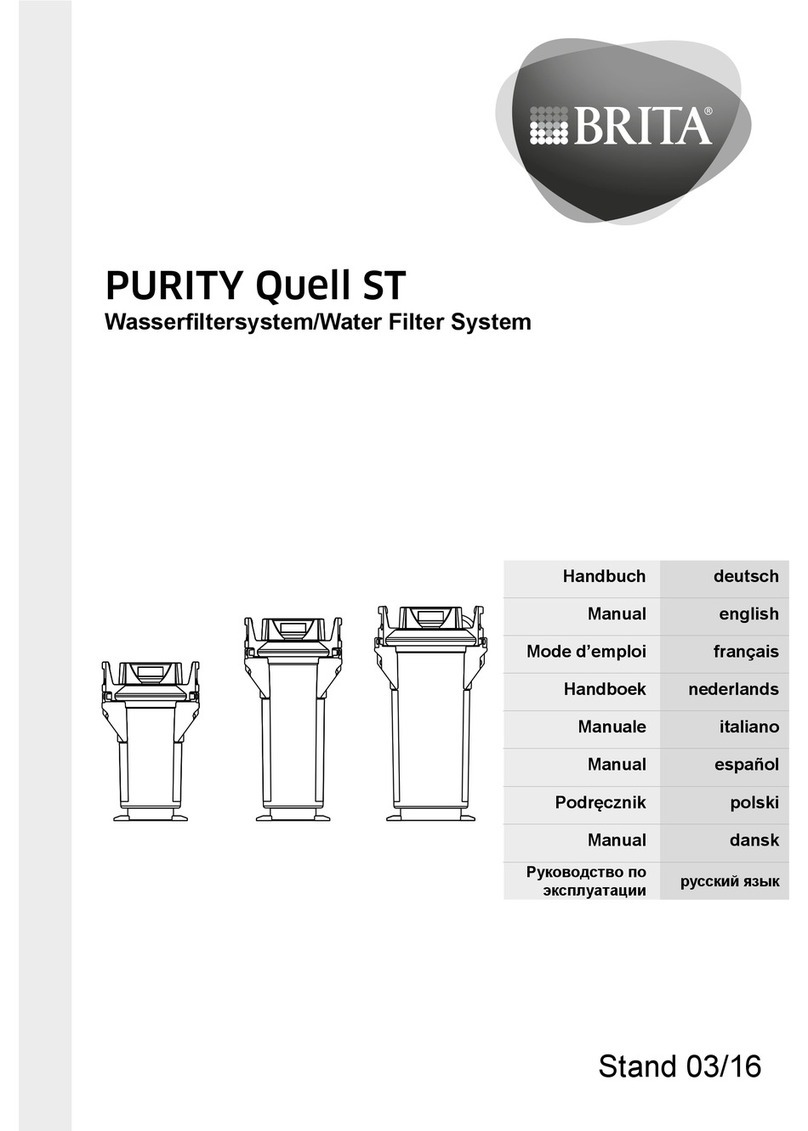
PURITY 450 Quell ST
PURITY 600 Quell ST
PURITY 1200 Quell ST
Filterkartusche/Filter Cartridge
deutsch
english
français
nederlands
italiano
español
polski
dansk
Tauschanleitung
Cartridge Replacement Instructions
Instructions de remplacement
Gebruiksaanwijzing voor vervanging
Istruzioni per la sostituzione
Instrucciones de sustitución
Instrukcja wymiany
Udskiftningsvejledning
русский
Обновленная инструкция
Stand 03/16

2
PURITY 450 Quell ST
PURITY 600 Quell ST
PURITY 1200 Quell ST
PURITY 450 Quell ST
PURITY 600 Quell ST
PURITY 1200 Quell ST
536825-001
11
3
2
1
4
5
12 13
7
6
8
9
10
12
21
20
14
18
16
16
15
19
10
20 30
40
50 %
0
17
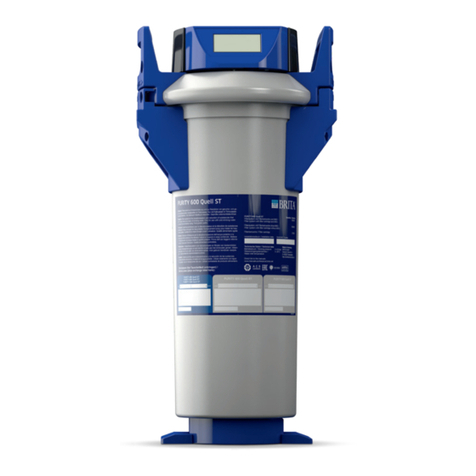
Definition of Terms
1Pressure Vessel
2Filter Cartridge
3Pressure Vessel Lid
4Connector Head
(optionally with measuring unit)
5Display Unit (optional)
6Inlet Hose
7Connection Inlet Hose
8Terminal Device Connection
9Flush Valve with Water Outlet
10 Connection of Outlet Hose
11 Filter Change Sticker
12 Kick Loops
13 Ejector Base
14 Display of the Display Unit (optional)
15 Lock
16 Mantle Handle
17 Reducer 1"–3/4"
18 Transport Protective Cap
19 By-pass Screw
20 Lid Handle
21 Flush Hose

DE
3
Deutsch Seite 6–9
1 Tauschanleitung PURITY Quell ST
2 Haftungsausschluss
3 Produktspezifische Sicherheitshinweise
4 Austausch der Filterkartusche
5 Entnehmen der Filterkartusche
6 Einsetzen der Filterkartusche
7 Inbetriebnahme
8 Filterkapazität
9 Technische Daten
10 Bestellnummern
English Page 10–13
1 Replacement instructions for the PURITY Quell ST
2 Liability exclusion
3 Product-specific safety instructions
4 Replacing the filter cartridge
5 Removing the filter cartridge
6 Inserting the filter cartridge
7 Commissioning
8 Filter capacity
9 Technical data
10 Order numbers
Français Page 14–17
1 Instructions de remplacement PURITY Quell ST
2 Exclusion de responsabilité
3 Consignes de sécurité spécifiques
4 Remplacement de la cartouche filtrante
5 Extraction de la cartouche filtrante
6 Mise en place de la cartouche filtrante
7 Mise en service
8 Capacité de filtration
9 Caractéristiques techniques
10 Références
Nederlands Pagina 18–21
1 Gebruiksaanwijzing voor vervanging
PURITY Quell ST
2 Aansprakelijkheid
3 Productspecifieke veiligheidsvoorschriften
4 Vervangen van de filterpatroon
5 Verwijderen van de filterpatroon
6 Plaatsen van de filterpatroon
7 Inbedrijfstelling
8 Filtercapaciteit
9 Technische gegevens
10 Bestelnummers
Italiano Pagina 22–26
1 Istruzioni per la sostituzione PURITY Quell ST
2 Esclusione di responsabilità
3 Istruzioni di sicurezza specifiche del prodotto
4 Sostituzione della cartuccia filtrante
5 Estrazione della cartuccia filtrante
6 Inserimento della cartuccia filtrante
7 Messa in funzione
8 Capacità filtrante
9 Dati tecnici
10 Numeri di ordinazione
11 Ulteriori informazioni sul prodotto
Español Página 27–30
1 Instrucciones de sustitución PURITY Quell ST
2 Exoneración de responsabilidad
3 Indicaciones de seguridad específicas del producto
4 Cambio del cartucho filtrante
5 Retirada del cartucho filtrante
6 Colocación del cartucho filtrante
7 Puesta en marcha
8 Capacidad del filtro
9 Datos técnicos
10 Números de pedido
Polski Strona 31 –34
1 Instrukcja wymiany PURITY Quell ST
2 Ograniczenie odpowiedzialności
3 Specyficzne wskazówki dotyczące
bezpieczeństwa
4 Wymiana wkładów filtracyjnych
5 Wyjmowanie wkładu filtracyjnego
6 Wkładanie wkładu filtracyjnego
7 Uruchomienie
8 Wydajność filtra
9 Dane techniczne
10 Numery zamówień
Dansk Side 35–38
1 Udskiftningsvejledning PURITY Quell ST
2 Ansvarsfrihed
3 Produktspecifikke sikkerhedsbemærkninger
4 Udskiftning af filterpatronen
5 Udtagning af filterpatronen
6 Indsætning af filterpatronen
7 Ibrugtagning
8 Filterkapacitet
9 Tekniske data
10 Bestillingsnumre
Русский страница 39– 42
1 PURITY Quell ST
2 Исключение ответственности
3 Специальная информация по
безопасности по данному изделию
4 Замена картриджа
5 Извлечение картриджа
6 Установка нового картриджа
7 Ввод в эксплуатацию
8 Ресурс фильтра
9 Технические параметры
10 Артикулы для заказа
DE
4
Verschnitt- und Kapazitätstabelle für Kaffee-/Espressomaschinen und
Vendingautomaten (Details Kapitel 7)
By-pass and capacity table for coffee/expresso machines and vending
machines (for details see Chapter 7)
Tableaux de réglage du by-pass et de détermination de la capacité pour
machines à café/expresso et distributeurs (voir chapitre 7)
Bypass- en capaciteitstabel voor koffie-/espressomachines en
vendingautomaten (details in hoofdstuk 7)
Tabella del by-pass e della capacità per macchine del caffè e distributori
automatici (dettagli al capitolo 7)
Tablas de mezcla y capacidad para cafeteras / máquinas de espresso
y máquinas expendedoras (Detalles en Capítulo 7)
Tabela rozmiarów obejść i wydajności dla ekspresów do kawy
i automatów do sprzedaży napojów (szczegóły: rozdział 7)
Blandings- og kapacitetstabeller til kaffe-/espressomaskiner
og Vendingautomater (detaljer i kapitel 7)
Таблица bypass и ресурсов фильтров для кофе- и эспрессо-автоматов,
а также автоматов по продаже напитков (подробнее см. гл. 7)
Carbonate Hard-
ness
in °dH (°KH)
By-pass setting Filter capacity in litres
PURITY 450 PURITY 600 PURITY 1200
450% 8250 14100 25800
550% 8250 14100 25800
650% 8250 14100 25800
750% 7071 12086 22114
850% 6188 10575 19350
950% 5500 9400 17200
10 40% 4217 7207 13187
11 40% 3833 6552 11988
12 30% 3077 5260 9624
13 30% 2841 4855 8884
14 30% 2638 4508 8249
15 30% 2462 4208 7699
16 30% 2308 3945 7218
17 30% 2172 3713 6793
18 30% 2052 3506 6416
19 30% 1944 3322 6078
20 20% 1650 2820 5160
21 20% 1571 2686 4914
22 20% 1500 2564 4691
23 20% 1435 2452 4487
24 20% 1375 2350 4300
25 20% 1320 2256 4128
28 20% 1179 2014 3686
31 20% 1065 1819 3329
35 20% 943 1611 2949

DE
5
Verschnitt- und Kapazitätstabelle für Kombidämpfer und Backöfen
(Details Kapitel 7)
By-pass and capacity table for combi ovens and conventional ovens
(for details see Chapter 7)
Tableau de réglage du by-pass et de détermination de la capacité pour
fours vapeur et fours traditionnels (voir chapitre 7)
Bypass- en capaciteitstabel voor combi-steamers en bakovens
(details in hoofdstuk 7)
Tabella del by-pass e della capacità per sistemi di cottura a vapore
combinati e forni di cottura (dettagli al capitolo 7)
Tablas de mezcla y capacidad para emisores de vapor combinados
y hornos convencionales (Detalles en Capítulo 7)
Tabela rozmiarów obejść i wydajności dla parników i piekarników
(szczegóły: rozdział 7)
Blandings- og kapacitetstabeller til kombidampere og bageovne
(detaljer i kapitel 7)
Таблица bypass и ресурсов фильтров пароконвектоматов и иных
стимеров (см. главу 7)
Carbonate Hard-
ness
in °dH (°KH)
By-pass setting Filter capacity in litres
PURITY 450 PURITY 600 PURITY 1200
410% 4991 8530 15607
510% 4991 8530 15607
610% 4991 8530 15607
710% 4278 7311 13378
810% 3743 6397 11706
910% 3327 5686 10405
10 10% 2995 5118 9364
11 10% 2722 4652 8513
12 10% 2496 4265 7804
13 10% 2304 3937 7203
14 10% 2139 3655 6689
15 10% 1996 3412 6243
16 10% 1872 3199 5853
17 10% 1762 3010 5508
18 10% 1664 2843 5202
19 10% 1576 2694 4929
20 10% 1497 2559 4682
21 10% 1426 2437 4459
22 10% 1361 2326 4257
23 10% 1302 2225 4071
24 10% 1248 2132 3902
25 10% 1198 2047 3746
28 10% 1070 1828 3344
31 10% 966 1651 3021
35 10% 856 1462 2676
Note: The capacity limits refer to average utilisation of the terminal equipment, do not contain any
filter flushing and cleaning cycles and depend on local water quality, flow, mains pressure and flow
continuity.

6
DE
1 Tauschanleitung PURITY Quell ST
Vor dem Filtertausch das System-Handbuch zum Filtersystem PURITY Quell ST beachten. Dort finden
Sie detaillierte Informationen hinsichtlich Betriebs- und Sicherheitshinweisen, Instandhaltung,
Fehlerbehebung und technischer Daten.
2 Haftungsausschluss
Der Filterwechsel muss genau nach den Angaben in dieser Tauschanleitung ausgeführt werden.
BRITA haftet nicht für etwaige Schäden einschließlich Folgeschäden, die aus falscher Handhabung
des Produktes entstehen können.
3 Produktspezifische Sicherheitshinweise
Aus hygienischen Gründen wird das Filtermaterial der Kartusche einer speziellen Behandlung mit Silber
unterzogen. Eine geringe Menge Silber, die gesundheitlich unbedenklich ist, kann an das Wasser
abgegeben werden. Diese steht im Einklang mit den Empfehlungen der Weltgesundheitsorganisation
(WHO) für Trinkwasser. Es kann jedoch allenfalls zu einer Überschreitung der im Codex Alimentarius
Austriacus genannten Werte kommen.
Hinweis für Nierenkranke oder Dialysepatienten: Während des Filtervorgangs kann es zu einer leichten
Erhöhung des Kaliumgehalts kommen. Sollten Sie nierenkrank sein und/oder eine spezielle Kaliumdiät
einhalten müssen, empfehlen wir eine vorherige Abstimmung mit Ihrem Arzt.
4 Austausch der Filterkartusche
!Achtung: Beim Austausch alle demontierten Teile sorgfältig untersuchen! Defekte Teile müssen
ausgetauscht, verunreinigte Teile gereinigt werden! Vor Austausch die Betriebs- und Sicherheits-
hinweise (Handbuch Kapitel 3) beachten. Nach Lagerung und Transport unter 0°C ist das Produkt
bei geöffneter Originalverpackung mindestens 24 Stunden vor Inbetriebnahme unter den in
der Tabelle „Technische Daten“ angegebenen Umgebungstemperaturen bei Betrieb zu lagern.
Filtersysteme ohne Mess- und Anzeigeeinheit
Der Austausch der Filterkartusche muss nach 6–12 Monaten erfolgen, spätestens 12 Monate nach
Inbetriebnahme, unabhängig vom Erschöpfungsgrad des Filtersystems. Ist die Kapazität der Filter-
kartusche bereits vorher erschöpft (Handbuch Kapitel 7), muss der Austausch früher erfolgen.
Filtersysteme mit Mess- und Anzeigeeinheit
Der Austausch der Filterkartusche muss spätestens 12 Monate nach Inbetriebnahme, unabhängig
vom Erschöpfungsgrad des Filtersystems, erfolgen. Ist die Kapazität der Filterkartusche bereits vorher
erschöpft (Handbuch Kapitel 5 und 7), muss der Austausch früher erfolgen. Wird die Kapazität der
Kartusche überschritten, wird diese im Display negativ und blinkend angezeigt, in der Balkendarstellung
werden keine Balken mehr angezeigt. Ist das Monatslimit für die Kartusche überschritten, so wird
dies durch ein Blinken des Datums signalisiert.

7
DE
Reset der Anzeigeeinheit
Zur Bedienung der Anzeigeeinheit muss diese von der Anschlussarmatur abgenommen werden.
Anzeigegehäuse um ca. 10 mm nach oben schieben und Anzeigeeinheit nach vorn entnehmen. Die
Bedienung der Anzeigeeinheit findet über einen Taster auf der Rückseite der Anzeigeeinheit statt.
• Durch Drücken des Tasters (> 10 sec) werden die bei
Erstinstallation eingestellten Daten erneut übernom-
men sowie Kapazität, Verschnitteinstellung und Ein-
gabedatum aktualisiert.
> 10 sec
Hinweis: Das Monatslimit wird hierbei automatisch auf 12 Monate gesetzt.
Hinweis: Erfolgt länger als 30 Sekunden keine Eingabe, kehrt die Anzeige in den Betriebsmodus
zurück, ohne geänderte Parameter zu übernehmen.
Anzeigeeinheit von vorn in ca. 10 mm Höhe einsetzen und nach unten schieben. Die Nasen am
Anzeigeteil müssen in die Nuten am Messkopf eingeführt werden.
5 Entnehmen der Filterkartusche
• Spannungsversorgung des Endgeräts abschalten (Netzstecker ziehen).
• Eingangsventil 7am Eingangsschlauch 6schließen.
• Spülschlauch in einen Eimer stecken und Filtersystem durch Öffnen des Spülventils drucklos
machen. Die austretende Wassermenge in einem Eimer auffangen.
Hinweis: Wenn die austretende Wassermenge einen Liter überschreitet, ist das Eingangs-
ventil 7nicht komplett geschlossen oder verkalkt.
• Mit beiden Füßen auf die Trittlaschen 12 stellen und dabei den Druckbehälter-
deckel 3durch Drücken der Verschlusssicherung 15 und durch gleichzeitiges
Drehen gegen den Uhrzeigersinn bis zum Anschlag öffnen.
• Druckbehälterdeckel 3vertikal auf beide Deckelgriffe 20 abstellen.
Hinweis: Deckel nicht horizontal über Kopf ablegen.
• Mit beiden Füßen auf die Trittlaschen 12 stellen und dabei Druckbehälter 1an den
Mantelgriffen 16 gegen den Uhrzeigersinn bis zum Anschlag drehen.
• Füße von den Trittlaschen 12 nehmen und Druckbehälter 1mit beiden Händen an den
Mantelgriffen 16 nach unten drücken.
• Erschöpfte Filterkartusche 2aus dem Druckbehälter 1nehmen.
• Erschöpfte Filterkartusche 2zum Entleeren mit Anschluss nach unten in Spüle stellen
(> 5 Minuten).
Erschöpfte Filterkartusche 2mit der Transportschutzkappe 18 der neuen Filterkartusche
verschließen und im Originalkarton an die entsprechende auf der Umschlagrückseite aufgeführte
BRITA-Adresse zurücksenden.

8
DE
6 Einsetzen der Filterkartusche
• Anschlusssitz für den O-Ring der Filterkartusche 2im Druckbehälterdeckel 3
auf Schmutz und Beschädigungen überprüfen.
• O-Ring-Dichtung der neuen Filterkartusche 2auf korrekten Sitz in Nut,
Verschmutzung und Beschädigungen überprüfen.
Hinweis: Der Kartuschensitz ist werkseitig mit lebensmittelechtem
Schmiermittel gefettet.
• Neue Filterkartusche 2in den Druckbehälter 1einsetzen.
• Mit beiden Füßen auf die Trittlaschen 12 stellen, Druckbehälter 1anheben und
dabei im Uhrzeigersinn drehen, bis Mantelgriffe 16 über den Trittlaschen 12
stehen.
• Mit beiden Füßen auf die Trittlaschen 12 stellen und Druckbehälterdeckel 3
auf Druckbehälter 1aufsetzen. Die Positionierung der Pfeilmarkierung am
Deckelgriff 20 muss dabei mit Nut „INSERT“ übereinstimmen.
• Druckbehälterdeckel 3nach unten drücken und im Uhrzeigersinn bis zum
Einrasten der Verschlusssicherung 15 drehen.
• Spannungsversorgung des Endgeräts einschalten (Netzstecker).
7 Inbetriebnahme
Einspülen/Entlüften von Filtersystemen mit und ohne Mess- und Anzeigeeinheit
Hinweis: Zum Einspülen/Entlüften wird ein Eimer mit mindestens 10 L Fassungsvermögen benötigt.
• Filtersystem horizontal hinlegen.
• Spülventil 9vollständig öffnen.
• Eingangsventil 7am Eingangsschlauch 6komplett öffnen, dabei Spül-
schlauch 21 im Eimer festhalten. Spülmenge mindestens 10 Liter bei einem
Mindestvolumenstrom von 3 l/min (180 l/h).
• Spülventil 9schließen, Filter hinstellen und Eimer entleeren.
• Spülventil 9vorsichtig öffnen, dabei Spülschlauch im Eimer festhalten.
Spülmenge erneut mindestens 10 Liter.
Hinweis: In Systemen mit Mess- und Anzeigeeinheit wird das Ende des
Spülvorgangs im Display angezeigt.

9
DE
• Spülventil 9schließen.
System auf eventuelle Leckagen prüfen.
• Nächstes Austauschdatum auf dem beiliegenden Aufkleber vermerken und diesen auf dem
Service-Pass auf dem Druckbehälter 1anbringen.
Hinweis: Den obersten Aufkleber mit Installationsdatum nicht überkleben.
Hinweis: Filtersysteme ohne Mess- und Anzeigeeinheit sind nun betriebsbereit.
Überprüfung der Initialisierung für Filtersysteme mit Mess- und Anzeigeeinheit
• Karbonathärte, Verschnitteinstellung in Prozent, Restkapazität in Litern, Kapazitätsbalken
und das aktuelle Datum müssen im Display angezeigt werden (Handbuch Kapitel 5.5).
Hinweis: Werden diese Werte nicht im Display angezeigt, muss das Filtersystem erneut
eingespült werden (Handbuch Kapitel 5.4), bis die Werte im Display erscheinen.
• Filtersysteme mit Mess- und Anzeigeeinheit sind nun betriebsbereit.
8 Filterkapazität
Die Filterkapazitätstabellen für Kaffee-/Espressomaschinen und Vendingautomaten sowie für
Kombidämpfer und Backöfen sind auf den Seiten 4/5 aufgeführt.
Hinweis: Die angegebenen Kapazitäten in der Verschnitt- und Kapazitätstabelle für Kaffee-/Espresso-
maschinen und Vendingautomaten sind Richtwerte, die je nach Produktvolumenstrom um ± 5%
variieren können und auch abhängig von den Maschinentypen sind. Bei Kombidämpfern und Backöfen
ist je nach Maschinentyp die Verschnitteinstellung 10% zu wählen, um ein optimal aufbereitetes
Wasser für den Kombidämpfer/Backofen zu erreichen. Wir sprechen gern individuelle Empfehlungen
aus!
Hinweis: Die Kapazitätsgrenzen beziehen sich auf durchschnittliche Beanspruchung des Endgerätes,
beinhalten keine Spül- und Reinigungszyklen des Filters und hängen ab von lokaler Wasserqualität,
Durchfluss, Leitungsdruck und Durchflusskontinuität.
9 Technische Daten
Betriebsdruck 2 bar bis max. 6,9 bar
Bertriebs-/Wassertemperatur 4°C bis 30°C
Umgebungstemperatur bei: Betrieb 10°C bis 40°C
Umgebungstemperatur bei: Lagerung –20°C bis 50°C
10 Bestellnummern
Artikelnummer
PURITY 450 Quell ST Filterkartusche 273000
PURITY 600 Quell ST Filterkartusche 273200
PURITY 1200 Quell ST Filterkartusche 273400

10
EN
1 Replacement instructions for the PURITY Quell ST
Before replacing the filter, please read the system manual for the PURITY Quell ST filter system.
There you will find detailed information on the operating and safety instructions, maintenance,
troubleshooting and technical data.
2 Liability exclusion
The filter must be replaced exactly in accordance with the information in these replacement instructions.
BRITA shall not be liable for any damage, including consequential damage, that may occur as a result
of not observing these replacement instructions or carrying them out incorrectly.
3 Product-specific safety instructions
For hygiene reasons, the filter material of the cartridge is subjected to a special treatment with silver.
A small amount of silver, that is not harmful to health, may leach into the water. This is in accordance
with the recommendations of the World Health Organisation (WHO) for drinking water.
Note for people with kidney disease or dialysis patients: during the filter process there may be a slight
increase in the potassium content. Should you suffer from kidney disease and/or must keep to a special
potassium diet, we recommend that you consult your doctor first.
4 Replacing the filter cartridge
!Caution: During the exchange, carefully examine all dismantled parts! Faulty parts must be
replaced and dirty parts cleaned. Before replacing parts read the operating and safety instructions
(Manual Chapter 3). After storage and transportation at under 0°C the product must be stored in its
original packaging, open, for at least 24 hours before commissioning when it is to be operated under
the ambient temperatures specified in the “Technical data” table.
Filter systems without a measuring and display unit
The filter cartridge must be replaced after 6–12 months, but no later than 12 months after commis-
sioning, regardless of the level of exhaustion of the filter system. If the capacity of the filter cartridge
has already been exhausted (Manual Chapter 7), it must be replaced earlier.
Filter systems with a measuring and display unit
The filter cartridge must be replaced no more than 12 months after commissioning regardless of the
level of exhaustion of the filter system. If the capacity of the filter cartridge has already been
exhausted (Manual Chapters 5 and 7) it must be replaced earlier. If the capacity of the cartridge
is exceeded, this will appear in the display as negative and flashing. No more bars will be shown in
the bar display. If the monthly limit for the cartridge is exceeded, the date will flash to indicate this.

11
EN
Resetting the display unit
To operate the display unit it has to be removed from the connecting fittings. Slide the display housing
up approx. 10 mm and remove the display unit by pulling it forward. The display unit is operated using
a button on the back of the display unit.
• If this button is pressed (> 10 sec), the data set on
initial installation will be applied again and the capacity,
by-pass setting and input date will all be updated. > 10 sec
Note: This automatically sets the monthly limit to 12 months.
Note: If there is no entry after more than 30 seconds the display returns to operating mode without
applying the changed parameters.
Insert the display unit from the front at a height of approx. 10 mm and slide down. The loops on the
display part must be inserted into the grooves on the measuring head.
5 Removing the filter cartridge
• Switch off the unit’s power supply (remove plug).
• Close inlet valve 7at inlet hose.
• Place the flushing hose in a bucket and remove pressure from the filter system by opening the
flush valve. Catch the escaping water in a bucket.
Note: Insert the free end of the flush hose in a bucket. If the discharged water is more than
0.5 litres, the inlet value is not completely closed or is blocked with scale.
• Stand on the kick loops 12 with both feet while opening the pressure vessel
lid 3by pressing the lock 15 and turning it anticlockwise as far as it will go.
The filter cartridge 2is released by pressing on the mantle handle 16 .
• Place the pressure vessel lid 3vertically on both lid handles 20 .
Note: Do not turn the lid horizontally on its head.
• Keep both feet on the kick loops 12 .
• Stand on the kick loops 12 with both feet while turning the pressure vessel 1anticlockwise
by the mantle handles 16 as far as it will go.
• Take your feet off the kick loops and push the pressure vessel down with both hands on the
mantle handles 16 .
• Remove exhausted filter cartridge 2from the pressure vessel 1.
• Place the exhausted filter cartridge 2in the sink with the connection facing down for
drainage (> 5 min.).
• Lock the exhausted filter cartridge
2
with the transport protective cap
18
of the new filter cartridge
and return in the original packaging to the appropriate BRITA address listed on the back of the cover.

12
EN
6 Inserting the Filter Cartridge
• Check the connector seat of the filter cartridge O-ring 2in the pressure vessel
lid 1for dirt and damage.
• Check that the O-ring seal of the filter cartridge 2is correctly seated
in the groove and also check for dirt and damage.
Note: The cartridge seat has been lubricated with food-safe lubricant
at the factory.
• Place the new filter cartridge 2in the pressure vessel 1.
• Stand on the kick loops 12 with both feet, lift the pressure vessel 1turning it
clockwise until the mantle handle 16 is over the kick loops 12 .
• Stand on the kick loops 12 with both feet and place the pressure vessel
lid 3on the pressure vessel 1. The positioning of the arrow marking on the
lid handle 20 must line up with the “INSERT” groove.
• Press the pressure vessel lid 3down and turn clockwise until the lock 15
engages.
• Switch on power supply to the terminal device (plug).
7 Commissioning
Flushing/bleeding filter systems with and without measuring and display unit
Note: A bucket with a minimum capacity of 10 l is needed for flushing/bleeding.
• Position filter system horizontally.
• Completely open flush valve 9.
• Open the inlet valve 7on the inlet hose 6completely holding the flush
hose 21 in the bucket. Flush with at least 10 litres of water with a minimum
volumetric flow of 3 l/min (180 l/h).
• Close flush valve 9, put down filter and empty bucket.
• Carefully open flush valve 9while holding the flush hose in the bucket.
Flush quantity once again with at least 10 litres.
Note: In systems with a measuring and display unit the end of the flushing
process is shown on the display.

13
EN
• Close flush valve 9.
• Check system for any leaks.
• Write the next replacement date on the sticker supplied and affix this to the service pass on the
pressure vessel 1.
Note: Do not stick over the top sticker with the installation date.
Note: Filter systems without measuring and display units are now ready for operation.
Checking initialisation of filter systems with a measuring and display unit
• The carbonate hardness, bypass setting as a percentage, remaining capacity in litres and the
current date must be shown on the display (Manual Chapter 5.5).
Note: If these values are not shown on the display the filter system must be flushed again
(Manual Chapter 5.4), until the values appear on the display.
Note: Filter systems without measuring and display units are now ready for operation.
8 Filter capacity
The filter capacity tables for coffee and expresso machines and vending machines and for combi
ovens and traditional ovens are listed on pages 4/5.
Note: The capacities specified in the bypass and capacity table for coffee and expresso machines
and vending machines are guidelines only that may vary by ± 5% depending on the product volume
flow and also depending on the type of machine. With combi ovens and traditional ovens, depending
on the type of machine, select the bypass setting 10% for optimally prepared water for the combi
oven/conventional oven. We will be happy to discuss your individual recommendations.
Note: The capacity limits refer to average use of the appliance, do not contain any filter flushing and
cleaning cycles and depend on local water quality, flow, mains pressure and flow continuity.
9 Technical data
Operating pressure 2 bar to max. 6.9 bar
Operating/water temperature 4°C to 30 °C
Ambient temperature during: Operation 10°C to 40°C
Ambient temperature during: Storage –20°C to 50 °C
10 Order numbers
Article number
PURITY 450 Quell ST filter cartridge 273000
PURITY 600 Quell ST filter cartridge 273200
PURITY 1200 Quell ST filter cartridge 273400

14
FR
1 Instructions de remplacement PURITY Quell ST
Avant le remplacement du filtre, veuillez tenir compte des indications du manuel d‘utilisation du
système PURITY Quell ST. Vous y trouverez des informations détaillées quant aux instructions de
service et de sécurité, à l‘entretien, au dépannage et aux caractéristiques techniques.
2 Exclusion de responsabilité
L‘installation doit rigoureusement s‘effectuer selon les indications du présent manuel. La société
BRITA ne saurait être tenue pour responsable d‘éventuels dommages directs ou indirects résultant
d‘une installation incorrecte ou d‘une utilisation non conforme du produit.
3 Consignes de sécurité spécifiques
Pour des raisons d’hygiène, la matière filtrante dela cartouche subit un traitement spécial à l’argent.
Une faible quantité d‘argent sans risque pour la santé peut se retrouver dans l‘eau. Ceci est en accord
avec les recommandations de l‘Organisation mondiale de la santé (OMS) en matière d‘eau potable.
Remarque destinée aux personnes souffrant des reins ou aux patients dialysés : pendant le filtrage,
il peut y avoir une légère augmentation de la teneur en potassium. Si vous souffrez des reins et/ou
devez respecter un régime spécial en potassium, nous vous recommandons au préalable de demander
l‘avis de votre médecin.
4 Remplacement de la cartouche filtrante
!Attention : Examiner toutes les pièces démontées minutieusement lors du remplacement !
Remplacer les pièces défectueuses et/ou les nettoyer si l‘on trouve des impuretés ! Lire les consignes
d‘utilisation et de sécurité (chapitre 3 du mode d‘emploi) avant le remplacement. Après un stockage
et un transport en dessous de 0°C, stocker le produit avec l‘emballage d‘origine ouvert au moins
24 heures avant sa mise en service aux températures ambiantes indiquées dans le tableau des
caractéristiques techniques.
Systèmes de filtration sans afficheur électronique/unité de mesure
La cartouche filtrante doit être remplacée au bout de 6–12 mois, 12 mois étant le délai maximum
après la mise en service, indépendamment de l‘état d‘usure de la cartouche. Si la cartouche est
saturée avant cette limite (chapitre 7), il faut la remplacer plus rapidement.
Systèmes de filtration avec afficheur électronique/unité de mesure
Le remplacement de la cartouche filtrante doit s‘effectuer au plus tard 12 mois après la mise en
service, indépendamment de l‘état d‘usure du système de filtration. Si la cartouche filtrante devient
inefficace dans un délai plus court (chapitres 5 et 7 du mode d‘emploi), il faut la remplacer plus rapidement.
Un dépassement de la capacité de filtration est indiqué sur l‘affichage par une valeur négative
clignotante.
L‘histogramme ne contient alors plus de barre. En cas de dépassement de la durée maximale, la
date clignote.

15
FR
Réinitialisation de l‘afficheur électronique
Pour utiliser l’afficheur électronique, il faut le retirer de l‘armature de raccordement. Pousser
le boîtier de l‘afficheur d‘env. 10 mm vers le haut et enlever l‘afficheur par l‘avant. L‘afficheur se
commande avec une touche qui se trouve sur sa face arrière.
• Une pression de la touche (> 10 s) a pour effet de
reprendre les données réglées à la première installation
et d‘actualiser la capacité, le réglage by-pass et la
date entrée.
> 10 sec
Remarque : la durée maximale est automatiquement réglée sur 12 mois.
Remarque : Si aucune saisie n‘intervient pendant plus de 30 secondes, l‘afficheur revient
dans le mode de fonctionnement sans enregistrer les paramètres modifiés.
Poser l‘afficheur devant la tête à une hauteur d‘env. 10 mm et le pousser vers le bas.
Les ergots de l‘afficheur doivent s‘engager dans les rainures de la tête de mesure.
5 Echange de la cartouche filtrante
• Mettre l’appareil raccordé au filtre hors tension (en débranchant la prise).
• Fermer la valve d’entrée 7sur le flexible d’entrée 6.
• Placer le flexible de rinçage dans un seau et mettre le système de filtration hors
pression en ouvrant la valve de rinçage. Récupérer l’eau qui sort dans un seau.
Remarque : si le volume d’eau qui sort dépasse 1 litre, la valve d’entrée 7n’est
pas complètement fermée ou est entartrée.
• Poser les deux pieds sur les appuis 12 et soulever le couvercle 3en
appuyant sur le verrou de sécurité 15 et en tournant simultanément dans
le sens contraire des aiguilles d’une montre jusqu’en butée.
• Poser le couvercle 3verticalement sur les deux poignées 20 .
Remarque : ne pas poser le couvercle horizontalement sur la tête.
• Maintenir les deux pieds sur les appuis 12 et tourner la chambre de pression 1au
niveau des poignées 16 dans le sens contraire des aiguilles d’une montre jusqu’en butée.
• Retirer les pieds des appuis 12 et pousser la chambre de pression 1vers le bas avec
les deux mains au niveau des poignées 16 .
• Enlever la cartouche filtrante 2saturée de la chambre de pression 1.
• Mettre la cartouche 2saturée à l’envers pour la vider de son eau (> 5 min).
• Placer le capuchon de protection 18 de la nouvelle cartouche filtrante sur la cartouche 2satu-
rée et l’envoyer dans le carton d’origine à l’adresse BRITA correspondante indiquée au verso.

16
FR
6 Mise en place de la cartouche filtrante
• Vérifier la propreté et l’état général du logement du joint torique de la cartouche
filtrante 2dans le couvercle 3.
• Vérifier la bonne position du joint torique de la cartouche filtrante 2dans la
rainure, la propreté et l’état.
Remarque : les joints de la cartouche sont graissés en usine avec une
graisse de qualité alimentaire.
• Insérer la nouvelle cartouche 2dans la chambre de pression 1.
• Poser les deux pieds sur les appuis 12 . Soulever la chambre de pression 1et la
tourner dans le sens des aiguilles d’une montre jusqu’à ce que les poignées 16
se trouvent au-dessus des appuis 12 .
• Maintenir les deux pieds posés sur les appuis 12 et placer le couvercle 3sur
la chambre de pression 1. Le positionnement de la flèche sur la poignée de
couvercle 20 doit concorder avec la rainure «INSERT».
• Emboîter le couvercle 3vers le bas et le tourner dans le sens des aiguilles
d’une montre jusqu’à enclenchement du verrou de sécurité 15 .
• Mettre l’appareil raccordé au filtre sous tension (en branchant la prise).
7 Mise en service
Rinçage/purge des systèmes de filtration avec ou sans afficheur électronique/unité de
mesure
Remarque : Un seau d‘au moins 10 litres est nécessaire pour rincer/purger le système.
• Poser le système de filtration à l‘horizontale.
• Ouvrir complètement la vanne de rinçage 9.
• Ouvrir complètement le robinet 7sur le flexible d‘entrée 6en tenant le
flexible de rinçage dans le seau 21 . Volume de rinçage minimum : 10 litres
pour un débit minimum de 3 l/min (180 l/h).
• Fermer la vanne 9. Poser le filtre et vider le seau.
• Ouvrir la vanne 9avec précaution en tenant le flexible de rinçage dans le
seau. Nouveau volume de rinçage minimum : 10 litres.
Remarque : Sur les systèmes avec afficheur électronique/unité de mesure,
la fin du cycle de rinçage est indiquée sur l‘écran.

17
FR
• Fermer la vanne 9.
Vérifier l‘étanchéité du système.
• Noter la prochaine date de remplacement de la cartouche filtrante sur l‘étiquette jointe et
appliquer cette dernière sur la carte de service placée sur la chambre de pression 1.
Remarque : Ne pas recouvrir l‘étiquette tout en haut qui indique la date d‘installation.
Remarque : les systèmes de filtration sans afficheur électronique/unité de mesure sont
maintenant opérationnels.
Contrôle de l‘initialisation des systèmes de filtration avec afficheur électronique/
unité de mesure
• La dureté carbonate, le réglage by-pass en pourcentage, la capacité restante en litres,
l‘histogramme de capacité et la date actuelle doivent s‘afficher sur l‘écran (chapitre 5.5 du
mode d‘emploi).
Remarque : Si ces valeurs ne s‘affichent pas, il faut rincer le système de filtration (chapitre 5.4 du
mode d’emploi) jusqu‘à ce qu‘elles apparaissent.
• Les systèmes de filtration avec afficheur électronique/unité de mesure sont maintenant
opérationnels.
8 Capacité de filtration
Les tableaux de détermination de la capacité de filtration pour les machines à café/expresso,
les distributeurs, les fours vapeur et fours traditionnels se trouvent aux pages 4/5.
Remarque : Les capacités mentionnées dans le tableau de réglage by-pass et de détermination de
la capacité pour les machines à café/expresso et les distributeurs sont des valeurs indicatives qui
peuvent varier de ± 5% en fonction du débit et dépendent aussi du type d‘appareil. En cas d‘utilisation
avec des fours vapeur et des fours traditionnels choisir, selon le type d‘appareil, le réglage by-pass
10% pour bénéficier d‘un traitement d‘eau optimal. Nous donnons volontiers des conseils adaptés à des
besoins particuliers !
Remarque : Les capacités limites se rapportent à la sollicitation moyenne de l‘appareil. Elles ne
comprennent pas les cycles de rinçage et de nettoyage du filtre et dépendent de la qualité de l‘eau
locale, du débit, de la pression dans le tuyau et de la continuité du débit.
9 Caractéristiques techniques
Pression de fonctionnement 2 bars à max. 6,9 bars
Température de fonctionnement/de l‘eau 4°C à 30 °C
Température ambiante : Fonctionnement 10°C à 40°C
Température ambiante : Stockage –20°C à 50 °C
10 Références
Référence
PURITY 450 Quell ST, cartouche filtrante 273000
PURITY 600 Quell ST, cartouche filtrante 273200
PURITY 1200 Quell ST, cartouche filtrante 273400

18
NL
1 Gebruiksaanwijzing voor vervanging PURITY Quell ST
Neem vóór het vervangen van de filterpatroon het systeemhandboek voor het PURITY Quell ST
Waterfiltersysteem in acht. Daar vindt u gedetailleerde informatie met betrekking tot bedienings- en
veiligheidsvoorschriften, onderhoud, oplossen van storingen en technische gegevens.
2 Aansprakelijkheid
De vervanging van het filter moet exact volgens de instructies in deze gebruiksaanwijzing voor
vervanging worden uitgevoerd BRITA is niet aansprakelijk voor eventuele schade, inclusief gevolg-
schade, die kan ontstaan door het niet opvolgen of het op een verkeerde wijze uitvoeren van de
instructies in deze gebruiksaanwijzing voor vervanging.
3 Productspecifieke veiligheidsvoorschriften
Om hygiënische redenen heeft het filtermateriaal van de filterpatroon een speciale behandeling met
zilver ondergaan. Hierdoor kan een geringe hoeveelheid zilver worden afgegeven aan het water, die
echter geen gevaar vormt voor de gezondheid. Dit is in overeenstemming met de aanbevelingen van
de Wereldgezondheidsorganisatie (WHO) voor drinkwaterkwaliteit.
Opmerking voor mensen met een nieraandoening of dialysepatiënten: tijdens het filterproces kan
het kaliumgehalte iets toenemen. Als u aan een nierziekte lijdt en/of een speciaal kaliumdieet volgt,
adviseren wij u vooraf met uw arts te overleggen.
4 Vervangen van de filterpatroon
!Attentie: Bij het vervangen alle gedemonteerde onderdelen zorgvuldig nakijken! Defecte
onderdelen moeten vervangen worden, verontreinigde delen dienen gereinigd te worden! Vóór de
vervanging de gebruiks-en veiligheidsvoorschriften (handboek, hoofdstuk 3) in acht nemen. Na
opslag en transport onder 0°C moet het product in de geopende originele verpakking minstens 24 uur
voor de inbedrijfstelling worden opgeslagen bij de in de tabel „Technische gegevens” aangegeven
omgevingstemperatuur bij bedrijf.
BRITA Waterfiltersystemen zonder elektronische meet- en afleeseenheid
De vervanging van de filterpatroon moet na 6–12 maanden plaatsvinden, uiterlijk echter 12 maanden
na de inbedrijfstelling, onafhankelijk van de uitputtingsgraad van het Waterfiltersysteem. Als de
capaciteit van de filterpatroon eerder uitgeput is (handboek, hoofdstuk 7), moet de vervanging eerder
plaatsvinden.
BRITA Waterfiltersystemen met elektronische meet- en afleeseenheid
De vervanging van de filterpatroon moet uiterlijk 12 maanden na inbedrijfstelling plaatsvinden, onafhankelijk
van de uitputtingsgraad van het Waterfiltersysteem. Als de capaciteit van de filterpatroon eerder uitgeput
is (handboek, hoofdstuk 5 en 7), moet de vervanging eerder plaatsvinden. Als de capaciteit van de patroon
wordt overschreden, wordt deze in het display negatief weergegeven en knippert de waarde. In het
balkendiagram worden geen balken meer weergegeven. Als de maandenlimiet voor de patroon
overschreden
is, wordt dit gesignaleerd door het knipperen van de datum.

19
NL
Het display resetten
Om het display te bedienen, dient u het eerst van het aansluitstuk te verwijderen. Displayhuis ca. 10 mm
naar boven schuiven en het display er naar voren uitnemen. De bediening van het display vindt plaats
via een toets aan de achterkant van het display.
• Door (> 10 sec) op de toets te drukken worden de
gegevens overgenomen die bij de eerste installatie
zijn ingesteld en de capaciteit, bypass-instelling en
invoerdatum bijgewerkt.
> 10 sec
Aanwijzing: De maandlimiet wordt hierbij automatisch op 12 maanden gezet.
Aanwijzing: Als er langer dan 30 seconden geen invoer plaatsvindt, keert het display terug naar de
bedrijfsmodus zonder gewijzigde parameters over te nemen.
Display van voren op ca. 10 mm hoogte erin zetten en omlaag schuiven. De neuzen op het display
moeten in de groeven op de meetkop worden ingevoerd.
5 Verwijderen van de filterpatroon
• Spanningstoevoer van het eindapparaat uitschakelen (stekker uit het stopcontact trekken).
• Ingangsventiel 7op de toevoerslang 6aansluiten.
• Spoelslang in een emmer houden en het Waterfiltersysteem drukloos maken door het spoelventiel
te openen. Het weglopende water in een emmer opvangen.
Opmerking: als er meer dan één liter water wegloopt, is het ingangsventiel 7niet volledig
gesloten of verkalkt.
• Met beide voeten op de strips 12 gaan staan en daarbij het deksel van de
drukbehuizing
3
openen door op de vergrendeling
15
te drukken en tegelijkertijd
linksom tot aan de aanslag te draaien.
• Deksel drukbehuizing 3verticaal op beide dekselgrepen 20 zetten.
Aanwijzing: deksel niet in horizontale positie ondersteboven neerleggen.
• Met beide voeten op de strips
12
gaan staan en daarbij de drukbehuizing
1
aan de handgrepen
16 linksom tot aan de aanslag draaien.
• Voeten van de strips 12 nemen en drukbehuizing 1met beide handen aan de handgrepen 16
omlaag drukken.
• Uitgeputte filterpatroon 2uit de drukbehuizing 1verwijderen.
• Uitgeputte filterpatroon 2met aansluiting omlaag in gootsteen plaatsen (> vijf minuten)
om hem te legen.
• Uitgeputte filterpatronen 2afsluiten met de transportbeschermkap 18 van de nieuwe filter-
patroon en in de originele doos naar het betreffende BRITA-adres terugsturen dat op de achter-
kant van de omslag wordt vermeld.

20
NL
6 Installeren van de filterpatroon
• Aansluitzitting voor de O-ring van de filterpatroon 2in deksel behuizing 3op
verontreiniging en beschadiging controleren.
• Controleer of de O-ring van de nieuwe filterpatroon 2op correcte wijze in de
groef is bevestigd, controleer op verontreiniging en beschadiging.
Aanwijzing: De zitting van de filterpatroon is in de fabriek met een voedselveilig
smeermiddel ingevet.
• Nieuwe filterpatroon 2in de drukbehuizing 1plaatsen.
• Met beide voeten op de strips 12 gaan staan, drukbehuizing 1optillen en met
de klok mee draaien tot de handgrepen 16 boven de strips 12 staan.
• Met beide voeten op de strips 12 gaan staan en het deksel van de drukbehuizing
3op de drukbehuizing 1zetten. De positionering van de pijlmarkering op de
dekselgreep 20 moet hierbij met groef „INSERT” overeenstemmen.
• Deksel van drukbehuizing 3omlaag drukken en rechtsom draaien tot de
vergrendeling 15 vastklikt.
• Spanningstoevoer van de apparatuur inschakelen (netstekker).
7 Inbedrijfstelling
Spoelen/ontluchten van BRITA Waterfiltersystemen met en zonder elektronische meet- en
afleeseenheid
Aanwijzing: voor het spoelen/ontluchten is een emmer met een inhoud van minimaal 10 l nodig.
• Waterfiltersysteem horizontaal neerleggen.
• Spoelventiel 9helemaal openen.
• Ingangsventiel 7op toevoerslang 6geheel openen, daarbij spoelslang 21
in de emmer houden. Spoelhoeveelheid: minstens 10 liter bij een minimale
volumestroom van 3 l/min (180 l/h).
• Spoelventiel 9sluiten, filter neerzetten en emmer legen.
• Spoelventiel 9voorzichtig openen, daarbij spoelslang in de emmer houden.
Spoelhoeveelheid minimaal 10 liter.
Aanwijzing: In BRITA Waterfiltersystemen met een elektronische meet- en
afleeseenheid wordt het einde van het spoelproces in het display weergegeven.
Other manuals for PURITY 450 Quell ST
2
This manual suits for next models
2
Table of contents
Languages:
Other Brita Water Dispenser manuals

Brita
Brita Purity C Series User manual

Brita
Brita AquaGusto 100 User manual

Brita
Brita Elemaris XL User manual

Brita
Brita Tap User manual

Brita
Brita WD 3010 User manual

Brita
Brita Elemaris User manual

Brita
Brita PURITY 450 Steam Guide

Brita
Brita PURITY 450 Quell ST Guide

Brita
Brita Wave BPA-Free Water Pitcher User manual

Brita
Brita PURITY 600 Quell ST User manual