TARTERUSA.COM
KIT INCLUDES:
TOOLS NEEDED:
INSTALLATION INSTRUCTIONS:
1.
2.
3.
4.
(REV 2) 0422224000096
5.
6.
7.
8.
9.
TARTERUSA.COM
STEP ONE
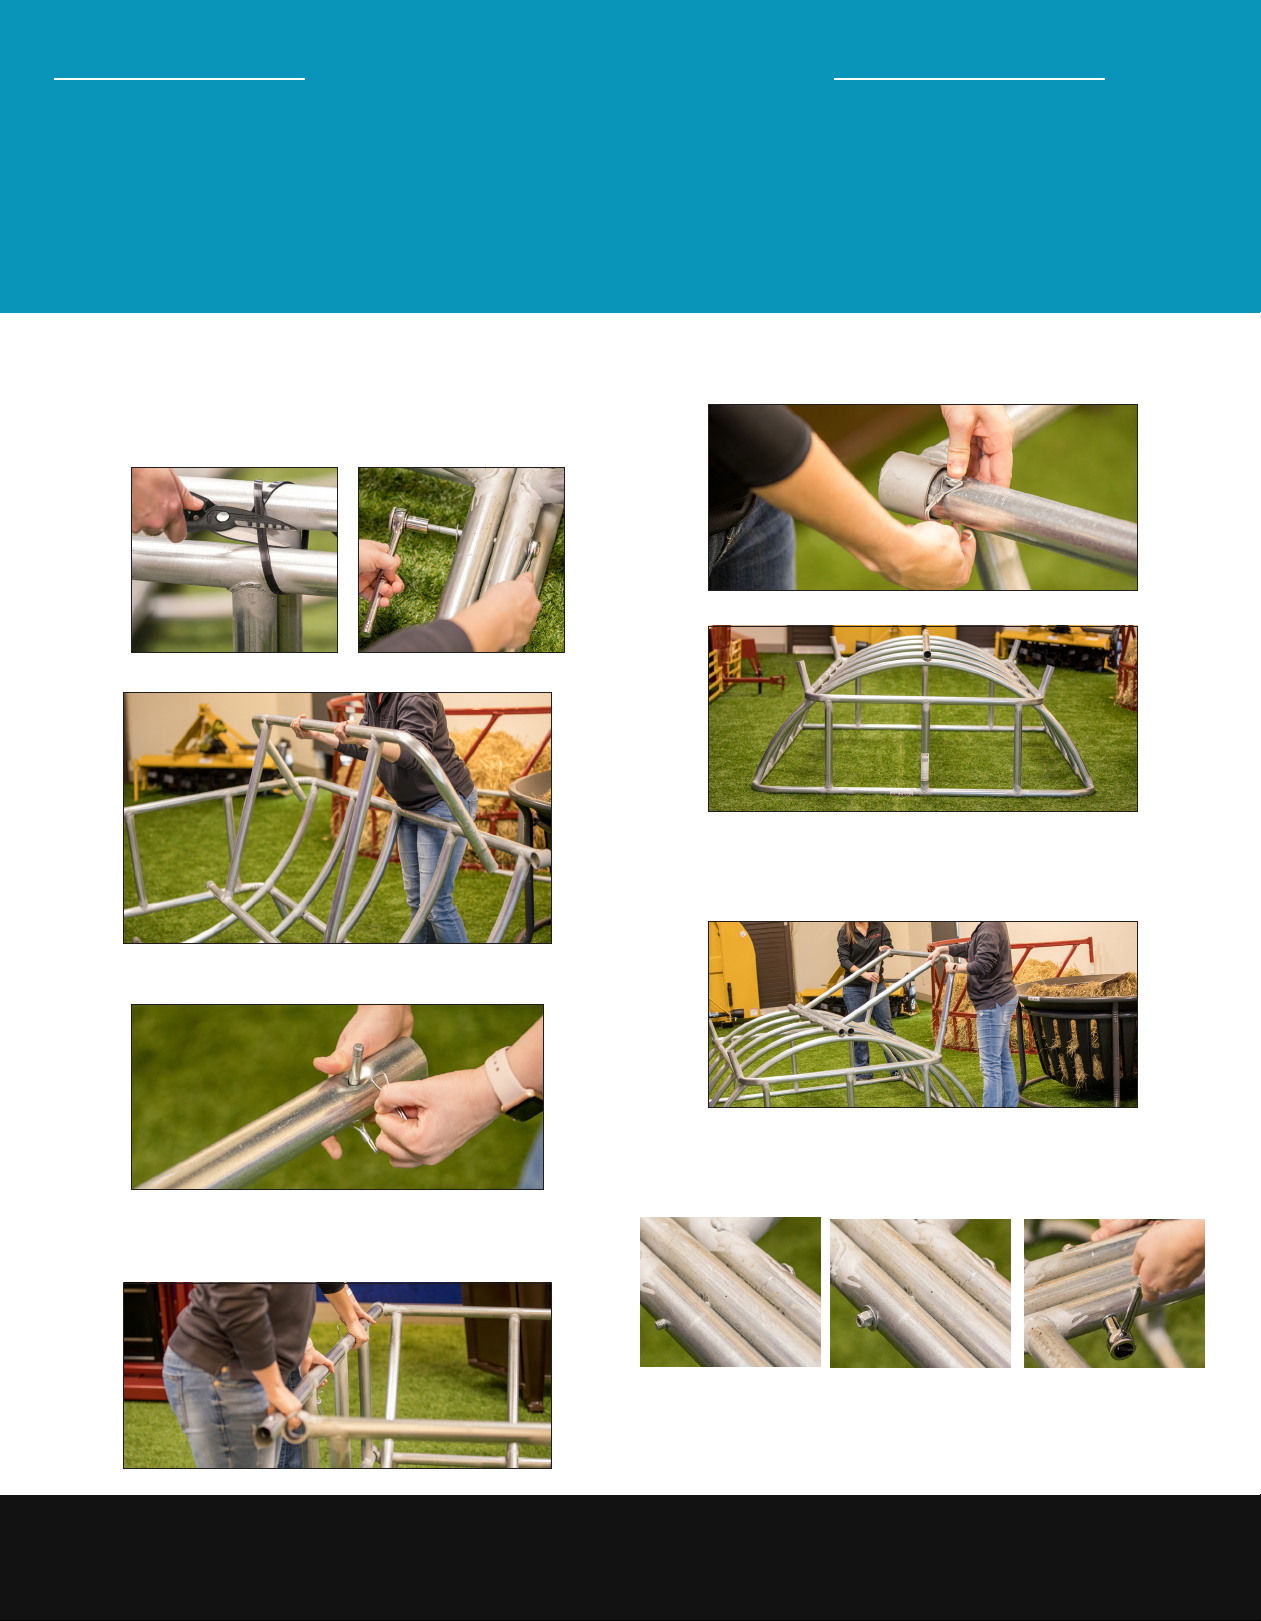
Cut all packing straps with tin snips or knife.
Using a 9/16” wrench, remove the two 6” bolts,
washers and lock nuts from the leg assembly in
the center of the hay rack and set aside for later.
STEP TWO
Place leg racks and front panel outside hay rack.
STEP THREE
Place front panel near the open area of hay rack and
remove the clevis pins (as shown) from both sides of
panel.
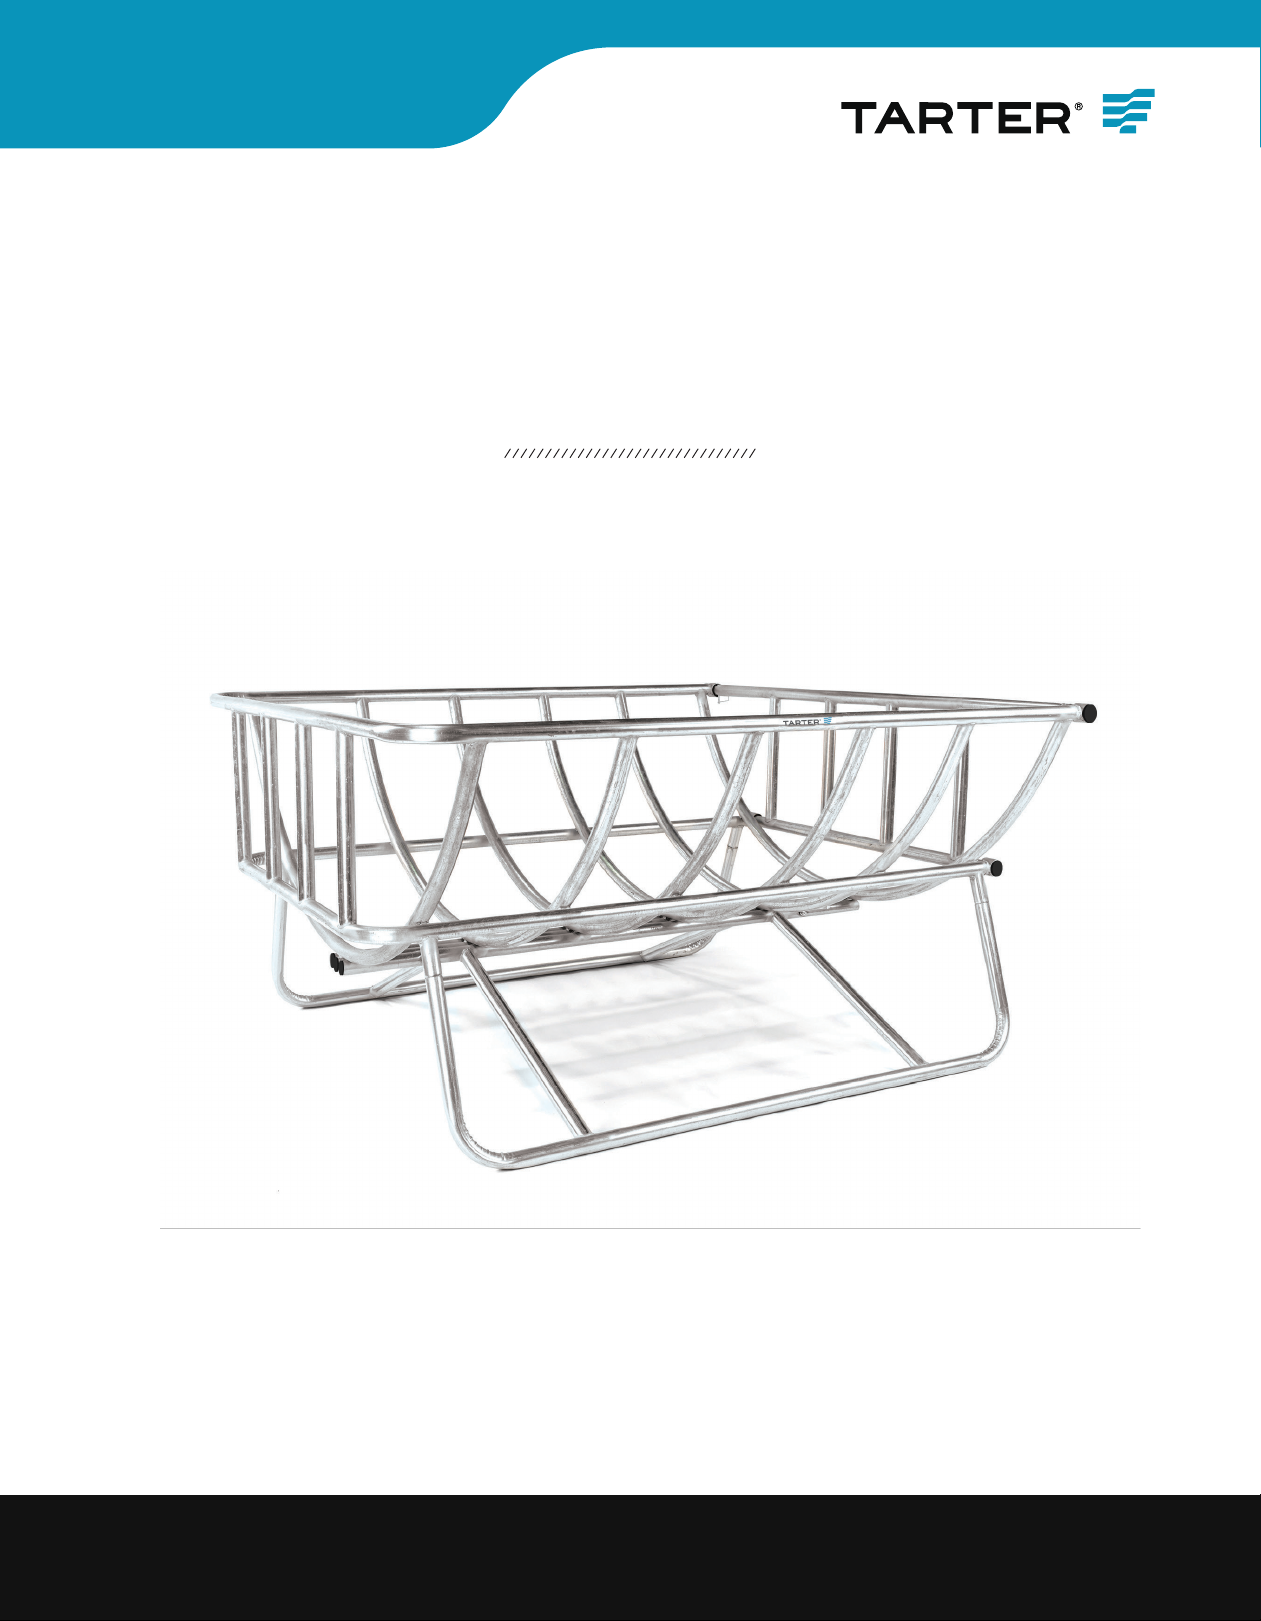
INTRODUCTION
The Cradle Bale Feeder keeps round bales off the
ground to minimize waste. For a brief video about
this product, please visit tarterusa.com, click on
Products > Feeders > Cattle Hay Feeders.
TOOLS REQUIRED
• Tin Snips/Knife
• 9/16” Wrench
4000096 (REV 1) 022620
TARTERUSA.COM
STEP ONE
Cut all packing straps with tin snips or knife.
Using a 9/16” wrench, remove the two 6” bolts,
washers and lock nuts from the leg assembly in
the center of the hay rack and set aside for later.
STEP TWO
Place leg racks and front panel outside hay rack.
STEP THREE
Place front panel near the open area of hay rack and
remove the clevis pins (as shown) from both sides of
panel.
INTRODUCTION
The Cradle Bale Feeder keeps round bales off the
ground to minimize waste. For a brief video about
this product, please visit tarterusa.com, click on
Products > Feeders > Cattle Hay Feeders.
TOOLS REQUIRED
• Tin Snips/Knife
• 9/16” Wrench
4000096 (REV 1) 022620
STEP FOUR
Align the upper and lower arm of the front panel with
the upper and lower sleeves of the hay cradle and
slide the panel into sleeve as far as possible.
Caution: Be aware of possible pinch points.
STEP FIVE
STEP SIX
Turn hay cradle frame upside down and place flat on
the ground.
TARTERUSA.COM
Align the opposite side of front panel with the upper
and lower sleeves and slide into place. Replace
clevis pins into upper and lower holes on both sides
of the front panel and lock into position.
STEP SEVEN
Take leg frame and slide left and right arms into
sleeves on the bottom of frame. Apply pressure to leg
frame to seat arms firmly into sleeves. Switch the
side the legs are on if they do not line up. Repeat
the process on the other side.
Caution: Be aware of possible pinch points.
4000096 (REV 1) 022620
STEP EIGHT
Place 6” bolt through holes in both legs and center
support beam. Place washer and locking nut on end
of bolt and tighten with 9/16” wrench. Repeat step
to other bolt in support beam near the back of the
hay cradle.
STEP NINE
Turn hay cradle upright onto legs.
TARTERUSA.COM
COMPLETE
You have now successfully assembled your Cradle
Bale Feeder and ready for use. For more information
and questions, please contact: Tarter Customer
Service 1-800-RED-GATE (1-800-733-4283).
4000096 (REV 1) 022620