manuals.online logo
Brands
  1. Home
  2. •
  3. Brands
  4. •
  5. Tascam
  6. •
  7. Media Converter
  8. •
  9. Tascam iU2 User manual

Tascam iU2 User manual

iU2 Audio/MIDI Interface for iPhone/iPad/iPod touch
TASCAM iU2 1
D01171900B
取扱説明書への追加と訂正
取扱説明書に説明不足や誤記がありましたことをお詫びして、追加と訂正を
いたします。(太字/下線部)
説明文の追加
1. 10ページ(左)1MON MIXつまみ
LINE OUT L /LINE OUT R端子および 端子からは本機の入力信号
(INPUT L端子か 端子のいずれかとINPUT R端子からの入力)と、
Dock経由で入力されたiOSデバイスまたはUSB経由で入力されたパソ
コンの出力信号をミックスして出力します。
 このつまみを使って、これらの信号のバランスを調節します。左いっぱ
い(COMPUTER)にするとDock経由で入力されたiOSデバイスまた
はUSB経由で入力されたパソコンの出力信号、右いっぱい(INPUT)
にすると本機の入力信号を出力します。
2. 11ページ(右)~ 12ページ(左)eMini USB端子
 USBケーブルを使ってパソコンと接続します(USB2.0に対応)。
USBケーブルを使ってUSB充電器と接続した場合、Dockコネクターケ
ーブルに接続されたiOSデバイスへの充電ができます。
 充電のために接続する場合は、必ずDockコネクターケーブルにiOSデ
バイスを接続後にUSBケーブルを接続してください。
この端子にUSB充電器またはパソコンを接続する事でファントム電源が
使用できます。
この端子に接続したUSB充電器がコンセントから抜けるとノイズが混入
しますのでご注意ください。
3. 28ページ(右)トラブルシューティングの確認項目の追加
0ライン/マイク(L)端子(INPUT L端子)の音が入力できない。
    ↓
i ボトムパネルのINPUT LスイッチがLINEあるいはMICに設定され
ていますか?
iiOSデバイスに4pinのマイク付きヘッドホンが接続されていません
か?
iOSデバイスは4pinのマイク付きヘッドホンを接続すると、入力を
マイク付きヘッドホンに切り換えてしまいます。3pinのヘッドホン
をご使用ください。
誤記訂正
29ページ/アナログ入出力定格の下記項目の数値を変更します。
(左)マイク1入力(INPUT L)規程入力レベル:−63dBu ~−21dBu
(左)マイク2入力(INPUT R)規程入力レベル:−63dBu ~−21dBu
(左)ラインL入力(INPUT L)規程入力レベル:−38dBu ~ +4dBu
(右)ラインR入力(INPUT R)規程入力レベル:−38dBu ~ +4dBu
(右)ギター入力( )     規程入力レベル:−58dBV ~−16dBV
Additions and Corrections to the Owner’s
Manual
The bold underlined items below are additions and corrections to the Owner’s
Manual.
Additions
1. Page 8 (left)
1 MON MIX knob
Signals input through the unit’s jacks (from the INPUT L jack or jack and the INPUT
R jack) and either from the iOS device through the dock connector or from the
computer by USB are mixed together and output from the LINE OUT L/R jacks and
jack.
Use this knob to adjust the balance between these signals. Turn the knob all the way
to the left (COMPUTER) to output only the signal from the iOS device or from the
computer by USB or all the way to the right (INPUT) to output only the signals input
through the unit’s jacks.
2. Page 9 (right)
13 Mini USB port
Use a USB cable to connect the unit with a computer (supports USB 2.0).
If the unit is connected to a USB recharger using the USB cable, the iOS device
connected to the dock connector cable can be recharged.
In order to recharge an iOS device, you must connect the device to the dock
connector cable before connecting the USB cable.
Connecting a USB recharger or computer to this port also enables the use of
phantom power.
Please be aware that unplugging the power of a USB recharger that is
connected to this port will momentarily cause noise in the audio signal.
3. Page 27 (right)
Additional item to check when troubleshooting
0Cannot input sound through the line/mic INPUT L jack.
• IstheINPUTLswitchonthebottompanelsettoLINEorMICasappropriate?
• Are (4-pin) headphones with a built-in mic connected to the iOS device?
If you connect (4-pin) headphones with a built-in mic to the iOS device,
the built-in mic will automatically become the active input. Use (3-pin)
headphones without a built-in mic.
CORRECTION
Page 28
The values of the analog input and output ratings have been changed as follows.
MIC 1 input (INPUT L)8Nominal input level: –63 dBu to –21 dBu
MIC 2 input (INPUT R)8Nominal input level: –63 dBu to –21 dBu
Line R input (INPUT L)8Nominal input level: –38 dBu to +4 dBu
Line R input (INPUT R)8Nominal input level: –38 dBu to +4 dBu
Guitar input (8) Nominal input level: –58 dBV to –16 dBV
Ergänzungen und Korrekturen zum
Benutzerhandbuch
Die im Folgenden unterstrichenen Passagen sind Ergänzungen und Korrekturen
am Benutzerhandbuch.
Ergänzungen
1. Seite 8 (links)
1 MON MIX-Regler
Die Eingangssignale der beiden Eingangskanäle (INPUT L/Gitarreneingang und
INPUT R) werden entweder mit dem vom iOS-Gerät über die Dockverbindung
oder mit dem vom Computer über USB zurückgeführten Signal gemischt und
anschließend an den Lineausgangsbuchsen LINE OUT L/R und der Kopfhörerbuchse
ausgegeben.
Mit diesem Regler passen Sie das Mischverhältnis zwischen diesen Signalen an.
Um nur das vom iOS-Gerät oder vom Computer via USB zurückgeführte Signal
abzuhören, drehen Sie den Regler vollständig nach links (COMPUTER). Um nur die
an den Eingängen anliegenden Signale abzuhören, drehen Sie ihn vollständig nach
rechts (INPUT).
2. Seite 10 (links)
Mini-USB-Schnittstelle
Verwenden Sie ein USB-Kabel, um das Interface mit Ihrem Computer zu verbinden
(unterstützt wird USB 2.0).
Indem Sie das Interface mithilfe des USB-Kabels mit einem USB-Ladegerät verbinden,
können Sie das via Dock-Anschlusskabel verbundene iOS-Gerät auaden.
Damit das iOS-Gerät aufgeladen wird, müssen Sie es zunächst mit dem Dock-
Anschlusskabel verbinden und erst danach die USB-Verbindung herstellen.
Sobald Sie ein USB-Ladegerät oder einen Computer mit dieser Schnittstelle
verbinden, können Sie auch die Phantomspeisung nutzen.
Bitte beachten Sie, dass beim Entfernen eines mit diesem Anschluss
verbundenen USB-Ladegeräts ein kurzzeitiges Geräusch im Audiosignal
auftritt.
3. Seite 28 (rechts)
Zusätzliche Punkte bei der Problembehebung
0Über den Line-/Mikrofoneingang INPUT L erfolgt keine Toneingabe.
• VergewissernSiesich,dasssichderSchalterINPUTLaufderGeräteunterseite
entsprechend der angeschlossenen Audioquelle in der richtigen Position bendet
(LINE oder MIC).
Vergewissern Sie sich, dass kein Headset mit einem 4-poligen Stecker mit
dem iOS-Gerät verbunden ist.
• Wenn dies der Fall ist, wird das Mikrofon des Headsets automatisch als
Eingang verwendet. Verwenden Sie stattdessen Kopfhörer (mit 3-poligem
Stecker) ohne eingebautes Mikrofon.
Korrektur
Seite 29
Die Nominalpegel der Analogeingänge und -ausgänge wurden wie folgt geändert:
Mikrofoneingang 1 (INPUT L) Nominaler Eingangspegel: –63 dBu bis –21 dBu
Mikrofoneingang 2 (INPUT R) Nominaler Eingangspegel: –63 dBu bis –21 dBu
Lineeingang L (INPUT L) Nominaler Eingangspegel: –38 dBu bis +4 dBu
Lineeingang R (INPUT R) Nominaler Eingangspegel: –38 dBu bis +4 dBu
Gitarreneingang ( ) Nominaler Eingangspegel: –58 dBV bis –16 dBV
iU2 Audio/MIDI Interface for iPhone/iPad/iPod touch
2TASCAM iU2 PrintedinChina
Ajouts et corrections du mode d'emploi
Les éléments soulignés ci-dessous sont les ajouts et corrections du mode
d'emploi.
Ajouts
1. Page 8 (gauche)
1 Bouton MON MIX
Les signaux entrant par les prises de l'unité (par la prise INPUT L ou la prise et la
prise INPUT R) et soit par le connecteur de dock depuis l'appareil iOS soit par USB
depuis l'ordinateur sont mixés ensemble et produits par les prises LINE OUT L/R et
la prise .
Utilisez ce bouton pour régler la balance entre ces signaux. Tournez le bouton à fond
à gauche (COMPUTER) pour ne produire que le signal reçu de l'appareil iOS ou de
l'ordinateur par USB ou à fond à droite (INPUT) pour ne produire que les signaux
entrant par les prises de l'unité.
2. Page 9 (droite)
13 Mini-port USB
Utilisez un câble USB pour brancher l'unité à un ordinateur (accepte l'USB 2.0).
Si l'unité est connectée à un chargeur USB utilisant le câble USB, l'appareil iOS
branché au câble connecteur de dock peut être rechargé.
Pour recharger un appareil iOS, vous devez le brancher au câble connecteur de dock
avant de brancher le câble USB.
Brancher un chargeur USB ou un ordinateur à ce port permet aussi l'emploi de
l'alimentation fantôme.
Veuillez noter que débrancher du secteur le chargeur USB connecté à ce port
entraînera un bruit momentané dans le signal audio.
3. Page 27 (droite)
Point supplémentaire à vérier pour le dépannage
0Impossible de faire entrer du son par la prise ligne/micro INPUT L.
• LecommutateurINPUTLdelafaceinférieureest-ilréglésurLINEouMICcomme
nécessaire?
• Un casque (4 broches) avec micro incorporé est-il branché à l'appareil iOS ?
Si vous branchez un casque (4 broches) avec micro incorporé à l'appareil
iOS, ce micro deviendra automatiquement l'entrée active. Utilisez un
casque (3 broches) sans micro incorporé.
CORRECTION
Page 28
Les valeurs d'entrée et de sortie analogiques ont été modiées comme suit.
8Entrée MIC 1 (INPUT L) Niveau d'entrée nominal : –63 dBu à –21 dBu
8Entrée MIC 2 (INPUT R) Niveau d'entrée nominal : –63 dBu à –21 dBu
8Entrée ligne L (INPUT L) Niveau d'entrée nominal : –38 dBu à +4 dBu
8Entrée ligne R (INPUT R) Niveau d'entrée nominal : –38 dBu à +4 dBu
8Entrée guitare ( ) Niveau d'entrée nominal : –58 dBV à –16 dBV
Aggiunte e correzioni al manuale di istruzi-
oni
Gli elementi sottolineati in grassetto qui sotto sono aggiunte e correzioni al
manuale di istruzioni.
Aggiunte
1. Pagina 8 (a sinistra)
1 manopola MON MIX
I segnali di ingresso attraverso le prese dell'unità (dalla presa INPUT L o la presa
e la presa INPUT R) e sia dal dispositivo iOS tramite il connettore dock che dal
computer via USB vengono mixati insieme e mandati in uscita dalla presa LINE OUT
L/R e la presa .
Usare questa manopola per regolare il bilanciamento di questi segnali. Ruotare la
manopola completamente a sinistra (COMPUTER) per emettere soltanto il segnale
dal dispositivo iOS o dal computer da USB o tutto a destra (INPUT) per emettere
solo i segnali di ingresso tramite le prese dell'unità.
2. Pagina 9 (a destra)
13 Porta mini USB
Usare un cavo USB per collegare l’unità a un computer (supporta USB 2.0).
Se l’unità è collegata a un caricabatterie USB tramite il cavo USB, il dispositivo iOS
collegato al cavo del connettore dock può venire ricaricato.
Per ricaricare un dispositivo iOS, è necessario collegare il dispositivo al cavo del
connettore dock prima di collegare il cavo USB.
Il collegamento di un caricabatterie USB o un computer a questa porta abilita
anche l'uso dell'alimentazione phantom.
Si prega di considerare che il distacco dell’alimentazione di un caricabatterie
USB collegato a questa porta causa un rumore momentaneo nel segnale audio.
3. Pagina 27 (a destra)
Voce aggiuntiva da controllare per la risoluzione dei problemi
0Nessun suono in ingresso dalla presa linea/mic INPUT L.
• L’interruttoreINPUTLsulpannelloinferioreèimpostatosuLINEoMICaseconda
deicasi?
• Sono collegate cue con microfono incorporato (4 pin) al dispositivo iOS?
Se si connettono cue con microfono incorporato (4 pin) al dispositivo iOS,
il microfono incorporato diventerà automaticamente l'ingresso attivo. Usare
cue senza microfono incorporato (3 pin).
CORREZIONE
Page 28
I valori di ingresso analogico e i dati di uscita sono stati modicati come segue.
8Ingresso MIC 1 (L INPUT) Livello nominale di ingresso: da -63 dBu a -21 dBu
8Ingresso MIC 2 (INPUT R) Livello nominale di ingresso: da -63 dBu a -21 dBu
8Ingresso Line L (INPUT L) Livello nominale di ingresso: da -38 dBu a +4 dBu
8Ingresso Line R (INPUT R) Livello nominale di ingresso: da -38 dBu a +4 dBu
8Ingresso GUITAR ( ) Livello nominale di ingresso: da -58 dBV a -16 dBV
Adiciones y correcciones al Manual de
instrucciones
Los elementos que aparecen a continuación en negrita y subrayados son
adiciones y correcciones al Manual de instrucciones.
Adiciones
1. Página 8 (izquierda)
1 Mando MON MIX
Las señales introducidas a través de las tomas de la unidad (a través de la toma INPUT
L o la toma y la toma INPUT R) y también desde el dispositivo iOS a través del
conector dock o desde el ordenador vía USB son mezcladas juntas y emitidas a
través de las tomas LINE OUT L/R y de la toma .
Use este mando para ajustar el balance entre estas señales. Gire el mando
completamente a la izquierda (COMPUTER) para dar salida solo a la señal
procedente del dispositivo iOS o del ordenador vía USB o totalmente a la derecha
(INPUT) para dar salida únicamente a las señales recibidas a través de las tomas de
entrada de esta unidad.
2. Página 9 (derecha)
13 Puerto USB mini
Use un cable USB para conectar esta unidad con un ordenador (admite USB 2.0).
Si la unidad está conectada a un cargador USB a través del cable USB, podrá recargar
el dispositivo iOS que esté conectado al cable de la toma dock.
De cara a recargar un dispositivo iOS, deberá conectar dicho dispositivo al cable de la
toma dock ANTES de conectar el cable USB.
La conexión de un cargador u ordenador USB a este puerto también permite el
uso de alimentación fantasma.
Tenga en cuenta que la desconexión de la corriente de un cargador USB que
tenga conectado a este puerto producirá de forma momentánea ruidos en la
señal audio.
3. Página 27 (derecha)
Elemento adicional a vericar en la resolución de problemas
0No puedo dar entrada a sonidos a través de la toma INPUT L de micro/
línea.
¿Está el interruptor INPUT L del panel inferior ajustado a LINE o MIC según
corresponda?
¿Tiene unos auriculares con micro incorporado (4 puntas) conectados al
dispositivo iOS?
Si conecta unos auriculares con micro incorporado (4 puntas) al dispositivo
iOS, ese micro incorporado se convertirá automáticamente en la entrada
activa. Use unos auriculares (3 puntas) que no incluyan un micro.
CORRECCIÓN
Página 28
Los valores de la entrada y salida analógica han sido modicados de la siguiente
forma.
8Entrada MIC 1 (INPUT L) Nivel de entrada nominal: –63 a –21 dBu
8Entrada MIC 2 (INPUT R) Nivel de entrada nominal: –63 a –21 dBu
8Entrada Line R (INPUT L) Nivel de entrada nominal: –38 a +4 dBu
8Entrada Line R (INPUT R) Nivel de entrada nominal: –38 a +4 dBu
8Entrada Guitar ( ) Nivel de entrada nominal: –58 a –16 dBV
Other manuals for iU2

1

Other Tascam Media Converter manuals

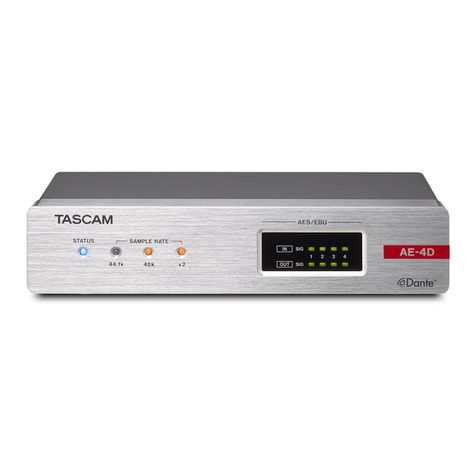
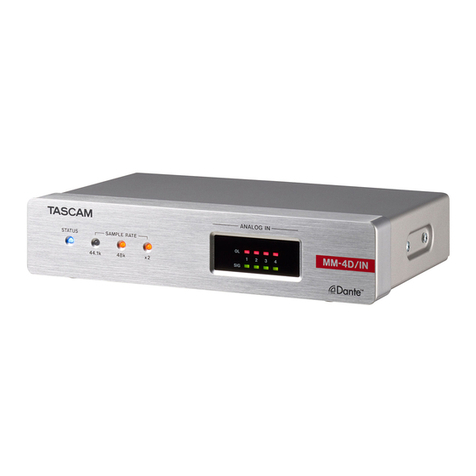
Tascam Dante AE-4D User manual

Tascam

Tascam Dante AE-4D User manual

Tascam CD-A580 User manual

Tascam

Tascam CD-A580 User manual

Tascam US-16X08 Use and care manual

Tascam

Tascam US-16X08 Use and care manual

Tascam LA-80MKII User manual

Tascam

Tascam LA-80MKII User manual

Tascam LA-40MKIII User manual

Tascam

Tascam LA-40MKIII User manual

Tascam FW-1804 User manual

Tascam

Tascam FW-1804 User manual

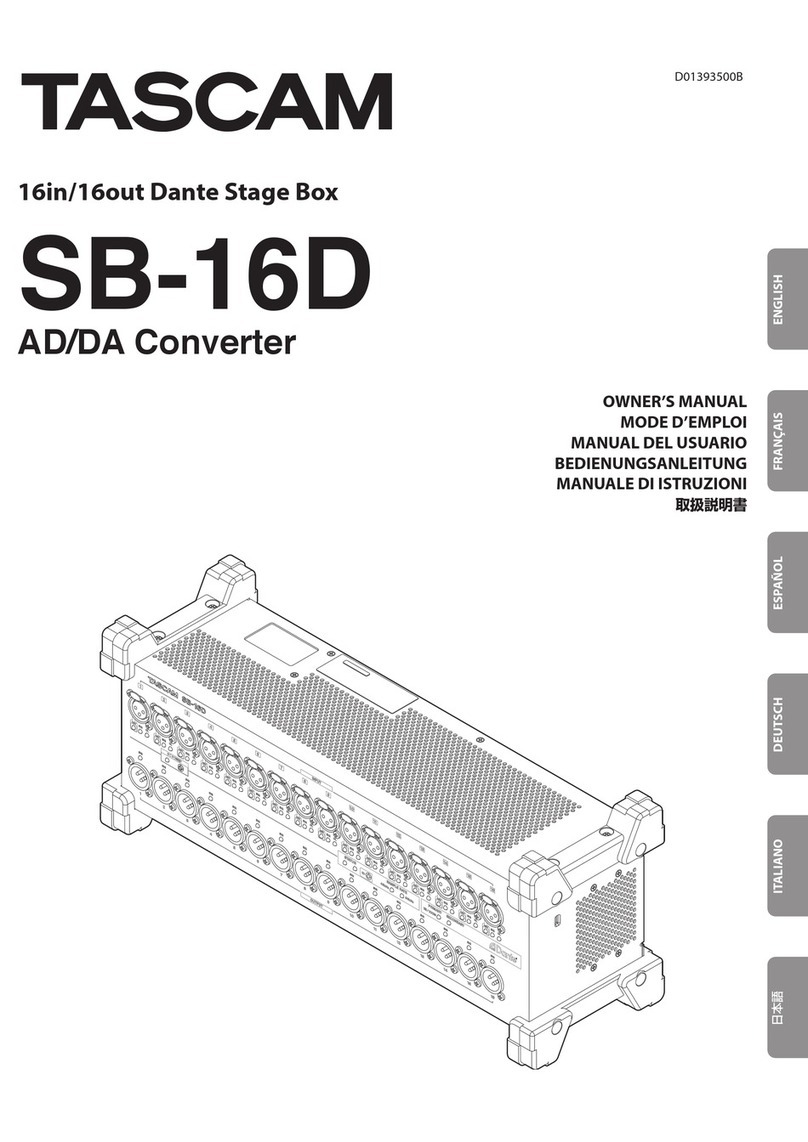
Tascam SB-16D User manual

Tascam

Tascam SB-16D User manual

Tascam SB-16D User manual

Tascam

Tascam SB-16D User manual

Tascam ML-32D User manual

Tascam

Tascam ML-32D User manual

Tascam us-4x4 User manual

Tascam

Tascam us-4x4 User manual

Tascam 0US-4x4TP User manual

Tascam

Tascam 0US-4x4TP User manual

Tascam MM-4D/IN-E User manual

Tascam

Tascam MM-4D/IN-E User manual

Tascam IF-DA8 User manual

Tascam

Tascam IF-DA8 User manual

Tascam MM-2D-E User manual

Tascam

Tascam MM-2D-E User manual

Tascam FW-1884 User manual

Tascam

Tascam FW-1884 User manual

Tascam Dante ML-4D/OUT-X User manual

Tascam

Tascam Dante ML-4D/OUT-X User manual

Tascam iXR User manual

Tascam

Tascam iXR User manual

Popular Media Converter manuals by other brands

Analog way SmartMatriX2 user manual

Analog way

Analog way SmartMatriX2 user manual

Okto Research dac8 Stereo owner's manual

Okto Research

Okto Research dac8 Stereo owner's manual

ADF Web J1939 user manual

ADF Web

ADF Web J1939 user manual

Revez HD500MOD user manual

Revez

Revez HD500MOD user manual

Kramer FC-42 user manual

Kramer

Kramer FC-42 user manual

Lead 2FE1-4ETH Series manual

Lead

Lead 2FE1-4ETH Series manual

evertz HD9010-SIE instruction manual

evertz

evertz HD9010-SIE instruction manual

Vicon VN-301TV5 Installation & operation manual

Vicon

Vicon VN-301TV5 Installation & operation manual

La Boite Concept LP160 user manual

La Boite Concept

La Boite Concept LP160 user manual

Honeywell S1 instruction manual

Honeywell

Honeywell S1 instruction manual

ION VCR 2 PC quick start guide

ION

ION VCR 2 PC quick start guide

Hegel HD30 user manual

Hegel

Hegel HD30 user manual

DCS 900E user manual

DCS

DCS 900E user manual

Transition Networks ION001-A Install guides

Transition Networks

Transition Networks ION001-A Install guides

Baumer HUBNER BERLIN HMG10 Mounting and operating instructions

Baumer

Baumer HUBNER BERLIN HMG10 Mounting and operating instructions

MG M80YV instruction manual

MG

MG M80YV instruction manual

Digitrax DN163A3 manual

Digitrax

Digitrax DN163A3 manual

Kelfar Technologies AK4 Pro SE Guide manual

Kelfar Technologies

Kelfar Technologies AK4 Pro SE Guide manual

manuals.online logo
manuals.online logoBrands
  • About & Mission
  • Contact us
  • Privacy Policy
  • Terms and Conditions

Copyright 2025 Manuals.Online. All Rights Reserved.