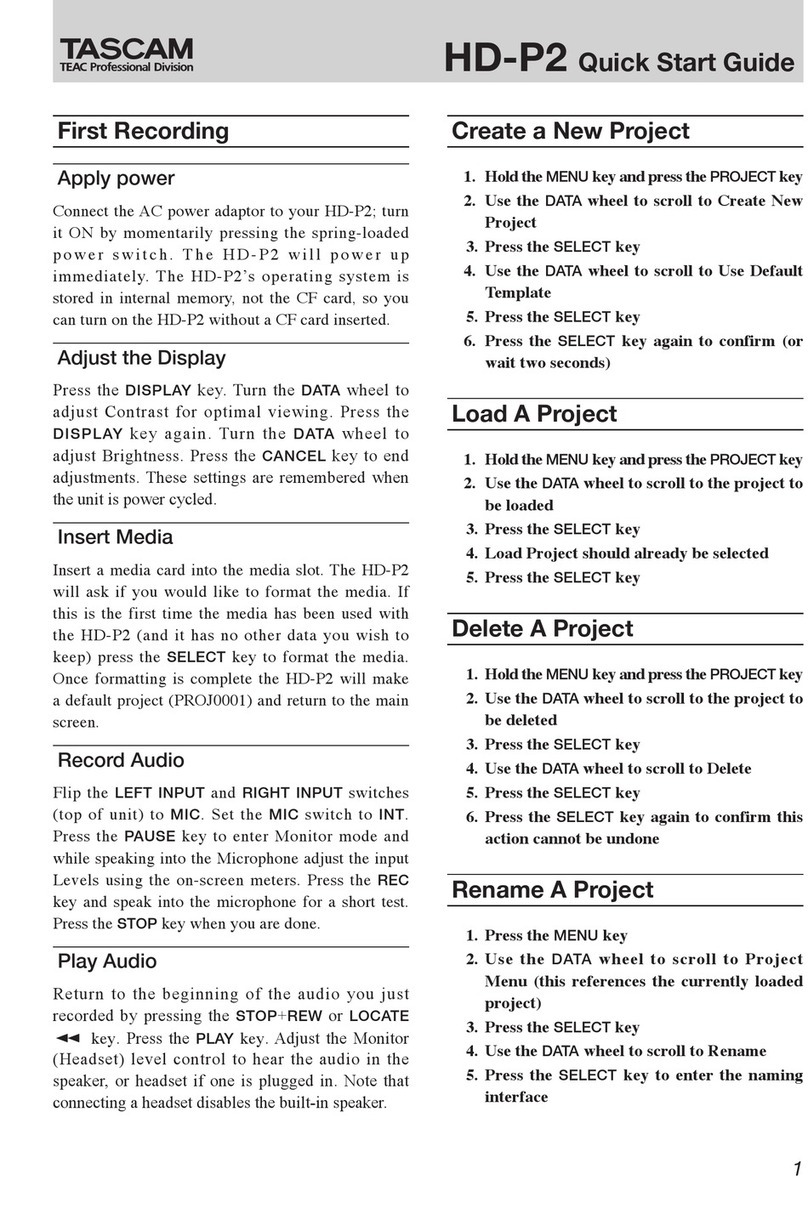
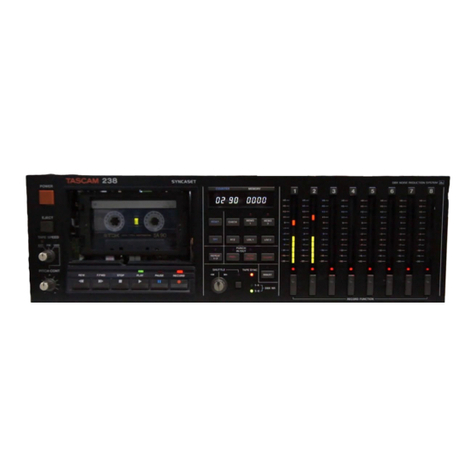
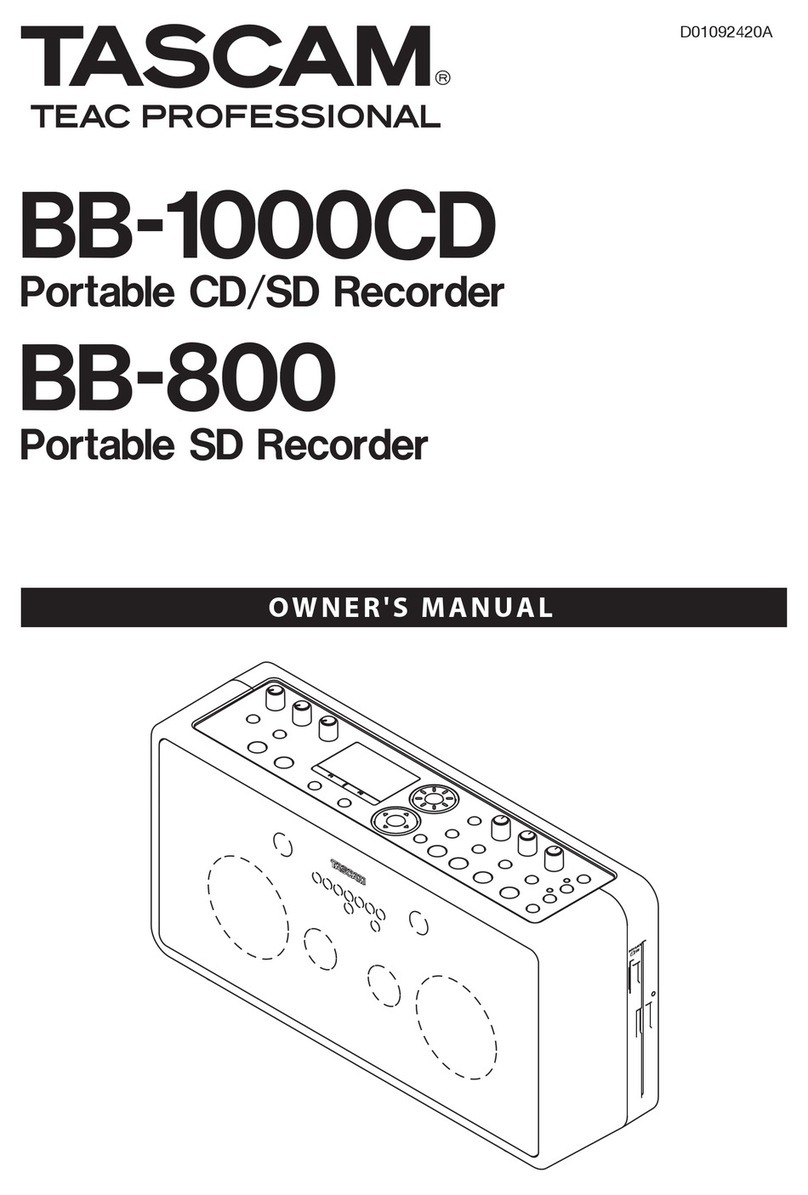
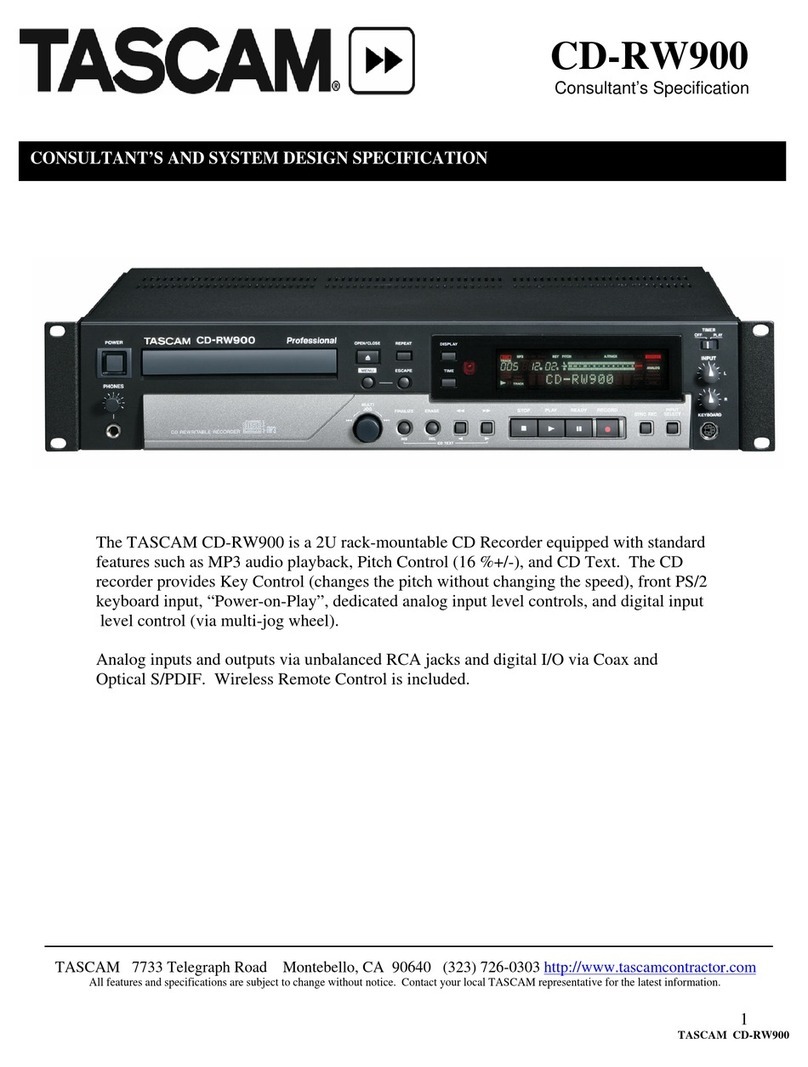
Tascam CC-222MKIV User manual

CC-222@%^
CD Recorder/Cassette Deck
D01226620B
OWNER'S MANUAL
Professional

2TASCAM CC-222MKIV
IMPORTANT SAFETY PRECAUTIONS
The exclamation point within an equilateral triangle is intended to alert the user to the
presence of important operating and maintenance (servicing) instructions in the litera-
ture accompanying the appliance.
The lightning flash with arrowhead symbol, within equilateral triangle, is intended to alert
the user to the presence of uninsulated “dangerous voltage” within the product’s enclo-
sure that may be of sufficient magnitude to constitute a risk of electric shock to persons.
CAUTION: TO REDUCE THE RISK OF ELECTRIC SHOCK, DO NOT REMOVE COVER (OR
BACK). NO USER-SERVICEABLE PARTS INSIDE. REFER SERVICING TO QUALIFIED SERVICE
PERSONNEL.
This device complies with Part 15 of FCC Rules. Operation
is subject to the following two conditions:
1) This device may not cause harmful interference, and
2) This device must accept any interference received, includ-
ing interference that may cause undesired operation.
INFORMATION TO THE USER
This equipment has been tested and found to comply
with the limits for a Class A digital device, pursuant to Part
15 of the FCC Rules. These limits are designed to provide
reasonable protection against harmful interference when
the equipment is operated in a commercial environment.
This equipment generates, uses, and can radiate radio
frequency energy and, if not installed and used in accor-
dance with the instruction manual, may cause harmful
interference to radio communications.
Operation of this equipment in a residential area is likely
to cause harmful interference in which case the user
will be required to correct the interference at his own
expense.
CAUTION
Changes or modifications to this equipment not expressly
approved by TEAC CORPORATION for compliance could
void the user's authority to operate this equipment.
For U.S.A.
IN USA/CANADA, USE ONLY ON 120 V SUPPLY.
WARNING: TO PREVENT FIRE OR
SHOCK HAZARD, DO NOT EXPOSE THIS
APPLIANCE TO RAIN OR MOISTURE.
For Canada
THIS CLASS A DIGITAL APPARATUS COMPLIES
WITH CANADIAN ICES-003.
CET APPAREIL NUMERIQUE DE LA CLASSE A EST
CONFORME A LA NORME NMB-003 DU CANADA.

TAS CA M CC-222MKIV 3
IMPORTANT SAFETY INSTRUCTIONS
• The apparatus draws nominal non-operating power
from the AC outlet with its POWER or STANDBY/ON
switch not in the ON position.
• The mains plug is used as the disconnect device, the
disconnect device shall remain readily operable.
• Caution should be taken when using earphones or
headphones with the product because excessive
sound pressure (volume) from earphones or
headphones can cause hearing loss.
• If you are experiencing problems with this product,
contact TEAC for a service referral. Do not use the
product until it has been repaired.
CAUTION
• Do not expose this apparatus to drips or splashes.
• Do not place any objects filled with liquids, such as
vases, on the apparatus.
• Do not install this apparatus in a confined space
such as a book case or similar unit.
• The apparatus should be located close enough to
the AC outlet so that you can easily grasp the power
cord plug at any time.
• If the product uses batteries (including a battery
pack or installed batteries), they should not be
exposed to sunshine, fire or excessive heat.
• CAUTION for products that use replaceable lithium
batteries: there is danger of explosion if a battery is
replaced with an incorrect type of battery. Replace
only with the same or equivalent type.
WARNING
• Products with Class !construction are equipped
with a power supply cord that has a grounding
plug. The cord of such a product must be plugged
into an AC outlet that has a protective grounding
connection.
8RACK-MOUNTING THE UNIT
Use the supplied rack-mounting kit to mount the unit in a
standard 19-inch rack, as shown below.
Remove the feet of the unit before mounting.
CAUTION
• Leave 1U of space above the unit for ventilation.
• Allow at least 10 cm (4 in) at the rear of the unit for
ventilation.
1 Read these instructions.
2 Keep these instructions.
3 Heed all warnings.
4 Follow all instructions.
5 Do not use this apparatus near water.
6 Clean only with dry cloth.
7 Do not block any ventilation openings. Install in
accordance with the manufacturer's instructions.
8 Do not install near any heat sources such as radiators,
heat registers, stoves, or other apparatus (including
ampliers) that produce heat.
9 Do not defeat the safety purpose of the polarized
or grounding-type plug. A polarized plug has two
blades with one wider than the other. A ground-
ing type plug has two blades and a third grounding
prong. The wide blade or the third prong are pro-
vided for your safety. If the provided plug does not
t into your outlet, consult an electrician for replace-
ment of the obsolete outlet.
10 Protect the power cord from being walked on or
pinched particularly at plugs, convenience recep-
tacles, and the point where they exit from the appa-
ratus.
11 Only use attachments/accessories specified by the
manufacturer.
12 Use only with the cart, stand, tripod, bracket, or table
specied by the manufacturer, or sold with the appa-
ratus. When a cart is used, use caution when moving
the cart/apparatus combination to avoid injury from
tip-over.
13 Unplug this apparatus during lightning storms or
when unused for long periods of time.
14 Refer all servicing to qualified service personnel.
Servicing is required when the apparatus has been
damaged in any way, such as power-supply cord or
plug is damaged, liquid has been spilled or objects
have fallen into the apparatus, the apparatus has
been exposed to rain or moisture, does not operate
normally, or has been dropped.

4TASCAM CC-222MKIV
Safety Instructions
8CAUTIONS ABOUT LASER RADIATION
This product has been designed and manufactured accord-
ing to FDA regulations “title 21, CFR, chapter 1, subchap-
ter J, based on the Radiation Control for Health and Safety
Act of 1968,” and is classified as a class 1 laser product.
There is no hazardous invisible laser radiation during oper-
ation because invisible laser radiation emitted inside of this
product is completely confined in the protective housings.
The label required in this regulation is shown at 1.
1For USA
CERTIFICATION
THIS PRODUCT COMPLIES WITH 21 CFR
1040.10 AND 1040.11 EXCEPT FOR
DEVIATIONS PURSUANT TO LASER
NOTICE NO.50, DATED JUNE 24, 2007.
MADE IN CHINA
Cautions:
• DO NOT REMOVE THE PROTECTIVE HOUSING
USING A SCREWDRIVER.
• USE OF CONTROLS OR ADJUSTMENTS OR
PERFORMANCE OF PROCEDURES OTHER
THAN THOSE SPECIFIED HEREIN MAY RESULT
IN HAZARDOUS RADIATION EXPOSURE.
• IF THIS PRODUCT DEVELOPS TROUBLE,
CONTACT YOUR NEAREST QUALIFIED
SERVICE PERSONNEL, AND DO NOT USE THE
PRODUCT IN ITS DAMAGED STATE.
Optical pickup
Type: LO-DWH02
Manufacturer: Lite-space Technology Co., Ltd.
Laser output: Less than 131.9mW (CD) and
147.8mW (DVD) on the objective
lens
Wavelength: 785nm (CD) typical
661nm (DVD) typical
Standard: IEC60825-1: 2007
8CAUTIONS ABOUT BATTERIES
This product uses batteries. Misuse of batteries could
cause a leak, rupture or other trouble. Always abide by
the following precautions when using batteries.
• Never recharge non-rechargeable batteries. The
batteries could rupture or leak, causing fire or injury.
• When installing batteries, pay attention to the
polarity indications (plus/minus (+/–) orientation), and
install them correctly in the battery compartment as
indicated. Putting them in backward could make the
batteries rupture or leak, causing fire, injury or stains
around them.
• When you store or dispose batteries, isolate their terminals
with insulation tape or something like that to prevent
them from contacting other batteries or metallic objects.
• When throwing used batteries away, follow the
disposal instructions indicated on the batteries and the
local disposal laws.
• Do not use batteries other than those specified. Do not
mix and use new and old batteries or different types of
batteries together. The batteries could rupture or leak,
causing fire, injury or stains around them.
• Do not carry or store batteries together with small
metal objects. The batteries could short, causing leak,
rupture or other trouble.
• Do not heat or disassemble batteries. Do not put them
in fire or water. Batteries could rupture or leak, causing
fire, injury or stains around them.
• If the battery fluid leaks, wipe away any fluid on
the battery case before inserting new batteries. If
the battery fluid gets in an eye, it could cause loss
of eyesight. If fluid does enter an eye, wash it out
thoroughly with clean water without rubbing the eye
and then consult a doctor immediately. If the fluid
gets on a person’s body or clothing, it could cause skin
injuries or burns. If this should happen, wash it off with
clean water and then consult a doctor immediately.
• The unit power should be off when you install and
replace batteries.
• Remove the batteries if you do not plan to use the unit
for a long time. Batteries could rupture or leak, causing
fire, injury or stains around them. If the battery fluid
leaks, wipe away any fluid on the battery compartment
before inserting new batteries.
• Do not disassemble a battery. The acid inside the
battery could harm skin or clothing.

TAS CA M CC-222MKIV 5
Contents
1 – Introduction...................................... 6
Supplied accessories.................................... 6
Some notes, precautions and
environmental considerations.................... 7
Beware of condensation...................................7
Never use a stabilizer or printable discs..........7
Handling of compact discs................................8
About CD-R and CD-RW discs ....................8
About finalizing........................................... 9
“Recordable” discs.............................................9
About tapes ................................................9
About this manual....................................... 9
Use of the remote control unit................. 10
Batteries ........................................................... 10
Inserting batteries ................................................. 10
2 – Features of the CC-222@%^ ...........11
Front panel................................................. 11
Rear panel.................................................. 12
Display........................................................ 13
RC-222MKIV Remote control unit............. 14
3 – Menu operation ..............................15
Menu operation......................................... 15
Menu configuration .................................. 15
4 – Disc operations................................16
Simple playback operations ..................... 16
Time display modes......................................... 16
Track search...................................................... 16
Playback modes ......................................... 17
Random playback ............................................ 17
Program playback............................................ 17
Repeat playback ..............................................18
A to B repeat playback....................................18
Intro check ................................................. 18
Auto spacing.............................................. 18
Pitch control playback............................... 19
Key control playback................................. 19
Playing back MP3 files .............................. 20
About MP3 track data ........................................... 20
Directory playback setting .............................20
5 – Recording CDs .................................21
Input selection........................................... 21
Signal volume .................................................. 21
Input monitoring ............................................. 21
Sampling Frequency conversion ....................21
Basic recording ..........................................22
Time display while recording .........................23
Playing back tracks..........................................23
Restricting the number of tracks ...................23
Full disc.............................................................23
Recording to disc from the RIAA PHONO
inputs ......................................................... 23
Dubbing from tape to disc........................ 24
Dubbing to CD from the middle of the tape.24
Bypassing the INPUT level for dubbing.........24
Advanced recording .................................. 25
Setting the trigger level..................................25
Using the trigger level ....................................25
Synchronized recording ..................................26
Automatic track division........................... 26
To enable or disable automatic track division: ... 26
Manually divide track......................................26
Fade-in and fade-out ................................ 27
To set the fade times: ............................................ 27
To perform a fade-in:.......................................27
To perform a fade-out: ....................................27
Rec mute function ..................................... 27
Copy-protection ........................................ 27
6 – After recording............................... 28
Finalizing.................................................... 28
Unfinalizing CD-RW discs ...............................28
Erasing........................................................28
Erasing tracks...................................................29
Erasing a whole disc........................................29
Refreshing a disc..............................................29
7 – Cassette operating ......................... 30
Playback operations ..................................30
Continuous tape/CD playback........................30
Recording operations................................ 31
Dubbing tapes from the CD deck............. 31
Dubbing to tape from the middle of a CD ....32
Recording tapes from the PHONO deck .. 32
Other recording features.......................... 32
Recording silences between items.................32
Erasing tapes....................................................32
Other tape functions and features .......... 33
Tape counter ....................................................33
Pitch control .....................................................33
OUT2 setting (TAPE or AUTO) ........................33
8 – Reference and specifications......... 34
Error messages ..........................................34
Messages displayed during normal
operation ...................................................34
Specifications............................................. 35
CD recorder section.........................................35
Cassette recorder section ...............................35
Phono input and headphones........................36
General specifications.....................................36
Dimensional drawing................................ 37
6TASCAM CC-222MKIV
1 – Introduction
Thank you for your purchase of the TASCAM
CC-222MKIV CD Recorder/Cassette Deck.
Before connecting and using the unit, please take some
time to read this manual thoroughly to ensure you under-
stand how to properly set up and connect the CC-222MKI V,
as well as the operation of its many useful and convenient
functions. After you have finished reading this manual,
please keep it in a safe place for future reference.
The CC-222MKIV provides you with an advanced system
for the recording and playback of digital compact discs and
analog cassettes, providing easy duplication facilities in
both directions, and combining the most advanced technol-
ogy in both fields.
Additional audio units, both analog and digital, can be
connected easily through the rear panel connections,
allowing the recording of other sources.
Additionally, the CC-222MKIV is fitted with a dedicated
phono connection, which eliminates the need for an addi-
tional RIAA-equipped amplifier when archiving vinyl
recordings.
TASCAM’s legendary attention to detail provides a high-
quality full-featured cassette tape deck.
24-bit digital-to-analog and analog-to-digital converters
provide excellent recording and playback quality for the
CD recorder.
A sampling frequency convertor is incorporated, allow-
ing the recording of CDs from digital audio sources which
are at frequencies other than the CD standard sampling
frequency of 44.1 kHz.
Disc track divisions can be entered manually, or can
produced automatically as a response to the input signal
level.
“One-touch” fade-ins and fade-outs over a specified
time allow you to edit program material to your specific
requirements.
A multi-function “multi dial” is used to set and confirm
parameter settings.
NOTE
This product is designed to help you record and repro-
duce sound works to which you own the copyright, or
where you have obtained permission from the copy-
right holder or the rightful licensor. Unless you own the
copyright, or have obtained the appropriate permis-
sion from the copyright holder or the rightful licensor,
your unauthorized recording, reproduction or distri-
bution thereof may result in severe criminal penalties
under copyright laws and international copyright trea-
ties. If you are uncertain about your rights, contact
your legal advisor. Under no circumstances will TEAC
Corporation be responsible for the consequences of
any illegal copying performed using the CC-222MKIV.
Supplied accessories
In addition to this manual, the CC-222MKIV has been
packed with the following:
• RC-222MKIV remote control unit .................................1
• AC power cable ...............................................................1
• AA batteries for the remote control unit ........................2
• Rack-mounting screw kit (screws and washers) .............1
• Owner’s Manual (this manual) .......................................1
The warranty is included at the end of this manual.
Contact your TASCAM supplier if any of these items are
missing.

1 – Introduction
TAS CA M CC-222MKIV 7
Some notes, precautions and environmental considerations
The CC-222MKIV may be used in most areas, but to main-
tain top performance, and prolong operating life, observe
the following notes, precautions and environmental condi-
tions:
• Avoid exposing it to extremes of temperature and
humidity and avoid mechanical shocks and vibration.
• Keep the unit away from strong magnetic fields (TV
sets, computer monitors, large electric motors, etc.).
• The nominal temperature should be between 5°C and
35°C (41°F and 95°F).
• Relative humidity should be 30 to 90 degrees non-
condensing.
• As the unit may become hot during operation, always
leave sufficient space above the unit for ventilation. Do
not install this unit in a confined space such as a book
case or similar product, and do not put any material
goods on the unit.
• Avoid installing this unit on top of any heat-generating
electrical device such as a power amplifier.
• Make sure that the unit is mounted in a level position for
correct operation.
• The voltage selector on the rear panel is only available
on units for the North American market. Please set this
to match your local supply. If you are in any doubt in
this matter, consult an electrician.
NOTE
When transporting the unit, always use the original
packing materials. For this reason, we strongly recom-
mend that you save all the packing materials that came
with the CC-222MKIV, in case you need to transport it
in the future.
Beware of condensation
If the unit (or a compact disc) is moved from a cold to a
warm place, or used after a sudden temperature change,
there is a danger of condensation; vapor in the air could
condense on the internal mechanism, making correct oper-
ation impossible. To prevent this, or if this occurs, let the
player sit for one or two hours at the new room temperature
before using.
Never use a stabilizer or printable discs
Using commercially available CD stabilizers or printable
recordable discs with this player will damage the mecha-
nism and cause it to malfunction.
NOTE
Never use a disc that has had a stabilizer mounted to
it. The residual adhesive may cause the disc to stick to
the turntable of the CC-222MKIV. If it sticks to the turn-
table, you will need a technician to get it out.
Trademarks
• TASCAM is a trademark of TEAC Corporation, regis-
tered in the U.S. and other countries.
• MPEG Layer-3 audio coding technology licensed from
Fraunhofer IIS and Thomson.
• Other company names, product names and logos in this
document are the trademarks or registered trademarks
of their respective owners.

1 – Introduction
8TASCAM CC-222MKIV
The CC-222MKIV has been designed for the playback of
CD-DA format discs and MP3 files recorded in ISO9660
format: In addition to ordinary 5-inch and 3-inch CDs, it
can also play properly recorded CD-R and CD-RW discs.
•
Always place the compact discs in the trays with their
label facing upward.
•
To remove a disc from its case, press down on the center
of the disc holder, then lift the disc out, holding it care-
fully by the edges.
•
Avoid getting fingerprints on the signal side (opposite
the label side). Grime and dust may cause skipping, so
keep discs clean and store them in their cases when not
being played. To clean the signal side of a disc, wipe
gently with a soft dry cloth from the center towards the
outside edge.
•
Do not use any record spray, anti-static solutions,
benzene, paint thinner or other chemical agents to clean
CDs as they could damage the delicate playing surface.
It may cause CDs to become unplayable.
•
Discs should be returned to their cases after use to avoid
serious scratches that could cause the laser pickup to
“skip.”
•
Keep discs away from direct sunlight, and places of
high heat and humidity. If left in such places, warping
could result.
•
Do not affix any labels or stickers to the label side of the
disc. Do not write on the disc with a ballpoint pen.
•
Do not insert discs that have adhesive remaining from
tape or stickers that have been removed. If they are
inserted into the player, they could stick to the internal
mechanism, requiring removal by a technician.
•
Do not use cracked discs.
•
Only use circular compact discs. Avoid using non-circu-
lar promotional, etc. discs.
•
Music discs with copy control, a compact disc copy-
protection system, have been released from several
record companies aiming to protect their copyright
interests. Since some of these discs do not comply with
the CD specifications, they may not be playable on the
CC-222MKI V.
Handling of compact discs
About CD-R and CD-RW discs
CD-R discs can be recorded once only. Once they
have been used for recording, they cannot be erased or
re-recorded. However, if space is available on the disc,
additional material can be recorded. The pack-aging of
CD-R discs will include one of the following logos:
By contrast, a CD-RW disc can be used in much the same
way as a CD-R disc, but the last track or tracks recorded
can be erased before the disc has been “finalized”, and the
space on the disc can be re- used for other recordings. The
packaging of CD-RW discs will include the logo one of the
following logos:
High Speed
However, you should note that an audio CD created using
a CC-222MKIV disc may not play back satisfactorily on
every audio CD player. It will, naturally, be playable on
the CC-222MKIV. This is in no way a limitation of the
CC-222MKIV itself, but of the difference between the
different types of media and the methods used to read
them.
There are precautions that you should take when handling
CD-R and CD-RW discs.
• Avoid touching the recording (non-label) side of a disc
on which you will be recording. Recording on a disc
requires a cleaner surface than playing back, and finger-
prints, grease, etc. can cause errors in the recording
process.
• CD-R and CD-RW discs are sensitive to the effects of
heat and ultraviolet rays. It is important that they are not
stored in a location where direct sunlight will fall on
them, and which is away from sources of heat such as
radiators or heat-generating electrical devices.

1 – Introduction
TAS CA M CC-222MKIV 9
In this manual, we use the term “recordable” disc to
describe a CD-R or CD-RW disc that has not been final-
ized, i.e. further recording is possible on the disc.
“Recordable” discs
About finalizing
Although audio data may be written on a CD-R or CD-RW
disc, a standard CD player will not be able to read the
data (i.e. play back the audio) until a final TOC2 (Table of
contents) has been written at the start of the disc.
The process of writing this table of contents is known as
“finalizing”. Once this has been done, no further data can
be written to the disc. See “Finalizing” on page 28 for
details. In the case of a CD-RW disc which has been final-
ized, the whole of the disc may be erased, or the disc may
be “refreshed”, and the disc re-used.
In addition, a CD-RW disc that has been finalized may be
“unfinalized”, i.e. only the TOC is removed. This allows
further tracks to be recorded to the disc, provided that
there is space on the disc.
2. TOC: Information of recorded data, which con-
tains titles, starting and ending addresses,
and etc..
• Always store CD-R and CD-RW discs in their cases to
avoid dirt and dust accumulating on their surfaces.
• When labeling CD-R and CD-RW discs, always use a
soft oil-based felt-tipped pen to write the information.
Never use a ball-point or hard-tipped pen, as this may
cause damage to the recorded side.
• Always keep the recording sides of the discs away from
grime and dust to avoid a reduction in sound quality.
To clean a disc, wipe gently with a soft dry cloth from
the center towards the outside edge. Do not use thinner,
gasoline, benzene or LP cleaning fluid, as these will
damage the disc and cause the disc unplayable.
• Do not put labels or protective sheets on the discs and do
not use any protective coating spray.
• If you are in any doubt as to the care and handling of a
CD-R and CD-RW discs, read the precautions supplied
with the disc, or contact the disc manufacturer directly.
About tapes
Do not store tapes in the following places:
• On top of heaters, exposed to direct sunlight, or in any
other places with high temperatures.
• Near speakers, on TV sets or amplifiers or where they
would be exposed to strong magnetic fields.
• Where humidity is high, or in dirty, dusty places.
• Avoid dropping or subjecting cassettes to excessive
shocks.
As C-120 tapes are mechanically weak, and could become
entangled in the transport mechanism, we do not recom-
mend their use.
About this manual
In this manual, we use the following conventions:
• The names of keys and controls are given in the follow-
ing typeface: ERASE.
• When the alphanumeric portion of the display shows
a message, this is shown in the following typeface:
Complete.
• If a preset indicator in the display (i.e. one which cannot
change, but is either on or off) is shown, this is shown as
follows: RANDOM.
• Selectable values (i.e. values in dB) or ON and OFF
selections (i.e. SRC>XXX) are shown in the following
typeface: XXX.

1 – Introduction
10 TASCAM CC-222MKIV
• Do not expose the infrared receiver (light receptive area
on the front panel) to direct sunlight or intense light for
extended periods of time. Long exposure to this light
may result in failure of the remote control sensor.
• When the remote control will not be used over one
month, please remove the batteries to prevent the possi-
bility of battery acid leakage which could damage the
unit. Should leakage occur, remove and discard the
batteries, and wipe the battery case thoroughly with a
cloth. Avoid getting the battery liquid on the skin. After
cleaning, replace with new batteries.
• The remote control functions by using an infrared light
signal. When using the unit to control the CC-222MKI V,
other devices that are turned on could be operated by its
signal.
• If the range of remote operation becomes smaller, or
commands do not always function properly, the batter-
ies have become weak and should be replaced. Always
replace both batteries with new batteries of the same type.
• Point the remote control to the remote sensor on the
main unit. Do not obstruct the path between the remote
control and the remote sensor.
Use of the remote control unit
If batteries are used improperly, or if leakage or breakage
occurs, the unit will not function.
Please observe the cautions indicated on the batteries and
their packaging to ensure proper usage.
• Confirm + and – polarity and follow the indications
when inserting new batteries into the remote control.
• Do not use old and new batteries together.
• Even if the battery is the same size, the voltage may
differ. Do not use batteries of different specifications
together.
• Do not attempt to recharge batteries that are non-
rechargeable.
• Do not open or disassemble batteries, throw them into a
fire or put them in water.
ªInserting batteries
1. Open the lid.
2. Conrm+/-polarity,andinserttwoAAbatteries.
3. Close the lid.
NOTE
The batteries are not supplied for Taiwan.
Batteries

1 – Introduction
TAS CA M CC-222MKIV 11
2 – Features of the CC-222@%^
Front panel
This section provides a brief reminder of the functions
provided by these controls.
1Power switch (POWER) Turns the unit on and off.
2Cassette holder Open this holder using the EJECT
key. Insert cassettes tape side downwards, and close the
holder by hand.
3Tape EJECT key Opens the cassette holder.
4RESET key Resets the tape counter to zero.
5REC MUTE key When recording to cassette and this
key is pressed, the sound is muted for about four sec-
onds, and then the unit enters record standby mode.
6RTZ key Returns the tape to the zero position.
7INPUT (cassette) control This rotary control affects
the level fed to the cassette. Note that it has no effect
during automatic disc-to-tape dubbing if the menu item
bypassing the volume during dubbing is set to “through”.
8INPUT 2 SEL key Repeated presses of this key cycles
between the different sources available for the cassette
recorder: LINE2 and DISC.
9DUB 2 TAPE<CD-RW key Starts the process of auto-
matic recording from the disc to a cassette.
0Display Provides information on the status of the cas-
sette and disc transport and the selected input sources, etc.
qDUB 1 TAPE>CD-RW key Starts the process of auto-
matic recording from the cassette to a recordable disc.
wINPUT 1 SEL key Repeated presses of this key cycles
through the different sources available for the CD drive:
OPTICAL, COAXIAL, LINE 1, PHONO, and TAPE.
eINPUT (CD) control This rotary control affects the
level fed to the disc. Note that it has no effect during
automatic tape-to-disc dubbing if the menu item bypass-
ing the volume during dubbing is set to “through”.
rPHONO key Starts recording from the phono source to
the cassette or disc recorder, depending on the selection
made in the menu system. See the appropriate sections
on recording to either tape or disc.
tDisc OPEN/CLOSE key Opens and closes the disc tray.
yDISPLAY key Changes the time display for the disc
recording and playback.
uFINALIZE key Used when finalizing recordable discs.
iERASE key Used when erasing data from CD-RW
discs.
oSYNC REC key Turns synchronized recording of the
disc recorder on and off.
pMENU key Repeated presses of this key cycles through
the different menu options.
aDisc tray Open and close this tray with the OPEN/
CLOSE key to load and unload discs.
sMULTI DIAL Used to select and confirm menu settings
etc. (turn to make the setting, push to confirm), and also
as a track search key when playing back discs.
dREMOTE SENSOR window Receives the infrared
signals from the remote control unit. Do not block this
window if you are using the remote control unit.
fREW key Rewinds the tape moving fast in the right-to-
left direction.
gFFWD key Forwards the tape moving fast in the left-to-
right direction.z
hTape STOP key Stops the current tape transport operation.
jTape PLAY key (˙)Starts or resumes tape playback or
recording, from right to left.
kTape PLAY key (¥)Starts or resumes tape playback or
recording, from left to right.
lTape PAUSE key Stands by for tape playback or record-
ing. Pressing this key again resumes the operation.

1 – Introduction
12 TASCAM CC-222MKIV
2 – Features of the CC-222@%^
;Tape RECORD key When stopped, pressing this key
enters recording standby mode.
zPITCH CONTROL knob This is a centerdetented knob
which allows the tape speed (and therefore the pitch) to
be changed by ±10%.
xREV MODE switch This three-position switch allows
the choice of single-side (Ä) or bidirectional (Ê)
playback and recording, or continuous (ä) playback
only (not recording).
cCD-TAPE CONT PLAY key Use this to turn continuous
playback (alternating between disc and cassette) on and off.
vCD TIMER (OFF/PLAY) switch Use this switch to turn
the CD timer option on or off. When this is in the PLAY
position, turning on the machine with a disc inserted
will automatically start playback.
bCD STOP key Stops CD playback or disc recording.
nCD PLAY key Starts CD playback or recording (from
record standby mode).
mCD PAUSE key Pauses or resumes CD playback or
recording (starts recording from record standby mode).
,CD RECORD key Places the disc in record standby
mode and performs manual track incrementing while
recording.
.MONITOR (TAPE,MIX,DISC) switch This switch
selects the source for the headphone outputs as either the
cassette deck, the disc recorder, or a mixture of both.
/PHONES jack and volume control Connect a standard
pair of stereo headphones to this 1/4” jack, and adjust
the level with the control.
Rear panel
! DIGITAL COAXIAL (INPUT and OUTPUT) jacks
These RCA jacks input and output SPDIF digital audio
data to and from the disc recorder.
Digital audio data received can be at any sampling
frequency between 32kHz and 48kHz. The output is
always 44.1kHz.
@
DIGITAL OPTICAL (INPUT and OUTPUT) jacks These
digital optical connectors input and output SPDIF digital
audio data to and from the disc recorder.
Digital audio data received can be at any sampling fre-
quency between 32kHz and 48kHz.
#
LINE OUTPUTS (L,R) / 1(CD), 2(TAPE/AUTO) Use
these connectors to connect the amplifier to the analog
outputs of the disc recorder (1) or the outputs of the cas-
sette deck (2).
$
RIA A PHONO INPUT (L, R) and GND terminal
Use these connectors to connect a record deck to the
CC-222MKIV. The destination of the signal is deter-
mined by a menu item.
Connect the earth (grounding) wire of the record deck to
the GND terminal.
NOTE
Do not connect a record deck to the LINE inputs and
do not connect any other equipment to these jacks.
% LINE INPUTS (L,R) / 1(CD), 2(TAPE) Use these con-
nectors to connect signal sources to the analog inputs
of the disc recorder (1) or the inputs of the cassette deck
(2).
^
VOLTAGE SELECTOR switch Switches the voltage to
either 230 V or 120 V.
NOTE
The voltage selector is only available on units for North
American market.
&AC IN jacks Connects the power cable supplied.

1 – Introduction
TAS CA M CC-222MKIV 13
2 – Features of the CC-222@%^
Display
This display shows various types of operation information,
including CD disc information, deck operation modes, and
menu status.
1˙/¥ (Tape-running indicator) Shows the direction of a
tape during playback or recording.
2Tape PAUSE (π)Lights when the unit is in standby
mode for tape playback or recording.
3Tape PLAY Lights when a tape is being played back or
recording.
4
Tape REC Lights during tape recording or recording
standby mode.
5Tape Counter display The tape counter value is incre-
mented when the tape is moving from left to right, and
decremented when it moves from right to left (See “Tape
counter” on page 33 for more details).
6Character display Disc or track information, menu,
message, time, and operation status are displayed.
7Tape Level meter Displays the playback level and the
input level of the source device for recording operation.
8TAPE, CD In the CD-TAPE CONT PLAY mode (con-
tinuous CD/tape playback), on of these will flash during
playback.
9Counter display Either TOTAL or REMAIN is lit. When
both indictors are off, the time mode is set to show the
elapsed time of the current track.
0
Disc information display NO TOC Lights when a disc
does not contain TOC (Table of Contents) data. CD,
CD-R or CD-RW lights up when a disc with TOC data
is loaded.
q
CD PL AY (¥) Lights during disc playback.
wCD REC Lights during disc recording or recording
standby mode.
e
SYNC Lights when the SYNC recording mode is on.
rREPEAT, A-B display When the Repeat function is
on, “REPEAT” is lit. When the A-B Repeat function is
on, “REPEAT” and “AB” are lit. “AB” also blinks until a
“B-point” is entered.
tINPUT 2 This is always displayed except when record-
ing with the PHONO key.
yLINE 2, DISC display Shows the different sources
available for INPUT 2 (Tape deck).
LINE 2: a signal source is connected to LINE INPUT 2.
DISC: a signal source is connected to internal CD drive.
uDUB 1, 2 When dubbing a tape to a CD-RW, the indica-
tor “DUB 1” lights up. When dubbing a CD-RW to a tape,
indicator “DUB 2” lights up.
iINPUT 1 This is always displayed except when record-
ing with the PHONO key.
o
OPTICAL, COAXIAL, LINE 1, PHONO, TAPE display
Shows the different sources available for INPUT 1 (CD
drive).
OPTICAL:Input source is connected to OPTICAL.
COAXIAL:Input source is connected to COAXIAL.
LINE 1: Input source is connected to LINE 1.
PHONO: Input source is connected to PHONO.
TAPE: Input source is connected to internal tape deck.
pA·TR ACK Lights when the Auto Track function is on.
The indicator blinks when Time mode is selected.
aA·SPACE Lights when the Auto Space function is on.
sCD PAUSE (π) Lights during playback or recording
standby mode.
dSINGLE, RANDOM, PROGRAM display Depending
on the playback mode selected. When all the indicators
are off, Continuous playback mode is on.
fCD Level meter Displays the playback or input source
level when recording.
gMUSIC CALENDER Available tracks for playback light
up; played back tracks disappear from the screen. When
there are more than 20 tracks available for playback, the
“OVER” indicator lights up.

1 – Introduction
14 TASCAM CC-222MKIV
2 – Features of the CC-222@%^
every track on a disc to be played.
eNumber keys (0 through 10, +10, and CLEAR key)
Use number keys to enter track numbers for disc playback.
The
CLEAR key cancels the last track entered.
rSEARCH Ô/keys Used for “fast forward” and
“fast reverse” through a disc.
tCD SKIP Â/¯keys Used to select tracks or menu
parameter values.
yCD REC key Places the disc in record standby mode and
performs manual track incrementing while recording.
uSYNC REC key Turns synchronized recording of the
disc recorder on and off.
iTape REC key When stopped, pressing this key enters
recording standby mode.
oTape REC MUTE key When recording to cassette and
this key is pressed, the sound is muted for about four
seconds, and the unit enters record standby mode.
pTape PLAY¥key Starts tape playback or recording,
from left to right.
aTape ˙PLAY key Starts tape playback or recording,
from right to left.
sDisc OPEN/CLOSE key Opens and closes the disc tray.
dA-B key Use this key to set the start and end points of a
repeat loop and to cancel such a loop.
fREPEAT key Sets the repeat mode (single track, or disc
repeat playback) on and off.
gFADER key Use this key to perform automated fade-
in and fade-out when recording to disc. The time is set
using menu items.
hERASE key Used when erasing data from CD-RW discs.
jFINALIZE key Used when finalizing recordable discs.
kCD REC MUTE key During disc recording, pressing
this key inserts a silence of about four seconds and paus-
es recording.
lCD PLAY key Starts CD playback or recording (from
record standby mode).
;CD PAUSE key Pauses or resumes CD playback or
recording (starts recording from record pause mode).
zCD STOP key Stops CD playback or disc recording.
RC-222MKIV Remote control unit
1Tape RESET key Resets the tape counter to zero.
2Tape RTZ key Returns the tape to the zero position.
3Tape PAUSE key Stands by for tape playback or record-
ing. Pressing this key again resumes the operation.
4Tape ∆/˚key Fast-rewinds or fast-forwards the
tape.
5Tape STOP key Stops the current tape transport operation.
6
CONT PLAY key Use this key to turn continuous play-
back (alternating between disc and cassette) on and off.
7PLAY MODE key Allows the selection of either con-
tinuos, single, programmed or random playback.
8AUTO SPACE key Automatically adds a space of about
four seconds between disc tracks on playback.
9DISPLAY key Changes the time display for the disc
recording and playback.
0
MENU key Repeated presses of this key shows different
menu items.
qENTER key Used to confirm menu settings.
wINTRO CHECK key Allows the first 10 seconds of

TAS CA M CC-222MKIV 15
The following are the menu items that can be set using the
MENU key. The majority of them affect disc recording.
Pressing the MENU key repeatedly cycles through the
menu items. Not every menu item is available in every
situation (for instance, if a digital input is not selected, the
digital direct option is not shown).
1 PresstheMENUkeyuntilthedesiredmenuisshown
onthedisplay.
2 TurntheMULTI DIALtochangeavalueorsetting.
3 Push the MULTI DIALtoconrmthechangeandexit
themenuitem.
Alternatively,keeppressingtheMENUkeyuntilthe
normaltimecounterisdisplayed.
Menu operation
Menu displayed Meaning Default (factory) value Described in:
CD PITCH Pitch control setting ON/OFF OFF “Pitch control playback” on page 19
PITCH CD pitch control setting 0.0% “Pitch control playback” on page 19
CD KEY Key control setting ON/OFF OFF “Key control playback” on page 19
KEY LEVEL CD key control setting 0 “Key control playback” on page 19
SRC Sampling rate converter ON “Sampling Frequency conversion” on page 21
VOLUME Digital volume control 0dB “Signal volume” on page 21
A_TRK Automatic track increment LEVEL “Automatic track division” on page 26
A_TIME Automatic track increment 1 min “Automatic track division” on page 26
S_LVL Sound (trigger) level for track increment –24 dB (analog) “Setting the trigger level” on page 25 and
–54 dB (digital) “Using the trigger level” on page 25
COPY ID Copy-protection on recorded discs 1 GEN “Copy-protection” on page 27
FADE IN Allows fade in of recorded discs 3s “Fade-in and fade-out” on page 27
FADE OUT Allows fade out of recorded discs 3s “Fade-in and fade-out” on page 27
DUB>VOL Bypasses (THRU) or enables (ON) THRU “Dubbing tapes from the CD deck” on
internal volume when dubbing from page 31 and “Dubbing from tape to disc”
tape to disc or disc to tape on page 24
PHONO Sends the PHONO inputs to DISC or DISC “Recording tapes from the PHONO deck”
TAPE on page 32 and “Recording to disc from
the RIAA PHONO inputs” on page 23
MP3 DIR MP3 directory OFF “Playing back MP3 files” on page 20
OUT2 Assign the OUTPUTS2 jacks to TAPE TAPE “OUT2 setting” on page 33
or DISC
Menu configuration
3 – Menu operation

1 – Introduction
16 TASCAM CC-222MKIV
4 – Disc operations
Time display modes
When playing back a CD, or when in standby mode, there
are four different time display modes.
In each mode, the current track number is given, fol-lowed
by the time, as given below, e.g.
10 Tr 0:4 8
Press the DISPL AY key to cycle through these time display
modes, as described here:
Display shows Meaning
TOTAL Total elapsed time of the disc
TOTAL REMAIN Time remaining of the current disc
[blank] Elapsed time of the current track
REMAIN Time remaining of the current track
NOTE
If the Program playback has been selected (see
”Program playback” on page 17), the elapsed time and
total remaining time refer to the programmed material,
not the whole disc.
Track search
Use the MULTI DIAL (or the SKIP keys on the remote
control unit) to jump forward or backward by one track at a
time, as shown on the display.
Note that going forward from the last track of the disc will
“wrap round” to track 1, and going backward from the first
track of the disc will “wrap round” to the last track of the disc.
It is also possible to use the number keys on the remote
control unit to jump directly to a particular track:
1 Toplaytracks1through9,simplypresstheappro-
priatekey(1through9).
2 Toplayatrackwhosenumberishigherthan9,
pressthe+10keyanappropriatenumberoftimesto
setthe“tens”digitofthetracknumber,followedby
asinglekeytosetthe“units”digit.Forexample:
Track13=+10,3
Track30=+10,+10,+10,0
NOTE
On the remote control unit only, the search keys can be
used to ”fast-forward” and ”fast-rewind” through the disc.
Simple playback operations
WARNING
If you are monitoring using headphones, first adjust
the level control to low on the unit, then connect to the
PHONES jack before playing back. This will prevent
any possible damage to your hearing.
1 Press OPEN/CLOSE key to open the disc tray.
2 Discs should be inserted in the tray with the label up-
permost.
3 Press the OPEN/CLOSE key to close tray.
When a disc is loaded into the unit, the display briefly
shows TOC Reading., with a flashing period as the unit
determines the contents of the disc. When the TOC has
been read, the display shows (at the left of the display) one
of the following:
CD Commercial pre-recorded CD
CD-R/CD-RW Finalized CD-R or CD-RW
CD-R, NO TOC CD-R which has yet to be finalized
CD-RW, NO TOC CD-RW which has yet to be finalized
4 PressthePLAYkeytostartplayback
The track number indicators at the bottom of the display
light, to show the available tracks playing back. If there are
thirteen tracks on the disc, for example, indicators 1 through
13 will light. If there are more than 20 tracks on the disc,
“OVER” will light at the end of the track number indicators.
Pressing the STOP key stops playback.
Pressing the PAUSE key pauses playback temporarily.
To resume playback, press the PAUSE key again or the
PL AY key.

1 – Introduction
TAS CA M CC-222MKIV 17
4 – Disc operations
Playback modes
The unit can be set to play back a single track, the whole
disc in the created order, the tracks of the disc in a random
(shuffled) order, or a programmed order. This operation
takes place when stopped.
NOTE
Selecting the playback mode is only possible using the
remote control unit.
1 Whenstopped,pressthePL AY MODEkeyonthe
remotecontrolrepeatedlytocyclethedisplay
throughthefollowing:
• Continue. Normal playback mode. Playback contin-
ues in the normal order.
• Single. The currently selected track is played and
then playback stops. The SINGLE indicator lights in this
mode.
• Random. In this mode, all the tracks on the disc are
played in random order, and the RANDOM indicator lights
(see “Random playback” on page 17 below).
• Program. The PROGRAM indicator lights in this mode
(see “Program playback” on page 17 below).
The selected mode is shown in large characters dis-appears
from the display a few seconds after selecting the mode,
and the display returns to its previous mode.
Program playback
The steps to set up to 99 program steps (tracks) to be
played back in a specified order are as follows:
1 Whenstopped,pressthePL AY MODEkeyuntilthe
displayshowsProgram.
2 Thedisplaychangestoshow0Tr 00:00 00,
meaningthattherearenotracksassignedforpro-
gramplayback.
3 Usethenumberkeysontheremotecontroltoenter
atracknumber.ThereisnoneedtopresstheEN-
TER key.
Thetrackenteredisassignedtotheprogramstep,
andthedisplaychanges,showingthetracknumber,
thetotaltimeoftheprogramsofar,andthestep
number,e.g.2Tr 14:56 03.
4 Thenextprogramstepcanthenbeentered.
NOTE
Steps 3 and 4 above can also be carried out from the
main unit by turning and pushing the MULTI DIAL key.
5 Repeatsteps3and4aboveuntiltheprogramis
complete.
6 PressthePLAYkeytostartplaybackattherst
programstep.
Thedisplayshowsthetrack,thecurrenttimedis-
play,andtheprogramstepnumber.
Whileinprogramplaybackmode,usingtheSKIP
keysortheMULTI DIALmovesbackwardsandfor-
wardsintheordersetintheprogram.
Use the PAUSE key to stop playback temporarily or the
STOP key to stop playback of the program. If the STOP
key is used, when playback is restarted, it starts from the
first program step.
When stopped, if the CLEAR key on the remote control is
pressed, it cancels the last track entered in the program.
Clear the program by pressing the PLAY MODE until the
display shows Continue. The program is also cleared
when the disc tray is opened, and if the STOP key is
pressed when playback is stopped in programmed order
mode.
The programmed play order is not memorized when the
power is turned off.
If you enter more than 99 program steps, the message PGM
Full ! appears on the display.
If the total time programmed goes over 100 minutes, the
message --:-- appears on the display.
In this mode, the unit will playback all the tracks on the
disc in random order.
1 Whenstopped,pressthePL AY MODEkeyuntilthe
displayshowsRandom.
2 PressthePLAYkeytostartrandomplayback.
Whileplayingback,usingthetrackskipfunction
willmoveforwardsthroughtherandomorder.Turn
the MULTI DIALontheunitclockwiseorpressthe
SKIP(¯)keyontheremotecontrol.
NOTE
You cannot go backwards to previous tracks in the
Random playback mode.
To stop random playback, press the STOP key. Opening
the disc tray also stops random playback.
Random playback

1 – Introduction
18 TASCAM CC-222MKIV
4 – Disc operations
Repeat playback
The unit can repeat the whole of the disc, the current track
only, or an A–B portion set as described here. Selecting the
repeat mode is only possible using the remote control unit.
NOTE
You can use this mode with Single, Random, or
Program playback modes.
1 Theunitshouldbeinplayback,standbyorstopmode.
PresstheREPE ATkeysothatthedisplayshows
Repeat ON(theREPEATindicatorlights).
To cancel repeat mode, press the REPEAT key again so that
the display shows Repeat OFF and the REPEAT indicator
goes out.
A to B repeat playback
You can set the points between which playback should loop.
1 Whileplayingback,presstheA-Bkeyonthere-
motecontrolatthepointwheretheloopistostart
(A-point).
The REPEAT indicatorlightsupandABindicator
blinkstillthesecondpoint(B-point)isentered.
2 PresstheA-Bkeyagainatthepointwheretheloop
istoend(B-point).
NOTE
If the A and B points are too close together, A-B loop-
ing is not possible.
Playbackjumpsbacktotherst“A-point”and
continuestothesecond“B-point”andthenreturns
tothe“A-point”again,repeatingtheloop.
Cancel the A-B repeat mode by pressing the A-B key, or
the STOP key. Both indicators will go out.
During playback, if the A-B key is pressed, the loop will be
canceled and playback will continue past the B-point.
NOTE
A-B repeat cannot be set when the specified section
spans more than one track, and cannot be used with
MP3 discs.
Intro check
You can skip through the first 10 seconds of all the tracks
on a CD to check the contents of the CD.
NOTE
This function is only available from the remote control
unit.
1 Whenstopped,intheContinuous(normal)mode,
presstheINTRO CHECKkey.
Therst10secondsofeachtrackonthediscwillbe
playedback.
2 PresstheINTRO CHECKkeyagainortheSTOPkey
tostopthisplaybackprocess.
NOTE
In Single or Random playback modes, with the disc
stopped, pressing the INTRO CHECK key cancels the
mode and returns to Continuous playback mode.
This function inserts a gap of about four seconds between
tracks on playback. This can be useful when recording to
tape, so that automatic searching can take place more easily
on tapes recorded from disc (see “Search keys” on page 33).
NOTE
This function is only possible using the remote
control unit.
Press the AUTO SPACE key when in playback, standby, or
stop mode, the A.SPACE indicator lights on the right side of
the display. Pressing the AUTO SPACE key again cancels
the mode and returns to normal playback.
The STOP key also cancels the mode and stops playback.
Auto spacing

1 – Introduction
TAS CA M CC-222MKIV 19
4 – Disc operations
Pitch control playback
When playing back an audio CD, the pitch (or speed) of the
playback can be varied. Pitch can be varied +/- 12.5%.
1. Whenstopped,presstheMENUkeytodisplayCD
PITCH>XXX
.
2. Use the MULTI DIALontheunitorSKIPkeyonthe
remotecontroltoselectON.
3. PresstheMENUkeytodisplayPitch> X.X%.
4. Use the MULTI DIALontheunitorSKIPkeyonthe
remotecontroltoadjustthepitchvalue.
NOTE
Pitch control cannot be used with MP3 discs.
When the unit is in stop mode with CD Pitch control on,
when the PLAY or PAUSE key is pressed, the display
shows Pitch ON for several seconds (if CD Pitch
control and CD Key control are on, Pitch/Key ON
appears on the display for seconds).
When the unit is writing data to a disc, the Pitch
control function does not work. However, the Pitch
control menu can be operated.
Key control playback
The key of the music can be changed during stop, playback
or playback standby modes. However, please note that this
feature does not work with MP3 discs.
1. PresstheMENUkeytodisplay CD KEY>XXX.
2. Use the MULTI DIALontheunitorSKIPkeyonthe
remotecontroltoselectON.
3. PresstheMENUkeytodisplayKEY LEVEL>XXX.
4. Use the MULTI DIALontheunitorSKIPkeyonthe
remotecontroltoadjustthekeyvalue.
The playback key can be raised or lowered 1/2 octave
in half-tone increments. Selection values: 0 (no
change), â1 to â6, ã1 to ã6.
NOTE
In this condition, when a CD is played back, the key
of the music is changed while the speed of the music
remains the same.
When the Key control function is on, only the playback
speed changes when you use the Pitch control func-
tion, and the key of playback will remain fixed. (The
key of playback will be fixed to the level set by KEY
LEVEL>XXX.) Therefore, if you set KEY LEVEL>XXX
to 0and turn on the Key control function, you can
change only the playback speed without changing the
key of playback.
When the unit is in stop mode with CD Key control on,
when the PLAY or PAUSE key is pressed, the display
shows Key ON for seconds (if CD Key control and CD
Pitch control are on, Pitch/Key ON appears on the
display for seconds).
When the unit is writing data to a disc, the Key control
function does not work. However, the Key control
menu can be operated.
When using the key control function, the volume of
the playback sound may occasionally sound like it is
vibrating. This is a result of the key control algorithm
working on the CD playback sound and is normal.

1 – Introduction
20 TASCAM CC-222MKIV
4 – Disc operations
MP3 files recorded onto a CD are handled the same way as
files are handled in an ordinary PC, with some MP3 files
held within a directory. In addition, several directories can
be combined into one directory. This results in multiple
layers of directories and files.
NOTE
MP3 file formatted at 44,1 kHz sampling rate and 128
kbps or higher are required, otherwise, that MP3 file
cannot be played back.
Each MP3 file is handled as a track.
When the Directory mode is on, only those files within a
selected directory are available for playback.
When the directory mode is off, the directory configura-
tion is ignored, and all MP3 files recorded on the disc are
available for playback. Please note that Program playback
and Repeat playback only function within directories.
NOTE
Directories which do not contain MP3 files directly
under them cannot be selected for playback. For
example, in the diagram below, under directory A are
directory B and C containing MP3 files in both direc-
tories which can be selected for playback. However,
directory A showing 0 Tr for its total track number
cannot be selected for playback.
When an MP3 disc is created in an ordinary PC, most-
ly, the files (tracks) are shown in the alphabetic order.
However, the CC-222MKIV gives track numbers to MP3
files in the order that the files were written on the disc,
so the file order shown on this unit may be different
from the ones on PC.
The CC-222MKIV can play back MP3 files recorded in
formats which conform to ISO9660 level 1, level 2, and the
Joliet extensions. Discs recorded in multiple sessions may
also be played back.
For MP3 CDs to be played by this unit, the following limi-
tations have been placed on the number of MP3 files and
directories.
Maximum number of directories: 255
Maximum number of hierarchical structures: 8
Maximum number of MP3 files: 999
Maximum title size of MP3 files and directories: 255
ªAbout MP3 track data
On this unit, file name or MP3 TAG information (track
title, artist name, etc.) can not be displayed.
The time display mode for MP3 is only [blank], showing
elapsed time of the current track.
Playing back MP3 files
mp3. 1
mp3. 2
mp3. 3
mp3. 4
mp3. 5
mp3. 6
mp3. 7
mp3. 8
mp3. 9
MP3 les
Disc
Directory
A
Directory
B
Directory
C
Directory
D
Example of MP3 file structure
Directory playback setting
1. PresstheMENUkeyuntilMP3 DIR>XXXappears
onthedisplay.
2 TurntheMULTI DIAL to set the value to ON,andpush
toenter.Thetotalnumberoftrackwillbeshown.
3. Use the MULTI DIAL orSKIPkeystoselectdesired
directoryforplayback.
ThedisplaybrieyshowsMP3 DIR>XXXwherethe
valueisdirectorynumber.
Asthedisplaydisappearsandreturntonormal
mode,thelastdirectoryshownonthescreenwillbe
playedback.
NOTE
A directory containing no MP3 files will be visible, but
it will show 0 Tr for its total track number.
4. PressthePLAYkeytostartplaybackinthedirectory.
ProgramorRepeatplaybackcanbeoperatedinthe
selecteddirectoryalso.
Table of contents
Other Tascam Recording Equipment manuals

Tascam
Tascam Mixcast 4 User manual

Tascam
Tascam CC-222mkIII User manual

Tascam
Tascam 246 User manual

Tascam
Tascam HS-8 How to use

Tascam
Tascam CD-RW750 User manual

Tascam
Tascam PORTASTUDIO 788 Operation instructions

Tascam
Tascam CD-RW402 User manual

Tascam
Tascam DA-88 User manual

Tascam
Tascam SD-20M User manual

Tascam
Tascam US-322 User manual

Tascam
Tascam BR-20 Series Manual

Tascam
Tascam DP-01 User manual

Tascam
Tascam Cubase LE User manual

Tascam
Tascam Frontier HD-P2 Parts list manual

Tascam
Tascam DA-98HR User manual

Tascam
Tascam HD-R1 Instruction Manual

Tascam
Tascam SX-1 User manual

Tascam
Tascam SS-CDR1 Guide

Tascam
Tascam CD-RW2000 User manual

Tascam
Tascam Portastudio 2488 User guide