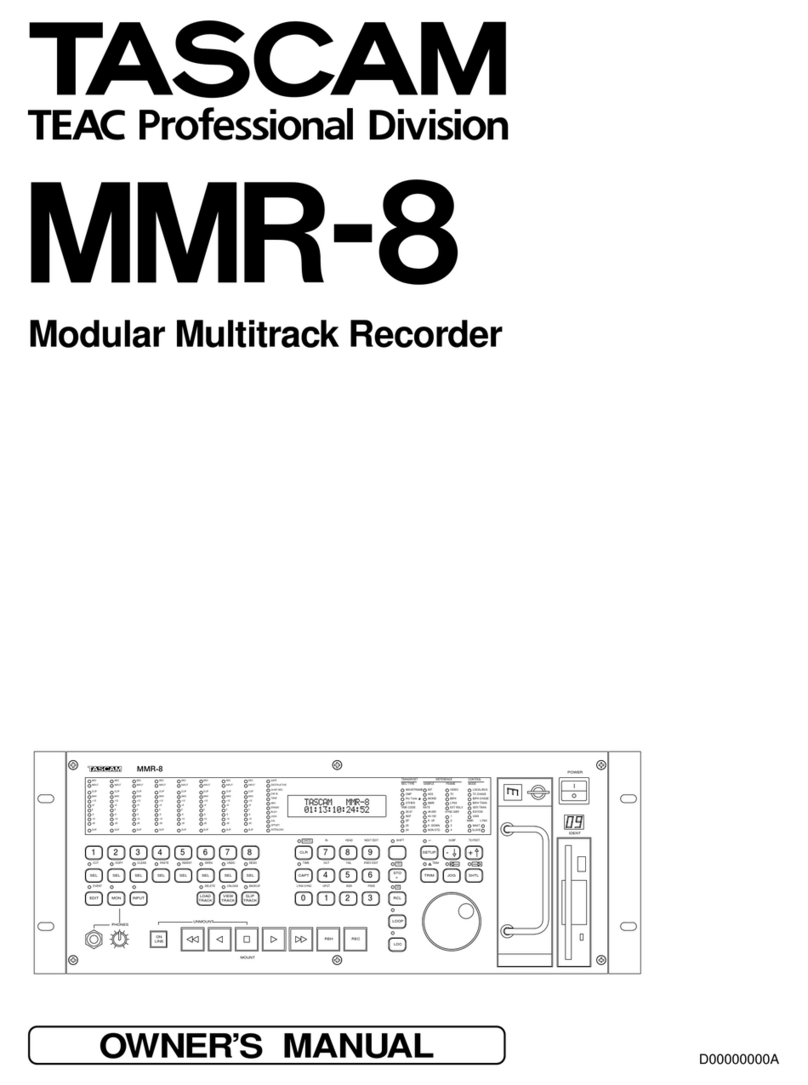
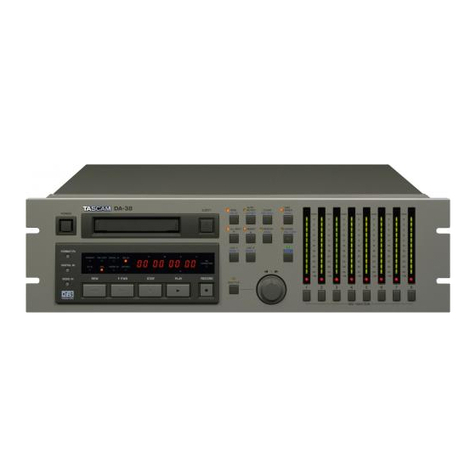
Tascam DA-78HR User manual

»
DA-78HR
Digital Multitrack Recorder
OWNER’S MANUAL
CAUTION: TO REDUCE THE RISK OF ELECTRIC SHOCK, DO NOT
REMOVE COVER (OR BACK). NO USER-SERVICEABLE PARTS
INSIDE. REFER SERVICING TO QUALIFIED SERVICE PERSONNEL.
The exclamation point within an equilateral triangle is intended to alert the user to the pres-
ence of important operating and maintenance (servicing) instructions in the literature
accompanying the appliance.
The lightning flash with arrowhead symbol, within an equilateral triangle, is intended to alert
the user to the presence of uninsulated “dangerous voltage” within the product’s enclosure
that may be of sufficient magnitude to constitute a risk of electric shock to persons..
This appliance has a serial number
located on the rear panel. Please record
the model number and serial number
and retain them for your records.
Model number
Serial number
Ü
ÿ
Ÿ
WARNING: TO PREVENT FIRE OR SHOCK
HAZARD, DO NOT EXPOSE THIS
APPLIANCE TO RAIN OR MOISTURE.
D00524000A

2
TASCAM DA-78HR
Important Safety Precautions
IMPORTANT (for U.K. Customers)
DO NOT cut off the mains plug from this equipment.
If the plug fitted is not suitable for the power points in your home or
the cable is too short to reach a power point, then obtain an
appropriate safety approved extension lead or consult your dealer.
If nonetheless the mains plug is cut off, remove the
fuse and dispose of the plug immediately, to avoid
a possible shock hazard by inadvertent connection to the mains
supply.
If this product is not provided with a mains plug, or one has to be
fitted, then follow the instructions given below:
IMPORTANT:
The wires in this mains lead are coloured in
accordance with the following code:
GREEN-AND-YELLOW :
EARTH
BLUE :
NEUTRAL
BROWN :
LIVE
WARNING:
This apparatus must be earthed.
As the colours of the wires in the mains lead of this apparatus may
not correspond with the coloured markings identifying the terminals
in your plug proceed as follows:
The wire which is coloured GREEN-and-YELLOW must be
connected to the terminal in the plug which is marked by the letter
E or by the safety earth symbol
ç
or coloured GREEN or GREEN-
and-YELLOW.
The wire which is coloured BLUE must be connected to the terminal
which is marked with the letter N or coloured BLACK.
The wire which is coloured BROWN must be connected to the
terminal which is marked with the letter L or coloured RED.
When replacing the fuse only a correctly rated approved type should
be used and be sure to re-fit the fuse cover.
IF IN DOUBT — CONSULT A COMPETENT ELECTRICIAN.
TO THE USER
This equipment has been tested and found to
comply with the limits for a Class A digital device,
pursuant to Part 15 of the FCC Rules. These
limits are designed to provide reasonable
protection against harmful interference when the
equipment is operated in a commercial
environment. This equipment generates, uses,
and can radiate radio frequency energy and, if
not installed and used in accordance with the
instruction manual, may cause harmful
interference to radio communications.
Operation of this equipment in a residental area
is likely to cause harmful interference in which
case the user will be required to correct the
interference at his own expense.
CAUTION
Changes or modifications to this equipment not
expressly approved by TEAC CORPORATION
for compliance could void the user’s authority to
operate this equipment.
For the consumers in Europe
WARNING
This is a Class A product. In a domestic environment, this
product may cause radio interference in which case the user
may be required to take adequate measures.
Pour les utilisateurs en Europe
AVERTISSEMENT
Il s’agit d’un produit de Classe A. Dans un environnement
domestique, cet appareil peut provoquer des interférences
radio, dans ce cas l’utilisateur peut être amené à prendre
des mesures appropriées.
Für Kunden in Europa
Warnung
Dies is eine Einrichtung, welche die Funk-Entstörung nach
Klasse A besitzt. Diese Einrichtung kann im Wohnbereich
Funkstörungen versursachen ; in diesem Fall kann vom
Betrieber verlang werden, angemessene Maßnahmen
durchzuführen und dafür aufzukommen.
For U.S.A

TASCAM DA-78HR
3
CAUTION:
…
Read all of these Instructions.
…
Save these Instructions for later use.
…
Follow all Warnings and Instructions marked on the audio
equipment.
1) Read Instructions
— All the safety and operating instructions should
be read before the product is operated.
2) Retain Instructions
— The safety and operating instructions should
be retained for future reference.
3) Heed Warnings
— All warnings on the product and in the operating
instructions should be adhered to.
4) Follow Instructions
— All operating and use instructions should be
followed.
5) Cleaning
— Unplug this product from the wall outlet before cleaning.
Do not use liquid cleaners or aerosol cleaners. Use a damp cloth for clean-
ing.
6) Attachments
— Do not use attachments not recommended by the
product manufacturer as they may cause hazards.
7) Water and Moisture
— Do not use this product near water — for
example, near a bath tub, wash bowl, kitchen sink, or laundry tub; in a wet
basement; or near a swimming pool; and the like.
8) Accessories
— Do not place this product on an unstable cart, stand,
tripod, bracket, or table. The product may fall, causing serious injury to a
child or adult, and serious damage to the product. Use only with a cart,
stand, tripod, bracket, or table recommended by the manufacturer, or sold
with the product. Any mounting of the product should follow the manufac-
turer’s instructions, and should use a mounting accessory recommended by
the manufacturer.
9)
A product and cart combination should be moved with care. Quick stops,
excessive force, and uneven surfaces may cause the product and cart com-
bination to overturn.
10)
Ventilation
— Slots and openings in the cabinet are provided for ven-
tilation and to ensure reliable operation of the product and to protect it
from overheating, and these openings must not be blocked or covered. The
openings should never be blocked by placing the product on a bed, sofa,
rug, or other similar surface. This product should not be placed in a built-in
installation such as a bookcase or rack unless proper ventilation is provided
or the manufacturer’s instructions have been adhered to.
11) Power Sources
— This product should be operated only from the
type of power source indicated on the marking label. If you are not sure of
the type of power supply to your home, consult your product dealer or local
power company. For products intended to operate from battery power, or
other sources, refer to the operating instructions.
12) Grounding or Polarization
— This product may be equipped with a
polarized alternating-current line plug (a plug having one blade wider than
the other). This plug will fit into the power outlet only one way. This is a
safety feature. If you are unable to insert the plug fully into the outlet, try
reversing the plug. If the plug should still fail to fit, contact your electrician
to replace your obsolete outlet. Do not defeat the safety purpose of the
polarized plug.
13) Power-Cord Protection
— Power-supply cords should be routed so
that they are not likely to be walked on or pinched by items placed upon or
against them, paying particular attention to cords at plugs, convenience
receptacles, and the point where they exit from the product.
14) Outdoor Antenna Grounding
— If an outside antenna or cable
system is connected to the product, be sure the antenna or cable system is
grounded so as to provide some protection against voltage surges and built-
up static charges. Article 810 of the National Electrical Code, ANSI/NFPA
70, provides information with regard to proper grounding of the mast and
supporting structure, grounding of the lead-in wire to an antenna discharge
unit, size of grounding conductors, location of antenna-discharge unit, con-
nection to grounding electrodes, and requirements for the grounding elec-
trode.
"Note to CATV system installer:
This reminder is provided to call the CATV system installer’s attention to
Section 820-40 of the NEC which provides guidelines for proper grounding
and, in particular, specifies that the cable ground shall be connected to the
grounding system of the building, as close to the point of cable entry as
practical.
15) Lightning
— For added protection for this product during a lightning
storm, or when it is left unattended and unused for long periods of time,
unplug it from the wall outlet and disconnect the antenna or cable system.
This will prevent damage to the product due to lightning and power-line
surges.
16) Power Lines
— An outside antenna system should not be located in
the vicinity of overhead power lines or other electric light or power circuits,
or where it can fall into such power lines or circuits. When installing an
outside antenna system, extreme care should be taken to keep from touch-
ing such power lines or circuits as contact with them might be fatal.
17) Overloading
— Do not overload wall outlets, extension cords, or
integral convenience receptacles as this can result in risk of fire or electric
shock.
18) Object and Liquid Entry
— Never push objects of any kind into
this product through openings as they may touch dangerous voltage points
or short-out parts that could result in a fire or electric shock. Never spill
liquid of any kind on the product.
19) Servicing
— Do not attempt to service this product yourself as open-
ing or removing covers may expose you to dangerous voltage or other
hazards. Refer all servicing to qualified service personnel.
20) Damage Requiring Service
— Unplug this product from the wall
outlet and refer servicing to qualified service personnel under the following
conditions:
a)
when the power-supply cord or plug is damaged.
b)
if liquid has been spilled, or objects have fallen into the product.
c)
if the product has been exposed to rain or water.
d)
if the product does not operate normally by following the operating
instructions. Adjust only those controls that are covered by the operating
instructions as an improper adjustment of other controls may result in
damage and will often require extensive work by a qualified technician to
restore the product to its normal operation.
e)
if the product has been dropped or damaged in any way.
f )
when the product exhibits a distinct change in performance – this
indicates a need for service.
21) Replacement Parts
— When replacement parts are required, be
sure the service technician has used replacement parts specified by the
manufacturer or have the same characteristics as the original part.
Unauthorized substitutions may result in fire, electric shock, or other
hazards.
22) Safety Check
— Upon completion of any service or repairs to this
product, ask the service technician to perform safety checks to determine
that the product is in proper operating condition.
23) Wall or Ceiling Mounting
— The product should be mounted to a
wall or ceiling only as recommended by the manufacturer.
24) Heat
— The product should be situated away from heat sources such
as radiators, heat registers, stoves, or other products (including amplifiers)
that produce heat.
ANTENNA
LEAD IN
WIRE
ANTENNA
DISCHARGE UNIT
(NEC SECTION 810-20)
GROUNDING CONDUCTORS
(NEC SECTION 810-21)
GROUND CLAMPS
POWER SERVICE GROUNDING
ELECTRODE SYSTEM
(NEC ART 250. PART H)
NEC - NATIONAL ELECTRICAL CODE
ELECTRIC
SERVICE
EQUIPMENT
Example of Antenna Grounding as per
National Electrical Code, ANSI/NFPA 70
GROUND
CLAMP
IMPORTANT SAFETY INSTRUCTIONS

Table of Contents
4
TASCAM DA-78HR
1 - Introduction to the DA-78HR
1.1 Unpacking ......................................... 7
1.2 Features.............................................7
1.3 Using this manual.............................7
1.4 Precautions and recommendations 8
1.4.1 Clock source ina digital studio....... 8
1.4.2 HR recording and emphasis ............ 8
1.4.3 Environmental conditions................ 8
1.4.4 Installing the DA-78HR..................... 9
1.4.5 Electrical considerations ................. 9
1.4.6 Three-core power cord..................... 9
1.4.7 Powering the DA-78HR off and on... 9
1.4.8 Condensation.................................... 9
1.5 Recommended tapes........................9
1.5.1 Tape brands....................................... 10
1.5.2 Available recording and playback
time........................................................... 11
2 - Front and rear panel features
2.1 General controls and indicators......13
1Power switch ........................................13
2Tape loadingslot and EJECT key ...... 13
3FORMAT/Fs key ................................... 13
4HR MODE key ....................................... 13
5CLOCK key ........................................... 13
6Status indicators .................................. 13
7Tape counter ........................................13
8PB CONDITION indicator .................... 13
2.2 Tape transport keys and controls ...13
9REW key ............................................... 13
AF FWD key ............................................ 13
BSTOP key .............................................. 14
CPLAY key .............................................. 14
DRECORD key ........................................14
EDATA/LEVEL control ........................... 14
2.3 System control keys.........................14
FSHIFT key and indicator ......................14
GRHSL (DELAY) key and indicator ....... 14
HAUTO IN/OUT (OFFSET) key and
indicator .................................................. 14
ICLEAR (PRE ROLL) key ......................14
JVARI SPEED / PITCH key and
indicator .................................................. 14
KALL INPUT (▼) key and indicator ...... 14
LAUTO MON (▲) key andindicator ...... 14
MREPEAT (MENU) key and indicator ....15
NCHASE (SUB MENU) key and
indicator .................................................. 15
OLOC 1 (MEMO 1) key ............................ 15
PLOC 2 (MEMO 2) key ............................ 15
QMIXDOWN (LEVEL/PAN) key and
indicator .................................................. 15
2.4 Track controls...................................15
RREC FUNCTION keys and indicators . 15
SPeak meters .......................................... 15
2.5 Rear panel features...........................15
TREMOTE IN/SYNC IN ............................15
UMIDI IN/OUT/THRU ................................15
VSYNC OUT .............................................15
WREMOTE IN ...........................................15
XREMOTE PUNCH IN/OUT .....................16
YTDIF-1 (DIGITAL I/O) .............................16
ZTIME CODE (IN, OUT) ...........................16
aWORD SYNC (IN, OUT, THRU) ............16
bDIGITAL IN, OUT(COAXIAL) ...............16
cANALOG INPUTS (unbalanced) ..........16
dANALOG INPUTS (BALANCED) ..........16
eANALOG OUTPUTS (unbalanced) ......16
fANALOG OUTPUTS (BALANCED) ......16
g~ IN .........................................................16
3 - Connections
3.1 Audio connections............................17
3.1.1 Balanced analog audio connections17
3.1.2 Unbalanced analog audio
connections .............................................17
3.1.3 Digital audio connections.................17
3.1.4 SPDIF connectors..............................18
3.2 Synchronization connections..........18
3.2.1 Word clock connections...................18
3.2.2 MIDI connectors (IN , OUT and
THRU) .......................................................18
3.2.3 Timecode connections......................18
3.2.4 MIDI timecode connections..............18
3.3 Connection to other TASCAM units18
3.3.1 REMOTE IN.........................................18
3.3.2 Footswitch..........................................18
3.3.3 Multiple DTRS units...........................18
3.3.4 “Indirect” word sync.........................19
4 - Menu interface, etc.
4.1 The display........................................20
4.1.1 Peak meters........................................20
4.2 The SHIFT key...................................20
4.2.1 Shifted keys........................................20
4.2.2 Shift mode..........................................20
4.3 Menus and sub-menus.....................21
4.3.1 Exiting menu mode............................21
4.3.2 Sub-menus.........................................21
4.3.3 Adjusting parameter values..............21
4.3.4 Resetting parameters to default
values .......................................................21
4.3.5 “Left” and “right” keys......................22
4.3.6 Sub-frame values...............................22
4.3.7 Using the DATA/LEVEL knob to set
values .......................................................22
4.4 SYSTEM menu...................................23
4.5 AUDIO1 menu....................................23
4.6 AUDIO2 menu....................................24
4.7 TC menu.............................................24

Table of Contents
TASCAM DA-78HR
5
4.8 TC chase menu..................................25
4.9 TC generator menu ...........................25
4.10 MIDI menu........................................25
4.11 Maintenance menu..........................26
4.12 Dedicated keys ................................26
5 - Basic operations
5.1 Formatting a tape..............................27
5.1.1 Selecting a word clock source........ 27
5.1.2 Formatting......................................... 27
5.1.3 Aborting the format process............ 28
5.1.4 Recording while formatting............. 28
5.2 Recording the first tracks.................28
5.2.1 Preparing to record...........................28
5.2.2 Selecting a clock source..................28
5.2.3 Write-protecting cassettes............... 28
5.2.4 Recording the first tracks (i)............ 29
5.2.5 Recording the basic tracks (ii).........29
5.2.6 Replaying the first tracks................. 29
5.3 Input selection...................................29
5.3.1 Digital input selection....................... 29
5.3.2 Input patchbay routing..................... 30
5.3.3 Track bouncing................................. 30
5.3.4 Returning to ALL ANALOG setting. 31
5.4 More on digital recording .................31
5.4.1 Sampling frequency and word
length ....................................................... 31
5.4.2 Selecting input word length............. 31
5.5 Overdubbing......................................31
5.6 Punch-in and punch-out...................32
5.6.1 Automatic punch point setting........ 32
5.6.2 Setting punch points “on the fly”.... 32
5.6.3 Setting punch points using the front
panel......................................................... 33
5.6.4 Editing the pre-roll and post-roll
times......................................................... 33
5.6.5 Rehearsing the punch-in..................34
5.6.6 Interrupting a rehearsal or punch
recording ................................................. 34
5.6.7 Recording the punch-in.................... 34
5.6.8 Replaying the punched material...... 34
5.6.9 Exiting punch-in mode..................... 35
6 - Monitoring
6.1 ALL INPUT .........................................36
6.2 AUTO MON.........................................36
6.3 Shuttle monitor..................................36
6.3.1 Enabling and disabling shuttle
monitoring ............................................... 36
6.4 Shuttle muting ...................................36
6.5 Summary of monitor modes ............37
7 - Advancedoperations
7.1 Autolocation ......................................38
7.1.1 Setting MEMO1 and MEMO 2 “on
the fly” ......................................................38
7.1.2 Checking,editing and manually
entering MEMO 1 and MEMO 2...............38
7.1.3 Setting the location pre-roll time .....38
7.1.4 Moving to MEMO 1 andMEMO 2......38
7.1.5 Location and playback......................38
7.2 Repeat function.................................39
7.2.1 To start repeat play ...........................39
7.3 Track delay.........................................39
7.4 Sub-mixer...........................................40
7.4.1 Entering mixdown mode...................40
7.4.2 Setting the master level ....................40
7.4.3 Leaving edit/pan setting mode.........40
7.4.4 Setting levels andpan positions......40
7.4.5 Setting the sub-mixer input sources41
7.5 Crossfade times................................41
7.6 Vari speed (pitch control).................41
7.6.1 To set a non-standard speed............41
7.7 Shuttle operations.............................42
7.7.1 Shuttle monitoring.............................42
7.7.2 Shuttle muting...................................42
7.8 Meter modes......................................42
7.8.1 Peak hold time...................................42
7.8.2 Meter ballistics...................................42
7.9 Sine oscillator....................................43
7.9.1 Recording the oscillator ...................43
7.10 REC MUTE (recording silence) ......43
7.11 Dither................................................43
7.11.1 Selectingdither settings.................44
7.12 Advanced output options...............44
7.12.1 Output wordlength .........................44
7.12.2 Output patchbay..............................44
7.13 Emulation.........................................45
7.14 Saving settings to tape...................45
7.15 Restoring settings from tape .........45
8 - Synchronization with other DTRS
units
8.1 Synchronization connections..........47
8.2 Machine ID and master/slave
settings..................................................47
8.2.1 Differences between DTRS models .47
8.2.2 Setting machine ID ............................48
8.2.3 Master/slave settings (CHASE
mode)........................................................48
8.3 Machine offset...................................48
8.3.1 Setting machine offset......................48
8.3.2 Cancelling machine offset................48
8.3.3 Setting machine offset “on the fly” .49
8.3.4 An example of setting offsets ..........49
8.4 Digital dubbing..................................50
8.5 Synchronized formatting..................50

Table of Contents
6
TASCAM DA-78HR
8.5.1 Recordingwhile formatting.............. 51
8.6 Individual clock mode......................51
8.7 Error messages.................................51
9 - Operations related to timecode
9.1 ABS and timecode............................52
9.1.1 ABS time............................................ 52
9.1.2 Tape timecode................................... 52
9.1.3 SelectingTC orABS timing .............52
9.2 Tape timecode mode........................52
9.2.1 TAPE TC setting................................ 53
9.2.2 ABS setting........................................53
9.3 Selecting the frame mode................53
9.4 Timecode inputand output..............53
9.4.1 Showing input timecode................... 54
9.4.2 Timecode input timing......................54
9.4.3 Timecode output ...............................54
9.4.4 MTC output ........................................54
9.4.5 Fast linear timecode (LTC) output... 55
9.4.6 Timecode output timing ................... 55
9.5 Recording timecode.........................55
9.5.1 Selectingthe timecode source........ 55
9.5.2 Recordingtimecode using the
generator .................................................56
9.5.3 Generator modes .............................. 56
9.5.4 Synthesizing timecode from ABS
timing ....................................................... 56
9.5.5 External timecode sources .............. 57
9.5.6 Recordingtimecode from external
sources.................................................... 57
9.5.7 Checking external timecode ............ 57
9.5.8 Checking the frame mode of striped
timecode .................................................. 58
9.6 Chasing to timecode ........................ 58
9.6.1 Machine ID and timecode................. 58
9.6.2 Timecode offset ................................ 58
9.6.3 Setting timecode offset .................... 58
9.6.4 Cancelling timecode offset .............. 59
9.6.5 Setting timecode offset “on the fly” 59
9.6.6 Park position ..................................... 59
9.6.7 Automatic park positionsetting...... 59
9.6.8 Absolute and relative difference...... 60
9.6.9 Rechasing timecode......................... 60
9.6.10 Bypassing timecode errors............ 60
9.6.11 Individual recording while chasing
timecode .................................................. 60
10 - MIDI control
10.1 MMC enable and disable................62
10.1.1Assigning a MIDIID to the
DA-78HR...................................................62
10.1.2MMC commands and the DA-78HR62
10.2 MMC Bit Map Array.........................63
10.3 MIDI Control Change......................65
10.4 MIDI System Exclusive...................65
10.4.1Identity Reply...................................65
10.4.2TASCAM Exclusive messages .......65
10.4.3Track delay.......................................65
10.4.4Crossfade .........................................65
10.4.5Machine offset..................................65
10.4.6Track Copy Setup............................66
10.4.7Track Copy Enable ..........................66
10.5 MIDI Implementation Chart............67
11 - Maintenance, etc.
11.1 Head and transport cleaning .........68
11.1.1To clean theheads and transport..68
11.1.2Checking error rates........................68
11.1.3Checking drum time........................69
11.2 Backup memory initialization........69
11.3 Checking version numbers............69
11.3.1Software upgrades ..........................70
12-Options,specificationsand reference
12.1 Options for the DA-78HR................71
12.1.1RC-898 remote control unit.............71
12.1.2RC-828 remote control unit.............71
12.1.3RC-808 remote control unit.............71
12.1.4IF-AE8 AES/EBU digital audio
converter..................................................71
12.1.5IF-88SD SDIF-2 digital audio
converter..................................................71
12.1.6IF-TAD ADAT digital audio
converter..................................................71
12.1.7TDIF-1EX extender box ...................71
12.1.8Cables...............................................71
12.2 Specifications..................................72
12.2.1Tape recorder section.....................72
12.2.2Analog inputs and outputs .............72
12.2.3Digital inputs and outputs ..............72
12.2.4Remote/sync connectors................72
12.2.5Word sync terminals .......................72
12.2.6Timecode connectors......................72
12.2.7MIDI connectors...............................72
12.2.8Remote control connectors............72
12.2.9Physical specifications ...................73
12.2.10 Power specifications.....................73
12.2.11 Audio specifications......................73

TASCAM DA-78HR
7
1 - Introduction to the DA-78HR
The TASCAM DA-78HR is a digital audio multi-
track recorder designed for use in avariety of appli-
cations,including videopost-productionand audio
multitrack work.
It records 8 tracks of full-quality digital audio on
standardHi8 videocassettes using aspecially-
designed transport and head mechanism. Using this
medium, up to 108 minutes of continuous recording
is possibleon a single NTSC “120” tape
Recording is carried out at either 24 or 16 bits of res-
olution, and digital data may be input at 16, 20 or 24
bits of resolution. Analog signals are converted to
digital datausing 64 timesoversampling delta-sigma
techniques.
The DA-78HR builds on the foundations laid by the
TASCAM DA-88, DA-38 and DA-98 digital multi-
track recorders, and retains compatibility with them.
16-bittapes recorded on one of theDAseries can be
replayed and overdubbed on any other machine in the
series, or any DTRS1machine. 24-bit tapes can only
be replayed in DA-78HR recorders,
1.1 Unpacking
The box contains the following.
• DA-78HR Digital Multitrack Recorder (x 1)
• Accessories:
–Rackmount screw kit (x 1)
–AC powercord,2 m (6ft.) long (x1)
–This manual (x 1)
• Warranty card (x 1)
1.2 Features
Other key features of the DA-78HR include:
• TASCAM-exclusive high-performance/high wear
resistive rotary 4-head mechanism with TASCAM
original track layout (DTRS standard)
• Use of standard, low-cost mediawith long record-
ing and playback times
• 24-bit or 16-bit linear quantization at either 44.1
kHz or 48 kHz provides CD-quality sound or better
• Fast, frame-accurate tape location and positioning;
end-to-end winding for a “120” tape is around 80
seconds
• Directdigital synchronization ofup to 16DTRS
recorders (128 tracks) without the use of any exter-
nalsynchronizer or controller
• Direct digital dubbing between DTRS units
• An internal digital patchbay, allowing input-to-
track assignment and selection of digital, analog
and off-tape sources without the use of external
switching or routing equipment
• Internal 8 x 2 mixer (level and pan) for stereo
replay of recorded tracks and output through a
standard SPDIFconnector withoutexternal mixing
equipment
• SPDIF stereo input
• Balanced +4dBu analog inputs and outputs carried
on a convenient compact D-sub connector
• Unbalanced –10 dBV connectors (RCA) for con-
nection to semi-professionalequipment
• 15-segment peak meters with user-selectable fall
ballistics and variable hold time (including contin-
uous peak hold)
• Meters also used for display of channel and track
information
• Integral digital sine oscillator, providing signals at
440Hzand 1kHzfor tuning and other frequencies
for lineup purposes
• Digital input and output on a single convenient
compact D-sub connector (TDIF-1 format)
• Settings carried out through a menu hierarchy
• SMPTE/EBU timecode input and output
• MIDI Time Codeand MIDI Machine Control
• Simplified source/tape monitoring functions with
automatic switching
• Autopunch-in and punch-out with rehearsal mode
• 2-point full function autolocator with A–B repeat
function.
• Variable speed recording and playback (up to 6.0%
in 0.1% steps)
• Shuttle mode enables “rock and roll” audio posi-
tioning of key locations
• Data entry mode allows use of shuttle knob to set
data values
1.3 Using this manual
We suggest that you take the trouble to read this man-
ual through at least once before starting to use the
DA-78HR. In this way, you will find out where to
turn when you need answers.
1. DTRS is a trademark ofTEAC Corporation

1 - Introduction to the DA-78HR
8
TASCAM DA-78HR
We suggest that you make a special noteof the sec-
tion 1.4, “Precautions and recommendations” as
these contain some information which is unique to
the DA-78HR.
We also suggest that you also read , as this will help
you when you come to performbasic operations.
When referring to acontrol or a connector on the
DA-78HR, the name of the control or connector will
be written in bold type, and may be followed by a
number, as in theexample below:
Holding down thePLAY key Cand pressing
theREC Dkey willstartthe recording pro-
cess.
The numbers refer to the front and rear panel illustra-
tions and description in this manual.
When referring to aword or phrase which appears on
the display, the word or phrase will be written as
follows:
MEMO. 1 (MEMO1).
If on-screen parameters aregiven as partof a display
example, they may sometimes be shown in the fol-
lowing way, where the ;; represents an unknown
value:
ID SEL ;; (ID SEL xx), where xx is the
machine ID
NOTE
Recording is an art as well as a science. A success-
ful recording is often judged primarily on the quality
ofsound as art,andweobviouslycannotguarantee
that.A company that makes paint and brushes for
artists cannot say that the paintings made with their
products will be critically well-received. TASCAMcan
make no guarantee that the DA-78HR by itself will
assure the qualityof the recordings you make. Your
skill as a technician and your abilities as an artist will
be significant factors in the results you achieve.
1.4 Precautions and
recommendations
As with any precision piece of electronic equipment,
common-sense precautions apply with the DA-
78HR.
However, there are afew extra precautions which
apply to the DA-78HR, and we suggest that you
make a note of these, to prolong the useful life of the
DA-78HR.
1.4.1 Clock source ina digital studio
The DA-78HR can be used in avariety of situations,
and with a variety of equipment, either digital or ana-
log.
If you are working with more than one digital audio
unit in your setup, you should note that all unitsmust
be driven by the same central clock source (“word
clock” or “word sync”).
If different word clock sources areused throughout
the setup, it is actually possible to damage speakers,
etc. because of mismatches.
The DA-78HR can be designated as the word clock
master foryour studio,or can beslaved to external
word clocks, using a convenient front-panel switch
and standard BNC connectors.
Even though AES/EBUstereodigital audio signals
are self-clocking, any AES/EBU format signals con-
verted and fed to orfrom theDA-78HR mustbe syn-
chronized at word level with the DA-78HR.
1.4.2 HR recording and emphasis
Recordings made in 24-bit (HR) mode do not use
emphasis.
If an attempt is made to record a digital signal that
contains emphasis using either the TDIF or the
SPDIF digital audio inputs, the display showsE
EMP (E EMP), and the signal is muted.
A digital emphasis circuit is provided, however, for
compatibility with previous models of DTRS
recorder.
Note that if a recording using emphasis is dubbed to
the DA-78HR via the analog inputs, this signal will
need to be modified appropriately.
1.4.3 Environmental conditions
The DA-78HR can be operated in mostenviron-
ments, but we suggest that you keep the environmen-
tal conditions within the following limits:
• Ambient temperature between 5°C and 35°C (41°F
and 95°F).
• Relative humidity should be between 30% and
80% non-condensing
• There should be no strong magnetic fields (speak-
ers, etc.) near the DA-78HR.
• Avoid spraying polish, insecticides, etc. near the
DA-78HR.
NOTE
If you need to cleantheDA-78HR, use a soft cloth,
moistened ifnecessary witha little detergentand

1 - Introduction to the DA-78HR
TASCAM DA-78HR
9
water. Do not use abrasive cleaners or solvents such
as alcohol or thinner.
Avoid subjecting the DA-78HR to jolts,sudden
shocks, etc.
NOTE
— I MPOR T ANT
If you have to return the unit forservice or repair, use
the original packing materials if possible. If the unit is
to be transported to a recording location, etc., use a
suitable transport case with sufficient shock
protection.
TASCAM does notaccept responsibility for damage
resulting from neglect or accident.
1.4.4 Installingthe DA-78HR
The DA-78HR may be installed in a standard 19”
rack, occupying 3U of space. Since the DA-78HR is
quite heavy (around between 7 and 8 kg – about
16lb.),your rack should be strong and stable to take
the weight of the DA-78HR.
TheDA-78HR should bemounted with the front
panel vertical.
1.4.5 Electrical considerations
Make sure thatyour local power supply matches the
voltage requirements marked on the rear panelof the
DA-78HR.
If you are in any doubtconcerning the local power
supply, consult an electrician.
Avoid extreme voltagefluctuations. If necessary, use
an input voltage regulator to smooth the power sup-
plied to the DA-78HR.
Do not open the unit to clean inside, or to perform
any internal adjustments. You should not attempt any
cleaning or other maintenance procedures which are
not described in this manual.
You may need to clean theheads occasionally. The
procedure for doing this, and for checking tapeerror
rates, etc., is given in 11.1, “Head and transport
cleaning”.
1.4.6 Three-core power cord
In order to maintain the best possible audio quality,
the DA-78HR is supplied with a 3-core (grounded)
power cord. DA-78HR should be used with a
grounded power cord, connected to a suitable electri-
cal ground, at all times. If it is not, there is a possibil-
ity that the audio quality will suffer.
1.4.7 Powering the DA-78HR off and on
When powering the DA-78HR off and on, always
wait for five seconds or more between powering the
unit off and turning it on again. If the power is
switchedtoo quickly, the precisionpowersupply
may not provide the power of the proper quality
required for recording.
If power is inadvertently switched off an on quickly,
and thepower supply does not respond properly,
switch the unit off again, wait for five or more sec-
onds, and switch it on again.
1.4.8 Condensation
If you use the DA-78HR in awarm place after mov-
ing it from a cold place (for instance, recording on
location), or if there has been a sudden changein
temperature, condensation may occur within the tape
mechanism, with a risk of possible damage to the
unit.
If condensation does occur, you will not be able to
operate the DA-78HR controls, and you willseethe
following message on the display E DEW (E DEW).
If you see the abovemessage, leave the DA-78HR
switchedonfor oneortwohours,thenswitchit off
and on again beforestarting recording.
If you are going to use the DA-78HR in a location
where you think condensation is likely to occur,
movethe DA-78HR into the warmer location about
oneor two hours before recording is due to start, and
leave it switched on. Turn the DA-78HR off and then
on again before starting recording.
1.5 Recommended tapes
The DA-78HR is designed for use with Hi8 video
cassettes.You cannot use any otherkind oftapewith
the DA-78HR.
Always use new tapes, or tapes in the best possible
condition, in orderto achieve the bestpossible results
whenrecording. Tapes which havebeen over-used
will not give such good results as new tapes.

1 - Introduction to the DA-78HR
10
TASCAM DA-78HR
There are two basictypes of Hi8 tape:MP and ME.
Each has its own particular characteristics and mer-
its:
• MPtapes are manufactured using a daubed mag-
netic particle deposit process and exhibit a level of
performance which is more than acceptable. They
have a durability which allows them to be used as
work tapes in studio and post-production
environments.
• MEtapes havetheirmagneticlayerproduced
through a metal evaporation process. Generally
speaking, though these tapes have a high perfor-
mancelevel, they are not asrobust asMPtapes(see
above) and should be used for live recording and
archival purposes, rather than as work tapes.
TASCAM does notendorse any specifictape or tape
manufacturer. TASCAM has licensed theuse of the
DTRS logo ( ) to tape manufacturers, provided
their tape meets the specifications required by DTRS
tape recorders. The table below lists several such
tapes, certified for use with DTRS tape recorders.
However, the use of the DTRS logo on the tape pack-
aging does not imply any endorsement of the tape by
TASCAM. It is possible that the characteristics and
sensitivities of tapes may be changed by the manu-
facturers without notice. The brands and model num-
bers oftapes listed belowmay not always meet the
specifications required by DTRS systems for opti-
mum performance. TASCAM assumes no responsi-
bility for problems resulting from changes made by a
manufacturer to the materials or specifications of its
tapeproducts.
The electrical characteristics of DTRS recorders are
adjusted and set using Sony Hi8tape parameters (MP
and ME) prior to shipment.
1.5.1 Tape brands
The following brands and models of tape can be used
with the DA-78HR. As mentioned above, this list
does not constitute any endorsement by TASCAM of
theseproducts, nor is itaguaranteethattapes bearing
this brand and model name will continue to give opti-
mum performance.
The electronics of DTRSrecorders aredesigned to
operate within specific parameters. Theuse of a tape
with sensitivity higher or lower than thatof tapes for
which the DTRS recorder was originally designed
may cause an error in functionality or prevent the
user from getting optimum performance from the
tape. Always use the shortest possible tape for a
given project.Do not attempt to use150-minute or
longer tapes in DTRS machines, as the machine will
detectthe thickness of tapeand automatically eject
any tape thinner than recommended.
Never attempt to use a tape with the DA-78HR that
has previously beenusedin video equipment.
NOTE
— I MPOR T ANT
You cannot cutand splice DTRS8mm tapes for edit-
ing purposes.Using a spliced tape in the DA-78HR
will invariably result in serious damage to the heads,
requiring replacement. All editing mustbe donedigi-
tally.
Maker MP ME
Sony DARS-MP E6-HME
P6-HMP E5-HME
P6-HMPX E6-HMEAD
P5-HMP E5-HMEAD
P5-HMPX E6-HMEX
E5-HMEX
Quantegy DA8 MP
BASF DA MP
HHB DA113
Maxell DRS-113DA (P)
Fuji DPD-MP

1 - Introduction to the DA-78HR
TASCAM DA-78HR
11
1.5.2 Available recording and playback
time
Depending on whetherthetapehas been purchased
for use with an NTSC (P6/E6) or a PAL/SECAM
(P5/E5)television system,thesame lengthof tape(as
far as video length is concerned) will provide differ-
ent times for audio work, as shown below, due to dif-
ferent frame rates between television systems. The
indication P6/E6 or P5/E5 willbe printed on the tape
package:
Time ontape
label P6/E6 (NTSC
tape) P5/E5 (PAL/
SECAMtape)
20 18 25
30 27 37
45 40 56
60 54 75
90 81 113
120 108 –

12
TASCAM DA-78HR
2 - Front and rear panel features

2 - Front and rear panel features
13
TASCAM DA-78HR
2.1 General controls and
indicators
1Power switch
Turns the power to the DA-78HR on and off. When
the DA-78HR is turned off, settings will be retained
in memory.
2Tape loading slot and EJECT key
Only useHi8 ME or MP tapes as specified in 1.5,
“Recommended tapes”. The DA-78HR willautomat-
ically eject all other tapes.
NOTE
—I MPORTANT
Do notuse a tapewhich hasbeenused for recording
video.Always useeither new tapes or tapes which
havebeenused ina DTRS recorder.
The EJECT key ejectsany loadedcassette.Acassette
can only be ejected when the transport is stopped.
3FORMAT/Fs key
The FORMAT/Fs key controls the formatting of tapes
and allows selection of the sampling frequency used
for recording (see 5.1, “Formatting a tape” for full
details). Thecurrent sampling frequency is shown on
the status indicators 6.
4HR MODE key
This key allows the selection of the recording resolu-
tion (16-bit or high-resolution 24-bit). See 5.1, “For-
matting a tape” for details.
The appropriate indicator 6will light if the HR
mode is selected.
5CLOCK key
This is used to select the word sync sourcefor the
DA-78HR (either internal, WORD or DIGITAL IN, as
shown ontheindicator6).
6Status indicators
The status indicators show the current status of vari-
ous DA-78HR functions. The legends of these indi-
cators are abbreviated for reasons of space. Hereis a
list of their full meanings, together with the pages on
which the functions are more fully described:
7Tape counter
The tape counter gives the current tape time in hours,
minutes, seconds and frames.
It is also used to display menus, sub-menus and the
values of the parameters of the unit, as well as pro-
viding information on the current status of the unit.
8PB CONDITION indicator
There is onemoreindicator:PBCONDITION, which
lights if there are many errors when reading or
recording the tape. It also flashes when theblock
error rate is being checked (11.1.2, “Checking error
rates”).
If this lights frequently, theblock error rate can be
checked and the heads cleaned (11.1, “Head and
transport cleaning”).
2.2 Tape transport keys and
controls
9REWkey
Rewinds the tape at high speed.
If this key ispressed during recording, recording will
stop and the tape will rewind.
AF FWD key
Winds the tape forward at high speed.
If this key ispressed during recording, recording will
stop and the tape will wind forward.
NOTE
Wheneither
REW
or
F FWD
is pressedfor thefirst
time after powering up,or loading a tape, the unit first
configuresitself for the reel hub diameter ofthe tape
inuse, duringwhich the tape advances at low
speeds. This takes several seconds. Thereafter, the
Legend Meaning Section
HR High-resolution (24-bit) mode 5.1
Fs (44.1k) Either of these will light to show
the current sampling frequency 5.1
Fs (48k)
ABS Tape subcode (ABS) is being
used as the timing reference 9.1
OFFSET Machineor timecode offset is in
operation 8.3.1and
9.6.2
CLOCK (WORD)
When both of these are lit, the
DA-78HR is using internal word
sync, and when neither is lit,
wordsync is being received
through the REMOTE IN/
SYNC IN connector. If one is
lit,theword syncisbeing
received through the appropri-
ate connector (digital audio
(COAXIAL) or word sync).
3.2
CLOCK
(DIGITALIN)
TAPE TC Lights when theDA-78HR is
reading timecode from the tape 9
Legend Meaning Section

2 - Front and rear panel features
TASCAM DA-78HR
14
transport momentarilygoes into stop mode before
the tape starts fast-winding.
BSTOP key
Cancels any current tapetransport mode, and stops
the tape. If pressed in chase mode, cancels the mode
and stops the tape.
CPLAY key
Starts playing the tape. If this key pressed while
recording is in progress, the DA-78HR drops out of
record mode.
DRECORD key
If thePLAY key Cis pressed while the RECORD
key is held down, recording will starton all “armed”
tracks (5.2.1, “Preparing to record”).
If the DA-78HR is in play mode, and theREC key is
pressed, recording will start immediately on any
“armed” tracks.
TheRECORD key also isused to set punch-in points
during auto punch-in/outoperations (5.6, “Punch-in
and punch-out”).
EDATA/LEVEL control
When theSHUTTLE/DATA key is pressed, the indica-
tor will light. The DATA/LEVEL control will then be
active as ashuttle control. Turning the control to the
right provides forward cueing and turning it to the
left provides reverse cueing, similar to “rock and
roll” on open-reel tape decks. For details, see 7.7,
“Shuttle operations”.
When theSHUTTLE/DATA key is pressed in conjunc-
tion with the SHIFT key, the DATA/LEVEL control is
also used as a data entry control to make various set-
tings, including the sub-mixer settings. See 4.3.7,
“Using the DATA/LEVEL knob to set values” and
7.4, “Sub-mixer” for details.
2.3 System control keys
The following keys all provide access to more
advanced functions of the DA-78HR. Many of them
are also used in themenu system to view and setsys-
tem parameters. See 4, “Menu interface, etc.” for
details.
Many of them also serve two functions, as shown by
the blue “shifted” legends below the unshifted leg-
ends (shown here inparentheses).See 4.2,“The
SHIFT key” for details.
FSHIFT key and indicator
Controls the behavior oftheotherkeys(see4.2,“The
SHIFT key” for details).
GRHSL (DELAY) key and indicator
This key and indicator allow selection of the
rehearsal modein auto punch-in and out(5.6,
“Punch-in and punch-out”).
When the DA-78HR is in shift mode, this key allows
the setting of track delays (7.3, “Track delay”).
HAUTO IN/OUT (OFFSET) key and
indicator
This key and indicator allow automatic punch-in and
punch out following rehearsal (5.6, “Punch-in and
punch-out”).
When the DA-78HR is in shift mode, this key allows
the setting of chase offsets (8.3, “Machine offset”
and 9.6.2, “Timecode offset”).
ICLEAR (PRE ROLL) key
This key defeatstherehearsaland auto modesduring
auto punch-in and out (see5.6,“Punch-in andpunch-
out”). Itcan also beusedto cancel a format operation
(5.1, “Formatting a tape”).
When the DA-78HR is in shift mode, this is used to
set pre- and post-roll times (5.6.4, “Editing the pre-
roll and post-roll times” and 7.1.3, “Setting the loca-
tion pre-roll time”).
JVARI SPEED / PITCH key and
indicator
Used to set the varispeed (pitch) amount, and to turn
the function on and off (see 7.6, “Vari speed (pitch
control)”.
KALL INPUT(▼) key and indicator
This key is used to switch the monitoring mode so
that the outputs mirror the inputs (see 6.1, “ALL
INPUT”).
LAUTO MON (▲) key and indicator
This key is used to change the monitoring mode to
change automatically in punch operations (see 6.2,
“AUTO MON”).
In menu mode and when editing parameters, this acts
asa key to selectand change (increment) parameters.
When used with the SHIFT key, it acts as a cursor
key.

2 - Front and rear panel features
15
TASCAM DA-78HR
MREPEAT (MENU) key and indicator
Thiskey is usedto providea repeatfunction between
the two location points (see 7.2, “Repeat function”).
When the DA-78HRis shiftmode, it allows selection
of the top-level menus (see 4.3, “Menus and sub-
menus”).
NCHASE (SUB MENU) key and
indicator
Thiskey is used to set the DA-78HR to a slavechase
mode, either to another DTRS unit, or to timecode
(see 8.2.3, “Master/slave settings (CHASE mode)”
and 9.6, “Chasing to timecode”).
When the DA-78HR is in shift mode, it allows selec-
tion of the second level of menus in the menu tree
(see 4.3, “Menus and sub-menus”).
OLOC 1 (MEMO 1) key
Thiskey locates the tape to the position set by MEMO
1(this key used with the SHIFTkey). See7.1,
“Autolocation”for details.
PLOC 2 (MEMO 2) key
Thiskey locates the tape to the position set by MEMO
2 (this key used with the SHIFT key). See7.1,
“Autolocation”for details.
QMIXDOWN (LEVEL/PAN) key and
indicator
This key turns the 8 x 2 sub-mixer output on and off
from therear panel outputs. See 7.4, “Sub-mixer”for
details.
When the DA-78HR is in shift mode, this key isused
to set the level and the pan position of each track in
the sub-mixer image(7.4, “Sub-mixer”).
2.4 Track controls
RREC FUNCTION keys and indicators
These eight switches and indicators allow the setting
and viewing of the record status on a track-by-track
basis.
When one of these switches is pressed, the appropri-
ate indicator will flash, the track is “armed”, and
going into record mode will startrecording on that
track. When recording isbeing carried outon atrack,
the track’s indicator will light steadily.
In addition, these keys are also used to select tracks
and channels for different operations, including the
input and output patchbays, the delay and sub-mixer
functions. See 7.3, “Track delay”, 7.4, “Sub-mixer”
and 5.3, “Input selection” for details of these
operations.
SPeak meters
These 15-segment peak meters show the input level
orthe recorded signal level,depending on themoni-
toring mode currently in operation (6, “Monitoring”).
NOTE
Whenusing digital recording equipment, thereis no
headroom above the 0 dB mark and no tape satura-
tionis possible.Anysignal whichcauses the“OVER”
segment to light willcause audible distortion. For this
reason you should take care not to let recording lev-
els exceed this level.
The ballistics and peak hold times are selectable (see
7.8, “Meter modes”).
They may also be used to provide a quick visual
guide to the statusof some of the settings (sub-mixer,
patchbay, etc.). See4.1.1, “Peak meters” fordetails.
2.5 Rear panel features
See 3, “Connections” for full details of how to con-
nect the DA-78HR to otherunits.
TREMOTE IN/SYNC IN
This connector is used to connect another “master”
DTRS unit (e.g. DA-78HR, DA-98, DA-88 or DA-
38). See 8, “Synchronizationwith other DTRS units”
for further details.
A TASCAM remote control unit may also be con-
nected here, but not all functions of the DA-78HR
may be available from the remote control unit.
UMIDI IN/OUT/THRU
These connectors carry MIDI TimeCode (MTC) and
MMC (MIDIMachine Control) commandsas wellas
MIDI System Exclusive messages. See 10, “MIDI
control” for details of how these facilities are used
when synchronizing to other units.
VSYNC OUT
This is used to connect another DTRS unit in the
“daisy-chain” or, if this DA-78HR is the last unit in
the chain, to attach a termination plug.
WREMOTE IN
Use this to connect an optional RC-808 remote con-
trolunit.Notethatnot all features ofthe DA-78HR
can be controlled using the RC-808.

2 - Front and rear panel features
TASCAM DA-78HR
16
XREMOTE PUNCH IN/OUT
Use this to connect an optional RC-30P foot-
switch to control punch operations.
YTDIF-1 (DIGITAL I/O)
This connector carries the digitalsignals to and from
the DA-78HR in TEAC Digital Interface Format
(TDIF-1).
ZTIME CODE (IN, OUT)
TheseRCA connectors areused to carry SMPTE/
EBU timecodeto and from the DA-78HR. For details
of using the DA-78HR with timecode synchroniza-
tion, see 9, “Operations related to timecode”.
aWORD SYNC (IN, OUT,THRU)
TheseBNC connectors areused to carry the word
clockbetweenthe DA-78HR and othertypes ofdigi-
tal audio equipment. The THRU connector is auto-
terminated (i.e. there is no need for a terminator
when this is unconnected).
bDIGITAL IN, OUT (COAXIAL)
TheseRCA connectors providean SPDIF stereo dig-
ital audio signalcontaining the submix signal (OUT)
or acceptan SPDIFsignal (IN) for recording (see 7.4,
“Sub-mixer” and 5.3.1, “Digitalinput selection”).
cANALOG INPUTS(unbalanced)
These eightRCA connectors accept unbalanced ana-
log audio inputs at –10 dBV.
dANALOG INPUTS (BALANCED)
This connector carries 8 balanced inputs at a nominal
+4 dBu level. This allows convenient and reliable
single-cable connection to the GROUP outputs of a
suitably-equipped consolesuch as theTASCAM M-
1600 series.
eANALOG OUTPUTS (unbalanced)
These eightRCA connectors output unbalanced ana-
log audio signals at a –10 dBV level.
fANALOG OUTPUTS (BALANCED)
This connector carries 8 balanced outputs at a nomi-
nal +4 dBu level. This allows convenient and reliable
single-cable connection to the tape return inputs of a
suitably-equipped consolesuch as theTASCAM M-
1600 series.
g~ IN
Use the provided AC power cord to connect theDA-
78HR to the AC power supply through this
connector.

TASCAM DA-78HR
17
3 - Connections
This section explains how to connectother equip-
ment to the DA-78HR. It is not intended as a com-
plete referenceto the use of the DA-78HR. Seethe
appropriatesections for full details of how these con-
nectors are used.
NOTE
S—IMPORTANT
When making connections between the DA-78HR and
other equipment, whether audio or control, both the DA-
78HR and the other equipment must be turned
off
, other-
wise damage may be caused to the DA-78HR and/or the
other equipment.
Only use TASCAM-supplied and TASCAM-approved
cables when making connections to the DA-78HR.Though
the cables and connectorsmayresemble computer cables,
they serve different purposes, and meet a different set of
specifications. The use of cables other than TASCAM
cables will at best cause the equipment to work erratically,
and at worst cause damage to the equipment.
If the use ofcables other than TASCAM cables
causes or results in damage, the warrantyisvoided.
3.1 Audio connections
Other audio equipmentcan be connected to theDA-
78HR either using analog or digital interfaces.
Selection for the input source (analog or digital) on a
global or individual trackbasis is made from the
menus. See 5.3, “Input selection” for details.
3.1.1 Balanced analog audio
connections
All balanced analog inputand output audio connec-
tions to the DA-78HR are made through 25-pin D-
sub connectors.
All these audio inputs and outputs are balanced and
are rated at a nominal+4dBu level.
This allows convenient and tidy cabling between the
DA-78HR and other units such as the TASCAM M-
1600 series of mixing consoles.
It is not recommended that you make up your own
cables—consultyour TASCAM dealer for availabil-
ity of suitable ready-madecables (and see 12.1.8,
“Cables”). However, we recognize that every situa-
tion has its own unique features, and thereare occa-
sions when a special cable must bemade.
Before starting to make the cable,we suggest you
contact your TASCAM dealer for fulldetailsof cable
specifications, etc.
Thepinouts forboth the ANALOG OUTPUT and
INPUT connectors are as follows:
where G=ground, H=”hot” (+) and C=”cold”(–).
The impedance of the inputs is 20kΩand that of the
outputs is 10Ω.
3.1.2 Unbalanced analog audio
connections
In addition to the balanced analog set of connections,
thereare eight RCA jacks for input signals and eight
for output. These are, of course, unbalanced, and the
nominal signal level is –10 dBV.
NOTE
Only connect and use one set of analog inputs at a
time. There is no facility to switch between the two
sets of analog input connectors.
3.1.3 Digital audio connections
Multitrack digital audio input and output signals are
carried on asingle 25-pin D-sub connector. The sig-
nals arein TDIF-1 format.
To carrysignals between aDA-78HR and another
unitequipped with TDIF-1 interfaces, such as the
TASCAM series of digital mixing consoles or other
DTRSrecorders, use a PW-88Dcable (1 meter long)
or a PW-88DL cable (5 meters long).
If you need to connect the DA-78HR to a digital
audiosource usinga differentformat, we recommend
the use of the following units:
• TASCAM IF-88AE Interface Unit—converts
between the TDIF-1 and AES/EBU formats
(8 channels). It also provides SPDIF format
conversion facilities.
• TASCAM IF-AE8—also provides sophisti-
cated conversion facilities between the TDIF-
1 and AES/EBU data formats.
• TASCAM IF-88SD Interface Unit—converts
between the TDIF-1 and SDIF-2 digital audio
formats.
• The TASCAM IF-TAD—converts between
the TDIF-1 and ADAT data formats, using a
digital optical input/output for the ADAT data.

3 - Connections
18
TASCAM DA-78HR
3.1.4 SPDIF connectors
The coaxial RCA digitalaudio connectors on the rear
panelallowconnection of anSPDIF-equippeddevice
(e.g. a DAT recorder).
This digital unit should be used as a clock source if
data is to be read from it
When synchronizing to the signal received at the
COAXIAL DIGITAL IN, set the CLOCK key so that
the DIGITAL INindicator lights.
3.2 Synchronization connections
The DA-78HR has facilities for control and synchro-
nization with other units. For full details of how to
operatethe DA-78HR with other units, see 8, “Syn-
chronization with other DTRS units” and 9, “Opera-
tions related to timecode”.
3.2.1 Word clock connections
This set ofBNC connectors is usedto synchronize
theDA-78HR to otherdigital audio devices.
The CLOCK key is used to change between clock
sources, and should besetto WORD when synchro-
nizing to an external word clock (the WORDindica-
tor will light).
The IN jack should be connected to the WORD
SYNC OUT of the digital audio device from which
the DA-78HR is to receive the synchronization clock.
The OUT outputs word clock information provided
from the DA-78HR, whilethe THRU, to echoes the
signals received at IN.
Note that if the DA-78HR is connected to other
DTRS units, the WORD SYNC jacks do not need to
beconnected between the DTRS units.
3.2.2 MIDI connectors (IN , OUTand
THRU)
These standard 5-pin DIN MIDI connectors are used
to carry MIDI Time Code (MTC) and MIDI Machine
Control (MMC) information between the DA-78HR
and other suitably-equipped units (for instance,
sequencers capable of being synchronized to MTC,
and capable of transmitting MMC commands).
The MIDI parameters are set through the menu
system (see 10, “MIDI control”).
Notethe difference between MIDI OUT and MIDI
THRU.The OUT connectoroutputs signals which
originate from the DA-78HR. The THRU connector
echoes messages received at the IN.
3.2.3 Timecode connections
The DA-78HR can be synchronized to externally-
generated timecode and is also equipped with an
internal timecode generator.
SMPTE/EBU timecode can be received at the TIME
CODEINRCA jack, and can be transmitted from the
TIME CODE OUT RCA jack.
See 9, “Operations related to timecode” for details.
3.2.4 MIDI timecode connections
The three MIDI connectors, IN, OUTand THRU, con-
form to the MIDI standards for such connectors.
3.3 Connection to other TASCAM
units
By a “TASCAM unit”, we mean another DA-78HR,
a DA-98, DA-88ora DA-38 unit,oranoptional
remote control unit, which may also be connected in
a “chain” with multiple DTRS units.
3.3.1 REMOTE IN
This jack on the rear panel can be used to connect a
remote control unitsuch as RC-808 remote control
unit.
Basic control can be carried out using this unit, but
more advanced operations will not be possible.
3.3.2 Footswitch
A footswitch such asthe optional TASCAM RC-30P
footswitch canbe connected totheREMOTE PUNCH
IN/OUTjack on the rear panel.
This footswitchallows hands-free punch-in and
punch-out.
When a track or track isarmed, and theunitis in play
mode, pressing the footswitch once will drop the unit
into record mode, and pressing it again will drop it
back into play mode.
The footswitch, rather than the transport keys, can
also be used to set punchpoints,as describedin 5.6,
“Punch-inand punch-out”.
3.3.3 Multiple DTRS units
Use a TASCAM PW-88S cable when connecting
other units to theREMOTE/SYNC IN connector or to
theSYNC OUT connector.
This synchronization cable will carry the internal
synchronization code and the transportsignals, etc.
There is no need to make any other connections,

3 - Connections
TASCAM DA-78HR
19
apart from the audio connections (either digital or
analog).
If more than one DTRS unit is to be used, the first
unit in the chain must have its Machine ID set to “1”,
(“0” in the caseofDA-88s) and subsequent units
must have their IDs set in order with no gaps in the
numbering sequence. Note that the diagram below
does not show any audio connections.
See 8.2, “Machine ID and master/slave settings” for
details of setting the Machine ID using the menu
system
NOTE
The last unit in the chain must be terminated (a
TASCAM termination plug must be plugged into the
SYNC OUT
of the last machine in the chain.Once
again,only useTASCAM cables for connectionof
equipment to and from the DA-78HR.
3.3.4 “Indirect” word sync
As mentioned earlier, there is usually no need to use
aword clock when connecting DTRS units together.
There is, however, an occasion when it is necessary
to carryexternal word syncbetween DTRSunits.
This is when a slave DTRS unit is recording digitally
from anotherdigital audiodevice:
Though the slave will receive its word clock from the
master unit, themaster itself mustreceive its word
clock from the other digital audio device.
In this case, the master unit willhave its clock source
set to WORD, and the slave will receiveits clock
from the master unit through the SYNC IN.
Machine ID 1
(master) Machine ID 2
(slave 1) Machine ID 3
(slave 2)
Termination
plug
PW-88S PW-88S
Machine ID 1
(master, but
CLOCK set to
WORD) Machine ID 2
(slave 1)
Termination
plug
PW-88S
IF-88SD
TDIF-1 digita l
audio
Digital SDIF-2
device
SDIF-2
digitalaudio
Word clock signal

20
TASCAM DA-78HR
4 - Menu interface, etc.
Read this section to understand the basic principles
of the menu operations. These menus areused for
making settings which cannot be made directly from
dedicated front panel keys.
In addition, this section gives a brief description of
the top-level menu groups as well as the sub-menu
items and the parameters. This is nota detailed
description of these menus and parameters, but may
beconsulted for quick reference. Seetheappropriate
sections of the manual for detailed information
regarding these menu settings.
4.1 Thedisplay
The DA-78HR’s menus and their options are dis-
played using the time counter. Since the display is
composed of 7-segment LED counters, aspecial
alphabet is used to show theletters of the alphabet.
The characters on theDA-78HR time counter are
shown as in the table below:
When a menu item or a value is given in this manual,
we show it in the following way:
Pk. Hld (PK HLD).
Noticealso that because there arenot manycharacter
positions on the time counter, the English menu
titles, etc. may be abbreviated sometimes.
4.1.1 Peak meters
In addition to the time display, the bargraph meters
are sometimes used to show a value. For example, in
the stereo sub-mixer settings, the meters actas a bar-
graph display to show the “fader” settings of the
track levels.
Typically, the higher the value of the parameter, the
more segments of the meter are lit (at minimum val-
ues, no segments are lit, at maximum values, all seg-
ments are lit).
Pressing and holdingSHIFT and pressingany REC
FUNCTION key in these editing modes will toggle
the meters between data value display and thenormal
meter display.
4.2 The SHIFT key
TheSHIFT key serves two functions: first, to modify
the action of another key when the SHIFTkeyis
pressed and held while the other key is pressed, and
secondly, to enter “shift mode”. These two are
explained below.
4.2.1 Shifted keys
Somekeys of the DA-78HR perform two functions,
labels associated with the key. For instance, the LOC
1(locate to memory position 1) key, has the alterna-
tive “shifted” function marked asMEMO1(storethe
currenttime into memory location 1).
When the SHIFT key is pressed and held down, and
one ofthesekeys,as described in therelevant part of
this manual, is pressed, the shifted function will be
performed.
The two keys can then be released in either order
(either theSHIFTkeyortheotherkeycanbereleased
first).
4.2.2 Shift mode
By contrast,pressing theSHIFTkey alone and releas-
ing it will place the unit into “shift mode”. The
SHIFTindicator flashes to show this.
Pressing any of the two-function keys while the unit
is in shift mode will automatically enter the shifted
function.
While the unit is in shift mode, pressing theSHIFT
key once again will turn the indicator off and exit
SHIFTmode.
Note, however, that pressing and holding the SHIFT
key and pressing another key to access the shifted
function of that key will not affect the current shift
mode.
ABCDEFGHI JK
ABCDE FGHI JK
L MNOPQRST UV
LMNOP QRST UV
WXYZ0123456
WXYZ0 1234 56
789- .x
a
a. This is a lowercase "x", used to denote an
unknown value.
789-. ;
Other manuals for DA-78HR
1
Table of contents
Other Tascam Voice Recorder manuals

Tascam
Tascam DR-40 Instruction Manual

Tascam
Tascam DR-05 User manual

Tascam
Tascam Mixcast 4 User manual

Tascam
Tascam HS-P82 Operation and maintenance manual

Tascam
Tascam HS-P82 User manual

Tascam
Tascam DR-05 User manual

Tascam
Tascam DR-05 Guide

Tascam
Tascam DR-05 How to use

Tascam
Tascam DR-08 User manual

Tascam
Tascam DA-38 User manual

Tascam
Tascam DR-40 User manual

Tascam
Tascam DR-701D User manual

Tascam
Tascam DA-6400 User manual

Tascam
Tascam DR-22WL User manual

Tascam
Tascam DR-07 User manual

Tascam
Tascam DR-100MKIII User manual

Tascam
Tascam dr-44wl User manual

Tascam
Tascam DR-05 User manual

Tascam
Tascam DA-6400 User manual

Tascam
Tascam PR-10 User manual