TATA Motors CHECK ExpressPCR User manual

REAL-TIME PCR MADE SIMPLE!
USER GUIDE
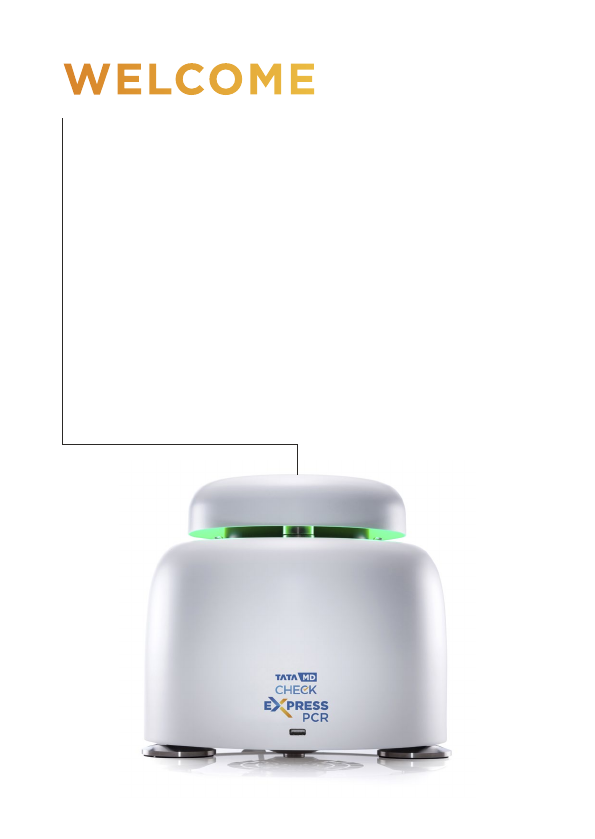
WELCOME
Thank you for choosing the Tata MD CHECK
ExpressPCR.
Tata MD CHECK ExpressPCR is a reliable, fast
and compact qPCR platform for smart molecular
testing labs. Novel Full Spectrum Optics deliver
120 optical channels of fluorescence data from
every tube for exceptional multiplex PCR. High-
performance Peltier elements, combined with
solid silver blocks, provide both speed and
proven world-leading thermal uniformity.
REAL-TIME PCR MADE SIMPLE!
2

3
CONTENT
This user guide will teach you what you need to
know to start running your Tata MD CHECK
ExpressPCR. It describes everything from connecting
your instrument to the network to data analysis
for your qPCR experiments. Contents include...
SETUP
Learn how to install your
ExpressPCR system -
from setting it up on your
workbench, to configuring
the instrument and
installing the software.
TIPS
Learn some useful tips
when using your
instrument.
EXPERIMENT
Learn the basics of setting
up an experiment on your
ExpressPCR.
ANALYSIS
Learn how to easily
analyse your results.
EXPORT
Learn how to export
your data for use with
other software.
MAINTENANCE
Learn how to look after
your ExpressPCR
instrument.
TROUBLESHOOTING
Learn how to troubleshoot
problems with your
instrument here.
4
1. EXPRESSPCR INSTRUMENT
2. EXPRESSPCR USER GUIDE
3. POWER SUPPLY UNIT AND MAINS CABLE
4. ETHERNET CABLE
5. USB DRIVE
Please keep the flight case and outer box the ExpressPCR
system came in, in case you need to protect your
ExpressPCR system during storage or shipment in future.
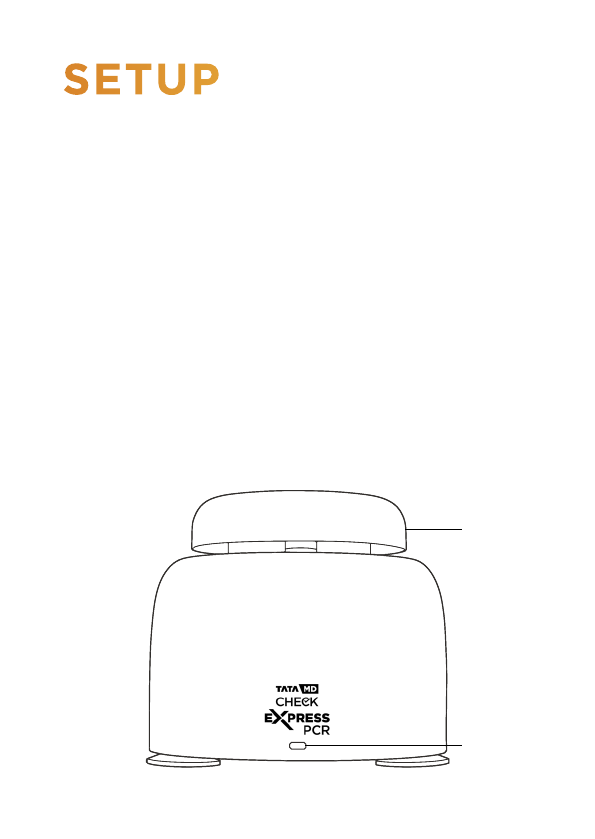
Lid
USB Port
SETUP
INSTALLING YOUR EXPRESSPCR
You should have the following items in the ExpressPCR
flight case:

5
LID
The lid ensures that tubes are seated correctly in the
wells, provides optical isolation, includes a heated lid
to reduce condensation, and prevents dust falling into
empty wells.
DISPLAY LEDS
ExpressPCR uses display LEDs to help you understand
what the instrument is doing. Here is a summary of these
display LEDs.
Blue Initialising
Green Idle
Red Lid open - Please close the lid
Yellow Tubes loaded
Blue Running, low temperature
Pink Running, medium temperature
Red Running, high temperature
Cyan Experiment complete
Red-Flashing Fault detected
USB PORT
Insert the USB drive here to run an experiment from
the USB drive.

6
EXPRESSPCR CONNECTIONS
The ExpressPCR has three connections. One in the
front and two in back as shown below:
This is for connecting your
ExpressPCR to your LAN
or computer.
This is to connect your
ExpressPCR system to the
provided power supply unit.
ETHERNET PORT
POWER
Ethernet Port
Power

7
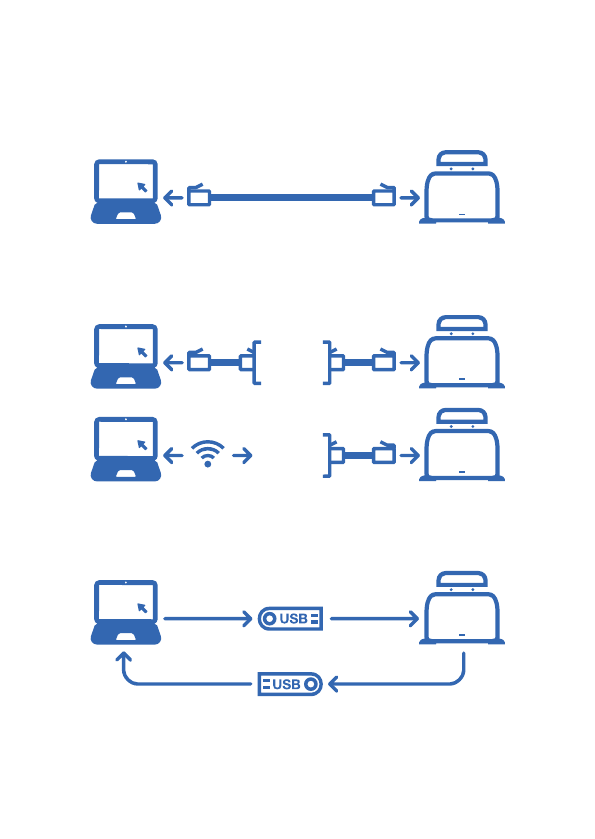
Connect one end of the Ethernet cable to the
instrument and the other end to a LAN port, or
directly to your computer. Once your ExpressPCR
is connected to a LAN, you can connect to your
instrument via Wi-Fi if your network supports it.
POWERING ON YOUR
EXPRESSPCR SYSTEM
Place the ExpressPCR on your lab bench, and then
connect AC power to the power supply unit. Your
instrument will now turn on after a few seconds. The
display LEDs will light up blue, and then turn green
if a lid is closed or red if not. Your ExpressPCR is
ready to run. ExpressPCR instrument uses a 3-pin
IEC mains connector. If you are not using an earthed
supply then you must provide an additional earth
connection.
CONNECTING YOUR
EXPRESSPCR
TO A NETWORK, PC OR LAPTOP
A summary of these connections is shown on the
following page...
8
EXPRESSPCR CONNECTION
MODES
1. Direct network connection
3. USB drive connection
2. Local area network connection
LAN

9
EXPRESSPCR HEATED LID
The ExpressPCR heated lid will get hot. Please do
not touch it. The heated lid will be preheated to
105°C if user activity is detected. This enables your
run to start as soon as possible. After 5 minutes
of inactivity the heated lid will be turned off to
conserve energy.
Heated Lid
Do not touch

10
Your ExpressPCR USB Drive contains software for
Windows, Mac OS X, and Linux operating systems.
Please open the software file matching your chosen
operating system. The latest version of the software
can also be downloaded from our website
www.tatamd.com
WINDOWS
Double-click on the
Windows installer and follow
the on-screen instructions
to install your ExpressPCR
software on Windows.
MAC OS X
Double-click on the disk
image and follow the
on-screen instructions to
install your ExpressPCR
software on your Mac PC.
INSTALLING YOUR
EXPRESSPCR SOFTWARE
11
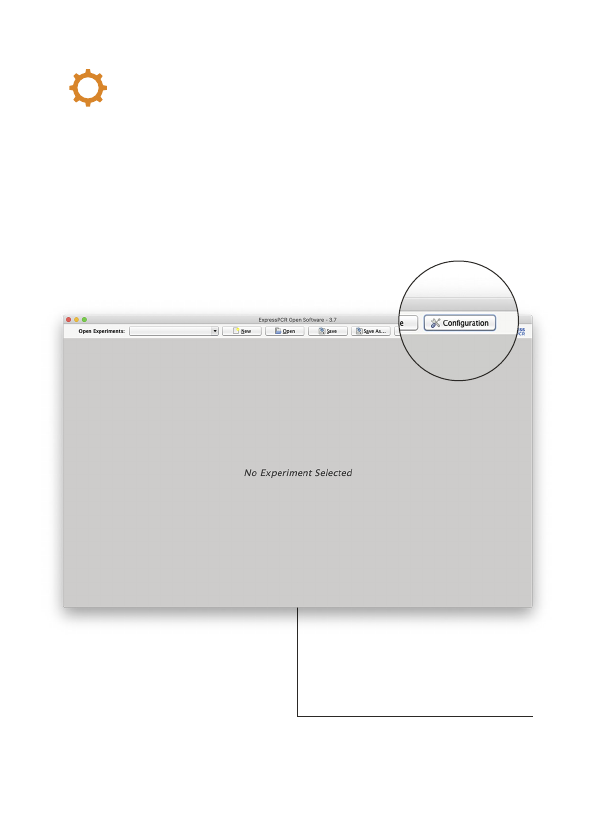
With your ExpressPCR software open, and your
ExpressPCR system connected to the network,
please connect to your ExpressPCR instrument
from the software.
Please select Configuration.
CONFIGURING YOUR
EXPRESSPCR

12
To add your new
ExpressPCR System select
the Add button. You will
now be presented with a list
of available instruments.
Please select ExpressPCR.

13
Double-click on the
instrument you wish
to connect to, or press
Select with the instrument
selected. The instrument
will now be added to the list
of Registered Instruments
for use in the software.

14
TIPS
Here are some great tips to keep in mind whilst using your
ExpressPCR instrument.
1. LID GETS WARM
2. DO NOT LEAVE THE LID OPEN
3. SPIN YOUR TUBES
4. REMOVE ALL BUBBLES
5. KEEP YOUR LAB CLEAN
6. KEEP YOUR INSTRUMENT CLEAN
7. PC SETTINGS
LID GETS WARM
The ExpressPCR lid can get warm during operation, this
is completely normal.
SPIN YOUR TUBES
This should ensure that all contents are at the bottom of
the tubes, and there are no bubbles present. Reaction
mixtures which are viscous, or contain high levels of
detergents, will require stronger centrifugation to
remove bubbles. Please use sufficient g-force to ensure
that no bubbles are present.
DO NOT LEAVE THE LID OPEN
If the lid is open dust may fall into the wells and affect
the performance of your instrument.
15
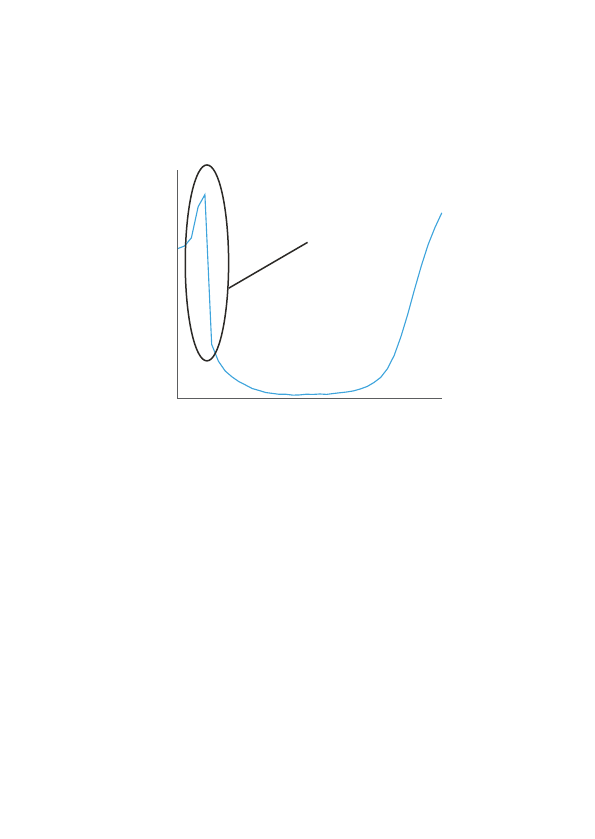
Intensity (RFU)
Cycle
REMOVE ALL BUBBLES
Bubbles can cause optical artefacts as shown in the graph
below. Ensure that no bubbles are present in reaction
volumes.
KEEP YOUR LAB CLEAN
Please keep your work space clean including all lab
equipment like surfaces, pipettes, and tube racks. This will
keep the instrument clean and help maintain good results.
KEEP YOUR INSTRUMENT CLEAN
We recommend a routine cleaning of your instrument.
To do so follow the cleaning guide in the Maintenance
section.
PC SETTINGS
Please disable all power saving settings e.g. sleep and
hibernate.
Artefact

Click New to create
a new experiment.
16
CREATE A NEW EXPERIMENT
EXPERIMENT
This section will teach you everything you need to
know to get started with ExpressPCR experiments.
You will learn how to create, save, open, and close
experiments. You will also learn how to set up
an experiment, including thermal profile, sample
information, and optical settings. Finally we will
show you how to run your new experiment from the
software, and from the USB drive provided.
Below is the ExpressPCR software home screen.
17
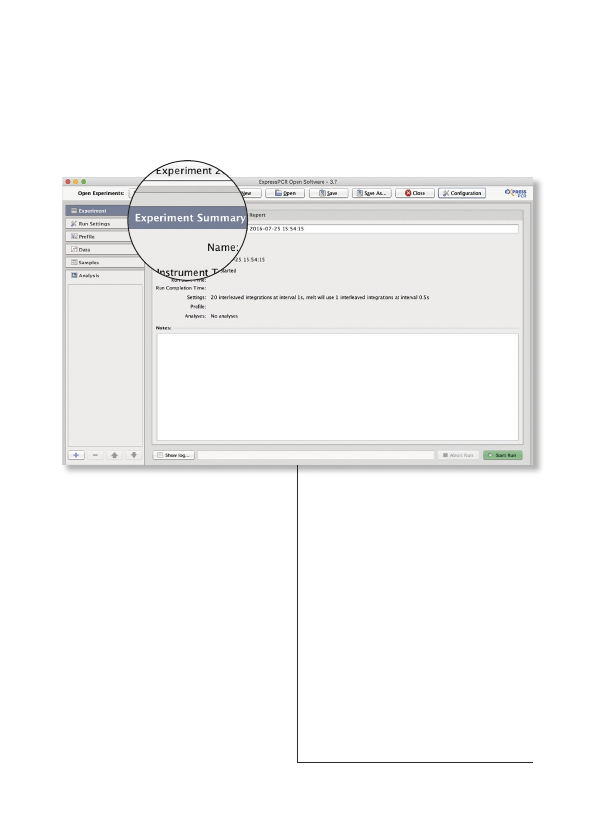
EXPERIMENT SUMMARY
Once you have created a new experiment the
Experiment Summary will be displayed as shown below:
By default the experiment
name will be “New
Experiment” with a date
and time stamp, which
can be edited.
The summary will give
you information about
the instrument you are
running, the settings
chosen, and any useful
notes you choose to
add about your
experiment.
18
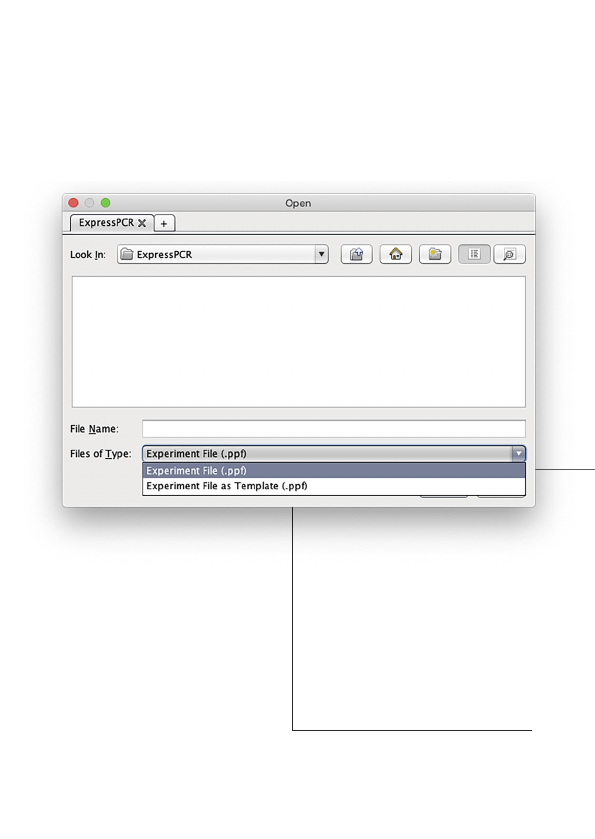
The Files of Type drop
down menu gives you
the option to open an
experiment normally, or
as a template that can be
used for a new run.
OPEN AN EXPERIMENT
By selecting Open you can open an experiment
as shown below:
FILES OF TYPE

19
EXPERIMENT FILE
An experiment file will contain
all the data and analyses, but
can not be re-run.
To open as an Experiment
File select the first option
shown on the opposite page.
EXPERIMENT FILE
AS TEMPLATE
Opening an experiment file
as a template allows you to
use the same profile, samples,
settings, and analyses to re-
run a previous experiment,
generating new data. When
an experiment file is opened
as a template, it has the same:
1. Temperature profile.
2. Optical settings.
3. Samples and targets.
4. Analyses, including settings.
If you wish to open an
Experiment File as Template
select the second option.
USB RUN
To open a USB run navigate to the USB location using the
Open dialog window shown to the left. Select Experiment
File in the Files of Type drop down menu, and then double
click on the USB run.

20
SAVING AN EXPERIMENT
Once a run has finished it can either be automatically
saved to a pre-set location on your computer, or
manually saved by you. The experiment must be
saved before the software is closed to ensure that
data is not lost.
AUTOMATIC
SAVING
When starting a run you
will be prompted with the
window displayed below.
Make sure the first checkbox is selected and your
experiments will be automatically saved. To prevent
the software from showing this dialog again, select the
second checkbox. You can change these settings later
by clicking Configuration and selecting General Config.
To automatically save
your data when the run
has finished, firstly click
Browse and choose the
location to save your
run to.
Popular Medical Equipment manuals by other brands


Getinge
Getinge Arjohuntleigh Nimbus 3 Professional Instructions for use

Mettler Electronics
Mettler Electronics Sonicator 730 Maintenance manual

Pressalit Care
Pressalit Care R1100 Mounting instruction

Denas MS
Denas MS DENAS-T operating manual

bort medical
bort medical ActiveColor quick guide

AccuVein
AccuVein AV400 user manual


