tau SLIM-R Series Guide

Made
in Italy
SLIM-R Series
FUNZIONAMENTO E REGOLAZIONE
OPERATION AND ADJUSTMENTS
FUNKTIONSWEISE UND EINSTELLUNG
FONCTIONNEMENT ET RÉGLAGE
FUNCIONAMIENTO Y REGULACIÓN
TAU srl via E. Fermi, 43 - 36066 Sandrigo (VI) Italia - Tel ++390444750190 - Fax ++390444750376
Edizione 02 - anno 2008 rev. 01 del 22/01/2008
http://www.tauitalia.com -
E-mail: [email protected]
The SLIM-R transmitter works both in the rolling code and fixed code modes (like mods. BUG, BUG-R,
TXD2-4, SLIM and SLIM-C). It is generally supplied in the rolling code mode with a standard code.
If you have a rolling code radio receiver you do not need to adjust the transmitter as the code is
automatically updated by the internal microprocessor each time it is used.
If you have a fixed code radio transmitter, the transmitter code must be adjusted to that of the
receiver.
To change from the rolling code to the fixed code mode, press down both buttons for about 5 seconds
until the green LED starts flashing the memorised code with 10 long or short signals. The length of the
signal matches the pre-set fixed code (long = dip switch ON, short = dip switch OFF).
At the end, the green LED will emit a final long signal.
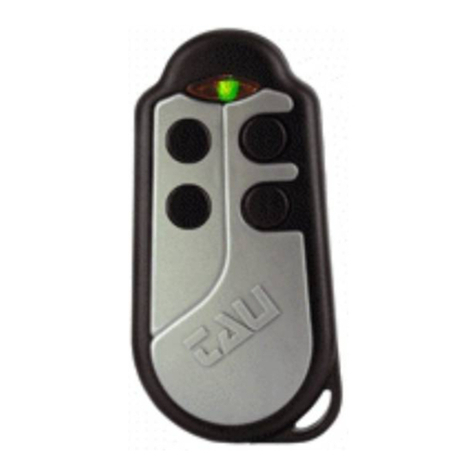
To adjust the fixed code of the transmitter to that of the radio receiver, press buttons 1 and 2 (as shown
in the figure 1). To store a dip switch ON signal press button 1 (Ch1), while to store a dip switch OFF
signal press button 2 (Ch2) according to the radio receiver code.
IMPORTANT: begin adjustment while the LED is transmitting the final long signal and complete
the 10-bit sequence, otherwise the pre-set code will remain unvaried.
DIP 1 and 2 (ON): HIGHER RANGE.
DIP 1 and 2 (OFF): LONGER BATTERY AUTONOMY.
Note: it is necessary to open the radio control device with a screwdriver in order to set dip-
switches 1 and 2.
To return to the rolling code mode, press both buttons for about 5 seconds until the LED starts
flashing.
Attention: danger of explosion if the battery is replaced with an incorrect type. use 2016 3V
lithium batteries. Dispose of used batteries in compliance with current regulations.
ITALIANO
ENGLISH
DEUTSCH
Il trasmettitore SLIM-R funziona sia in modalità rolling code che in modalità codice fisso (come i mod.
BUG, BUG-R, TXD2-4, SLIM e SLIM-C). Di norma viene fornito in modalità rolling code con un codice
standard.
Se si dispone di una radioricevente a modalità rolling code non è necessaria alcuna regolazione del
trasmettitore in quanto il codice verrà automaticamente aggiornato dal microprocessore interno ad
ogni uso dello stesso.
Se si dispone di una radioricevente a modalità codice fisso è necessario regolare il codice del
trasmettitore su quello della radioricevente.
Per passare dalla modalità rolling code a quella a codice fisso tenere premuti ambedue i tasti per circa
5 secondi finchè il led verde inizierà a lampeggiare visualizzando il codice memorizzato emettendo
10 segnali che possono essere lunghi o brevi. L’intensità dei segnali corrisponde al codice fisso
predefinito (lungo = dip switch ON, breve = dip switch OFF).
Al termine il led verde emetterà un ultimo lungo segnale.
Per regolare il codice fisso del trasmettitore su quello della ricevente bisogna agire sui tasti 1 e 2 (come
rappresentato in figura 1). Per immettere un dip switch ON premere il tasto 1 (Ch1), mentre per un dip
switch OFF premere il tasto 2 (Ch2) secondo la regolazione della radioricevente.
IMPORTANTE: iniziare la regolazione mentre il led sta dando l’ultimo segnale lungo e
completare la sequenza di 10 bit, in caso contrario il codice predefinito resterà invariato.
DIP 1 e 2 (ON): SUPER PORTATA.
DIP 1 e 2 (OFF): MAGGIORE AUTONOMIA BATTERIE.
Nota: per impostare i dip-switches 1 e 2 è necessario aprire il radiocomando servendosi di un
cacciavite.
Per tornare alla modalità rolling code tenere premuti ambedue i tasti per circa 5 secondi finchè il led
lampeggia.
Attenzione: pericolo d’esplosione se la batteria è sostituita con una di tipo scorretto. usare
batterie al litio 2016 3V. Eliminare le batterie usate seguendo le normative vigenti.
Der Sender SLIM-R funktioniert sowohl im Rolling-Code-Modus als auch im Modus mit festem Code
(wie die Mod. BUG, BUG-R, TXD2-4, SLIM und SLIM-C) und wird gewöhnlich im Rolling-Code-Modus
mit einem Standardcode geliefert.
Wenn man über einen Empfänger mit Rolling-Code-Modus verfügt, so ist keine Einstellung des
Senders notwendig, da der Code bei jedem Gebrauch desselben automatisch vom internen
Mikroprozessor aktualisiert wird.
Wenn man über einen Empfänger mit festem Code verfügt, so muss der Sendercode auf den des
Empfängers eingestellt werden.
Zum Übergang vom Rolling-Code-Modus auf den Modus mit festem Code, beide Tasten ca. 5
Sekunden lang gedrückt halten, bis die Grüne Led zu blinken beginnt, den gespeicherten Code
angezeigt und 10 Signale abgibt, die lang oder kurz sein können. Die Signaldauer entspricht einem
vorgegebenen festen Code (lang = Dip-Switch auf ON, kurz = Dip-Switch auf OFF).
Am Ende wird die Grüne Led ein letztes, langes Signal abgeben.
Made
in Italy
SLIM-R Series
FUNZIONAMENTO E REGOLAZIONE
OPERATION AND ADJUSTMENTS
FUNKTIONSWEISE UND EINSTELLUNG
FONCTIONNEMENT ET RÉGLAGE
FUNCIONAMIENTO Y REGULACIÓN
TAU srl via E. Fermi, 43 - 36066 Sandrigo (VI) Italia - Tel ++390444750190 - Fax ++390444750376
Edizione 02 - anno 2008 rev. 01 del 22/01/2008
http://www.tauitalia.com -
E-mail: [email protected]
The SLIM-R transmitter works both in the rolling code and fixed code modes (like mods. BUG, BUG-R,
TXD2-4, SLIM and SLIM-C). It is generally supplied in the rolling code mode with a standard code.
If you have a rolling code radio receiver you do not need to adjust the transmitter as the code is
automatically updated by the internal microprocessor each time it is used.
If you have a fixed code radio transmitter, the transmitter code must be adjusted to that of the
receiver.
To change from the rolling code to the fixed code mode, press down both buttons for about 5 seconds
until the green LED starts flashing the memorised code with 10 long or short signals. The length of the
signal matches the pre-set fixed code (long = dip switch ON, short = dip switch OFF).
At the end, the green LED will emit a final long signal.
To adjust the fixed code of the transmitter to that of the radio receiver, press buttons 1 and 2 (as shown
in the figure 1). To store a dip switch ON signal press button 1 (Ch1), while to store a dip switch OFF
signal press button 2 (Ch2) according to the radio receiver code.
IMPORTANT: begin adjustment while the LED is transmitting the final long signal and complete
the 10-bit sequence, otherwise the pre-set code will remain unvaried.
DIP 1 and 2 (ON): HIGHER RANGE.
DIP 1 and 2 (OFF): LONGER BATTERY AUTONOMY.
Note: it is necessary to open the radio control device with a screwdriver in order to set dip-
switches 1 and 2.
To return to the rolling code mode, press both buttons for about 5 seconds until the LED starts
flashing.
Attention: danger of explosion if the battery is replaced with an incorrect type. use 2016 3V
lithium batteries. Dispose of used batteries in compliance with current regulations.
ITALIANO
ENGLISH
DEUTSCH
Il trasmettitore SLIM-R funziona sia in modalità rolling code che in modalità codice fisso (come i mod.
BUG, BUG-R, TXD2-4, SLIM e SLIM-C). Di norma viene fornito in modalità rolling code con un codice
standard.
Se si dispone di una radioricevente a modalità rolling code non è necessaria alcuna regolazione del
trasmettitore in quanto il codice verrà automaticamente aggiornato dal microprocessore interno ad
ogni uso dello stesso.
Se si dispone di una radioricevente a modalità codice fisso è necessario regolare il codice del
trasmettitore su quello della radioricevente.
Per passare dalla modalità rolling code a quella a codice fisso tenere premuti ambedue i tasti per circa
5 secondi finchè il led verde inizierà a lampeggiare visualizzando il codice memorizzato emettendo 10
segnali che possono essere lunghi o brevi. L’intensità dei segnali corrisponde al codice fisso predefinito
(lungo = dip switch ON, breve = dip switch OFF).
Al termine il led verde emetterà un ultimo lungo segnale.
Per regolare il codice fisso del trasmettitore su quello della ricevente bisogna agire sui tasti 1 e 2 (come
rappresentato in figura 1). Per immettere un dip switch ON premere il tasto 1 (Ch1), mentre per un dip
switch OFF premere il tasto 2 (Ch2) secondo la regolazione della radioricevente.
IMPORTANTE: iniziare la regolazione mentre il led sta dando l’ultimo segnale lungo e completare
la sequenza di 10 bit, in caso contrario il codice predefinito resterà invariato.
DIP 1 e 2 (ON): SUPER PORTATA.
DIP 1 e 2 (OFF): MAGGIORE AUTONOMIA BATTERIE.
Nota: per impostare i dip-switches 1 e 2 è necessario aprire il radiocomando servendosi di un
cacciavite.
Per tornare alla modalità rolling code tenere premuti ambedue i tasti per circa 5 secondi finchè il led
lampeggia.
Attenzione: pericolo d’esplosione se la batteria è sostituita con una di tipo scorretto. usare
batterie al litio 2016 3V. Eliminare le batterie usate seguendo le normative vigenti.
Der Sender SLIM-R funktioniert sowohl im Rolling-Code-Modus als auch im Modus mit festem Code
(wie die Mod. BUG, BUG-R, TXD2-4, SLIM und SLIM-C) und wird gewöhnlich im Rolling-Code-Modus
mit einem Standardcode geliefert.
Wenn man über einen Empfänger mit Rolling-Code-Modus verfügt, so ist keine Einstellung des Senders
notwendig, da der Code bei jedem Gebrauch desselben automatisch vom internen Mikroprozessor
aktualisiert wird.
Wenn man über einen Empfänger mit festem Code verfügt, so muss der Sendercode auf den des
Empfängers eingestellt werden.
Zum Übergang vom Rolling-Code-Modus auf den Modus mit festem Code, beide Tasten ca. 5 Sekunden
lang gedrückt halten, bis die Grüne Led zu blinken beginnt, den gespeicherten Code angezeigt und 10
Signale abgibt, die lang oder kurz sein können. Die Signaldauer entspricht einem vorgegebenen festen
Code (lang = Dip-Switch auf ON, kurz = Dip-Switch auf OFF).
Am Ende wird die Grüne Led ein letztes, langes Signal abgeben.

Fig. 1
L’émetteur SLIM-R fonctionne aussi bien en mode rolling code qu’en mode code fixe (comme les mod.
BUG, BUG-R, TXD2-4, SLIM et SLIM-C). Généralement, il est fourni en mode rolling code avec un
code standard.
Si l’on dispose d’un récepteur radio en mode rolling code, il ne faut effectuer aucun réglage sur
l’émetteur dans la mesure où le code sera automatiquement mis à jour par le microprocesseur interne
à chaque utilisation de l’émetteur.
Si l’on dispose d’un récepteur radio en mode code fixe, il faut régler le code de l’émetteur sur celui
du récepteur.
Pour passer du mode rolling code au mode code fixe, presser simultanément les deux touches pendant
environ 5 secondes jusqu’à ce que la LED vert commence à clignoter en signalant la mémorisation
du code à travers l’émission de 10 signaux qui peuvent être longs ou brefs. L’intensité des signaux
correspond au code fixe prédéfini (long = dip-switch ON, bref = dip-switch OFF).
À la fin, la LED vert émettra un dernier signal long.
Pour régler le code fixe de l’émetteur sur celui du récepteur radio, il faut agir sur les touches 1 et 2
(comme l’illustre la figure 1). Pour enregistrer un dip-switch ON, presser la touche 1 (Ch1), tandis que
pour enregistrer un dip-switch OFF presser la touche 2 (Ch2), suivant le réglage du récepteur.
IMPORTANT : commencer le réglage pendant que la LED émet le dernier signal long et
compléter la séquence de 10 bits, en cas contraire, le code prédéfini restera inchangé.
DIP 1 et 2 (ON): PORTÉE MAJORÉE.
DIP 1 et 2 (OFF): AUTONOMIE BATTERIES MAJORÉE.
Note : pour régler les dip-switchs 1 et 2, il faut ouvrir la radiocommande en utilisant un tour-
nevis.
Pour revenir au mode rolling code, maintenir les deux touches enfoncées pendant environ 5 secondes
jusqu’à ce que la LED clignote.
Attention : risque d’explosion si la pile est remplacée par une pile non appropriée. utiliser des
piles au lithium 2016 3V. Mettre au rebut les piles usées en respectant les normes en vigueur.
El transmisor SLIM-R funciona tanto en modo rolling code como en modo código fijo (igual que los
modelos BUG, BUG-R, TXD2-4, SLIM y SLIM-C). Generalmente, es entregado configurado en modo
rolling code con un código estándar.
Si se dispone de un radiorreceptor en modo rolling code no es necesaria ninguna regulación del
transmisor, puesto que el código será actualizado automáticamente por el microprocesador interno
cada vez que se lo use.
Si se dispone de un radiorreceptor en modo código fijo, es necesario regular el código del transmisor
según aquel del receptor.
Para pasar del modo rolling code al modo código fijo hay que tener presionados ambos botones
durante alrededor de 5 segundos, hasta que el led verde comience a parpadear mostrando el código
memorizado y emitiendo 10 señales que pueden ser largas o cortas. La intensidad de las señales
corresponde al código fijo predefinido (larga = dip switch ON, corta = dip switch OFF).
Al concluir, el led verde emitirá una última señal larga.
Para regular el código fijo del transmisor según aquel del radiorreceptor hay que usar los botones 1 y
2 (tal como muestra la figura 1). Para configurar un dip switch ON presione el botón 1 (Ch1), y para un
dip switch OFF presione el botón 2 (Ch2), según la regulación del radiorreceptor.
IMPORTANTE: comience la regulación mientras el led está dando la última señal larga y
complete la secuencia de 10 bits, por el contrario el código predefinido quedará invariado.
DIP 1 y 2 (ON): GRAN ALCANCE.
DIP 1 y 2 (OFF): MAYOR AUTONOMÍA DE LAS BATERÍAS.
Nota: para configurar los dip-switches 1 y 2 es necesario abrir el radiocontrol utilizando un
destornillador.
Para retornar al modo rolling code mantenga apretados ambos botones durante alrededor de 5
segundos hasta que el led parpadee.
Atención: existe peligro de explosión si se sustituye la batería con una que no sea la adecuada. utilice
baterías de litio 2016 3V. Elimine las baterías usadas según la normativa vigente
Esempio di tabella per l’inserimento del codice segreto del telecomando:
Example of a table for entering the secret code on the remote control unit:
Beispiel: Tabelle für die Eingabe des geheimen Codes der Fernsteuerung:
Exemple de tableau pour l’introduction du code secret de l’émetteur :
Ejemplo de tabla para inserción del código secreto del control remoto:
Dip1 Dip2 Dip3 Dip4 Dip5 Dip6 Dip7 Dip8 Dip9 Dip10
ON Ch1 Ch1 Ch1 Ch1 Ch1
OFF Ch2 Ch2 Ch2 Ch2 Ch2
CH= Canale
Kanäl
Channel
Canal
Canal
FRANÇAIS
ESPAÑOL
S LIM-R
C h1
C h2
Zur Einstellung des festen Sendercodes auf den Code des Empfängers müssen die Tasten 1 und 2
betätigt werden (wie auf der Abbildung 1 dargestellt). Um einen Dip-Switch = ON einzugeben, auf Taste
1 (Ch1) drücken, wogegen für einen Dip-Switch = OFF je nach Einstellung des Empfängers auf Taste
2 (Ch2) gedrückt werden muss.
WICHTIG: Solange die Led das letzte lange Signal abgibt, die Einstellung beginnen und die 10
bit Sequenz vervollständigen, andernfalls wird der vorgegebene Code unverändert bleiben.
DIP 1 und 2 (ON): GROßE REICHWEITE.
DIP 1 und 2 (OFF): MEHR BATTERIEAUTONOMIE.
BITTE BEMERKEN: um die Dip-Switches 1 und 2 einzustellen, muss die Fernbedienung mit
einem Schraubenzieher geöffnet werden.
Um zum Rolling-Code-Modus zurück zu kehren, beide Tasten ca. 5 Sekunden lang gedrückt halten,
bis die Led blinkt.
Achtung: explosionsgefahr, falls die Batterie nicht mit dem richtigen typ Ausgewechselt wird.
Lithiumbatterien 2016 3v Benutzen. Verbrauchte Batterien nach den gültigen Vorschriften entsorgen.
Fig. 1
L’émetteur SLIM-R fonctionne aussi bien en mode rolling code qu’en mode code fixe (comme les mod.
BUG, BUG-R, TXD2-4, SLIM et SLIM-C). Généralement, il est fourni en mode rolling code avec un
code standard.
Si l’on dispose d’un récepteur radio en mode rolling code, il ne faut effectuer aucun réglage sur
l’émetteur dans la mesure où le code sera automatiquement mis à jour par le microprocesseur interne
à chaque utilisation de l’émetteur.
Si l’on dispose d’un récepteur radio en mode code fixe, il faut régler le code de l’émetteur sur celui
du récepteur.
Pour passer du mode rolling code au mode code fixe, presser simultanément les deux touches pendant
environ 5 secondes jusqu’à ce que la LED vert commence à clignoter en signalant la mémorisation
du code à travers l’émission de 10 signaux qui peuvent être longs ou brefs. L’intensité des signaux
correspond au code fixe prédéfini (long = dip-switch ON, bref = dip-switch OFF).
À la fin, la LED vert émettra un dernier signal long.
Pour régler le code fixe de l’émetteur sur celui du récepteur radio, il faut agir sur les touches 1 et 2
(comme l’illustre la figure 1). Pour enregistrer un dip-switch ON, presser la touche 1 (Ch1), tandis que
pour enregistrer un dip-switch OFF presser la touche 2 (Ch2), suivant le réglage du récepteur.
IMPORTANT : commencer le réglage pendant que la LED émet le dernier signal long et compléter
la séquence de 10 bits, en cas contraire, le code prédéfini restera inchangé.
DIP 1 et 2 (ON): PORTÉE MAJORÉE.
DIP 1 et 2 (OFF): AUTONOMIE BATTERIES MAJORÉE.
Note : pour régler les dip-switchs 1 et 2, il faut ouvrir la radiocommande en utilisant un tour-
nevis.
Pour revenir au mode rolling code, maintenir les deux touches enfoncées pendant environ 5 secondes
jusqu’à ce que la LED clignote.
Attention : risque d’explosion si la pile est remplacée par une pile non appropriée. utiliser des
piles au lithium 2016 3V. Mettre au rebut les piles usées en respectant les normes en vigueur.
El transmisor SLIM-R funciona tanto en modo rolling code como en modo código fijo (igual que los
modelos BUG, BUG-R, TXD2-4, SLIM y SLIM-C). Generalmente, es entregado configurado en modo
rolling code con un código estándar.
Si se dispone de un radiorreceptor en modo rolling code no es necesaria ninguna regulación del
transmisor, puesto que el código será actualizado automáticamente por el microprocesador interno
cada vez que se lo use.
Si se dispone de un radiorreceptor en modo código fijo, es necesario regular el código del transmisor
según aquel del receptor.
Para pasar del modo rolling code al modo código fijo hay que tener presionados ambos botones
durante alrededor de 5 segundos, hasta que el led verde comience a parpadear mostrando el código
memorizado y emitiendo 10 señales que pueden ser largas o cortas. La intensidad de las señales
corresponde al código fijo predefinido (larga = dip switch ON, corta = dip switch OFF).
Al concluir, el led verde emitirá una última señal larga.
Para regular el código fijo del transmisor según aquel del radiorreceptor hay que usar los botones 1 y
2 (tal como muestra la figura 1). Para configurar un dip switch ON presione el botón 1 (Ch1), y para un
dip switch OFF presione el botón 2 (Ch2), según la regulación del radiorreceptor.
IMPORTANTE: comience la regulación mientras el led está dando la última señal larga y
complete la secuencia de 10 bits, por el contrario el código predefinido quedará invariado.
DIP 1 y 2 (ON): GRAN ALCANCE.
DIP 1 y 2 (OFF): MAYOR AUTONOMÍA DE LAS BATERÍAS.
Nota: para configurar los dip-switches 1 y 2 es necesario abrir el radiocontrol utilizando un
destornillador.
Para retornar al modo rolling code mantenga apretados ambos botones durante alrededor de 5
segundos hasta que el led parpadee.
Atención: existe peligro de explosión si se sustituye la batería con una que no sea la adecuada. utilice
baterías de litio 2016 3V. Elimine las baterías usadas según la normativa vigente
Esempio di tabella per l’inserimento del codice segreto del telecomando:
Example of a table for entering the secret code on the remote control unit:
Beispiel: Tabelle für die Eingabe des geheimen Codes der Fernsteuerung:
Exemple de tableau pour l’introduction du code secret de l’émetteur :
Ejemplo de tabla para inserción del código secreto del control remoto:
Dip1 Dip2 Dip3 Dip4 Dip5 Dip6 Dip7 Dip8 Dip9 Dip10
ON Ch1 Ch1 Ch1 Ch1 Ch1
OFF Ch2 Ch2 Ch2 Ch2 Ch2
CH= Canale
Kanäl
Channel
Canal
Canal
FRANÇAIS
ESPAÑOL
S LIM-R
C h1
C h2
Zur Einstellung des festen Sendercodes auf den Code des Empfängers müssen die Tasten 1 und 2
betätigt werden (wie auf der Abbildung 1 dargestellt). Um einen Dip-Switch = ON einzugeben, auf Taste
1 (Ch1) drücken, wogegen für einen Dip-Switch = OFF je nach Einstellung des Empfängers auf Taste
2 (Ch2) gedrückt werden muss.
WICHTIG: Solange die Led das letzte lange Signal abgibt, die Einstellung beginnen und die 10
bit Sequenz vervollständigen, andernfalls wird der vorgegebene Code unverändert bleiben.
DIP 1 und 2 (ON): GROßE REICHWEITE.
DIP 1 und 2 (OFF): MEHR BATTERIEAUTONOMIE.
BITTE BEMERKEN: um die Dip-Switches 1 und 2 einzustellen, muss die Fernbedienung mit
einem Schraubenzieher geöffnet werden.
Um zum Rolling-Code-Modus zurück zu kehren, beide Tasten ca. 5 Sekunden lang gedrückt halten,
bis die Led blinkt.
Achtung: explosionsgefahr, falls die Batterie nicht mit dem richtigen typ Ausgewechselt wird. Lithium-
batterien 2016 3v Benutzen. Verbrauchte Batterien nach den gültigen Vorschriften entsorgen.
This manual suits for next models
1
Other tau Transmitter manuals
Popular Transmitter manuals by other brands

Satel
Satel GPRS-T2 manual
Emerson
Emerson Micro Motion 1000 Series Configuration and Use Manual

Seasafe
Seasafe SSTX/01 user manual
Dwyer Instruments
Dwyer Instruments 604D-0 Specifications-installation and operating instructions
Napoleon
Napoleon F-40 Installation and operation instructions

MRHANDSFREE
MRHANDSFREE STEREOBOOMM - datasheet
