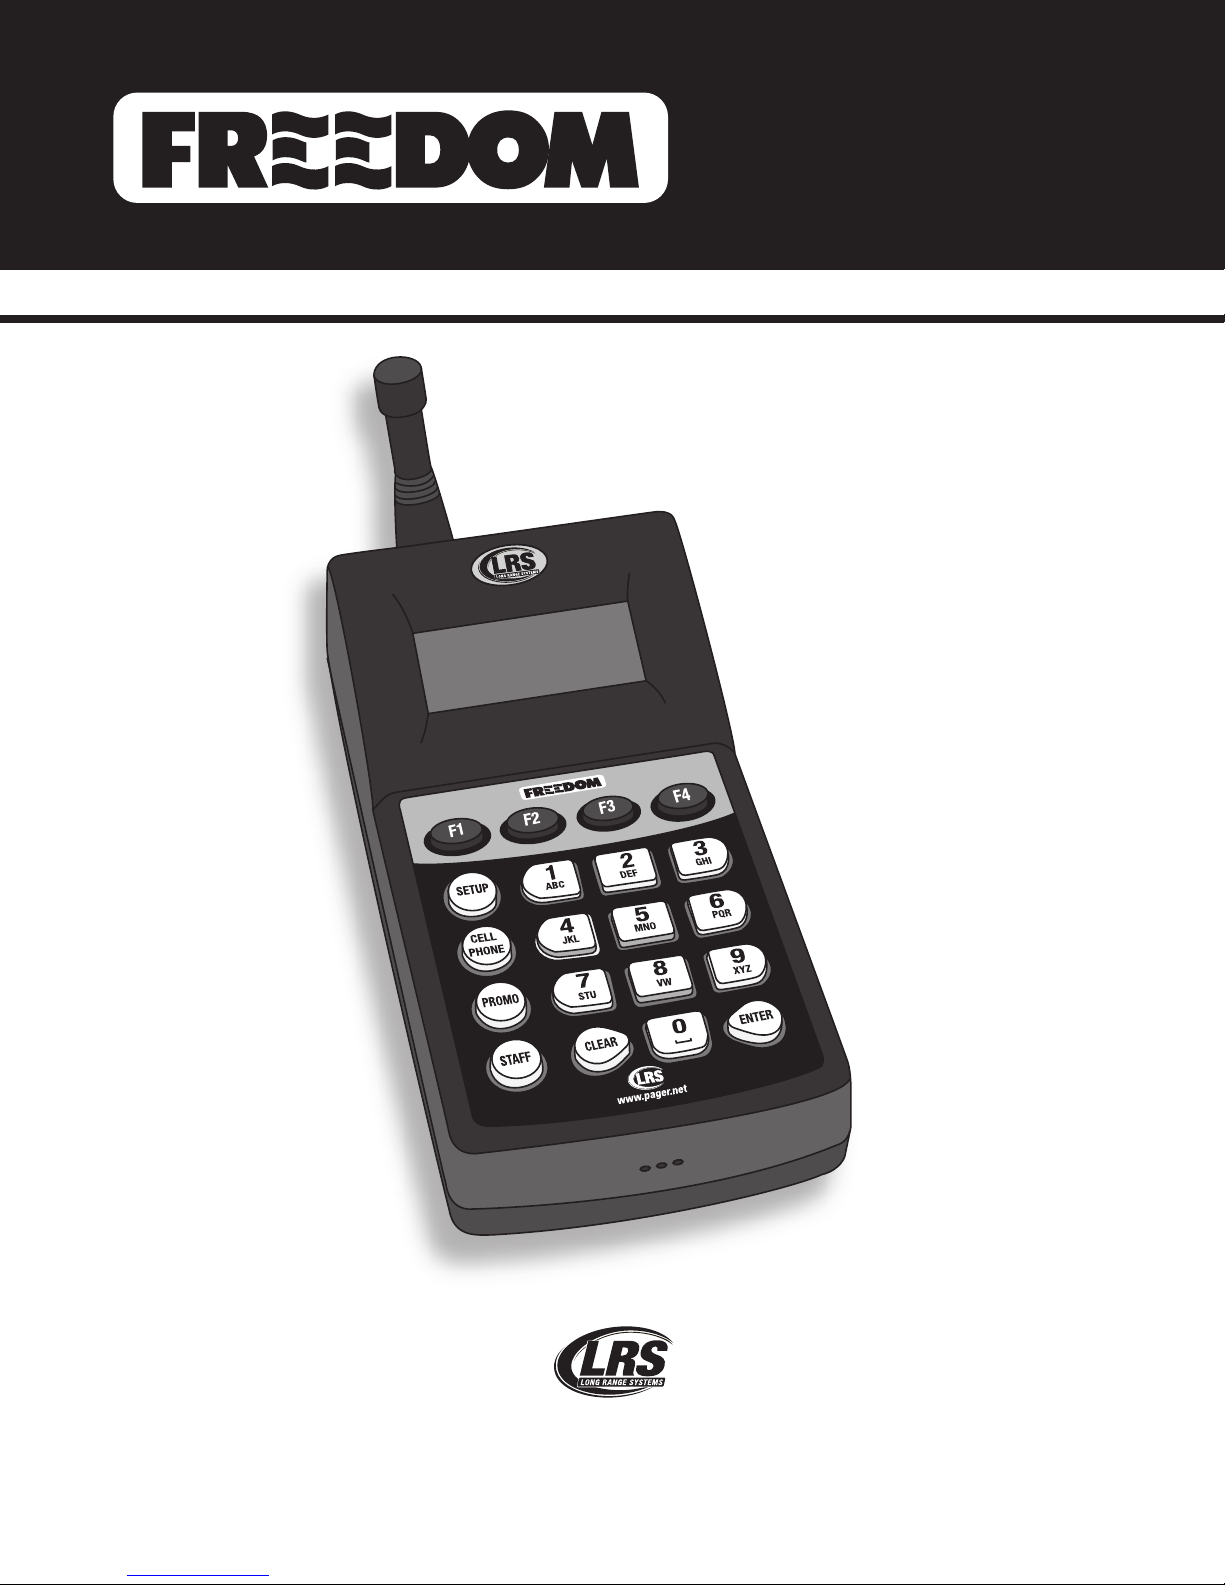
LRS Freedom T7460 User manual
Long Range Systems, In .
4550 Excel Parkway, Suite 00
Addison, TX 75001
800.437.4996 •14.553.5308
www.pager.net
(T7460 Paging System Transmitter)
USER MANUAL

Table Of Contents
Compatible Pagers . . . . . . . . . . . . . . . . . . . . . . . . . . . . . . . . . . . . . . . . . . . . . . . . . . . . . . . . . . . . 3
Installation and Setup . . . . . . . . . . . . . . . . . . . . . . . . . . . . . . . . . . . . . . . . . . . . . . . . . . . . . . . . . 4
Hardware Provided . . . . . . . . . . . . . . . . . . . . . . . . . . . . . . . . . . . . . . . . . . . . . . . . . . . 4
Installation Pro edure . . . . . . . . . . . . . . . . . . . . . . . . . . . . . . . . . . . . . . . . . . . . . . . . . 4
Conne tions . . . . . . . . . . . . . . . . . . . . . . . . . . . . . . . . . . . . . . . . . . . . . . . . . . . . . . . . . 4
Keypad Des ription . . . . . . . . . . . . . . . . . . . . . . . . . . . . . . . . . . . . . . . . . . . . . . . . . . . 5
Initial Power Up and Time Set . . . . . . . . . . . . . . . . . . . . . . . . . . . . . . . . . . . . . . . . . . 5
Basic Paging Operation Guide . . . . . . . . . . . . . . . . . . . . . . . . . . . . . . . . . . . . . . . . . . . . . . . . . . 6
Page Guest Pagers . . . . . . . . . . . . . . . . . . . . . . . . . . . . . . . . . . . . . . . . . . . . . . . . . . . . 6
Page Individual Staff Pagers . . . . . . . . . . . . . . . . . . . . . . . . . . . . . . . . . . . . . . . . . . . . 6
Page a Cell Phone . . . . . . . . . . . . . . . . . . . . . . . . . . . . . . . . . . . . . . . . . . . . . . . . . . . . 7
Canned or Spe ial Alphanumeri Messages . . . . . . . . . . . . . . . . . . . . . . . . . . . . . . 7
Canned Message . . . . . . . . . . . . . . . . . . . . . . . . . . . . . . . . . . . . . . . . . . . . . . . . . . . . 8
USB Keyboard Operation . . . . . . . . . . . . . . . . . . . . . . . . . . . . . . . . . . . . . . . . . . . . . . 8
Special Functions . . . . . . . . . . . . . . . . . . . . . . . . . . . . . . . . . . . . . . . . . . . . . . . . . . . . . . . . . . . . . 9
Theft-Deterrent Fun tion . . . . . . . . . . . . . . . . . . . . . . . . . . . . . . . . . . . . . . . . . . . . . . . 9
Tra king . . . . . . . . . . . . . . . . . . . . . . . . . . . . . . . . . . . . . . . . . . . . . . . . . . . . . . . . . . . . . 10
Custom Tra king . . . . . . . . . . . . . . . . . . . . . . . . . . . . . . . . . . . . . . . . . . . . . . . . . . . . . 10
Group Paging . . . . . . . . . . . . . . . . . . . . . . . . . . . . . . . . . . . . . . . . . . . . . . . . . . . . . . . . 11
Manager Mapping . . . . . . . . . . . . . . . . . . . . . . . . . . . . . . . . . . . . . . . . . . . . . . . . . . . . 12
Dry Conta t . . . . . . . . . . . . . . . . . . . . . . . . . . . . . . . . . . . . . . . . . . . . . . . . . . . . . . . . . 12
Set Alarms . . . . . . . . . . . . . . . . . . . . . . . . . . . . . . . . . . . . . . . . . . . . . . . . . . . . . . . . . . 13
Feature Setup Procedures . . . . . . . . . . . . . . . . . . . . . . . . . . . . . . . . . . . . . . . . . . . . . . . . . . . . . . 15
User Password . . . . . . . . . . . . . . . . . . . . . . . . . . . . . . . . . . . . . . . . . . . . . . . . . . . . . . . 15
Set Manager Password . . . . . . . . . . . . . . . . . . . . . . . . . . . . . . . . . . . . . . . . . . . . . . . . 15
Set Page Mode . . . . . . . . . . . . . . . . . . . . . . . . . . . . . . . . . . . . . . . . . . . . . . . . . . . . . . . 15
Set to Page Staff or Guest Pagers . . . . . . . . . . . . . . . . . . . . . . . . . . . . . . . . . . . . . . . 16
Create Alphanumeri Messages . . . . . . . . . . . . . . . . . . . . . . . . . . . . . . . . . . . . . . . . . 16
Setting System Time/Date for Freedom Transmitter (T7460) . . . . . . . . . . . . . . . . . . 17
Repeat Delay . . . . . . . . . . . . . . . . . . . . . . . . . . . . . . . . . . . . . . . . . . . . . . . . . . . . . . . . . 18
ID Span . . . . . . . . . . . . . . . . . . . . . . . . . . . . . . . . . . . . . . . . . . . . . . . . . . . . . . . . . . . . . 18
Alphanumeri Pager Button Enable/Disable . . . . . . . . . . . . . . . . . . . . . . . . . . . . . . 18
Guest Message . . . . . . . . . . . . . . . . . . . . . . . . . . . . . . . . . . . . . . . . . . . . . . . . . . . . . . 18
Freeform Messages . . . . . . . . . . . . . . . . . . . . . . . . . . . . . . . . . . . . . . . . . . . . . . . . . . . 19
Alpha Vibration Level . . . . . . . . . . . . . . . . . . . . . . . . . . . . . . . . . . . . . . . . . . . . . . . . . 19
Display the Prompt . . . . . . . . . . . . . . . . . . . . . . . . . . . . . . . . . . . . . . . . . . . . . . . . . . . 19
Turning ON/OFF Canned Messages in Display Prompt . . . . . . . . . . . . . . . . . . . . . . 20
Editing Canned Messages in Display Prompt . . . . . . . . . . . . . . . . . . . . . . . . . . . . . 20
Long Range Systems 1Freedom User Manual

Freeform Staff Message . . . . . . . . . . . . . . . . . . . . . . . . . . . . . . . . . . . . . . . . . . . . . . . 20
Display the Staff Prompt . . . . . . . . . . . . . . . . . . . . . . . . . . . . . . . . . . . . . . . . . . . . . . . 21
Staff Message . . . . . . . . . . . . . . . . . . . . . . . . . . . . . . . . . . . . . . . . . . . . . . . . . . . . . . . . 21
Turning ON/OFF Canned Messages in Staff Display Prompt . . . . . . . . . . . . . . . . . 21
Editing Canned Messages in Staff Display Prompt . . . . . . . . . . . . . . . . . . . . . . . . . 22
USB Keyboard . . . . . . . . . . . . . . . . . . . . . . . . . . . . . . . . . . . . . . . . . . . . . . . . . . . . . . . 22
Alpha Pager Communi ation Baud Rate . . . . . . . . . . . . . . . . . . . . . . . . . . . . . . . . . . 22
Maintenance Functions . . . . . . . . . . . . . . . . . . . . . . . . . . . . . . . . . . . . . . . . . . . . . . . . . . . . . . . . 23
Paging Types in Mixed Systems . . . . . . . . . . . . . . . . . . . . . . . . . . . . . . . . . . . . . . . . . 23
Station ID . . . . . . . . . . . . . . . . . . . . . . . . . . . . . . . . . . . . . . . . . . . . . . . . . . . . . . . . . . . 23
Adjust Transmit Power . . . . . . . . . . . . . . . . . . . . . . . . . . . . . . . . . . . . . . . . . . . . . . . . 23
Lo ating Mispla ed Pagers . . . . . . . . . . . . . . . . . . . . . . . . . . . . . . . . . . . . . . . . . . . . 24
Cell Phone Paging/Messaging . . . . . . . . . . . . . . . . . . . . . . . . . . . . . . . . . . . . . . . . . . . . . . . . . . 25
Overview . . . . . . . . . . . . . . . . . . . . . . . . . . . . . . . . . . . . . . . . . . . . . . . . . . . . . . . . . . . . 25
System Requirements . . . . . . . . . . . . . . . . . . . . . . . . . . . . . . . . . . . . . . . . . . . . . . . . . 25
Cell Phone Status . . . . . . . . . . . . . . . . . . . . . . . . . . . . . . . . . . . . . . . . . . . . . . . . . . . . 26
Programming Pagers . . . . . . . . . . . . . . . . . . . . . . . . . . . . . . . . . . . . . . . . . . . . . . . . . . . . . . . . . . 27
Individual Pagers . . . . . . . . . . . . . . . . . . . . . . . . . . . . . . . . . . . . . . . . . . . . . . . . . . . . . 27
Program Pager Groups . . . . . . . . . . . . . . . . . . . . . . . . . . . . . . . . . . . . . . . . . . . . . . . . 29
Alpha En ryption . . . . . . . . . . . . . . . . . . . . . . . . . . . . . . . . . . . . . . . . . . . . . . . . . . . . . 30
Program Pager Vibration . . . . . . . . . . . . . . . . . . . . . . . . . . . . . . . . . . . . . . . . . . . . . . . 31
Program Wel ome Message . . . . . . . . . . . . . . . . . . . . . . . . . . . . . . . . . . . . . . . . . . . . 31
System Specifications . . . . . . . . . . . . . . . . . . . . . . . . . . . . . . . . . . . . . . . . . . . . . . . . . . . . . . . . . 32
Transmitter . . . . . . . . . . . . . . . . . . . . . . . . . . . . . . . . . . . . . . . . . . . . . . . . . . . . . . . . . . 32
Battery Powered Pagers . . . . . . . . . . . . . . . . . . . . . . . . . . . . . . . . . . . . . . . . . . . . . . . 32
Re hargeable Pagers . . . . . . . . . . . . . . . . . . . . . . . . . . . . . . . . . . . . . . . . . . . . . . . . . . 32
Troubleshooting . . . . . . . . . . . . . . . . . . . . . . . . . . . . . . . . . . . . . . . . . . . . . . . . . . . . . . . . . . . . . . 33
Display Shows Nothing . . . . . . . . . . . . . . . . . . . . . . . . . . . . . . . . . . . . . . . . . . . . . . . . 33
Pagers Do Not Re eive Pages . . . . . . . . . . . . . . . . . . . . . . . . . . . . . . . . . . . . . . . . . . . 33
My Cell Phone Paging Is Not Working . . . . . . . . . . . . . . . . . . . . . . . . . . . . . . . . . . . . 33
Service Questions and Answers . . . . . . . . . . . . . . . . . . . . . . . . . . . . . . . . . . . . . . . . . . . . . . . . 34
LRS Pagers Available for the Freedom Transmitter (T7460) . . . . . . . . . . . . . . . . . . . . . . . . . 34
Using the 4-Line Alphanumeri Pager . . . . . . . . . . . . . . . . . . . . . . . . . . . . . . . . . . . . 34
Using the Star Pager . . . . . . . . . . . . . . . . . . . . . . . . . . . . . . . . . . . . . . . . . . . . . . . . . . 37
Using the SP5 1-Line Re hargeable Alphanumeri Pagers . . . . . . . . . . . . . . . . . . . 37
Using the Non-Alphanumeri Guest Pagers . . . . . . . . . . . . . . . . . . . . . . . . . . . . . . . 39
Using the Alphanumeri Coaster Guest Pagers . . . . . . . . . . . . . . . . . . . . . . . . . . . . 40
Cleaning & Charging Instructions for LRS Paging Equipment . . . . . . . . . . . . . . . . . . . . . . 41
Warranty . . . . . . . . . . . . . . . . . . . . . . . . . . . . . . . . . . . . . . . . . . . . . . . . . . . . . . . . . . . . . . . . . . . . 42
Long Range Systems 2Freedom User Manual

1
2
3
4
800.437.4996
www.pager.net
StarPager
www.pager.net
www.pager.net
1
2
3
4
800.437.4996
www.pager.net
1
4
1
800.437.4996
www.pager.net
WaitTimeisapprox.
5minutes
Staff Pagers:Customer Pagers:
Compatible Pagers
Long Range Systems 3Freedom User Manual
Coaster Call
Alphanumeric
Coaster
AdverTeaser
(Paddle)Pager
Pizza Pager
Lobster Pager
SP5 1 Line Rechargeable
Alphanumeric Pager
Star Pager
RX E 4 Line
Alphanumeric Pager
(Battery Operated)

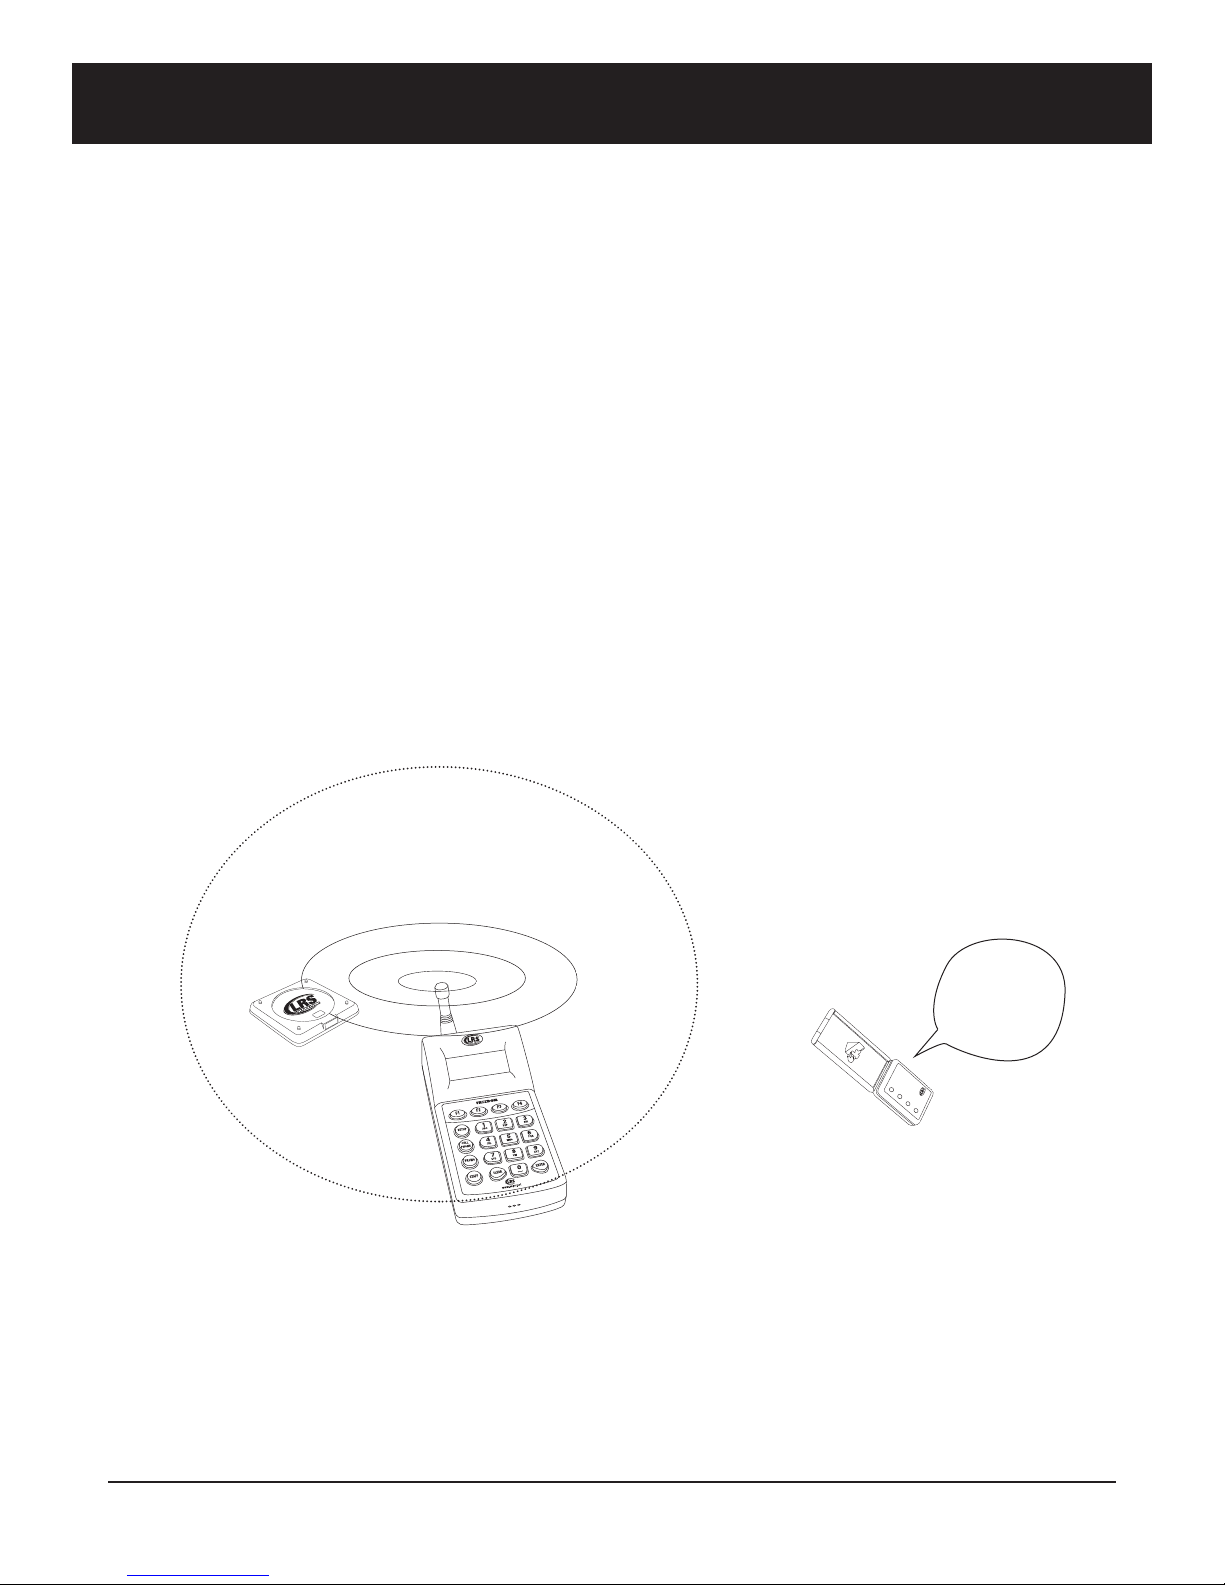
Installation and Setup
Hardware Provided
The system ontains the transmitter keypad, an instru tion booklet, an antenna, a strip of Vel ro, rubber feet,
and a 12-VDC power adapter.
Notice: Operation is subje t to the following:
• This devi e may or may not ause interferen e.
• This devi e will a ept any interferen e in luding interferen e that may ause undesired oper-
ation of the unit.
Notice: To redu e potential radio interferen e to other users, the antenna type and gain should be so
hosen that the equivalent isotropi ally radiated power (EIRP) is not more than required for
su essful ommuni ation.
Installation Procedure
The following is the basi installation pro edure:
CAUTION: Do not mount the transmitter antenna near any large metal objects.
1. Un-wrap all system omponents.
2. Twist the 3” antenna onto the silver onne tor lo ated on the rear of the transmitter.
3. Plug the power adapter into a standard 110/220V outlet and insert the barrel onne tor end into
the port lo ated on the rear of the antenna.
4. Upon ompletion of setup, make sure pagers are fully harged and/or have good batteries and are
powered on.
5. The systems are shipped ready for the most general use. If you need to modify settings, refer to
the table of ontents to lo ate a spe ifi fun tion guideline.
Connections
The following diagram shows the system onne tions.
!
M1 M2M3 M4
SETUP
CALL
PHONE
PROMO
MODE
CLEAR ENTER
1
2
3
4
5
6
7
8
9
0
ABC DEF GHI
JKL
MNO
PQR
STU
VW
XYZ
[
12:00:36 am
Pager #: ---
www.pager.net
CONDOR
CLASS 2 TRANSFORMER
(408)745-7141
INPUT: AC 12OV 60Hz 19w
OUTPUT: AC 9V 1800mA
P/N: A91A8
RoHS
UU
LL
LISTED
C
MODEL: 48A -9- 1800
EIA 363 0635 S
MADE IN CHINA
110/220 ELECTRICAL SUPPLY
12 DC POWER ADAPTER
ANTENNA
KEYPAD/TRANSMITTER
NETWORK/ETHERNET CABLE
(Optional)
USB Keyboard (Optional)
Long Range Systems 4Freedom User Manual

Keypad Description
Before using the keypad, read the following keypad des riptions.
Note: As the display changes, the keys may perform different functions.
Initial Power Up and Time Set
1. After the transmitter initializes, the set date menu is shown, type in the urrent date (Using
MM/DD/YY) and press ENTER.
2. When the display asks to enter time, type in the urrent time and sele t F1 (AM) or F2 (PM).
Long Range Systems 5Freedom User Manual
F1 F2 F3 F4
SETUP
CELL
PHONE
PROMO
STAFF
CLEAR ENTER
1
2
3
4
5
6
7
8
9
0
ABC DEF GHI
JKL
MNO
PQR
STU
VW
XYZ
[
12:00:36 am
Guest #: ---
www.pager.net
F Keys
The F (fun tion) keys are
the first row of keys under
the display. The F1 - F4
keys orrespond to the
bottom row of text in the
keypad display window.
Number Keys
Keys 1 through 0 enter
numeri data su h as the
pager number. In some
modes they will also
enter alphanumeri data.
Setup Key
The Setup key enables
menus when he king or
hanging the transmitter’s
programmed settings.
Cell Phone Button
This key is used to enter
the patron’s mobile
phone number into the
T7460’s memory.
Promo Key
Allows entering email
addresses for future pro-
motions.
Staff Key
Used to temporarily
hange the paging fun -
tion to page Staff pagers.
Clear Key
Clears the input when
paging a pager and re-
turns to the Guest paging
display or to restart an
input when programming.
Enter Key
The Enter key is used to
start the paging fun tion,
and to omplete pro-
gramming where re-
quired.

Basic Paging Operation Guide
The following are the most ommonly used pro edures for paging. Make sure that all re hargeable guest or
staff pagers are not on the harging unit and all battery-operated pagers are turned on.
Page Guest Pagers:
Non-Alphanumeric (AdverTeaser, Pizza, Lobster, Coaster Call pagers)
1. Main s reen displays – Guest #: - - - -
2. Enter number assigned to guest at handout.
3. Press ENTER to send page.
4. Return guest pagers to harging unit after paging.
Alphanumeric (Alphanumeric Coaster pager)
1. Main s reen displays – Guest #: - - - -
2. Enter number assigned to guest at handout - then press ENTER.
3. Enter message ode (000-099). (see Canned Messages Table pg. 8).
4. Press ENTER to send page.
5. Return guest pagers to harging unit after paging.
Page Individual Staff Pagers:
Non-Alphanumeric (Star Pager)
1. On keypad press STAFF (Display will show: Pager #: - - - -).
2. Enter staff pager number to be paged - then press ENTER.
3. Press ENTER to send page.
OR
4. Press F1 (V1), F2 (V2) or F3 (V3) for 1, 2 or 3 vibrations.
Alphanumeric (Alphanumeric, Rechargeable alphanumeric pagers)
1. On keypad press STAFF (Display will show: Pager #: - - - -).
2. Enter staff pager number to be paged - then press ENTER.
3. Enter message ode (000-099). (see Canned Messages Table pg. 8)
4. Press ENTER to send page.
OR
5. Press F1 (V1), F2 (V2) or F3 (V3) for 1, 2 or 3 vibrations.
All Call Page:
Page all guest pagers simultaneously.
At (Guest #: - - -) S reen Display:
1. Enter 000 then press ENTER.
Long Range Systems 6Freedom User Manual

Long Range Systems 7Freedom User Manual
All Staff Alpha Page:
Page all staff pagers simultaneously.
1. Press STAFF.
2. Press 9-1-1 then ENTER.
3. Enter message number ode (000-099). (see Canned Messages Table pg. 8).
4. Press ENTER to send page.
OR
5. Choose F1 (V1), F2 (V2), F3 (V3) or F4 (Exit) for 1, 2 or 3 vibrations.
All Staff SP4 Page:
1. Press STAFF.
2. Type 0-0-0 then ENTER.
3. Press F1 (YES) to send all page, or F4 (NO) to an el.
4. Enter a message of 1-9.
5. Press ENTER to send the page.
OR
6. Choose F1 (V1), F2 (V2), F3 (V3) or F4 (Exit) to send 1, 2 or 3 vibrations.
Page a Cell Phone
1. Press Cell Phone and type in guest’s ell phone number, then press ENTER.
2. Re ord the Pager number that appears on the s reen.
Note: Pager number 500 – 999 are reserved for Cell Phone Paging.
3. When the ustomer’s table is ready, at the Guest S reen, enter the pager number assigned to the
ustomer.
Canned or Special Alphanumeric Messages
Using Message Codes
When prompted for a message on the Freedom Transmitter (T7460):
1. Enter message number ode (and an extension number – optional).
2. Press ENTER.
Example: Send a message to all extension 123.
• From Canned Message Table hoose – 006 (Call Ext).
• Enter ode 0-0-6-1-2-3 (Displays: CALL EXT 123).
Note: These non editable messages are built into the transmitter. If using Alphanumeric pagers, ad
ditional messages can be created (see Create Additional Alphanumeric Messages on pg. 16).
See next page for table of canned messages.
006 MESSAGE
EXTENSION #

000 Phone Call
001 Sales Call
002 Manager
003 Customer
004 Room
005 Visitor
006 Call Ext
007 MTG Room
008 Lane
009 Aisle
010 Void
011 Stamps
012 Change
013 Station
014 Ma hine
015 Operator
016 Emergen y
017 XX Minutes
018 Tee
019 Pro Shop
020 Starter
021 Servi e drive
022 Showroom
023 Parked Call
024 Voi e Mail
025 Dressing room
026 Pri e he k
027 Department
028 Cashier
029 Offi e
030 Table
031 Winner
032 Pi kup
033 Do k
034 You have mail
035 Table ready
036 No spe ial
037 Hole
038 Kit hen
039 Bar
040 Door
041 Survey
042 T-nnn Q-mm
043 Break
044 Fire
045 Unit
046 Window
047 Nurse
048 Register
049 Owner
050 Che k
051 Drink
052 Food
053 Servi e
054 Seat
055 Booth
056 Lobby
057 Help
058 Restroom
059 Valet
060 Car
061 Bus
062 Bay
063 Low battery
064 Error
065 Exit
066 Fax
067 host
068 Spa e
069 Lo ation
070 Nursery
071 Teller
072 Offi er
073 Buffet
074 Diaper hange
075 Child rying
076 To nursery
Canned Message
Code Message
USB Keyboard Operation
A USB Keyboard an be plugged into the Freedom Transmitter to allow data entry.
• F1 - F4 keys fun tion as F1-F4 keys on Freedom Transmitter Keypad sele ting menu options.
• F8 toggles between Staff and Guest Paging.
• A-Z, 1-10, and characters operate as normal.
• Shift Key works to hange hara ter.
• F5 will enter Cell Paging Menu ( ell phone paging must be turned on).
• Ctrl + S the Setup Menu.
• Arrow Keys an be used to move the ursor.
• Escape (ESC) will exit the urrent view.
• Enter (ENT) will a ept the urrent entry.
• F12 will enter Promo Email Entry Menu (Cell Phone Paging must be turned on)
See pg. 22 for enabling or disabling the USB keyboard.
Long Range Systems 8Freedom User Manual
Special Functions
User Password
All of the fun tions that adjust paging preferen es are prote ted by a Password.
• To redu e tampering with riti al settings, the keypad is password prote ted.
• The Password 56789 allows you to enter most restri ted programming s reens.
• Press F4 at any menu to return to the Guest menu.
Theft-Deterrent Function
Theft deterrent is used to alert staff and guests that they are leaving the premises while still arrying the
oaster/pager.
When Activated:
• The transmitter sends a signal to the oaster/pager, and if the signal is not re eived, the
oaster/pager will emit a ontinuous beep sound until it is returned to the harging unit or ba k
in range.
• The LED s reen on the alphanumeri pagers will display “OUT OF RANGE”.
• When theft deterrent mode is a tive, a “T” will display on the upper left orner of the transmit-
ter display.
To Activate:
1. Press SETUP and enter Password.
2. Press 1 (SYSTEM).
3. Press 1 (Anti-Theft).
4. Press F1 (YES) to turn theft mode on (Press F2 (NO) to turn off).
5. Main s reen display will show “T “ on upper left orner when turned on.
1
2
3
4
800.437.4996
www.pager.net
StarPager
IN RANGE AREA
PAGERS OPERATE NORMALLY
OUT OF RANGE AREA
PAGERS ALARM
BEEP..
BEEP...
BEEP
Long Range Systems 9Freedom User Manual

Long Range Systems 10 Freedom User Manual
Tracking
This fun tion allows the host to monitor whi h Guest or Staff pager has been paged, and ontinues paging,
based on a user defined interval and run time setting. The pager number is leared on the keypad unit when
run time is omplete or when user lears the number by press the Fun tion Key (F1-F4) under the number.
To turn Tracking on (or off):
1. Press SETUP and enter Password.
2. Press F2 (DN) until s reen displays 3) Tra king.
3. Sele t 2 (Tra king).
4. Sele t 1) Enable.
5. Press F1 (YES) or F2 (NO).
To Use Tracking
1. Page the guest or staff pager using the basi
paging pro edure.
2. The pager number will appear at the bottom of
the s reen signifying that the pager is being paged.
3. When the page has been re eived and a knowledged, lear the page by pressing the F1, F2 or F3
key under the pager number shown on the keypad display.
• If more than 3 pagers are in the queue “”will be shown at the right of the display.
• Press F4 to see the rest of the list.
Custom Tracking
Tracking Intervals
The tra king feature an be set to a user defined duration and paging intervals.
Duration
The Duration is the total amount of time the repeated pages will ontinue for in se onds.
For example, if you hoose 120 se onds, the Freedom Transmitter (T7460) will ontinue to page at the pre-
defined interval until the overall 2 minutes (120 se onds) is timed out.
The default duration is 90 se onds.
The duration an be set for 0-3600 se onds.
To Set the Duration
1. Press SETUP and enter Password.
2. Press 1) system.
3. Press F2 (DN) until display shows 2) Tra king.
4. Press 2.
5. Sele t 2) Duration.
6. Type in a new time, in se onds and press ENTER.
Note: Entering 0 will make the Duration run “Forever”
CANCELS
STAFF 99
CANCELS
GUEST 82
CANCELS
STAFF 92
SCROLLS
THROUGH
PAGER LIST
PAGERS IN
THE QUEUE
Transmitter Tracking Screen
F1 F2 F3 F4
SETUP
CELL
PHONE
PROMO
STAFF
CLEAR ENTER
1
2
3
4
5
6
7
8
9
0
ABC DEF GHI
JKL
MNO
PQR
STU
VW
XYZ
[
12:00:36 am
Guest #: ---
www.pager.net
F1 F2 F3 F4
SETUP
CELL
PHONE
PROMO
STAFF
CLEAR ENTER
1
2
3
4
5
6
7
8
9
0
ABC DEF GHI
JKL
MNO
PQR
STU
VW
XYZ
[
12:00:36 am
Guest #: ---
www.pager.net
F1 F2 F3 F4
SETUP
CELL
PHONE
PROMO
STAFF
CLEAR ENTER
1
2
3
4
5
6
7
8
9
0
ABC DEF GHI
JKL
MNO
PQR
STU
VW
XYZ
[
12:00:36 am
Guest #: ---
www.pager.net
F1 F2 F3 F4
SETUP
CELL
PHONE
PROMO
STAFF
CLEAR ENTER
1
2
3
4
5
6
7
8
9
0
ABC DEF GHI
JKL
MNO
PQR
STU
VW
XYZ
[
12:00:36 am
Guest #: ---
www.pager.net
12:34:56pm
Guest#:---
Pgr Pgr
99 82 92

Interval
The Interval defines how many se onds of time passes between pages.
The default Interval is 10 se onds.
The Interval an be set from 10-255 se onds.
To set the Interval
1. Press SETUP and enter Password.
2. Press 1) system.
3. Press F2 (DN) until display shows 2) Tra king.
4. Press 2.
5. Sele t 3) Interval.
6. Type in a new time, in se onds, and press ENTER.
Group Paging
General Purpose
This fun tion is used with Alpha pagers. These pagers an be programmed to respond to group alls. Ten
groups are available and ea h pager an be a member of 5 groups. Ea h pager will respond to its individ-
ual number and to any groups it belongs to. See example below.
Group Paging Rules
General rules for paging groups are:
• Pagers must be programmed in the group mode.
• Staff pagers must be numbered above 100. (1-99 are reserved for groups)
• Any alphanumeri pager an be a member of up to 5 groups.
GROUP 1 GROUP 2
Pager
99 Pager
51
Pager
77
Pager
94
DURATION
0-3600 Seconds
INTER AL
10-255 Seconds
PAGE TIME • • •
PAGE TIME PAGE TIMEOFF TIME
OFF TIME
Long Range Systems 11 Freedom User Manual

Paging Groups
1. Enter the number for the pager or the group.
• If only paging staff pagers and have the transmitter default set to Pager, enter the pager or group
number dire tly.
• If paging, default is set to Guest, press Staff before entering the pager or group number.
2. Enter the message to send.
3. Press ENTER.
To Turn Group Paging On/Off
1. Press SETUP and enter the Password.
2. Press 1 (System).
3. Press F2 (DN) until display shows 2) POCSAG.
4. Press 1) Groups Enabled.
5. Sele t 2) Group Paging.
6. Press F1 (Yes) or F4 (No).
Manager Mapping
The Manager Map fun tion allows the user to store up to 10 manager ell phone numbers to use in situations
where the manager’s ell phone would be alerted. Example fun tions would in lude a times alarm or a trig-
gered Dry Conta t. Manager numbers will be stored in pager numbers 501-510.
Note: Requires cell paging to be enabled.
1. Press SETUP and enter Password.
2. Press 1 (System).
3. Press F2 (DN) until s reen shows 3) Manager Map.
4. Press 3) Manager Map.
5. Type in a pager number 501-510.
6. Type in a manager’s ell phone number to orrespond to the pager number and press ENTER.
Dry Contacts
The Dry Conta t are onta ts or swit hes that are onne ted through a wire to the T7460, for example: Door-
bell. This sensor an send a message to the pager or ell phone when an event o urs (e.g., alarms if a door
is opened). To make a Dry Conta t alert the manager’s ell phone when the onta t is triggered: This fun -
tion requires Network Enabled, ell paging ON, a manager ell phone number mapped, and a valid a ount.
Default setting for the Conta t Sensor is OFF. To program the Conta t Sensor (Dry Conta t):
1. Press SETUP and enter the Password.
2. Press F2 (DN) until the display shows 1: Dry Conta t.
3. Sele t 1 (1: Dry Conta t).
4. At the Conta t Menu s reen - sele t 1 (1: Prog Conta ts).
5. Sele t onta t to program - press 1 (1: Conta t #1) or 2 (2: Conta t #2).
6. The S reen will show if Conta t Sensor is urrently on or off:
• Press F1 to turn the fun tion ON.
• Press F2 to turn the fun tion OFF.
7. If sele t ON, sele t for the sensor to set as:
• Press F4 for Normally Closed (this is the default setting).
Long Range Systems 12 Freedom User Manual

• Press F1 for Normally Open.
8. Enter the pager number that will be pager when this event
o urs (Pager Num = - - - - ) and press ENTER.
9. Enter a User Message:
• Press F2 to reate a new message, use the 1-9 keys to
enter the text, and then press ENTER to Save.
• Press F1 to edit the urrent message.
10. Sele t paging type mode - F1 (STAFF), F4 (GUEST).
11. Press F4 to EXIT.
T7460 Dry Contact Specifications:
T7460 Dry Contact Cable Specifications:
Set Alarms
This fun tion is used to set the transmitter to page an individual or all STAFF pagers at a spe ifi time or on
a timed interval. The transmitter an send 10 different time alarms or periodi alarms. Alarms may be set to
page a spe ifi pager (or all pagers) or ell phone at a spe ifi time every day. To make an alarm onta t the
manager’s ell phone, this fun tion requires Network Enabled, ell phone paging ON, a manager ell phone
number mapped, and a valid a ount.
1. Press SETUP and enter Password.
2. Press 1 (System).
3. Press F2 (DN) until display shows 3) ALARMS.
4. Sele t 3 (3: ALARMS).
Input oltage
Contact Diameter
Contact Type
0-5 olts DC
2.5 mm
Mono Plug
Contact Diameter
Contact Type
Number of Conductors
Ring Connection
Tip Connection
2.5 mm
Mono Plug
2
Positive
Ground
Long Range Systems 13 Freedom User Manual
Dry C ntacts
P wer USB
Ethernet
Antenna
T7460 Back View

Long Range Systems 14 Freedom User Manual
5. From the Alarm menu, sele t the number of the alarm to set (0 through 9) and press ENTER.
6. The Alarm Display s reen shows the status of the sele ted alarm. Sele t Change (F1) to en-
able/disable or modify the alarm.
Note: If the alarm is already enabled as an interval alarm:
• Press F1 (YES) to reset the timer and return to the paging menu.
• Press F4 (NO) to ontinue to the ON/OFF menu.
7. At Enable menu sele t F1 (YES) to enable the alarm or F4 (NO) to disable the alarm.
8. Sele t the type of alarm 1 (Interval), 2 (Daily), or 3 (Weekly).
Interval Alarms are alarms that re-page a staff pager at regular intervals.
1. Enter the desired time interval in hours and minutes (HH:MM) and Press ENTER.
2. Enter pager number to be alerted.
3. Type in anned message (See Table on pg. 8) and press ENTER.
Daily Alarms are alarms that re-page a staff pager at a parti ular time every day.
1. At the Time of Day menu enter the time for alarm.
2. Sele t F1 (AM) or F2 (PM).
3. Type in pager number to be alerted and press ENTER.
4. Type in anned message (See Table on pg. 8) and press ENTER.
Weekly Alarms are alarms that will page a staff page on a ertain day of the week.
1. Sele t the Day of Week to page. Use F2 (DN) to s roll through Wednesday through Saturday.
2. Enter the Time of Day (HH:MM) for the alarm.
3. Press F1 (AM) and F2 (PM).
4. Type pager number to page and press ENTER.
5. Type in anned message (See Table on pg. 8) and press ENTER.
6. At Set pager Number menu, either:
• Enter the number of the pager to be alarmed followed by ENTER.
OR
• Press F1 (KEEP) to use the existing number.
Note: Entering pager number 911 will page all Alpha pagers.

Feature Setup Procedures
User Password
All of the fun tions that adjust paging preferen es are prote ted by a Password.
• To redu e tampering with riti al settings, the keypad is password prote ted.
• The Password 56789 allows you to enter most restri ted programming s reens.
• Press F4 at any menu to return to the Guest menu.
Set Manager Password
To hange the Manager Password:
1. Press SETUP and enter Password.
2. Press F2 (DN).
3. Sele t 3) Manager Password.
4. Type in new 5 digit Manager Password and press Enter.
Set Page Mode
This programs how guest and staff pagers will respond when paged. Guest pagers an flash, beep, glow,
flash and beep, et . To set the modes:
1. Press SETUP and enter Password.
2. Press F2 (DN).
3. Sele t 1) Page Mode.
4. Sele t 1 (1:Guest) or 2 (2:Staff).
Guest Pager - Select:
Note: An asterisk next to a mode indicates that is the current Paging Mode.
Press 1) Flash/Beep/Glow.
Sele t a page Mode.
1) Flash 30 se .
2) Flash 5 mins.
3) Beep/Flash.
Press F2 (DN).
1) Flash 1 se .
2) Glow 15 times.
3) Glow 5 mins.
Press F2 (DN).
1) Beep 3 times.
2) Beep ontinuously.
Long Range Systems 15 Freedom User Manual

To turn Alphanumeric Guest Paging Vibration On or Off:
Sele t 2) Alphanumeri Vibe.
Press F1 (yes) to turn Alphanumeri Vibration On of F2 (No) for Off.
Manager Pager - Select:
1) Vibe 1 time.
2) Vibe 2 times.
3) Vibe 3 times.
F2 (ON)
1) Vibe ontinuously.
2) Vibe/Beep 1 time.
3) Vibe/Beep 2 times.
F2 (ON)
1) Vibe/Beep 3 times.
2) Beep 3 times.
3) Beep ontinuously.
Set to Page Staff or Guest Pagers
In ases where the unit will always be paging staff pagers, the transmitter default an be set to page either
Guest or Staff pagers. Fa tory default is Guest:
1. Press SETUP and enter Password.
2. Sele t 1 (1: Default Mode).
3. Sele t 1 (Guest Paging) for guest pager or 2 (Staff Paging) for staff pager.
Create Alphanumeric Messages
If your staff pagers are alphanumeri , they an display 77 different pre-set messages (numbered 000 through
076), and 22 additional user-defined messages of up to 32 hara ters per message (077 through 099).
1. Press SETUP and enter Password.
2. Press 3) Other.
3. Press 1) Canned Message.
4. At the Canned Msg.# s reen sele t F3 (EDIT) to edit message, (use (F1 (up) or F2 (DN) to s roll
through messages to edit).
5. If no message exists at the Edit Message s reen, type a new message. If a message exists, press
F3 (EDIT) to hange it. Enter the desired message using the number keys, waiting until the ursor
moves between letters (i.e. for letter ‘E’ press #2 twi e). Similar to a Cell Phone.
6. Press the ENTER key to save your message.
Long Range Systems 16 Freedom User Manual

Setting Time and Date for Freedom Transmitter (T7460)
Set Date:
1. Press SETUP and enter Password.
2. Press 3) Date/Time.
3. Press 3) Set Date.
4. Enter Date (MM/DD/YY) (e.g. Mar h 11, 2010 = 03/11/10) and press ENTER.
Set Time:
1. Press SETUP and enter Password.
2. Press 3) Date/Time.
3. Press F2 (DN).
4. Press 1) Set Time.
5. Enter Time (--:--) (e.g. 08:30) and sele t F1 (AM ) or F2 (PM).
Time Format:
1. Press SETUP and enter Password.
2. Press 3) Date/Time.
3. Press 2) Time Format.
4. Sele t 1) 12 hour or 2) 24 hour.
Note: Asterisk next to an option indicates the current operation mode
Date Format:
1. Press SETUP and enter Password.
2. Press 3) Date/Time.
3. Sele t 1) Date Format.
4. Sele t 1) MM/DD/YY or 2) DD/MM/YY.
Note: Asterisk next to an option indicates the current operation mode
13:34:56
Guest #
:----
1:34:56pm
Guest#:----
24 HOUR TIME
ON DISPLAY
12 HOUR TIME
ON DISPLAY
Long Range Systems 17 Freedom User Manual
T7460 Transmitter Screen

Repeat Delay
When using a repeater, it may be ne essary to add a delay between pages when paging multiple pagers to
allow the repeater time to repeat the signal and dete t the next one. To add repeat delay:
1. Press SETUP.
2. Enter Password.
3. Press 1) System.
4. Press F2 (DN) until the display shows 2) Repeat Delay.
5. Press 2 (2: Repeat Delay).
6. Sele t F1 (Yes) to enable or F4 (No) to disable.
ID Span
In very large systems up to 9999 Guest pagers an be paged. To do this, ID Span is required. This fun tion
disables normal System ID fun tions ex ept for Staff Paging and allows the programming of Guest Pagers
from 1000 to 9999.
To use ID Span:
1. Press SETUP.
2. Enter Password.
3. Press 3) Other.
4. Press 2) ID Span.
5. Sele t F1 (YES) to enable or F4 (NO) to disable.
Alphanumeric Pager Button Enable/Disable
The buttons on an Alpha Pager an be enabled or disabled.
1. Press SETUP and enter Password.
2. Press 1 for 1) System.
3. Press F2 (DN) until 1)POCSAG-> is displayed.
4. Press 1 for 1)POCSAG->.
5. Press 2 for 2) Btns Enabled.
6. Press F1 (Yes) to enable Alpha Pager buttons, or press F4 (No) to disable Alpha Pager buttons.
Alpha Pager Vibration Level
The strength of vibration when an Alpha Pager re eives a Vibration Alert an be varied.
1. Press SETUP and enter Password.
2. Press 1 (System).
3. Press F2 (DN) until s reen show 1 (POCSAG).
4. Press 1 (POCSAG).
5. Press F2 (DN) until s reen displays 1 (Vibe Strength).
6. Press 1 (Vibe Strength).
7. Press F1 (UP) to in rease the level or F2 (DN) to lower the level.
8. Press F4 (Done) when finished.
Long Range Systems 18 Freedom User Manual

Guest Message
The Guest Message is the default anned message sent to Guest Alpha Pagers. To hange the message.
1. Press SETUP and enter Password.
2. Press 1 for 1) System.
3. Press F2 (DN) until 1)POCSAG-> is displayed.
4. Press 1 for 1)POCSAG->.
5. Press 3 for 3) Guest Message.
6. Type a number 00-99 for sele ted anned message and press ENTER.
Note: See pg. 16 for Creating Alphanumeric Messages.
Freeform Guest Message
When the Freedom Transmitter pages Guest Alpha pagers, the user is given a default message and the abil-
ity to add an extension, example 035125 = "Table Ready 125".
The user an sele t to have a Freeform message when they ontrol what is entered and if the message an
be edited.
Features for editing guest messages an be a essed by:
1. Press SETUP and enter Password.
2. Press 1 (System).
3. Press F2 (DN) until s reen shows 1 (POCSAG).
4. Press 1 (POCSAG).
Display the Guest and Staff Prompt
When paging Guest or Staff Alpha Pagers, the user is shown a prompt:
Freedom Transmitter screen Display
To Enable or Disable Seeing This Prompt While Paging:
1. Press SETUP and enter Password.
2. Press 1 (System).
3. Press F2 (DN) until s reen shows 1 (POCSAG).
4. Press 1 (POCSAG).
5. Press F2 (DN) until s reen show 1 (Disp Prompt).
6. Press 1 (Disp Prompt).
7. Press F1 (YES) to display, or F4 (NO) to not display.
If Display Prompt is disabled, the message sent will default to the Guest Message.
SelectPageMo e
MSG:035----
Out:TableRea y
Exit
Long Range Systems 19 Freedom User Manual
Table of contents
Other LRS Transmitter manuals


