Taurus T10.3 Pro User manual

TREADMILL 5TMPCCEPS1H
OWNER’S MANUAL

Content
TREADMILL 5TMPCCEPS1H..............................................................................................1
OWNER’S MANUAL.............................................................................................................1
..............................................................................................................................................1
1. Fittings Checking................................................................................................................
2. Overview Drawing..............................................................................................................4
2.1. Wire Rod and Power Switch...................................................................................5
2.2. Running Belt and Lateral Incline Base...................................................................6
. IMPORTANT SAFETY INSTRUCTIONS...........................................................................7
.1. Power Requirement................................................................................................8
.2. Add Lubricant..........................................................................................................9
. . ADD SILICONE.....................................................................................................10
.4. Level Adjustment...................................................................................................11
.5. Power Switch........................................................................................................11
.6. Running Belt Adjustment......................................................................................12
4. Assembly Instructions......................................................................................................1
4.1. Pre-Assembly Check List......................................................................................1
4.2. Hardware Pack.....................................................................................................14
4. . Assembly Steps....................................................................................................15
5. Power Saving Mode.........................................................................................................19
6. Console Handle Instruction..............................................................................................20
6.1. LCD DECAL..........................................................................................................21
6.2. Heart Rate Training Zone Instruction....................................................................21
6. . Body Muscle Instruction........................................................................................22
6.4. Main Keyboard Instruction....................................................................................22
6.5. Handrail Keyboard Instruction..............................................................................2
6.6. USB POWER CHARGING INSTRUCTION.........................................................2
6.7. Heart Rate Instruction...........................................................................................24
6.8. Program Simple Handle Instruction ...................................................................24
6.9. APP(iOS&Android) INSTALLATION GUIDANCE................................................. 2
7. Attachment.......................................................................................................................41
2014/1/24 V1.0+ T1BT V1. +BT APP V1.1
2

1. Fittings Checking
Check the following fittings after opening the box. If there is anything missing, please
contact with the local dealer.
2014/1/24 V1.0+ T1BT V1. +BT APP V1.1
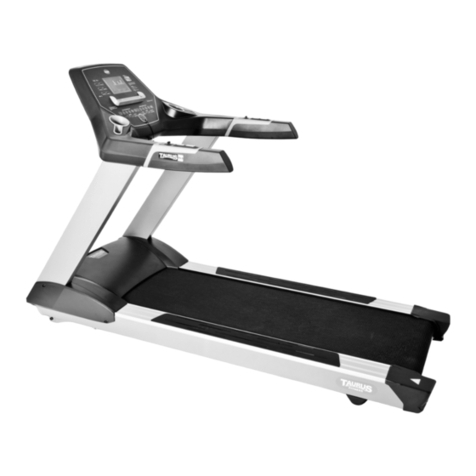
Computer Console x1
Frame x1
Left Upright x1
Right Upright x1
Left handrail set x1
Right handrail set x1

. Overview Drawing
2014/1/24 V1.0+ T1BT V1. +BT APP V1.1
4

.1. Wire Rod and Power Switch
2014/1/24 V1.0+ T1BT V1. +BT APP V1.1
5
Wire Rod
Twist the power cord round the wire rod.
Note:
Don’t carry the treadmill by the wire rod.
Pulling it by force will result in distortion.
Power Socket
Power Switch
Circuit Breaker
Power Switch
Circuit Breaker
If the current excesses rated current, the circuit breaker will bounce.
Press it back after 10 minutes.
Power Socket
Please pay attention to the voltage of the socket (110V or 220V )

. . Running Belt and Lateral Incline Base
Running Belt
Don’t touch the running belt by hand to avoid danger while the treadmill is running.
Lateral Incline Base
The hand shouldn’t be close to the incline base to avoid danger while the treadmill is
ascending or falling.
2014/1/24 V1.0+ T1BT V1. +BT APP V1.1
6
Caution
Caution

3. IMPORTANT SAFETY INSTRUCTIONS
When using this product, basic precautions should always be followed, including the
following:
Please read the instruction carefully before starting to use this product.
Danger – To reduce the risk of electric shock:
Always unplug this product from the electrical outlet immediately after using and before
cleaning the treadmill.
Warning – To reduce the risk of burns, fire, electric shock, or physical
injury:
1 The product should never be left unattended while plugged in.
2 When using the treadmill, please step on the treadmill before start. Do not start the
treadmill and then step on the treadmill.
Unplug the product from the outlet when not in use or before putting on or taking off
the clothes and other belongings.
To avoid any danger, close supervision is necessary when this production is used by
children, invalids or disabled persons. So it is when the machine is working with such
persons around.
4 Not proper or excessive training may be harmful to your health.
5 Be sure to use the product only for its intended use as described in this manual. Do
not use any attachment not recommended by the manufacturer in order to avoid any
danger or accidents
6 Never operate the product if it has a damaged cord or plug, if it is not working properly,
if it has been damaged, or dropped into water. Please return the product to the service
center of seller for examination and repair.
7 Do not carry this product by the supply cord or use the cord as a handle.
8 Keep the cord away from hot surfaces or ground.
9 Never operate the product with the air vents blocked. Keep the air vents free of lint,
hair, etc.
10 Never drop or insert any objects into any vent of the treadmill.
11 Do not use or operate outdoors.
12 Place the treadmill on flat ground or flat roof.
1 Please confirm 2000㎜×1000㎜space away behind the treadmill.
14 Do not operate where aerosol (spray) products are being used or where oxygen is
thin.
15 Before turning the product power off, turn all controls to the off position then remove
the plug from the outlet
16 Connect the product to a properly grounded outlet only.
17 If the machine has folding mechanism, user should descend the incline to original
position after workout.
18 The max weight of user is 150kg.
2014/1/24 V1.0+ T1BT V1. +BT APP V1.1
7

19 Place Customer Service Address (one of Manufacturer, Importer, Agent).
3.1. Power Requirement
This treadmill needs special power supply:
Power Voltage(V)Frequency(HZ)Rated Current(A)
100 50/60 18
120 50/60 18
200 50/60 9
220 50/60 9
2 0 50/60 9
240+ 50/60 9
Wirings should be transported according to the electric law of the local country. High
pressure wires, low pressure wires and underground wires should be transported
separately and can’t connect with or twist other wires.
Improper connection of the grounding plug can result in the risk of electric shock. Check
with a qualified electrician or serviceman if you are in doubt as to whether the products are
properly grounded. Do not modify the plug provided with the product – If it will not fit the
outlet, have a proper outlet installed by a qualified electrician.
Figure
Grounding methods
2014/1/24 V1.0+ T1BT V1. +BT APP V1.1
8
GROUNDED PIN
GROUNDE
D OUTLET

3. . Add Lubricant
Use the Hex Wrench to unscrew the hex screws inside the Rear End Cap. Then pull the
belt up and daub some SILICON to the center of the board. After that, adjust the belt to the
center of the deck, followed by tightening the screw to the original set. Adjust the running
belt according to the above steps. Half a month should be checked once
Function of LUBRICATION REQUIRED
It will remind you to add lubricant when total distance added up to 2000Km(the distance is
difference with the levels of running belt). When restarting the treadmill next time, the
character string of “ LUBRICATION REQUIRED” will show on the screen and then into
start/ready status after continuously displaying for 1 minute.
Ps: When adding lubricant, check whether the lubricant in the running belt is dried up. If it
is, then add lubricant into it.
How to cancel the character string of “LUBRICATION REQUIRED” displayed on the
screen every time you restart the treadmill. Actions are as follows: it will display the
character string of “LUBRICATION REQUIRED” for 1 minute on the screen. During the
one minute, press speed up key and speed down key at the same time. The number will
turn to 0 after 5 seconds and cancel the character string of “LUBRICATION REQUIRED”
which will display until the next 2000km reach.
2014/1/24 V1.0+ T1BT V1. +BT APP V1.1

9

3.3. ADD SILICONE
Time of add SILICONE
When suggested time of adding SILICONE is achieved, please extend your hand to the
center of the running board to make sure whether there is any SILICONE before adding. If
no SILICONE on the running board, please add 0cc SILICONE to the running board. If
there is still a little SILICONE, add 15cc SILICONE to the running board.
Area of adding SILICONE
Add SILICONE from the center of the running board to the running belt ’s the left and right
side which should minus 6 cm.
2014/1/24 V1.0+ T1BT V1. +BT APP V1.1
10

3.4. Level Adjustment
The treadmill will wobble during workout and the incline angles will be affected if it is
placed on uneven ground.
The level adjustment method is as follows:
1 Turn A counter-clockwise to loosen it
2 Adjust B to the proper height
Turn A clockwise to tighten it.
4 The left side adjustment method is the same with the right side
3.5. Power Switch
The Power Switch is on the bottom panel of the treadmill. 1 means on, 0 means off.
2014/1/24 V1.0+ T1BT V1. +BT APP V1.1
11

3.6. Running Belt Adjustment
After assembling the treadmill, check the operation of the running belt.
First, make sure the power supply is correct. After starting the treadmill, stand on the two
sides of the pedal(At the very start, don’t stand on the running belt).Press QUICK START
key and then increase the speed to 4.0MPH(6.4KPH) by pressing + key.
If the running belt is moving towards the right side:
Turn the right button 90°clockwise and contrarotate the left button(A) 90°. You will find the
treadmill return to the center position automatically.
If the running belt is moving towards the left side:
Turn the left button 90°clockwise and contrarotate the right button 90°. You can also find
the treadmill return to the center position automatically.
If you find that the belt has not moved to the proper position, please repeat the steps
above.
Note :When adjusting the button, the angle can not exceed 90°which will make it
imposssible to adjust the belt to the proper position.
2014/1/24 V1.0+ T1BT V1. +BT APP V1.1
12

4. Assembly Instructions
Ready the operation instructions carefully before use, then choose a flat position to
assemble.
Instruction for parts of product
This treadmill also can use other way to account the HRC. When in
fitness,user can wear the chest pulse belt and the HRC will show in Pulse
windows.
4.1. Pre-Assembly Check List
2014/1/24 V1.0+ T1BT V1. +BT APP V1.1
ITEM Description Qty
A Computer Console 1
B Left handrail set 1
C Right handrail set 1
D Left Upright 1
E Right Upright 1
F Frame 1
1

4. . Hardware Pack
2014/1/24 V1.0+ T1BT V1. +BT APP V1.1
ITEM Description Qty
a Truss hex screw M10xP1.5x80 8
b Truss hex screw M8xP1.25x20 8
c Hex Screw M8xP1.25x20 Stainless Steel 2
d Washer Ø8xØ19x .0t 2
e Spring Washer M8 2
f Bushing Wrench + Screwdriver 1
g T-shaped Wrench 8mm 1
h Hex Wrench + Screwdriver
5mm
1
i Hex Wrench 6mm 1
j SILICONE 1
k Safety clip 1
14

4.3. Assembly Steps
STEP 1
2014/1/24 V1.0+ T1BT V1. +BT APP V1.1
15

Two persons are required to finish the assembly steps.
Caution!! Please follow exactly the assembly steps below to avoid injury.
Remove the motor cover from frame (B), then fix slightly Upright(C, D) on the frame with
screw (a). Tighten screw (d), and then tighen screw (a).Finally, put the motor cover back to
the frame (B) and tighten with screws.
Note:
To avoid danger, always assemble the treadmill with more than two workers, do
not assemble by yourself.
When assembling the upright, make sure one person holds the upright to avoid
falling.
STEP
2014/1/24 V1.0+ T1BT V1. +BT APP V1.1
16
Philips Screw
Philips Screw
Philips Screw
Philips Screw

connect the Hand Grip Pulse Wire (Upper) of left & right handrail set(C,B) with Hand Grip
Pulse Wire (Lower) of computer console(A) first. tighten with screw(b) on computer
console.
2014/1/24 V1.0+ T1BT V1. +BT APP V1.1
17
Hand Grip Pulse Wire (Upper)
Hand Grip Pulse Wire (Lower)

STEP 3
Place the Computer Shelf(A) on the assembled Uprights(D 、E) of Frame(F) and pull the
control wire in upright to connect it with the computer’s. Then put the computer shelf above
the uprights and tighten with Nylon Nut(b) as shown in the above drawing
Note:(1) When tightening the screws, pay attention whether the control wire in the tube is
hooked or pressed.
(2) When connecting the control wires, pay attention whether the corresponding
color is right, red matches with red and white matches with white.
2014/1/24 V1.0+ T1BT V1. +BT APP V1.1
18
Control Wire (Upper)
Control Wire (Lower)

5. Power Saving Mode
When the treadmill not work for 4 minutes, it will enter power saving mode and at this time,
the meter will not show anything.
Caution
If you want to use treadmill, please take off the safety key (1-1)and take it back to original
place(2-1), then make the treadmill back to start/steady mode.
2014/1/24 V1.0+ T1BT V1. +BT APP V1.1
19

6. Console Handle Instruction
2014/1/24 V1.0+ T1BT V1. +BT APP V1.1
20
Other manuals for T10.3 Pro
2
Table of contents
Other Taurus Treadmill manuals

Taurus
Taurus IT10.5PRO User manual

Taurus
Taurus CVTM2522 User manual

Taurus
Taurus T10.5 Pro User manual

Taurus
Taurus T9.5 Pro User manual

Taurus
Taurus T10.3 Pro User manual

Taurus
Taurus T9.9 Black Edition User manual

Taurus
Taurus T9.5 User manual

Taurus
Taurus TF-RUN-X-2 User manual

Taurus
Taurus RUN X User manual

Taurus
Taurus CVTM2517 User manual
Popular Treadmill manuals by other brands

Pro-Form
Pro-Form CROSSWALK CALIBER ELITE PFTL71505.2 user manual

Pro-Form
Pro-Form 790cd Treadmill user manual

Healthstream
Healthstream HC10TM owner's manual

CARDIOSTRONG
CARDIOSTRONG CCST-TX50-3 Assembly and operating instructions

Pro-Form
Pro-Form 3.5 P Manuale d'istruzioni

BLADEZ
BLADEZ BLADEZ T4 PRO Illustrated parts manual