TC Electronic G-MINOR User manual

G•MINOR
MIDI FOOT CONTROLLER
USERS MANUAL


CONTENTS
3
Introduction
Contents . . . . . . . . . . . . . . . . . . . . . . . . . . . . . . . . . .3
Introduction . . . . . . . . . . . . . . . . . . . . . . . . . . . . . . . .5
Overview
Overview . . . . . . . . . . . . . . . . . . . . . . . . . . . . . . . . . .6
Connecting the G•Minor . . . . . . . . . . . . . . . . . . . . . . .6
The G•Minor Display and Switches . . . . . . . . . . . . . .6
The G•Minor Modes
Program Change Mode . . . . . . . . . . . . . . . . . . . . . . .8
Control Change . . . . . . . . . . . . . . . . . . . . . . . . . . . .10
Setup Mode . . . . . . . . . . . . . . . . . . . . . . . . . . . . . . .11
The Tuner Mode . . . . . . . . . . . . . . . . . . . . . . . . . . .15
Appendix
Daisy Chaining Several G•Minors . . . . . . . . . . . . . . .16
Technical Specifications . . . . . . . . . . . . . . . . . . . . . .17
Important Safety Instructions . . . . . . . . . . . . . . . . . .18
Certificate of Conformity . . . . . . . . . . . . . . . . . . . . . .20
MIDI Implementation . . . . . . . . . . . . . . . . . . . . . . . .21
G•Minor & G•Force . . . . . . . . . . . . . . . . . . . . . . . . .22
TC Electronic, Sindalsvej 34,
English version Rev 2.1 - SW - V 1.00
Prod. No: 606103211

Congratulations on the purchase of your
G•Minor MIDI Foot Controller
The G•Minor is a multi purpose MIDI Foot Controller that sends and receives
MIDI information. The G•Minor will control any MIDI device using MIDI Control
and Program Changes and when used with the TC Electronic G•Major and
G•Force* Guitar Processors; certain specific features are available.
When used with the G•Major or the G•Force* you can:
• Tap Global Tempo
• Switch Effect blocks on and off via MIDI Control Changes
• Select presets via Program Changes
• Mute the Outputs for silent tuning
• Switch channels on your combo or preamp via the G•Major Relay Switch
function
• Use the Preset level function on the G•Major e.g. for instant change of level
for solos etc.
• Any other functions that are controlled via a MIDI CC or a Program Change
command
Furthermore several G•Minors can be “daisy-chained” giving you more
“on the fly” options.
Translated versions of this manual can be downloaded from our web-site at:
www.tcelectronic.com
* Please note that your G•Force must run with software 2.04 or higher to utilize the functions
described.
4
INTRODUCTION

5
G•MINOR - OVERVIEW
SQUARE
SWITCH
UP
SWITCH
MIDI OUT
SELECT
SWITCH
9V DC
IN
MIDI IN
DOWN
SWITCH

Connecting the G•Minor
• Connect the MIDI Out of the G•Minor to MIDI In on the MIDI device you
wish to control.
• Connect the supplied power supply. The power Input of the G•Minor
is compatible with commonly used 9V DC Power Supplies.
• At startup the display will show the current software version.
The G•Minor Display and Switches
Display + Tuner LEDs
The seven segment display of the G•Minor changes indication according to the
G•Minor operation mode. Detailed explanations will follow.
UP Switch
Various functions but in general the UP switch is used to step up in program
numbers or send a pre-programmed Control Change value.
DOWN Switch
Various functions but in general the DOWN switch is used to step down in
program numbers or send a pre-programmed Control Change value.
SQUARE Switch
• Switches between Online/Offline modes
• Activates Tuner Mute mode when pressed and held for 1 second
• Various others functions
6
OVERVIEW

SELECT Switch
With the SELECT switch you select between:
• Program Change mode - Down position
• Control Change mode - Up position
• Off Mode - Middle position
• In Program Change mode you can send program changes to
any receiving MIDI device.
• In Control Change mode the G•Minor can be programmed to send out any
CC value via the UP and DOWN switch. When used with the G•Major or
G•Force various functions such as Effect block On/Off, Bypass All,
Relay 1&2 On/Off and other Effect specific parameters can be controlled.
•ASetup Mode for all MIDI settings etc. This mode is accessed from Off
mode (SELECT switch in middle position) by pressing the UP or DOWN
switch while turning the G•Minor on.
•Tuning mode can be accessed from both Control Change mode and
Program Change mode. It allows you to have a Tuner visible in the
G•Minor pedal but only when hooked up with a G•Major or a G•Force.
- connect G•Minor MIDI Out to G•Major/G•Force* MIDI In
- connect G•Major/G•Force* MIDI Out to G•Minor MIDI In.
* Please note that to utilize these functions with a G•Force, the G•Force must run software version 2.04
or higher.
7
OVERVIEW

Program Change mode (SELECT switch in “down-position”)
This mode holds three sub-modes; Online, Offline and Tuner
• Press the SQUARE switch with a single touch to switch between the Online
and Offline modes.
• Press and hold the SQUARE switch for one second to select Tuner mode.
Please read the description of the Tuner mode for further instructions.
Online
Online mode is selected when the preset number is steady in the display.
Press the UP or DOWN switch to select and instantly recall the adjacent
presets. The display always indicates current program number.
Offline
Offline mode is selected when the display is blinking. You can scroll through
presets by pressing the UP or DOWN switch. Once you have found the
desired preset number press SQUARE to activate/recall the preset. The
displayed preset number will then be steady !
Example
You want to go from preset 2 to 5 without recalling/activating presets 3 and 4
on the way to 5.
• With preset 2 active press the SQUARE switch once to access Offline Mode
(display is blinking). Now press the UP SWITCH three times. Preset number
5 is now blinking indicating that the preset is not yet recalled/activated.
• To activate preset number 5 press SQUARE.
Tip! For fast scrolling through presets; press and hold the UP or DOWN switch.
8
PROGRAM CHANGE MODE

Program Change mode can also be accessed from Control Change
mode by a single tap on the SQUARE switch.
Number of Presets
Via the G•Minor you can recall up to 999 presets. A G•Minor preset recall
consists of a Control Change 0 message selecting bank and a Program
Change message selecting preset.
Example: Via the G•Minor you send what is displayed as Program Change 347
in the G•Minor display. This actually means that a value 3 is send via Control
Change 0 for bank selection and Program Change 47 is send for program-
recall in bank 3. If using the G•Minor with the TC Electronic G•Force please
read pages 22 and 23 in this manual.
Program Change mode and Tap Tempo function
Tap the SQUARE switch consecutively in the tempo of the song you are
playing. If the connected Guitar processor is a G•Major the tapped tempo will
automatically be perceived as the Global Tempo. If using a G•Force the Tempo
parameter must be setup to respond to CC 80. This is easily done via the I/O
Setup-Control menu in the G•Force using the learning function.
The tapped tempo is global but the preset algorithms in the G•Major and
G•Force can be set up to respond in various ways to this tempo via the
Subdivision parameter. Read more about this in the respective manuals.
As explained above the Tap Tempo function sends MIDI CC 80 pr default and
any connected MIDI device that can utilize a Tap function via CC 80, can
therefore use this.
9
PROGRAM CHANGE MODE

Control Change Mode (SELECT switch in “up-position”)
In this mode the UP/DOWN switches can be programmed to send specific
Control Change values. This programming is done in the Setup Mode - please
see next pages for information on how to do this.
When used in conjunction with the G•Major or the G•Force, various functions
such as Effect Block bypass, Tap Tempo, Relay 1&2 On/Off and other Effect
specific parameters can be controlled.
Given that the G•Major/G•Force MIDI Out is connected to the G•Minor MIDI In,
the LED status of the G•Minor will be update according to preset status.
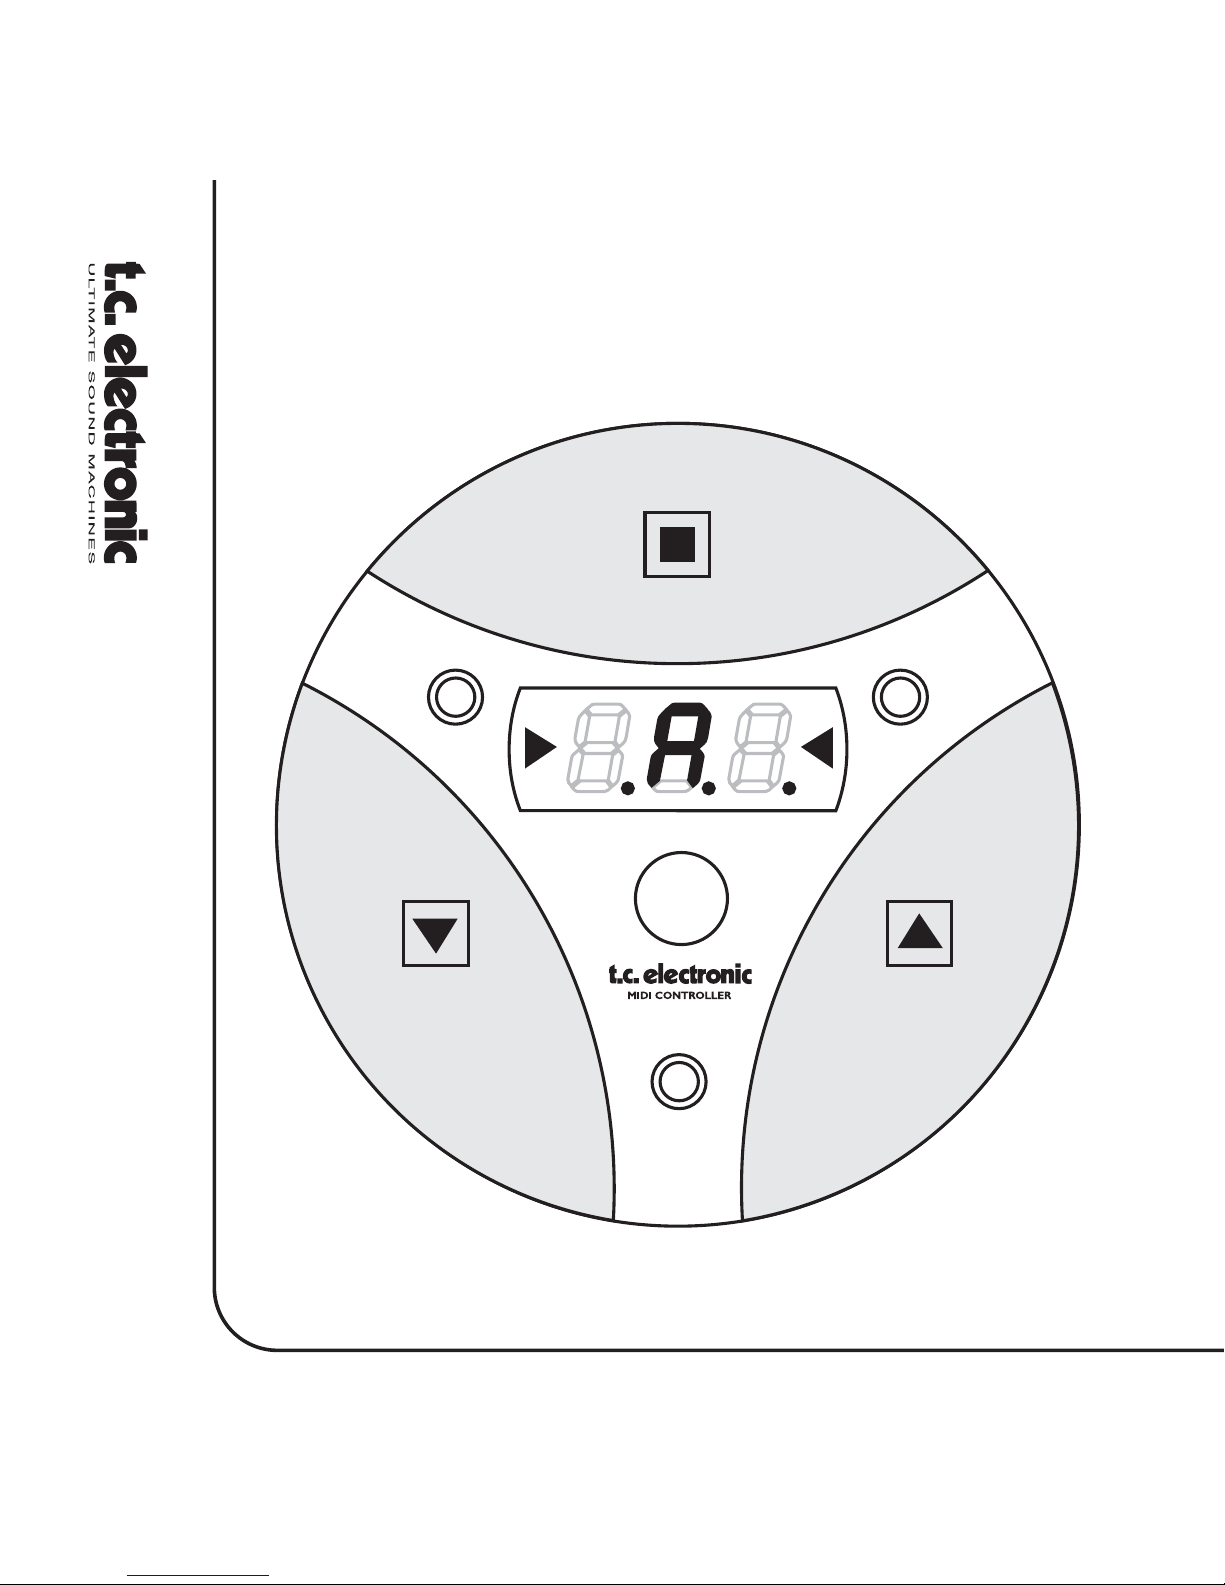
Tuner access in Control Change Mode
Pressing and holding the "Square" switch for approximately 1 second will
cause muting of the G•Major Outputs allowing you to tune your guitar silently.
The G•Minor Tuner LEDs are always active but when the G•Minor is in Tuner
Mute mode the display will allow more accurate response of the tune of the
currently played note.
Pressing any switch once will un-mute the G•Major Outputs.
Accessing Program Change Online mode
from Control Change mode
It is conveniently possible to access the Program Change Online mode from
Control Change mode.
• Tap the SQUARE switch once, and you are in Program Change Online mode
• Now select preset using the UP and DOWN switches
• Press SQUARE once more and you are back in Control Change mode
10
CONTROL CHANGE MODE

Setup Mode
To enter Setup Mode:
• Turn off the G•Minor by setting the MODE selector in the middle
position.
• Then press and hold the UP switch while powering on the G•Minor by
moving the MODE selector either up or down.
• The G•Minor is now in Setup Mode
The display now reads “Ch” indicating that you are about to setup on which
MIDI channel the G•Minor should send.
• Use the UP and DOWN switch to select the G•Minor sending
MIDI channel
• Press the SQUARE switch to confirm your channel selection
The display now reads “C1” indicating that you are about to setup
Controller 1 - which we previously have referred to as the DOWN switch.
11
SETUP MODE

• Use the UP and DOWN switch to select which Control Change number you
wish to send when pressing the DOWN switch/Controller 1
• Press SQUARE to confirm
The display now reads “C2” indicating that you are about to setup
Controller 2 - which we previously have referred to as the UP switch.
• Use the UP and DOWN switch to select which Control Change number you
wish to send when pressing the UP switch/Controller 2
• Then press SQUARE to confirm
The display now reads “Ct” indicating that you are about to setup the
Controller type.
12
SETUP MODE

You can switch between having the UP and DOWN switches work as
momentary or alternating type switches.
A momentary switch is to be compared to keyboard hold pedal. Connection is
made when pressed and no connection is present when released.
An alternating type switch is a toggle switch. When pressed once and released
immediately the connection is held. When repressed the switch is disconnected.
• Press either the UP or the DOWN switch to switch between
Momentary type indicated by:
Or the alternating type indicated by:
13
SETUP MODE

• Press SQUARE again to confirm your choice.
The display now reads FAC giving you the option of doing a factory reset.
• Press and hold the UP or DOWN switch for approx 1 second to perform
the factory reset.
All LEDs in the pedal will be lit when the Factory reset is performed.
• To NOT perform the factory reset simply press SQUARE once when the
display reads FAC.
Depending on the position of the MODE toggle switch on the back of the
G•Minor you are now either in Program Change mode or in
Control Change mode.
14
SETUP MODE

15
THE TUNER MODE
Tuner
• To access the Tuner Mode press and hold the SQUARE switch for 1 second
The Tuner will only be displayed in the G•Minor if both MIDI In and MIDI
Out on the G•Minor are connected to a G•Major or a G•Force.
MIDI Out to MIDI In
MIDI In to MIDI Out
The two red Tuner LEDs are constantly showing the tune of the current note.
When G•Minor is switched to Tuner mode (by pressing and holding the
SQUARE switch for approximately 1 second), the three dots in the lower half
of the display will scroll with varying speed according to the distance to the
closest note.
• When the three digits scrolls to the right, the note is too high
• When the three digits scrolls to the left, the note is too low
• When the three digits and two triangular TUNER LEDs are steady the Input
note is in tune
The mid bar of the three seven segments indicates the current note
Switching Mode
The display permanently indicates Tuner info, given that proper connection is
provided.

16
USING SEVERAL G•MINORS
Daisy Chaining Several G•Minors
You can connect several G•Minors in a daisy-chain as illustrated
above to increase the “on-the-fly” options.
If using e.g. two G•Minors you could use one of them to send
program changes for preset change and the other for activating/
deactivating a few effect blocks or tapping in a tempo.

Control Interface
MIDI:
EMC
Complies with:
Safety
Certified to:
Environment
Operating Temperature:
Storage Temperature:
Humidity:
General
Finish:
Display
Dimensions:
Weight:
Supply Voltage:
Power Consumption:
Warranty Parts and labor:
In/Out : 5 Pin DIN
EN 55103-1 and EN 55103-2
FCC part 15, Class B, CISPR 22, Class B
IEC 65, EN 60065, UL6500 and CSA E65
32° F to 122° F (0° C to 50° C)
-22° F to 167° F (-30° C to 70° C)
Max. 90 % non-condensing
Dark color polycarbonate cover
3 x 7 - Segment LED display
2 LED's for tuner
Ø129.14 x 39.2 mm (Ø5.08" x 1.54")
G - Minor : 395 g (0.871 lb )
Adapter 120 V: 182 g (0.401 lb )
Adapter 230 V: 212 g (0.467 lb)
9 V DC, Adapter for 230 V or 120 V included
2 W @ 9 V DC, 4 W @ 120/230 V
1 year
17
TECHNICAL SPECIFICATIONS
Due continuous development these specifications
are subject to change without notice.

18
IMPORTANT SAFETY INSTRUCTIONS
Please read, keep, and follow these instructions before connecting this unit. Heed all warnings and instructions.
Retain this notice and the owner´s manual for future reference.
Warning!
• To reduce the risk of fire or electric shock, do not expose this unit to rain or moisture.
• Do not open the unit - risk of electric shock inside.
• Be advised that different operating voltages require the use of different types of mains adapters and attachment plugs.
If in doubt please contact your TC distributor.
• Check the voltage in your area and use the correct type. See table below:
• Do not install near heat source, such as radiators, heat registers, stoves or other
apparatus.
(including amplifiers) that produce heat.
• Clean only with a damp cloth.
• Do not defeat the safety purpose of a polarized or grounding type plug. A polarized plug has two blades with one wider
than the other. A grounding type plug has two blades/prongs and a third grounding prong.
The wide blade or the third prong are provided for your safety. When the provided plug does not fit into your outlet, consult
an electrician for replacement of the obsolete outlet.
• Protect the power cord from being walked on or pinched particularly at plugs
convenience receptacles.
• Only use attachments/accessories specified by the manufacturer.
• Unplug this apparatus during lightning storms or when unused for long periods of time.
Service
There are no user-serviceable parts inside. All service must be performed by qualified personnel. Servicing is required when:
• the unit has been damaged in any way, such as when the power-supply cord or plug is damaged.
• the unit has been exposed to rain or moisture, or liquid has been spilled into the unit.
• objects have fallen into the unit.
• the unit does not work properly.
• the unit has been dropped.
Voltage Adapter according to standard.
110-125V UL817 and CSA C22.2 no 42.
220-230V CEE 7 page VII, SR section 107-2-D1/IEC 83 page C4
240V BS 1363 of 1984. Specification for 13A fused plugs and
switched and un-switched socket outlets.

This equipment has been tested and found to comply with the limits for a Class B Digital device, pursuant to part 15 of the
FCC rules. These limits are designed to provide reasonable protection against harmful interference in a residential
installations.
This equipment generates, uses and can radiate radio frequency energy and, if not installed and used in accordance with the
instructions, may cause harmful interference to radio communications. However, there is no guarantee that interference will
not occur in a particular installation.
If this equipment does cause harmful interference to radio or television reception, which can be determined by turning the
equipment off and on, the user is encouraged to try to correct the interference by one or more of the following measures:
• Reorient or relocate the receiving antenna.
• Increase the separation between the equipment and receiver.
• Connect the equipment into an outlet on a circuit different from that to which the receiver is connected.
• Consult the dealer or an experienced radio/TV technician for help.
The user may find the following booklet, prepared by the Federal Communications Commission, helpful:
"How to identify and Resolve Radio/TV interference Problems."
This booklet is available from the US. Government Printing Office, Washington, DC 20402, Stock No. 004-000-0034-4.
Caution:
You are cautioned that any change or modifications not expressly approved in this manual could void your authority to operate
this equipment.
For the customers in Canada:
This Class B Digital apparatus meets all requirements of the Canadian Interference-Causing Equipment Regulations.
Cet appareil numérique de la classe B respecte toutes les exigences du Réglement sur le matériel brouilleur du Canada.
19
IMPORTANT SAFETY INSTRUCTIONS

Certificate Of Conformity
TC Electronic A/S, Sindalsvej 34, 8240 Risskov, Denmark, hereby declares on own
responsibility that following product:
G•Minor MIDI Foot Controller
- that is covered by this certificate and marked with CE-label conforms with following
standards:
EN 60065 Safety requirements for mains
(IEC 60065) operated electronic and related
apparatus for household and similar
general use
EN 55103-1 Product family standard for audio,
video, audio-visual and entertainment
lighting control apparatus for
professional use. Part 1: Emission.
EN 55103-2 Product family standard for audio,
video, audio-visual and entertainment
lighting control apparatus for
professional use. Part 2: Immunity.
With reference to regulations in following directives:73/23/EEC, 89/336/EEC
Issued in Risskov, March 2001
Anders Fauerskov
Chief Executive Officer
20
CERTIFICATE OF CONFORMITY
Table of contents
Other TC Electronic Accessories manuals