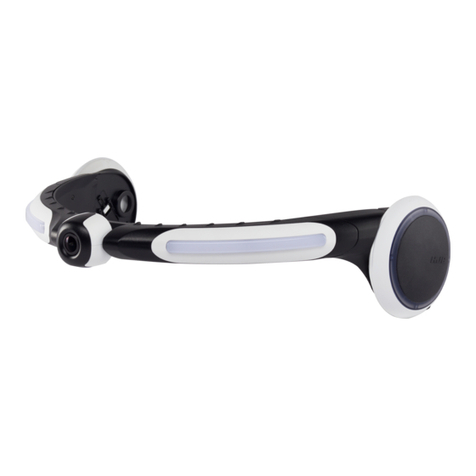
TE-Group GUARDO 360 CAM User manual

1
USER’S MANUAL
GB NL D FR
360°

2
DECLARATION OF CONFORMITY
EN55022: 2010
EN55024: 2010/A1:2015
EN62479: 2010
EN60950-1: 2006/A2:2013
EN60529: 2013
------------------------------- Manual/Guardo 360° Cam/ 12-2016/V1 ----------------------------------
Copyright © GUARDO
TE-GROUP nv
Kapelsestraat 61, 2950 Kapellen - BELGIUM
Guardo 360° Cam
Action Camera WiFi
ETSI EN 300 328 V1.9.1 (2015-02)
ETSI EN 301 489-1 V1.9.2 (2011-09)
ETSI EN 301 489-17 V2.2.1 (2012-09)
REACH: EC 1907/2006
Hereby,
Par la présente,
Company/Entreprise:
Address/Adresse:
declare that the following equipment:
déclare que le dispositif suivant :
Product name/ Nom du produit:
Product type/Type de produit:
conforms with the following safety requirements of the directives 2014/30/EU, 2014/35/EU,
2011/65/EU and 1999/5/EC. Conformity is guaranteed by the CE-symbol.
est conforme aux exigences de sécurité suivantes des directives 2014/30/EU, 2014/35/EU,
2011/65/EU et 1999/5/EC. La conformité est garanti par le symbole CE.
This product has been tested against following standards and specifications, applying versions
valid in October 2016.
Ce produit a été testé par rapport aux normes et spécifications suivantes, appliquant les versions
valides en Octobre 2016.
Joseph van Oosterum, CEO TE-Group NV, Kapellen, December 1st 2016
Authorized Signature
GB

3
ILLUSTRATIONS
2X 2X
2X
1
1615
14
13
12
11
10
9
8
7
6
54
3
2
17
18
19
20
21
3
22

4
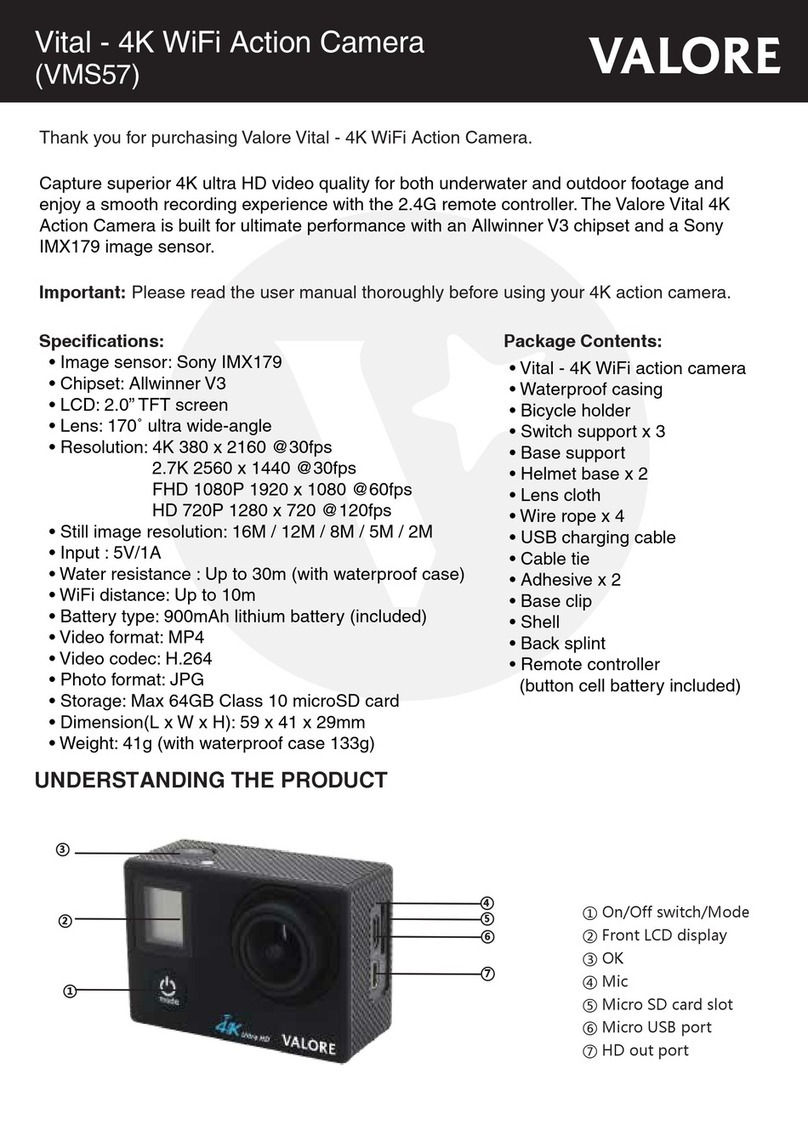
CAMERA See illustration I
1. Power / Mode Button
2. Power / Charge indicator
3. Dual Lens
4. Record / OK Button
5. Wi/Menubutton
6. Wiindicator
7. LCD display
8. Resetbutton
9. Recording indicator
10. Micro USB port
11. Micro SD card slot (Micro SD card optionally
available on www.guardo.be)
LCD SCREEN
A Video Mode
1. Video mode
2. Video timer: displays hours and minutes that
stillcanbeusedforrecording
3. Battery capacity
4. Date
5. Time
B Photo Mode
1. Photo mode
2.Photocounter:displaysnumberofphotos
lefttocapture
3. Battery capacity
4. Date
5. Time
Note:
Theiconsmayvaryaccordingtothestatusofthecamera.
12. MicroUSBchargingcable
13. RF Remote Control
14. Waterproofcase
15. 2xatsurfacemount+acc.
16. 2xcurvedsurfacemount+acc.
17. Gorilla Tripod
18. Protection EVA Bag
19. Cameracarrybag
20. Lens cloth
21. Tripod/screw thread adapter 1/4”
22. Curvedsurfacemount+acc.
PARTS AND FUNCTIONS
1
2
4
3
5
1
2
4
3
5

5
CHARGING THE BATTERY
Note: Make sure the battery is fully charged before rst use!
To charge the battery:
1. Make sure the Guardo 360 Cam is turned off.
2. ConnectthemicroUSBcable(12)totheMicroUSBPort(10)oftheGuardo360Cam.
3. ConnecttheotherendofthemicroUSBcable(12)totheUSBportofyourcomputeror
theoptionalGuardoUSBhomechargingdevicewitha5V1A(1000mA)outputpower,
optionallyavailableonwww.guardo.be.
4. Duringcharging,thebluePower/Chargeindicator(2)willlightcontinuously.When
chargingiscompletedtheblueLEDindicator(2)willturnoff.
Note:
• Thecameracanbeusedwhilecharging.
• Whenthebatteryrunsoutofpower,theGuardoAction360Camwillturnoffbutwill
savethepartthatwasrecordeduntilthecameraturnedoff.
• WhenthecameraisONbutnotinuseitwillautomaticallyturnoffafter5min.Thisis
thedefaultsettingandcanNOTbechangedinthecamera’smenu.
• ThedeliveredmicroUSBcable(12)offersfastandefcientchargingbutisalsoused
forsynchronizinganddatatransferwithyourPC.
• Extrachargingdevices/accessoriescanbeorderedfromourwebsite:www.guardo.be.
• Ifthecameraisnotusedforalongtime,periodicallyrechargeittoensurebattery
performance.

6
USE THE WATERPROOF HOUSING
Placethecamerainthewaterproofhousing:
Open waterproof case Place camera Close backdoor Grasp arm & Click
into place
IMPORTANT! USAGE FOR PREVENTING WATER LEAKAGE
1. BEFORE EVERY USE:checkcarefullythatthewaterproofhousingissecurelylocked
onto the camera and that there are no‘objects’ (such as sand or a lock of hair) in
betweentherubberstrapandthehousing,asthiscouldcauseleaking.
2. Therubberstrapisthemostimportantpartofthewaterproofhousingasitisthe
elementthatkeepsyourcamerawaterproof.Therubberstrapcanberemovedtoclean
itinfreshwater.Donotuseadampclothtodry,butdryitbyshakingit.
3. Wheneverusedinsaltywater,ALWAYScleantheplasticwaterproofhousingafterwards
in non-salt water and dry it. This is to avoid corrosion or to prevent dust/sand/…
buildingupintherubberseal.
!ATTENTION!
Ifyoudonotconsistentlyperform/executetheabovementionedtips,waterdamagemay
occurandcanresultintothecamerabeingdamaged/destroyed.ThewarrantydoesNOT
coverwaterdamagecausedbyimproperusebytheuser!

7
Regularycheckthelenstoseeifwaterdropsorcondensation/foghaveappearedasthese
maybeshownonyourfootage.
Toremove/avoidwaterdropsandcondensation/fog,thesetipsmighthelp:
• Spit or lick the port or housing lens.
• Applyawaterrepellentandanti-beading/anti-fogcoatingorwax(suchas‘RAIN-X).
• Makesuretheinsideofthehousingandcameraisasdryaspossible(e.g.dryhands,no
sweat)topreventfog/condensation.
• Don’tleavethecamerainthedirectsunornearheatanddon’tleaveitON(generating
heat)whennotnecessary.
• Openthefoggedcamerahousingandcarefullywipeoffthefoginside,thencloseitagain.
• Trytoavoidtoolargetemperaturedifferencesasthesemaycausecondensation/fog.
Anti-Foginsertsareoptionallyavailableonwww.guardo.be.
Note:‘Mufed’soundisinevitablewhenusingthecamerawiththewaterproofhousing.
Attachingthecameratoanymount,isalwaysdoneinthesameway:
1. Removethescrewfromthemount.
2. Place the camera on the mount with the screw.
3. Rotate/Tiltthecameraintothedesiredshootingangleandfastenwiththetighteningscrew.
WATERDROPS & CONDENSATION
MOUNTING THE CAMERA USING THE
DELIVERED MOUNTS

8
MOUNTS WITH ADHESIVE TAPE
How to apply the adhesive tape (IMPORTANT!)?
1. Apply the tape 24 hours before use in a room temperature around 21°C
2. Makesurethesurfaceyouwanttoapplythe tape on is smooth: the tape will not
adhereproperlyonanembossedorporoussurface.
3. Clean and dry the surface before application.Anycleanerthatwillnotleavealmor
oilysurfacecanbeused!
4. Pressthetapeentirelyandrmlyintoplace!
How to remove the adhesive tape?
Theadhesivetapecanberemovedbyusingahairdryer:theheatedairwillloosenthe
adhesive part. Remove the residue with a cleaner or with alcohol.
A. CURVED SURFACE MOUNT
Stickthe3MVHBtapetoeitheroneofthecurvedsurfacemounts(16or22)andplace/
stickthemountonacurvedsurface.
Note:Thismountcanalsobeusedwiththeremotecontrol’sstrap!

9
B. FLAT SURFACE MOUNT
Placethemountonaatsurface,suchasasnowboard,usingthe3MVHBtape.
OTHER MOUNTS
A. GORILLA TRIPOD
Thissmallexibletripodallowsyoutoattach
theGuardocamera toavariety ofobjectslike
trees,fences…thankstoitsbendablelegs.The
legscanalsobeshapedsothattheystandrmly
onanysurface.
B. TRIPOD/SCREW THREAD ADAPTER 1/4”
This Tripod/Screw thread adapter mount
provides stable and secure mounting through
a stronger vertical xation point and allows
you to shoot extra crisp imagery. Simply screw
theadapterintothewaterproofcasingofyour
camera and plug in the other end into any
GuardoMountofyourchoice.
2X
2X
2X
1
1615
14
13
12
11
10
9
8
7
6
54
3
2
17
18
19
20
21
3
22

10
PLACE MICRO SD CARD
Make sure a Micro SD card of
32 or 64 GB (preferably from
a known A-brand), Class 10
(UHS-I) with a minimum of 30
MB/s writing speed (optionally
available at www.guardo.be.) is
inserted into the Micro SD Card
slot (11) before you start using
the Guardo 360 Cam.
MakesureyouformattheMicroSDcardbeforerstuse!YoucanformatthemicroSDcardvia:
• theApp(see‘FulloperationfromGuardo360App)
• thecamera’smenu(see‘Menu&SystemSettings‘)
• yourcomputer(see‘Connectingtoacomputer’tondouthow)
PlacethemicroSDcardintotheMicroSDCardslot(11)andpressgentlywithyournger
nailsothatitclicksintoplace.(ToremovetheMicroSD-card:pressthecardgentlyagain
withyourngernailsothatitpopsout).
Note:
• WhenthereisnomicroSDcardinserted,thecameracannotbeused!
• MakesurethecapacityofyourmicroSDcarddoesnotexceed64GB,Class10(UHS-I).
TURNING ON/OFF
• To turn the Guardo 360 Cam ON:PressthePower/ModeButton(1)for2/3sec.toturn
thecameraon.TheLCDdisplay(7)willturnONandshow“360Wi”.Theredindicator
(2)willashandyouwillhearashortbeepindicatingthatthecameraisturnedon.
• To turn the Guardo 360 Cam OFF:PressthePower/ModeButton(1)againfor2/3sec.
toturnthecameraoff.TheLCDdisplay(7)willturnOFF.
GETTING STARTED

11
Note: TheGuardo360Camwillturnoffautomaticallywhenitisnotbeingusedfor5
minutes.ThisisthedefaultsettingandcanNOTbechanged.
CHANGE MODE
Thecameracanbesetinto2differentmodes:videomode&photomode.
Afterhavingturnedonthecamera,pressthePower/ModeButton(1)toswitchbetween
thedifferentmodes:
• Video mode: Record videos. The video camera icon willbeshownintheupperleft
cornerofthedisplay.Videomodeisselectedbydefaultwhenturningonthecamera.
• Photo mode: Make photos. The photo camera icon willbeshownintheupperleft
cornerofthedisplay.
DEFAULT SETTINGS
The Guardo 360 Cam can be set (resolution,
video mode, camera mode, …) according to
thepurposeforwhichitisusedandaccording
to your own preferences! When the camera
is turned on for the 1st time, the following
informationwillappearontheLCDdisplay,this
isthedefaultsetting:
CHANGE MENU SETTINGS & SYSTEM SETTINGS
TheLCDdisplayontopofthecameramakesitabletocontrolthecamera.
Change menu settings
How? In video/photo mode:
• Long presstheWi/Menubutton(5)toopenthemenu.
• UsetheWibutton(5)tonavigatethroughthemenu.
• PresstheRecord/OKbutton(4)toopenthesubmenu.
• UsetheWibutton(5)tonavigatethroughthesubmenu.
• PresstheRecord/OKbutton(4)toselectthedesiredsetting.
• Toclosethemenu,longpresstheWi/Menubutton(5).

12
Forexample:toset‘PowerSave’to‘1min.’invideomode,pleasefollowthesesteps:
• Turn the Guardo 360 Cam ON.
• Long presstheWi/Menubutton(5).
• PresstheWiButton(5)until‘PowerSave’.
• PresstheRecordButton(4).
• PresstheWiButton(5)until‘1min.’
• PresstheRecordButton(4)toselect‘1min.’.
• LongpresstheWibutton(5)toexitthemenu.
SETTING DATE AND TIME
Tosetcorrectdateandtime,pleasefollowthesesteps:
• Long presstheWi/Menubutton(5).
• PresstheWiButton(5)until‘Date&Time’.
• PresstheRecordButton(4).
• AdjustdateandtimebyusingtheWiButton(5)(changedigits)andthePower/Mode
Button(1)(swaptomonth,date,hour,…).
• LongpresstheWibutton(5)toexitthemenu.
Menu Video/Photo mode:
Power Save
Powers o automacally to
save baery
OFF
1 min.
3 min.
5 min.
Date & Time
YY/MM/DD
MM/DD/YY
DD/MM/YY
Language
English, Français, Nederlands, Español, Italiano,
Português, Deutsch, Česna, Polski
FactoryReset
Reset to factory default No
Yes
System
System Info.
Card Info.
(from SD card)
Format
Deleng and formang
SD card
No
Yes

13
TheGuardo360Camrecordsvideo’s&makespicturesfrombothlensesandcombines
theminto1singleleusingtheGuardo360ApportheGuardo360PCsoftware.
Start video recording:
Make sure the Guardo 360 Cam is turned on and in Video Mode.
PresstheRecordButton(4)once.TheredLEDindicator(9)willstartashingslowlyandatimer
willappear=startofrecording.
Note:
Shootingviewanglesareslightlydifferentindifferentworkingmodesofthevideocamera.
Stop video recording:
PresstheRecordButton(4)onceagaintostoprecording.TheredLEDindicator(9)and
thetimerwillturnoff.
Note:
Whenthememory card is full,theGuardo360 Camwillautomatically stoprecording.
Your recordingswill be saved,beforethe camera turns off!When0:00showsonyour
screen,thisindicatesyourSDcardisfullandrecordingisnolongerpossible.Youneed
toemptyorformatyourSDcard(viaApp,computerorcamera)again.Thisofcourseafter
havingcopied/savedyourphotos/footagefromthecardtoanotherdevicesuchasyour
computer’sharddisk.See‘FormatSDCard’.
Whenrecordingcontinuously overa longer period oftime(e.g. 2 hours non-stop),the
footagesavedonyourMicroSDCardwillbesplitindifferentsections,1section=approx.
4GB/45 minutes max.
Make a photo:
Make sure the Guardo 360 Cam is turned on and in Photo Mode.
PresstheRecordButton(4)once.YouwillhearabeepandtheredLEDindicator(9)will
light up once = taking a photo
Note:OnlywhenyouhaveheardthebeepandtheredLEDIndicator(9)hasashedthe
photo was really taken.
OPERATION

14
Theremotecontrolcanbeusedforvideo
recording, for taking pictures and for
turning the Guardo Action 360 Cam ON
and OFF.
1. Turn ON: Press and hold thePowerButtontoturnthecameraon(wait till the red LED
isOFFduringpress).Waitawhileforthecameratostartup.
2. Take a photo: Press the Photo Button once to make a photo.
3. Start video recording: Press the Video Button once to start recording.
4. Stop video recording: Press the Video Button once again to stop recording.
5. Turn OFF: Press and holdthePowerButtontoturnthecameraoff.
Note:
• Maxdistance=15~25meters(dependsonsurrounding&location).
• Whenusingtheremotecontrol,thecamerawillshootaccordingtothelast(manually)
set settings.
OPERATION FROM REMOTE CONTROL
Power ON/OFF Button
Photo Button
Video Button

15
INSTALL THE APP
SearchfortheApponyoursmartphoneortablet:
•
ForAndroidusers:Searchfor‘Guardo360Cam’inGooglePlayorscanthisQRcode:
•
ForAppleiOSusers:Searchfor‘Guardo360Cam’intheAppStoreorscanthisQRcode:
Finish the installation so that the Guardo 360 Cam App icon appears on your
smartphoneortablet.
ENABLE WI-FI ON THE GUARDO 360 CAM
PresstheWi-FiButton(5)onyourGuardo360CamtoenableWi-Fi.Make sure the battery
is fully charged.‘Wi-FiON’willappearontheLCDdisplayandtheredLEDindicator(6)
willstartashing.
ANDROID APPLE
FULL OPERATION FROM APP

16
MAKE A WI-FI DIRECT CONNECTION BETWEEN GUARDO 360 CAM
AND YOUR SMARTPHONE/TABLET
• EnableWi-Fionyoursmartphoneortabletandletit searchfortheWi-FiDirect
network‘Guardo360_xxxxxx’.
• SelectthisWi-FiDirectnetwork.Whenyouconnectitthersttime,youneedto
enterthepassword:“9876543210”.‘Connected’willnowappearonthedisplayof
yoursmartphoneortablet.
• TheredLEDindicator(6)willnolongerashbutwillstayredduringconnection.
• Whenconnectionislost,thecamerawilltrytoauto-reconnect.Ifnot,thenmanually
re-connect again.
Note:
• Whenthebatterycapacityislow,Wi-Ficannotwork.Pleaserechargethebatteryrst!
• Wi-Firangeisupto15~25meters(dependsonsurroundings&location).
• DuringWi-Ficonnectionandconnectionwithasmartphone/tablet,thecamerawill
turnwarm.Thisisnormalandnotamalfunction!
• AMicroSDCardneedstobeinsertedbeforeyoucanmakeaWi-Ficonnection.
• Wi-Fi will automatically be disabled on your Guardo 360 Cam when no device
(smartphone/tablet)isconnectedwithin2min.tosavebatterypower.
• ThepasswordandnetworknamecanbechangedbytheuserintheApp.
• Date/TimewillbesetautomaticallybyAppanddevice.
OPERATION
BeforeyoustartusingtheappmakesureamicroSDcardisinsertedintothecamera!
PresstheAppicononyourAndroidorAppleiOsdevice.Afterrstsetupofthecamera
withtheApp,youneedtopresstheCameraicon at the top right corner to connect
the Guardo 360 Cam to your device.

17
Yourdevicewillmakeaconnectionwiththecameraandalivevideopreviewwillappear!
TheAppisdefaultsettovideomodeandsothisisthestartscreen(Androidasexample):
A. Invert view
B. Gobacktoprevioussetting
C. World mode
D. Explore mode
E. Dome mode
F. VR mode
G. Gallery
H. Recordbutton
I. Record duration
J. Battery status
K.
GyroMode:Ifthisfunctionisactivatedandsupported
by your mobile phone, you can move your phone
around and explore all viewing directions.
L. Settings
M. Video mode
A
B
C
D
E
F
K
MG
J
H
L
I

18
TousetheAppformakingphotos,pressthe icon.Thestartscreenformakingphotos
willappear(Androidasexample):
A. Invert view
B. Gobacktoprevioussetting
C. World mode
D. Explore mode
E. Dome mode
F. VR mode
G. Gallery
H. Capturebutton
I. Battery status
J. Gyro Mode: If this function is activated and
supportedbyyourmobilephone,youcanmoveyour
phone around and explore all viewing directions.
K. Settings
L. Photo mode
A
B
C
D
E
F
J
LG
I
H
K

19
ADJUST GENERAL SETTINGS FOR VIDEO/PHOTO
SET WHITE BALANCE
Press the Settings icon
on your start screen and
press‘WhiteBalance’.
Youcannowchoosefrom:
FORMAT SD CARD ON CAMERA
Press the Settings icon on your start screen and press‘Format’.
Press‘OK’toformattheMicroSDCardinyourcamera.
CHANGE WI-FI PASSWORD
Press the Settings icon onyourstartscreenandpress‘ChangewiPassword’.

20
SET UPSIDE DOWN RECORDING
Press onyourstartscreentoinverttheview.Theiconwillbeturnedupsidedownto
indicate the view is inverted.
MAKE VIDEO RECORDINGS
• Start video recording:
Press the Record Button onyourdeviceonce.TheRecordButtonwillstartashing
slowly=startofrecording.
Note: Depending on your device’s model/type there could be a delay between the
cameraandthedevice.TherecordingwillbeOKandnormal.
• Stop video recording:
Press the Record Button once again to stop recording. The Record Button will stop
ashing=stopofrecording.
IMPORTANT!
Afteryoustartedrecording,youcanturnOFFthewiconnectiononphone/tabletand
closetheApp.ThecamerawillkeeprecordingtillitstopsortilltheSDcardisfull.
MAKE PHOTOS
Press the Photo Button onyourdeviceonce.ThePhotoButtonwillashonceand
youwillhearasnapshotsoundindicatingthatthephotowillbetaken.Assoonasyou
heardabeepcomingfromthecameraandsawtheredLEDonyourcameraash,the
shot was made.
Note:Dependingonyourdevice’smodel/typetherecouldbeadelaybetweenthecamera
andthedevice.TherecordingwillbeOKandnormal.
VIEW/SELECT/DELETE/… VIDEOS AND PHOTOS
Press .Therecordedvideosandphotoswillappearinthumbnailicons.Therecorded
videos are marked with a .
Simplypressthephoto/videotoviewitfullscreen.
Table of contents
Languages:
Other TE-Group Action Camera manuals
