TE Technology TC-24-25 User manual

Operation Manual
For
Model TC-24-25 RS232
Thermoelectric Cooler
Temperature Controller
November 8, 2005
Drawing #3599 Rev. F
TETECHNOLOGY, INC
.
1590 Keane Drive Phone: (231) 929-3966
Traverse City, MI 49686-8257 Fax: (231) 929-4163
http://www.tetech.com e-mail: cool@tetech.com

2
Table of Contents
Features ..........................................................................................................................................................................................3
General Description........................................................................................................................................................................4
Technical Description.....................................................................................................................................................................4
Set-Up Instructions.........................................................................................................................................................................6
1.0 Setup...............................................................................................................................................................................6
2.0 Configure........................................................................................................................................................................7
3.0 Tuning ............................................................................................................................................................................9
4.0 Calibration....................................................................................................................................................................10
5.0 Controller Operation.....................................................................................................................................................10
6.0 Custom Software..........................................................................................................................................................11
Controller Wiring Diagram ..........................................................................................................................................................12
Expansion Connector Wiring Diagram ........................................................................................................................................13
Mechanical Package Drawing......................................................................................................................................................14
Block Diagram .............................................................................................................................................................................15
RS232 Communications Connections..........................................................................................................................................16
APPENDIX A Troubleshooting Communications Port ...............................................................................................................17
APPENDIX B PID Tuning...........................................................................................................................................................18
APPENDIX C Serial Communications........................................................................................................................................20
APPENDIX D Thermistor Styles for TC-24-25 RS232...............................................................................................................32
Notice: Improper tuning of this temperature controller (or any temperature controller) can lead to
excessive thermal cycling and/or overheating of the thermoelectric device, either of which are known to
reduce the lifetime of any thermoelectric device. Care should be taken to prevent the temperature of the
thermoelectric device from going beyond the range specified by the device manufacturer. Care should
also be taken so that any thermal cycling of the thermoelectric device is a result of changes in the
controller’s set-point temperature and not instability at a given set point due to improper selection of the
tuning variables.
In no event shall TE Technology, Inc. be liable for any damages whatsoever (including without limitation,
damage for loss of business profits, business interruption, loss of business information, or any other
pecuniary loss) arising out of the use or inability to use this TE Technology, Inc. product, even if TE
Technology, Inc. has been advised of the possibility of such damages.

3
Features
•Input voltage from (12 to 28) VDC
•Self-contained, (0.1 to 25) A current rating
•Computer programmable via RS232 communications port
•Bi-directional, solid state H-bridge operation for heating and cooling applications
•Control temperature of –20 °C to +100 °C using MP-2379 thermistor (supplied with controller)
•Proportional (P), Integral (I) and Derivative (D) control that can be selected as P, PI, PD or PID;
or Deadband (on/off) with an adjustable hysteresis
•Temperature resolution of 0.1 °C or 0.1 °F
•Control stability of ±0.1 °C or ±0.1 °F (when controlling a cold plate)
•Pulse width modulation of output:
•Selectable modulation frequency of 675 Hz or 2700 Hz
•Controls up to 680 W
•Set temperature selectable:
•Computer set with controller stand alone operation
•Remote user set temperature potentiometer
•0 mA to 20 mA current loop
•0 VDC to 5 VDC adjustable range
•Differential temperature control
•No computer programming experience required to use the communications software program
(Supplied software is compatible with Windows 95/98/XP/NT)
•Command set is provided so programmers may create their own software interface or embedded
controller applications
•Versatile alarm system:
•Computer configurable alarms for 5 VDC at 25 mA
•Alarm cancel: selectable via computer-software communication or remote contacts
•Second sensor also configurable as a heat-sink over-temperature shut-down
•Non-volatile memory retention of parameters (1,000,000 write cycles maximum; see command
#31 in Appendix C for further details.)
•Operating temperature range of 0 °C to 65 °C
•Storage temperature range of -55 °C to +105 °C

4
General Description
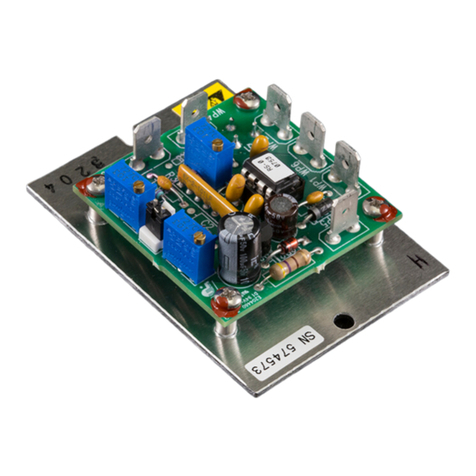
The TC-24-25 RS232 is a bi-directional control for independent thermoelectric coolers or in conjunction
with auxiliary or supplemental resistive heaters for both cooling and heating applications. The H-bridge
configuration of the solid state MOSFET output devices allows for the bi-directional flow of current
through the thermoelectric coolers. Highly efficient N-channel output devices are used for this control
mode.
This controller is programmable via an RS232 communication port for direct interface with a compatible
computer. The easily accessible communications link permits a variety of operational mode
configurations. Field selectable parameters or data acquisition in a half duplex mode can be performed.
This controller will accept a communications cable length in accordance with RS232 interface
specifications. The supplied software is compatible with Windows 95/98/XP/NT.
Once the desired set parameters are established, the TC-24-25 RS232 can be disconnected from the
computer, and it becomes a unique, stand-alone controller. All parameter settings are retained in non-
volatile memory.
The user friendly, communications software requires no prior programming experience to establish
operation. A command set is provided for qualified personnel to program a software interface or use as
an embedded control.
Mechanically, the control printed circuit board is mounted to a metal bracket that is suitable for either
horizontal or vertical orientation. Input and output connections are accessible via screw type terminal
strips and fast-on terminals.
Technical Description
The TC-24-25 RS232 is capable of operating from an input supply voltage of (12 to 28) VDC, common
to many available thermoelectric coolers. The self-contained MOSFET output devices deliver load
currents from (0.1 to 25) A. (NOTE: consult appropriate installation instructions for power supply and
heat sinking requirements for high current operation). This unit will control total load power up to 680
W with a finite temperature resolution of 0.1 °C or 0.1 °F.
The output signal to the thermoelectric cooler is pulse-width modulated and can be set for either 675 Hz
or 2700 Hz operation. Pulse-width modulation (PWM) averages the amount of energy provided to the
module and reduces the extreme temperature excursions that are experienced with a thermostatic control
system. This tends to extend the life and reliability of the thermoelectric devices. The PWM control
scheme affords control accuracy to within ±0.1 °C or ±0.1 °F at the control sensor.
The controller tuning structure allows designation of a variety of control features:
1) The Computer Set Value provides for manual control of the output from 0% to ±100% of load power.
2) Proportional bandwidth (P) in degrees, Integral reset (I) in repeats per minute, and the Derivative rate
(D) in minutes may be configured for P, PI, PD, or PID control.

5
3) Deadband control (on/off) with an adjustable hysteresis may be selected. However, this control mode
is not generally recommended.
4) Differential temperature control is provided when two input sensing thermistors are used. The unit
will control the differential between Input 2 (reference temperature) and Input 1 (actual system
temperature).
A control temperature range of –20 °C to +100 °C is standard when using TE Technology’s standard
thermistor sensor probe for the primary set temperature. Additional external set temperature input types
may be selected. As mentioned above, a second thermistor can be used for differential control (or it
could be used for alarm condition sensing). In addition, the controller could use a remote set temperature
potentiometer, a (0 to 5) VDC signal, or a (0 to 20) mA current loop. These secondary inputs are used to
define and “map” the secondary input to an adjustable temperature range in order to remotely control the
set temperature. All temperatures may be consistently displayed in °C or °F.
Two types of control output modes may be selected. This determines the direction of the current flow
through the thermoelectric cooler during the heat cycle. This current flow may be from Wire Point
WP1+ to Wire Point WP2-. Alternatively, this current flow may be reversed from WP2+ to WP1- as
selected in the configuration menu.
Several alarm settings may be selected, some of which provide a 5 VDC output, rated for 25 mA of
current for alarm signaling. The settings can be selected for no alarm function, tracking alarm, and
fixed-value alarm. Alarm set temperature values are entered in the setup menu. The computer-
controlled selection is available for additional embedded controller input/output options. The alarm
setup menu also provides for selection of an alarm latching condition. The alarm sensor may be either
the control temperature sensor or a secondary thermistor sensor.
The various alarms have the ability to determine the status of the output power to the thermoelectric
cooler or auxiliary heater. Power may be maintained during an alarm condition or the main power may
be shut down.

6
Set-Up Instructions
1.0 Setup
NOTE: the maximum allowable ambient temperature for the controller is 65 °C. Furthermore, the
maximum allowable temperature of the controller base (underneath the transistor-mounting area) is 80
°C.
1.1 Make sure the computer is off and the controller is un-powered. Connect the RS232
Communications Port from the controller (JP3) to the RS232 input (Serial Communications Port) on
the computer. Pin 1 of JP3 is the controller’s RX, Pin 2 of JP3 is the controller’s TX, and Pin 3 of
JP3 is the controller’s shield. Pin 1 of JP3 should connect to the clear wire on the RS-232 cable, Pin
2 of JP3 should connect to the red wire on the RS-232 cable, and Pin 3 of JP3 should connect to the
black wire on the RS-232 cable. See “RS232 Communications Connections” for further
information.
1.2 Attach the thermistor to the control location. Generally, this is the cold side of the cooler rather than
the part itself that is to be cooled/heated. This provides better control stability. As much wire
length of the thermistor should be thermally connected to the cold side as possible so that the
thermistor and its wire leads are as equivalent in temperature as possible. This can be accomplished
by using aluminum tape placed over the wire leads and adhered to the cold side of the cooler. This
will help eliminate errors resulting from heat conducting along the wire leads and affecting the
sensor reading.
The standard thermistor supplied with the TC-24-25 RS232 is the MP-2379. Appendix D
“Thermistor Styles for TC-24-25 RS232” shows dimensional data on the MP-2379 and other
thermistor styles readily available as well as temperature-resistance data. If you are using the MP-
2379, it is recommended that you use thermal grease (such as TE Technolgy TP-1) between the
thermistor and the surface to which it is mounted.
If you want to use thermistors that have different resistance-temperature curves than the standard
thermistor, it can be done as long as the operating resistance range is within that of the standard
thermistor. The thermistor should be a negative temperature coefficient device. Because the
temperature controller is really measuring the thermistor’s resistance and converting this to a
temperature, the temperature controller will be fooled into thinking that the thermistor is at a
different temperature than it really is, and the Set-Temperature will be skewed accordingly. A loss
of resolution and control stability may occur as a result. The user assumes all risks associated with
making any substitutions and TE Technology assumes no liability whatsoever for the operation of
the controller when a non-standard thermistor is used.
1.3 Connect the appropriate DC power (12 to 28 volts) to the controller between WP3+ and WP4- and
the thermoelectric cooler between WP1 and WP2 in accordance with the “Controller Wiring
Diagram.” NOTE: Generally there is approximately a 0.5 to 1.3 V drop from the power supply to
the thermoelectric modules. You may want to adjust the power supply accordingly to ensure full
power is delivered to the cooler when needed.

7
1.4 Turn power on to both the computer and power supply (which in turn powers up the controller).
The on-board green LED will flash at a steady rate to indicate that the controller is energized
correctly.
1.5 Insert the TC-24-25 RS232 software disk into the computer floppy-disk drive. To run the software
from the floppy disk, select START, RUN from your Windows Desktop and then enter A:\TC-24-
25 RS232.exe. This will load the software into your computer's RAM. Alternatively, copy the TC-
24-25 RS232.exe file to your hard-disk drive and run the program from there.
1.6 The Main Menu screen will appear on your computer monitor. All selections are made from this
menu screen. In the PC COMMUNICATIONS section, select the RS232 comm port (1 through 4)
to which the controller is connected by using the SELECT COMM PORT menu key. After making
this selection, click on the INITIALIZE button.
1.7 NOTE: If you receive an error message, please refer to Appendix A “Troubleshooting
Communications Port.”
2.0 Configure
2.1 In the CONFIGURE section, the various selections are used to establish the custom operating
criteria for the controller. NOTE: To avoid damage to the thermoelectric cooler, confirm that OFF
is selected in the OUTPUT ON/OFF menu key and then click the Send Box Values button prior to
proceeding!
2.2 First, select the PWM OUTPUT TIMEBASE menu key. Options for SLOW TIMEBASE 675Hz or
FAST TIMEBASE 2700Hz will appear. Select the option that is appropriate for you. Generally,
675 Hz will work fine and is the recommended default.
2.3 Next, click on the SET TEMP TYPE INPUT 2 menu key to reveal the options available.
COMPUTER SET VALUE is to be selected when using the software to set the desired control
temperature. The other selections, POTENTIOMETER SET, 0 TO 5vdc SET, and 0 TO 20ma SET,
are for external set temperature adjustments. Refer to the “Controller Wiring Diagram” and the
“Block Diagram” for additional information. The controller default setting for these options is the
full range of the thermistor input sensor. The DIFF.SET=INP2+FIXED SET establishes an actual
set temperature that is the sum of the temperature sensed by the optional, secondary thermistor input
sensor and the temperature entered as the FIXED SET TEMP value. This allows the controller to
maintain a constant temperature difference between the primary thermistor temperature and the
secondary thermistor.
2.4 Enter the SET TEMP HIGH RANGE and SET TEMP LOW RANGE values. These values are used
to linearly scale the temperature range that you are controlling within to the full range of the
external input. The set limit values must be within the temperature range that controller is capable
of controlling to.

8
For example, suppose you are using a (0 to 5) VDC external input to control the set temperature.
Suppose further that you enter -20 °C for the SET TEMP LOW RANGE and +100 °C for the SET
TEMP HIGH RANGE. This sets up a linear scale of 5 V per 120 °C, or 0.0417 V/°C. So, to
control to 10 °C, for example, you would set the external input voltage to 1.25 V.
2.5 Click the CONTROL TYPE menu key and select which type is appropriate for your application.
The DEADBAND CONTROL is an on/off control and PID CONTROL is a
proportional/integral/derivative control. COMPUTER CONTROL allows a constant, fixed
percentage of power to be applied to the thermoelectric cooler. Generally, DEADBAND
CONTROL should not be used unless care is taken to prevent the thermoelectric cooler from being
damage by excessive thermal cycling.
2.6 Clicking on the CONTROL MODE menu key permits the selection of either HEAT WP1+ AND
WP2- or HEAT WP2+ AND WP1-. These selections establish the polarity for the heating mode of
the thermoelectric cooler. This selection allows you to reverse the current flow in the thermoelectric
cooler without having to change the wiring.
NOTE: For TE Technology’s standard products, the TE+ (red) wire should be attached to WP2
and the TE- (black) wire should be attached to WP1 as shown in the “Controller Wiring Diagram.”
The CONTROL MODE should then be set to HEAT WP1+ and WP2-.
2.7 The ALARM TYPE menu key permits the selection of available alarm options. NO ALARM
PICKED indicates that no alarm parameters are desired. SET TRACKING ALARMS allows an
alarm to be set with respect to the set temperature. It will move accordingly with a change of the
temperature setting. This option can be used for a high alarm, low alarm, or both settings. FIXED
VALUE ALARMS permits the setting of a fixed, absolute temperature either above or below the set
point temperature or both. COMPUTER CONTROLLED ALARM is not an actual alarm, but
provides for user activation of the alarm relay via the computer software. The “Expansion
Connector Wiring Diagram” shows how customer-supplied LED’s can be installed to signal various
alarm conditions.
2.8 The POWER OUT SHUT DOWN IF ALARM menu key provides two selections. NO SHUT
DOWN IF ALARM will let the controller continue to control to the set temperature. MAIN OUT
SHUTDOWN IF ALARM shuts off power to the cooler when an alarm condition exists.
2.9 Associated with the ALARM TYPE configuration are the HIGH ALARM SETTING, LOW
ALARM SETTING, and the ALARM DEADBAND settings. If an alarm type has been selected,
enter the desired high and low temperature values that you want to have trigger an alarm condition.
The ALARM DEADBAND option sets the hysteresis of the alarm values from 0.1 degrees to 100
degrees.
2.10 The ALARM LATCH menu key permits the selection of ALARM LATCH OFF or ALARM
LATCH ON. If ALARM LATCH OFF is selected, the controller will automatically reset if the
alarm condition self-corrects when the corresponding temperature returns back to the temperature
defined by the ALARM DEADBAND and alarm setting. If ALARM LATCH ON is selected, the

9
controller will maintain the alarm condition until it is manually cleared. When ALARM LATCH
ON is selected, and if an alarm condition exists, the alarm latch can be reset by clicking the SEND
LATCH CLEAR button.
2.11 The SENSOR TYPE menu key allows for the selection of different types of temperature sensors for
two different control ranges. Select the TS-67 sensor type when using the standard MP-2379 sensor
or other sensors listed in Appendix D “Thermistor Styles for TC-24-25 RS232.” This will provide a
control range of -20 °C to +100 °C. However, remember that depending on the type of cooler you
have, it might not be suitable for operation at temperatures greater than 70 °C. The TS-141 sensor
type is selected when you need a -40 to +70 °C control range. This sensor type is non-standard but
can be provided. Consult with TE Technology if you need this control range.
2.12 The CHOOSE SENSOR FOR ALARM menu key allows for the selection of either the CONTROL
SENSOR the thermistor or INPUT 2 SENSOR thermistor be used for the alarm. (Note: The
INPUT 2 SENSOR thermistor cannot be used if you are using a potentiometer or voltage/current
levels to control the set point.) The INPUT 2 SENSOR thermistor can be attached to the heat sink
in order to detect over-temperature conditions.
2.13 The CHOOSE DEG C OR DEG F menu key permits the selection of displaying °F or °C.
2.14 The EEPROM WRITE ENABLE, located just below the CONFIGURE SECTION, can be checked
or unchecked depending on your requirements. See Appendix C, command #31 for more
information on EEPROM WRITE ENABLE.
2.15 Review all of your controller configuration selections. If all the configuration selections are correct
for your application, select the Send Box Values button to download these settings to the controller.
3.0 Tuning
3.1 You are now ready to tune the controller. All selections for this portion will occur in the TUNING
section of the controller software. The various constants required by the controller to optimize the
system performance are entered in this section.
3.2 The FIXED SET TEMP is the set temperature value entered in degrees. This temperature must be
within the range of the selected input sensor or the limits of low and high set ranges from the
controller configuration setup. Also, verify that the cooler is capable of safely operating at the
entered set temperature. This is particularly important if you are heating. While you can control to
+100 °C using the standard thermistor, many coolers are rated for at most 80 °C.
If you selected COMPUTER CONTROL in the CONTROL TYPE menu key under the
CONFIGURE section, the values that can be entered in the FIXED SET TEMP box range from
–12.0 to +12.0. This corresponds linearly to a fixed percentage of power output where –12.0 equals
–100% power and +12.0 equals +100% power.

10
3.3 PROPORTIONAL BANDWIDTH is the temperature band in which 0% to 100% power will be
applied to the cooler. The acceptable bandwidth values that may be entered are 1º to 100º. See
Appendix B “PID Tuning” for additional information on settings.
3.4 INTEGRAL GAIN is used to slowly change the output power until the difference between the
actual temperature and set temperature is zero. This value is expressed in repeats per minute, and
the acceptable values that may be entered are 0.01 to 10 repeats per minute.
3.5 DERIVATIVE GAIN senses the rate of rise or fall of the system temperature and adjusts the cycle
time of the controller to minimize overshoot or undershoot. This value is expressed in cycle rates
per minute, and the acceptable values that may be entered are 0.01 to 10 cycles per minute.
3.6 CONTROL DEADBAND is the temperature band where the controller is turned on and off by
either rising or falling temperatures where no heating or cooling takes place. This band is expressed
in degrees, and the acceptable values that may be entered are 0.1 to 100.
3.7 Review the tuning parameters for correctness and then click the Send Box Values button to
download these constants to the controller.
4.0 Calibration
4.1 The CALIBRATE section provides additional variables that can be used to fine tune your system’s
operation. You may want to try controlling with the initial settings prior to entering values in this
section.
4.2 INPUT 1 OFFSET is a manual method of compensating for the sensor 1 temperature and actual
control temperature.
4.3 INPUT 2 OFFSET is a manual method for compensating for the sensor 2 temperature and actual
temperature.
4.4 HEAT SIDE MULTIPLIER is a 0.01 to 2.00 numerical multiplier that compensates for the non-
symmetrical response of the thermoelectric cooler between the heat and cool modes.
4.5 If you have entered values in the CALIBRATE box and they are desired settings, click the Send
Box Values button to download these constants to the controller.
5.0 Controller Operation
5.1 Initial set-up of the TC-24-25 RS232 controller is complete.
5.2 Select ON in the OUTPUT ON/OFF menu key located in the CONFIGURE section. Then click the
Send Box Values in the CONFIGURE section to turn the controller on.
5.3 Click the SAMPLE button to monitor the CONTROL SENSOR’s temperature. This temperature is
indicated in the TEMP box. If you have an INPUT 2 SENSOR thermistor attached, its temperature
is indicated in the SECOND SENSOR box.

11
5.4 If all of the settings are satisfactory, you can turn off the computer and power supply, disconnect the
controller from the RS-232 port, and turn back on the power supply. The controller remembers its
last settings on EEPROM and will resume control based on that.
6.0 Custom Software
The controller does not specifically have to be used with the software that is provided. You could
also use commercial software such as LabVIEW from National Instruments. This might be useful if
you wanted to control a specific temperature profile over a particular amount of time. This is
accomplished by communicating through the RS-232 port of the computer using the command set
for the controller. The command set is given in Appendix C “Serial Communications.”

Controller Wiring Diagram
12

Expansion Connector Wiring Diagram
Note: The 25 mA current source is a true current source. Maximum compliance voltage is approximately
V+, the input voltage to the temperature controller. No external current limit resistors are needed for the
LED. The LED must be capable of being driven with a 25 mA continuous current.
8
7
6
5
4
3
2
1
Expansion Connector
Molex 22-23-2081
25 mA Current Source
Alarm Cancel
Input Common
High Alarm
Low Alarm
No Alarm
JP2
8
7
6
5
4
3
2
1
Customer- supplied
Connector
Note: Pins 6 and 7 not functionally defined.
Please do not connect.
8
7
6
5
4
3
2
1
Expansion Connector
Molex 22-23-2081
25 mA Current Source
Alarm Cancel
Input Common
High Alarm
Low Alarm
No Alarm
JP2
8
7
6
5
4
3
2
1
Customer- supplied
Connector
Note: Pins 6 and 7 not functionally defined.
Please do not connect.
13

Mechanical Package Drawing
14

Block Diagram
INPUT #1 SENSOR
TEMPERATURE
SENSOR
-20 °C TO 100 °C
10K OHM POTENTIOMETER
0 TO 5 VDC*
4 to 20 mA DC**
OR
0 TO 20 mA DC**
PC SET VALUE
DIFF SET= INPUT 2
INPUT #2 AUXILLARY INPUT
*CONTROLLER INPUT IMPEDANCE 6.5K OHMS
**REQUIRES ADDITION OF EXTERNAL RESISTOR
SUMMING
JUNCTION
CONTROL
PID
PID W/ ALARM
DEADBAND
DEADBAND W/ ALARM
OUTPUTS
H-BRIDGE
1 TO 25 A PWM
675 OR 2700 Hz
REMOTE INDICATOR
RED/YELLOW/GREEN
LED’S
INPUT #1 SENSOR
TEMPERATURE
SENSOR
-20 °C TO 100 °C
INPUT #1 SENSOR
TEMPERATURE
SENSOR
-20 °C TO 100 °C
10K OHM POTENTIOMETER
0 TO 5 VDC*
4 to 20 mA DC**
OR
0 TO 20 mA DC**
PC SET VALUE
DIFF SET= INPUT 2
INPUT #2 AUXILLARY INPUT
*CONTROLLER INPUT IMPEDANCE 6.5K OHMS
**REQUIRES ADDITION OF EXTERNAL RESISTOR
10K OHM POTENTIOMETER
0 TO 5 VDC*
4 to 20 mA DC**
OR
0 TO 20 mA DC**
PC SET VALUE
DIFF SET= INPUT 2
INPUT #2 AUXILLARY INPUT
*CONTROLLER INPUT IMPEDANCE 6.5K OHMS
**REQUIRES ADDITION OF EXTERNAL RESISTOR
SUMMING
JUNCTION
SUMMING
JUNCTION
CONTROL
PID
PID W/ ALARM
DEADBAND
DEADBAND W/ ALARM
CONTROL
PID
PID W/ ALARM
DEADBAND
DEADBAND W/ ALARM
OUTPUTS
H-BRIDGE
1 TO 25 A PWM
675 OR 2700 Hz
H-BRIDGE
1 TO 25 A PWM
675 OR 2700 Hz
REMOTE INDICATOR
RED/YELLOW/GREEN
LED’S
REMOTE INDICATOR
RED/YELLOW/GREEN
LED’S
15

RS232 Communications Connections
RS232 CABLE
(SUPPLIED BY
TE TECHNOLOGY)
BLACK WIRE
TO JP3-3
RED WIRE
TO JP3-2
CLEAR WIRE
TO JP3-1
THERMISTOR WIRES TO
JP1-5 AND JP1-6
(POLARITY NOT IMPORTANT)
RS232 CABLE
(SUPPLIED BY
TE TECHNOLOGY)
RS232 CABLE
(SUPPLIED BY
TE TECHNOLOGY)
BLACK WIRE
TO JP3-3
BLACK WIRE
TO JP3-3
RED WIRE
TO JP3-2
RED WIRE
TO JP3-2
CLEAR WIRE
TO JP3-1
CLEAR WIRE
TO JP3-1
THERMISTOR WIRES TO
JP1-5 AND JP1-6
(POLARITY NOT IMPORTANT)
THERMISTOR WIRES TO
JP1-5 AND JP1-6
(POLARITY NOT IMPORTANT)
PC CONNECTION TABLE
PC CONNECTOR PC FUNCTION* CONTROLLER
9 PIN 25 PIN
PIN 2 3 RECEIVE (RX) TRANSMIT (TX) JP3-2
PIN 3 2 TRANSMIT (TX) RECEIVE (RX) JP3-1
PIN 5 7 COMMON SHIELD JP3-3
*Functions normally assigned to pins.
Check your PC manual to confirm
16

17
APPENDIX A Troubleshooting Communications Port
You can perform a quick check of the comm. port (without having to initialize variables) by clicking the
“CommCheck” button in the PC COMMUNICATIONS section of the software screen. You should have
the controller connected to a comm. port and the controller powered up when performing the comm.
check. A “COMM ERROR!” message will show if there is no hookup. If the connection is good a
“COMM OKAY” message will appear.
When you initialize, an error message my show up if there is any additional problems. The following
table offers possible solutions corresponding to a particular error:
Error Message Cause Solution
Comm Port Timeout No power to TC-24-25 RS232
unit Apply power to TC-24-25 RS232, review
customer drawing for proper hookup.
Comm Port Timeout Wrong Comm Port selected Check computer hardware setting and set to
the correct Comm Port.
Comm Port Timeout Incorrect wiring of Comm Port
to the computer. Check for correct wiring from JP3 to the
computer.
Comm Port Open
Error No Comm Port available at this
port setting. Check computer hardware setting and set to
the correct Comm Port.
Note: See Appendix C, Section III RS232 Communications Parameters regarding the insertion of a delay
between sending characters if you are using your own software program.

18
APPENDIX B PID Tuning
Tuning the TC-24-25 temperature controller involves three variables: (P)ROPORTIONAL
BANDWITH, (I)NTEGRAL GAIN, and (D)ERIVATE GAIN.
The control algorithm sums the three values of these terms to determine the output power.
P + I + D = > Power Applied
Most applications work satisfactorily with only the “P” and “I” values used.
Start the tuning process by setting the Integral and Derivative functions to zero. Then turn on the
controller.
PROPORTIONAL BANDWITH is defined as the temperature range around the set point where the
controller modulates (proportions) the output power. When the actual temperature deviates from the set
temperature, the “P” term of the control equation is increased until the power output reaches 100%.
Stated another way, the amount of temperature deviation required to increase the output to 100% is, by
definition, the proportional bandwidth. The programmable bandwidth range of the TC-24-25 is from 1°
to 100°. The units are shipped with a default setting of 20°.
Each thermal system has its own time constants determined by the thermal mass of the components and
the placement of the sensor relative to the load. When the “I” and “D” terms are set to zero, and the
bandwidth is too large, the temperature will never reach the set point. In this case the controller’s output
will approach zero as the temperature difference approaches zero, so the system will never get the
required power to actually reach the set point. On the other hand, if the bandwidth is too small and there
is any time lag between the cooling/heating element and the temperature sensor, the temperature will
initially overshoot the set point and then settle into a pattern of oscillation above and below the set point.
Assuming the controller is configured for your requirements, start the tuning process by applying power
with the default settings and observing the system’s response. If the system comes into the proportional
band and maintains a steady temperature near set point, without over shoot, the bandwidth setting is either
satisfactory or too large. Reduce the bandwidth setting until the system just begins to oscillate. At this
point, the bandwidth is too small. Note the bandwidth setting that just caused the system to oscillate, and
record the period of oscillation for use in determining the Integral Gain setting. To set the proportional
bandwidth, multiply the current bandwidth setting by 1.5 and use it as your new bandwidth setting. The
system should come into control and maintain a steady temperature near the set point.
INTEGRAL GAIN monitors the difference between the set point and the actual temperature. Its
function is to slowly change the output power until the difference between actual temperature and set
temperature is zero.
The function works by integrating the error signal at fixed intervals. The intervals are expressed in
repeats per minute. The acceptable range for the TC-24-25 is 0.01 to 10 repeats per minute. Start with a
setting determined by the following formula:
Integral Gain = 1/(2 x T) where “T” is the period of oscillation measured above. The period is expressed
in minutes.

19
Example: The system’s period of oscillation with the appropriately set Proportional Bandwith was 75
seconds. Therefore, the suggested Integral Gain is
Integral Gain = 1/(2 x 1.25 minutes) = 0.4 repeats/minute.
For slower response but better stability, reduce the Integral Gain.
DERIVATE GAIN senses the rate of change of the temperature and allows the controller to anticipate
the power needed to compensate for rapid changes in system loading. This term is generally used only on
very sluggish systems or where very quick response is necessary. The acceptable range for the TC-24-25
is 0.1 to 10 cycles per minute.
To determine an appropriate derivate rate, use the following formula:
Derivate Gain = Integral Gain/10.
Continuing the above example, the Derivate Gain would be 0.04 cycles per minute.
NOTE: DERIVATIVE GAIN is difficult to apply and often causes more trouble than it is worth. If you
are not experienced in process control, you may be better off leaving the DERIVATIVE GAIN at zero.

20
APPENDIX C Serial Communications
I. Definitions:
All numeric values are in hexadecimal format.
Use lowercase ASCII characters.
(stx) Start of text character (*) 2a hex.
(etx) End of text character (carriage return) or 0d hex.
(ack) Acknowledge character (^) 5e hex.
AA Address characters are ASCII characters from 0 through 9 or a through f.
00 is the only address that should be used for the TC-24-25 RS-232.
CC Command characters are ASCII characters from 0 through 9 or a through f.
DDDDDDDD Hex two’s-complement return or send value.
1d = 00000001
-1d=ffffffff
SS The 8-bit (modulo 256) checksum of characters sent to/from the controlling computer.
This is represented as 2 ASCII hex characters. The checksum calculation excludes the
characters (stx), SS, (etx). The TC-24-25 RS232 sums (in an 8-bit register) the ASCII
values of the characters sent to/from the controlling computer. Any overflow is truncated,
leaving the 8-bit (modulo 256) checksum. When the controller is receiving data, this
number (as represented by two hex characters) is compared to the two ASCII character
hex checksum sent by the controlling computer. The TC-24-25 RS232 will respond as
shown below depending on whether or not the checksums match. When the controlling
computer is receiving data the checksum sent by the controller can be used to make sure
the data has not been received with an error. Remember, when finding the ASCII value for
a hex number (a, b, c, d, e, and f) be sure to use lower case letters.
To write a command to a controller, the controlling computer must send the following ASCII characters:
(stx)AACCDDDDDDDDSS(etx)
If the temperature controller receives the command and the checksum is correct, the temperature
controller will respond by sending back the “send value” and the checksum of those eight ASCII
characters:
(stx)DDDDDDDDSS(ack)
To query a controller, there is no send value so the controlling computer only needs to send the following
ASCII characters:
(stx)AACCSS(etx)
If the temperature controller receives the query and the checksum is correct, the temperature controller
will respond by sending back a “return value” and the checksum of those eight ASCII characters:
(stx)DDDDDDDDSS(ack)
Table of contents
Other TE Technology Temperature Controllers manuals
