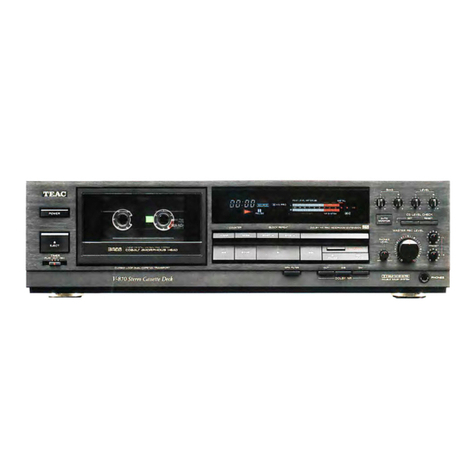
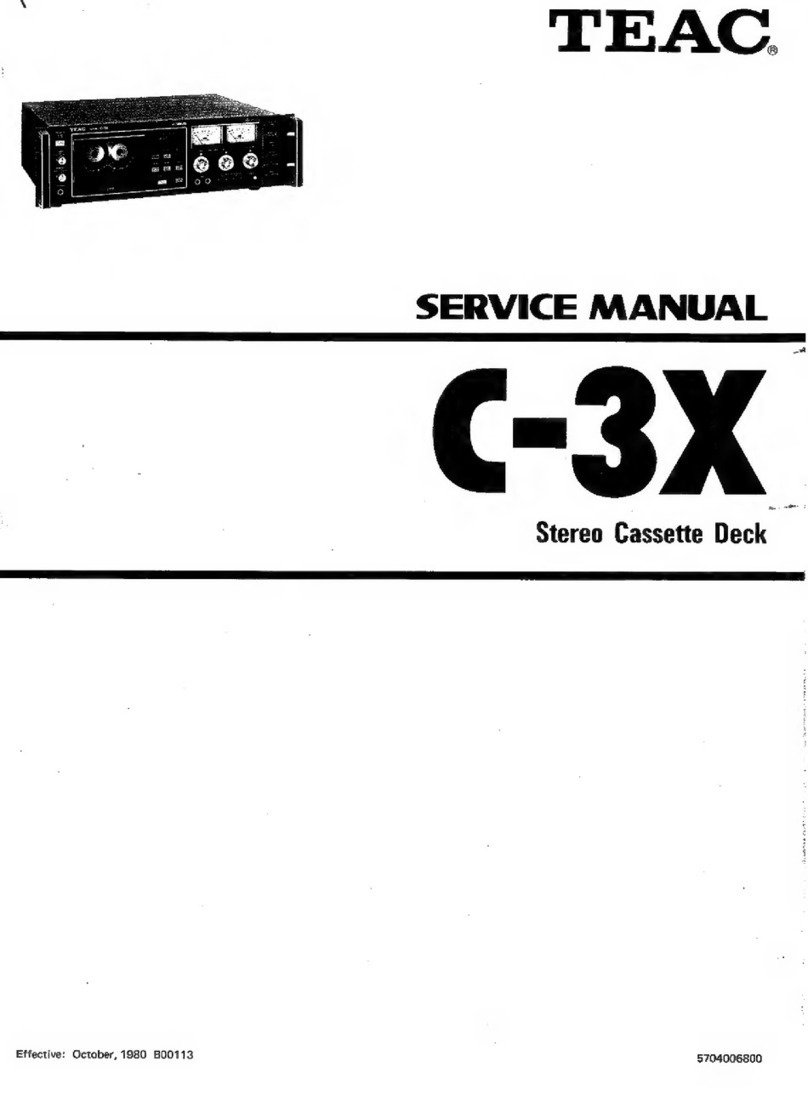
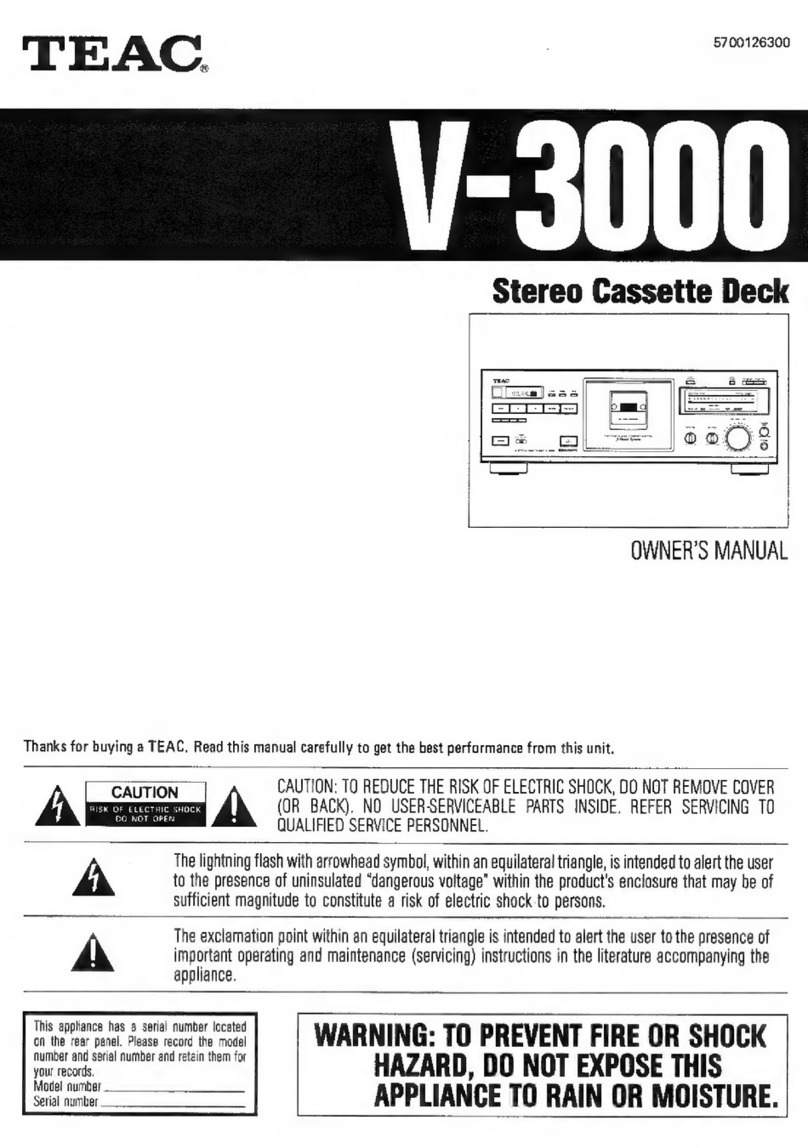
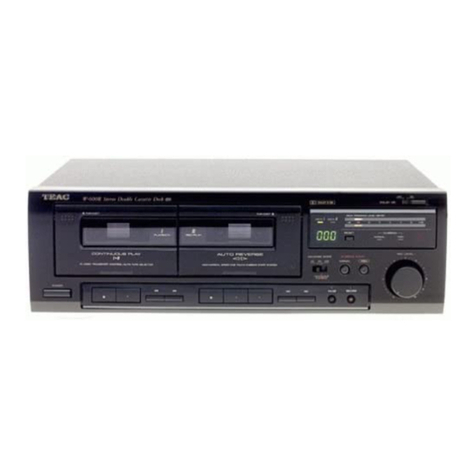
Teac V-770 User manual

TEAC.
oe
Stereo
Cassette
Deck
Thanks
for
buying
a
TEAC.
Read
this
manual
carefully
to
get
the
best
performance
from
this
deck.
Nous
vous
remercions
pour
I’achat
d’un
appareil
TEAC.
Lire
ce
manuel
avec
attention
pour
en
obtenir
les
meilleures
performances
possibles.
Vielen
Dank
fiir
den
Kauf
dieses
TEAC-Gerats.
Bitte lesen
Sie
diese
Anleitung
sorgfatig
durch,
um
die
Leistungfahigkeit
dieses
o
Decks
stets
optimal
nutzen
zu
konnen.
OWNER
Ny
MANUAL
zi
JANUEL
DU
PROPRIETAIRE
Grazie
per
aver
acquistato
un
prodotto
TEAC.
Leggere
atten-
tamente
questo
manuale
per
ottenere
le
migliori
prestazioni
da
BEDIENUNGSANLEITUNG
Wena
redous
wes
17
ene
MANUALE
DELLE
ISTRUZIONI
......24
CAUTION
|
CAUTION:
TO
REDUCE
THE
RISK
OF
ELECTRIC
SHOCK,
DO
NOT
REMOVE
COVER
RISK
OF
ELECTRIC
SHOCK
(OR
BACK).
NO
USER-SERVICEABLE
PARTS
INSIDE.
REFER
SERVICING
TO
ee
QUALIFIED
SERVICE
PERSONNEL.
The
lightning
flash
with
arrowhead
symbol,
within
an
equilateral
triangle,
is
intended
to
alert
the
user
A
to
the
presence
of
uninsulated
“dangerous
voltage”
within
the
product's
enclosure
that
may
be
of
sufficient
magnitude
to
constitute
a
risk
of
electric
shock
to
persons.
The
exclamation
point
within
an
equilateral
triangle
is
intended
to
alert
the
user
to
the
presence
of
A
important
operating
and
maintenance
(servicing)
instructions
in
the
literature
accompanying
the
appliance.
ante
a
pre
Pease
rere
ode
WARNING:
TO
PREVENT
FIRE
OR
SHOCK
wes
HAZARD,
DO
NOT
EXPOSE
THIS
Se
unter
APPLIANCE
TO
RAIN
OR
MOISTURE.

Stereo
amplifier
Amplificateur
stéréo
Stereo-Verstarker
Amplificatore
stereo
|
|
Rear
pane!
|
Panneau
arriére
Riickplatte
Pannello
posteriore
Normal
Tapes
Bandes
normales
Normalbander
Nastri
Normales
Chrome
(Cobalt)
Tapes
Bandes
au
chrome
(Cobait)
Chrombénder
(Kobalt)
Nastri
Cromo
(Cobalto}
WZ70:>
5}
Metal
Tapes
Bandes
métal
Metallbander
Nastri
Metal
|
©
Tape
position
identification
holes.
f
|
©
Trous
d’identification
de
type
de
bande.
|
|
©
Bandsorten-Identifikationséffnungen.
©
Fori
di
identificazione
de
tipo.
Fig.
3
Fig.
4
Abb.3
Abb.4
Capstan
Pinch
Roller
Cabestan
Galet
presseur
Capstan
Andruckrolle
Capstan
Rullo
di
presa
Erase
Head
Record/Playback
Combination
Head
Téte
d'effacement
‘Téte
combinaison
d’enregistrement/lecture
Léschkopf
Aufnahme/Wiedergabe-Kombinationskopf
Testina
dicancellazione
—_Testina
combinata
di
registrazione/
riproduzione
Fig.
5
Abb.
5
Amplifier
Amplificateur
Verstarker
Amplificatore
Tuner
Spare
AC
outlet
Prise
CA
de
rechange
Zusatzliche
Netzsteckdose
Presa
AC
di
riserva
Syntoniseur
)
Tuner
|
Sintonizzatore
Audio
timer
Minuterie
audio
Audio-Schaltuhr
Temporizzatore
audio
re
©
=<
AC
power
Alimentation
CA
Netzspannung
Alimentatione
AC

Reference
IIlustrations
Bezugsabbildungen
Illustrations
de
référence
IIlustrazione
di
riferimento
1-770
Stera0
Cassette
Deck
@
2
3
4
cy
|
|
|
I
|
|
|
|
|
i
=
t
t
a
Fil.
hie
|are
[Start
Memo]
[
PEAK
LeveL
METER
(am)
[NORM
GrO2
METAL
1).
1)
CT]
|
BeuRce]|
stor
memo)
AOTADEAEALETLUTLLL
1510
aa
TUMATTiNiaMMLGTANAAULITIyA
CTTEPEEEE
EEO
DOBOoUC)
[NR
SYSTEM
[MPX
FILTER]
|
|
|
©

Precautions
ey
Environment
Avoid
using
the
deck
in
the
following
cir-
cumstances:
eHigh
temperature
(close
to
heater,
in
direct
sunlight
etc.)
Extremely
low
temperature,
@
Excessive
humidity.
Dusty
atmosphere,
Where
power
line
voltage
fluctuation
is
severe
(the
use
of
a
voltage
regulator
may
be
advisable),
Cassette
Tape
(Fig.
2)
Tape
Selection:
For
the
automatic
tape
select
function
to
work
properly,
metal
and
chrome
(cobalt)
formula
tapes
must
have
tape
identification
holes.
Tape
Handling:
Do
not
store
tape
in
the
following
places:
On
top
of
heaters,
in
direct
sunlight
or
in
any
other
high-temperature
areas.
«
Near
speakers,
on
TV
sets
or
amplifiers
or
near
any
strong
magnetic
fields.
«
High-humidity
areas
or
dirty,
dusty
areas,
Avoid
dropping
or
subjecting
the
cassettes
‘to
excessive
shock,
Voltage
Conversion
(For
general
export
models)
(Fig,
3.)
If
it
is
necessary
to
change
the
voltage
requirements
of
the
deck
to
match
your
area,
use
the
following
procedure:
1.
DISCONNECT
POWER
LINE
CORD.
2.
Using
a
screwdriver,
turn
the
selector
until
the
desired
voltage
marking
ap-
pears,
IMPORTANT
(for
U.K.
Customers)
The
wires
in
this
mains
lead
are
coloured
in
accordance
with
the
following
code:
BLUE:
NEUTRAL
BROWN:
LIVE
As
the
colours
of
the
wires
in
the
mains
|
lead
of
this
apparatus
may
not
corres-
pond
with
the
coloured
markings
identi-
fying
the
terminals
in
your
plug,
pro-
|
ceed
as
follows:
a
The
wire
which
is
coloured
BLUE
must
be
connected
to
the
terminal
which
is
marked
with
the
letter
N
or
coloured
“BLACK.
The
wire
which
is
coloured
BROWN
must
be
connected:
to
‘the
terminal
which
is
marked
with
the
letter
L
or
coloured
RED.
In
the
U.K.,
this
unit
is
sold
without
an
AC
plus.
et
©
PEA
This
product
is
manufactured
to
comply
with
the
radio
interference
of
EEC
direc-
tive
“82/499/EEC.””
*
Dolby
noise
reduction
and
HX
PRO
head-
room
extension
manufactured
under
license
from
Dolby
Laboratories
Licensing
Corporation.
HX
PRO
originated
by
Bang
and
Olufsen.
“Dolby”,
the
double-D
symbol
and
“HX
PRO”
are
trademarks
of
Dolby
Laboratories
Licensing
Corpo-
ration,
Connections
(Fig.
1)
Turn
off
power
for
all
equipment
before
making
connections,
«Read
instructions
for
each
component
you
intend
to
use
with
the
deck.
Features
and
Controls
(Fig.
6)
=,
©
POWER
Switch
Press
to
switch
the
deck
on.
The
multi
counter,
etc,
will
light.
Press
again
to
turn
the
deck
off.
Note:
When
power
is
switched
off,
be
sure
to
wait
at
least
2
seconds
before
switching
power
back
on.
@
EJECT
Button
In
the
stop
made,
press
to
open
the
cassette
holder.
©
Cassette
Holder
@
MULTI
DISPLAY
i)
Multi
Counter
Tape
Counter
Mode
In
this
mode,
the
counter
functions
like
a
conventional
tape
counter,
counting
up
when
the
tape
is
moving
forward
and
down
when
the
tape
is
being
rewound.
The
display
can
be
cleared
by
pressing
the
CLEAR
button,
resetting
the
counter
index
to
“0000”.
mar
Poe
[ns [r+
-
Tape-Run-Time
Counter
Mode
In
this
mode,
tape
travel
is
measured
in
increasing
minutes
and
seconds
up
to
a
maximum
of
99.59
(99
minutes
59
se-
conds).
The
display
can
be
cleared
by
pressing
the
CLEAR
button,
resetting
the
counter
index
to
“00,00".
To
change
the
display
mode,
press
the
MODE
button.
cr cr
- =
CPS
Display
Indicates
the
number
preset
through
the
CPS
(Computomatic
Program
Search)
facilities.
CDS
Display
Indicates
the
number
preset
through
the
CDS
(Computomatic
Direct
Selection)
facilities,
1
[~~
2)
AUTO
MONITOR
Indicators
(TAPE/
SOURCE)
TAPE:
Lights
when
the
tape
signal
is
being
monitored.
SOURCE:
Lights
when
the
input
signal
is
being
monitored.
For
de-
tailed
information,
see
@AUTO
MONITOR
Select
Button.
3)
Block
Repeat
Indicators
START
MEMO(ry):
Lights
up
when
START
MEMO
button
@_
is
pressed,
indicating
memorization
request
is
accepted,
STOP
MEMO(ry):
Lights
up
when
the
STOP
MEMO
button
@
is
pressed,
4)
PEAK
LEVEL
METER
This
meter
shows
the
peak
level
of
the
input
or
playback
signal.
In
the
record
mode,
the
meter
indicates
the
level
of
the
source
signals
which
have
been
ad-
justed
with
the
RECORDING
LEVEL
controls.
The
highest
peak
to
be
record-
ed
should
generally
not
exceed
the
meter
reference
reading
for
the
type
of
tape
used.
During
playback,
the
meter
indicates
the
level
of
signals
recorded
on
the
tape.
5
Tape
Type
Indicators/Meter
Reference
Indicators
The
deck
automatically
detects
the
type
of
tape
which
has
been
loaded,
and
these
indicators
(NORMal
CrO.
and
METAL)
indicate
the
type
of
tape
being
used.
A
dash
indicator
below
the
appropriate
tape
type
indicator
is
provided
as
the
meter
reference
reading
for
the
type
of
tape
used.
(6)
Transport
Mode
Indicators
(PLAY/REC/
PAUSE)
PLAY:
Lights
when
deck
is
in
the
playback
and
record
made,
REC:
Lights
when
deck
is
in
the
record
and
record-ready
mode,
and
flashes
dur-
ing
record-muting,
PAUSE:
Lights
when
deck
is
in
the
stand-by
mode
for
playback
or
recording.

7
OO
HX
PRO
Indicator
The
indicater
lights
during
record-play
or
record-pause
mode
and
blinks
during
record-muting
mode,
For
detailed
description
of
OO
HX
PRO,
see
page
31,
8)
MPX
FILTER
Indicator
This
indicator
lights
to
show
the
MPX
FILTER
is
on,
9)
NR
SYSTEM
Indicators
These
indicators
show
which
noise
re-
duction
system
is
selected.
©
AUTO
MONITOR
Select
Button
and
Indicators
This
button
allows
you
to
select
which
signal
is
to
be
monitored
and
to
display
its
level
on
the
meter.
TAPE:
Selects
the
tape
signal
either
in
playback
and
record
mode,
SOURCE:
Selects
the
input
signal
con-
nected
to
the
LINE
IN
jacks.
The
level
displayed
by
the
meter
depends
on
the
setting
of
the
RECORDING
LEVEL
controls.
When
the
power
is
applied
to
the
deck,
the
monitor
mode
is
set
to
TAPE,
Pressing
this
button
each
time
changes
the
monitor
mode
and
the
indicator
lights
to
show
the
present
monitor
mode.
The
AUTO
MONITOR
function
automatically
changes
the
monitor
mode
in
record
and
record-
pause
mode,
In
recording,
the
monitor
should
be
set
to
TAPE
to
check
the
record-
ed
sound.
When
you
enter
the
record-
pause
mode
by
pressing
the
PAUSE
button,
the
monitor
signal
will
be
changed
to
SOURCE
and
when
you
resume
recording
by
pressing
the
»
button
again,
the
monitor
source
will
be
back
to
TAPE
automatically.
@
>
(Play)
Button
Pressing
this
button
causes
the
tape
to
run
at
normal
speed (from
left
to
right).
If
the
deck
is
in
the
record-pause
mode,
pressing
the
»
button
resumes
recording.
To
initiate
the
record
mode,
while
holding
in
the
RECORD
button,
simulaneously
press
the
»
button.
©
<«
/
>>
(Rewind/Fast-forward)
Button
Pressing
the
<4
side
rewinds
the
tape
at
high
speed
(from
right
to
left).
Pressing
the
>>
side
fast
forwards
the
tape
at
high
speed
(from
left
to
right),
When
the
tape
is
fully
rewound
or
fully
wound,
the
stop
mecha-
nism
automatically
stops
the
tape
transport.
©
STOP
Button
Press
to
stap
the
tape
and
release
any
other
mode,
©
RECORD
Button
Press
this
button
together
with
the
>
but-
ton
to
initiate
recording.
@
PAUSE
Button
Use the
PAUSE
button
to
temporarily
stop
tape
motion
during
recording
or
playback.
Press
the
»
button
to
release
the
pause
mode,
In
the
stop
mode;
pressing
the
PAUSE
button
makes
the
deck
enter
the
play-pause
mode
and
pressing
the
PAUSE
button
together
with
RECORD
button
initiates
the
record-pause
mode.
@
REC
MUTE
Button
Press
this
button
during
recording
to
pro-
vide
about
4
seconds
of
blank
space
on
a
tape.
Then
the
deck
will
enter
the
record-
pause
mode.
Press
the
>
button
to
start
recording
again,
(See
“Record
Muting
Operation”.)
@®
PHONES
Jack
Connect
8
ohms
stereo
headphones
to
this
jack
for
private
listening
or
monitoring.
®
PHONES
LEVEL
Control
This
knob
is
used
to
adjust
the
output
level
to
the
PHONES
jack,
This
knob
does
not
affect
the
output
level
to
the
OUTPUT
jacks
on
the
rear
panel
nor
the
level
in-
dicated
on
the
PEAK
LEVEL
METER.
@®
BIAS
FINE
Tuning
Control
This
control
allows
fine
bias
level
setting
when
recording.
The
center
“click”
position
provides
a
nominal
amount
of
bias
current
depending
on
the
type
of
tape.
Turning
the
control
toward
+
increases
the
amount
of
bias
and
thus
decreases
high
frequency
response.
Turning
the
control
toward
—
decreases
the
amount
of
bias
and
thus
increases
high
frequency
response.
Keep
this
control
in
the
center
position
when
it’s
not
being
used.
®
NR
SYSTEM
Select
Button
Used
to
select
the
desired
NR
system
IN/OUT
Switch:
Use
this
switch
to
ac-
tivate
and
deactivate
the
noise
reduction
system.
OOB/OOC
Switch:DOB
is
for
recording
or
playback
using
Dolby
B
type
NR.
OOC
is
for
recording
or
playback
us-
ing
Dolby
C
type
NR.
@
BLOCK
REPEAT
Memory
Buttons
Press
the
START
MEMO
button
at
the
desired
start
position
for
playback,
then
the
STOP
MEMO
button
at
the
desired
stop
position,
(For
more
details
refer
to
page
8.)
®
CPS/CDS
Button
This
button
is
provided
for
the
CPS,
CDS
and
INTRO
CHECK-CPS
functions.
See
the
following
items
for
detailed
explanations
of
these
functions.
@
MULTI
DISPLAY
INTRO
CHECK
Function
(page
7.)
CPS
(Computomatic
Program
Search)
Func-
tion
(page
7.)
CDS
(Computomatic
Direct
Selection)
Function
(page
8.)
®
INTRO
CHECK
Button
When
pressed,
the
deck
plays
the
first
10
seconds
(approx.)
of
each
tune
and
fast-
winds
the
sections
in
between.
(See
page
7)
®
MPX
FILTER
Button
Press
this
button
to
IN
when
making
Dolby
NR
recording
of
an
FM
broadcast;
it
elimi-
nates
the
pilot
tone
(19kHz)
and
sub
carrier
tone
(38
kHz)
of
the
FM
broadcast
which
could
cause
misoperation
of
the
Dolby
noise
reduction
system.
To
release
this
function,
press
this
button
to
OUT.
®
TIMER
Switch
PLAY:
For
timer
playback.
QUT:
Normal
position,
Timer
control
not
possible.
REC:
For
timer
recording,
CAUTION:
TIMER
Switch
Operation
Set the
TIMER
switch
to
the
OUT
position
whenever
the
timer
function
is
not
being
used.
If
the
TIMER
switch
is
in
the
REC
or
PLAY
position
when
power
is
applied,
the
deck
will
enter
the
record
or
play
mode,
Even
though
the
deck
is
set
to
allow
timer
recording
operation,
the
deck
will
enter
the
play
mode
if
the
record-protection
tabs
are
removed
from
the
cassette.
@
RECORDING
LEVEL
Controls
These
slide
controls
are
used
to
adjust
the
level
of
the
input
signal
before
it is
recorded
on
the
tape,
The
left
and
right
channels
may
be
adjusted
separately
if
required.
The
highest
peak
to
be
recorded
should
generally
not
exceed
the
meter
reference
reading
for
the
type
of
tape
used
.
@®
COUNTER
MODE
Button
Used
to
select
one
of
the
display
modes.
(Conventional
tape
counter
or
tape-run-
time
counter).
@®
COUNTER
CLEAR
Button
Pressing
the
CLEAR
button
resets
either
the
conventional
tape
counter
or
the
tape-run-
time
counter
to
zero.
Operations
TT
Playback
&
Recording
Stereo
Playback
1,
Set the
TIMER
switch
to
OUT.
2,
Press
the
POWER
switch
to
ON,
3.
Load
a
pre-recorded
cassette.
4.
Select
the
NR
system
with
the
NR
SYSTEM
selectors.
5.
Press
the
®
button,
6.
Adjust
the
volume
with
the
controls
on
the
amplifier,
Stereo
Recording
Recording
from
a
stereo
system.
1.
Set
the
TIMER
switch
to
OUT.

.
Press
the
POWER
switch
to
ON.
.
Load
a
recordable
cassette,
.
Select
the
NR
system
with
the
NR
SYSTEM
selectors.
5.
Press
the
MPX
FILTER
button
to
IN
when
making
a
Dolby
NR
recording
of
an
FM
broadcast,
6.
Press
the
PAUSE
button
together
with
RECORD
button
(both
indicators
light).
This
enables
you
to
adjust
the
recording
level
without
actually
recording
on
the
tape,
7.
Adjust
the
BIAS
FINE
tuning
control
described
in
“Using
the
BIAS FINE
Tuning
Control”,
8.
Adjust
the
RECORDING
LEVEL
con-
trols
so
that
the
loudest
peak
to
be
recorded
just
makes
the
meters
briefly
indicate
the
meter
reference
reading
for
the
type
of
tape
used.
9,
Press
the
®
button
to
start
recording
and
the
AUTO
MONITOR
will
be
changed
to
TAPE
automatically.
Note:
eTo
momentarily
stop
recording,
press
the
PAUSE
button.
Pen
Note
Recording
prerecorded
tapes,
records,
or
other
published
or
broadcast
material
may
infringe
copyright
laws,
Check
these
laws
befare
recording.
Setting
the
Recording
Level
Setting
the
recording
level
correctly
is
essential
if
you
want
to
make
top-quality
recordings.
If
the
level
is
too
low,
the
recording
will
be
noisy.
If
the
level
is
set
too
high,
the
recording
will
be
distorted.
Generally
speaking,
the
recording
level
should
be
set
so
that
the
loudest
peak
to
be
recorded
makes
the
meters
briefty
indicate
the
meter
reference
reading
for
the
type
of
tape
used.
If
the
meters
peak
over
the
reference
reading,
decrease
the
recording
level
by
sliding
the
RECORDING
LEVEL
controls
back,
until
the
loudest
peak
is
re-
tained
(held)
within
the
reference
reading.
However,
some
program
material
of
different
tape
formulations
may
require
higher
or
lower
recording
levels.
With
a
little
time
and
practice
you
will
be
able
to
select
the
critical
recording
level
that
gives
you
the
best
hi-fi
recordings.
The
type
and
condition
of
the
tape,
as
well
as
the
type
of
music
source
you
are
recording
will
affect
the
optimum
setting
of
the
recroding
level.
Using
the
BIAS
FINE
Tuning
Control
1.
Place
the
deck
into
the
record
mode
and
begin
recording
by
using
a
disc
or
a
pre-recorded
tape
of
which
sound
quality
you
are
familiar
with,
2.
Set
the
AUTO
MONITOR
switch
to
TAPE
to
monitor
the
reproduced
sound.
If
the
high
frequency
sound
seems
higher
than
the
original
of
which
you
are
comparing,
turn
the
BIAS FINE
tuning
control
toward
“+”
to
obtain
the
best
possible
monitoring
sound
by
ear,
On
the
other
hand,
if
the
high
frequency
sound
seems
low,
turn
the
control
to-
ward
“~"
until
the
appropriate
bias
cur-
rent
is
obtained.
3.
As
a
final
check,
alternatively
set
the
AUTO
MONITOR
to
SOURCE
and
TAPE
to
confirm
the
correct
setting
of
the
BIAS FINE
tuning
control
by
com-
paring
the
recorded
sound
against
the
original.
Record
Muting
Operation
The
capability
of
creating
blank
unrecorded
(erased)
portions
on
a
tape
during
recording
is
a
real
advantage
is
many
recording
situa-
tions.
For
instance,
you
may
want
to
eliminate
undesired
portions
of
an
FM
broadcast
that
you
are
recording,
such
as
commercials,
station
breaks
or
announce-
ments,
You
may
want
to
record
a
complete
program
with
controlled
spacing
between
each
song.
Such
blank
portions
on
a
tape
can
be
easily
left
using
the
REC
MUTE
function.
1,
Automatic
Spacing
Operation
—
for
a
4-
second
blank
—
(during
recording)
Press
the
REC
MUTE
button
during
recording.
The
tape
movement
conti-
nues,
and
a
blank
space
of
about
4
seconds
is
recorded
(the
REC
indicator
flashes).
The
deck
then
switches
automatically
to
the
record-pause
mode
(both
the
REC
and
PAUSE
indicators
light).
To
begin
recording
the
next
tune,
press
the
»
button
(the
PAUSE
indicator
goes
off},
2.
Automatic
Spacing
Operation
—
for
a
4-second
blank
—
(during
record-pause)
During
the
record-pause
mode,
pressing
the
REC
MUTE
button
causes
the
REC
indicator
to
blink
to
show
the
record-
muting
stand-by
mode.
As
soon
as
the
>
button
is
pressed,
the
tape
runs
and
the
above-mentioned
automatic
spacing
operation
will
be
initiated,
3.
Fora
Blank
of
More
Than
4
Seconds
During
recording,
keep
the
REC
MUTE
button
pressed
for a
longer
blank
period.
Release
the
button
to
enter
the
record-
pause
mode.
To
begin
recording,
press
the
»
button.
4,
Fora
Blank
of
Less
Than
4
Seconds
After
peessing
the
REC
MUTE
button
during
recording,
press
the
PAUSE
-~6—
button,
before
the
4-second
interval
has
expired,
to
cancel
the
muting
mode
and
engage
the
record-pause
made.
To
begin
recording,
press
the
>
button,
Or
press
the
REC
MUTE
button
again
to
resume
recording
without
stopping
the
tape.
Dubbing
Deck-to-deck
copying
of
tapes
(dubbing)
can
be
done
without
using
an
external
am-
plifier,
Operation
is
the
same
as
standard
record
and
playback
procedures
described
in
the
record
and
playback
sections,
This
deck
can
be
used
as
the
“master”
re-
corder
with
a
second
recorder
used
as
the
“slave”
recorder.
Connect
the
output
of
the
master
to
the
input
of
the
slave
recorder,
To
use
this
deck
and
the
second
recorder
in
opposite
rolles,
simply
reverse
the
input
and
Output
connections,
Punch-In
Recording
During
playback,
you
can
go
from
repro-
duce
to
record
by
halding
in
the
RECORD
button
and
simultaneously
pressing
the
»
button.
A
new
recording
will
start
from
that
location.
This
operation
allows
you
to
re-
cord
over
or
correct
a
recorded
section
of
the
tape
without
pressing
STOP
button
first
and
then
enabling
the
record
mode,
A
previously
recorded
tape
will
be
auto-
matically
erased
when
you
make
a
new
recording
on
it.
Alternatively
it
can
be
erased
by
“recording”
on
it
with
the
RE-
CORDING
LEVEL
controls
set
to
MIN.
Multi
Counter
Function
With
the
multi-counter
facilities
incorpa-
rated
in
the
unit,
there
are
two
different
display
modes
available,
depending
on
the
setting
of
the
COUNTER
MODE
button,
Tape
Counter
Mode:
The
counter
functions
as
a
conventional
tape
counter,
Tape-run-time
Counter
Mode:
The
counter
measures
tape
travel
in
minutes
and
seconds,
Using
as
a
Tape
Counter
Using
the
COUNTER
MODE
button,
call
up
the
tape
counter
mode;
a
4-digit
display
will
appear.
Its
function
is
identical
to
that
of
conventional
tape
indexing
counters.
The
counter
counts
upwards
as
the
tape
moves

from
left
to
right,
and
downwards
during
rewind
as
the
tape
moves
from
right
to
left.
The
indicated
numerals
are
not
related
to
time
lapse
and
are
not
compatible
with
the
counter
readings
of
other
cassette
decks.
A
typical
example
of
using
this
display
in
the
conventional
tape
counter
mode
is
to
first
load
a
cassette
and,
before
recording,
press
the
CLEAR
button
resetting
the
counter
to
“0000".
Then
note
the
counter
reading
at
the
beginning
of
each
piece
of
music
to
facilitate
locating
a
particular
selection
when
you
wish
to
play
it
back.
Using
as
a
Tape-run-time
Counter
Using
the
COUNTER
MODE
button,
call
up
the
tape-run-time
mode;
a
dot
appears
between
the
2nd
and
3rd
digit.
In
this
mode,
tape
travel
is
measured
in
increasing
minutes
and
seconds
while
the
tape
is
running
at
normal
speed
during
recording
(including
record
muting)
and
playback.
Counting
stops
during
rewind
and
fast-
forward,
This
function
can
be
used
to
measure
the
approximate
length
of
a
re-
corded
song
or
to
make
a
calculated
estima-
tion
of
how
much
tape
is
left.
“Visible”
and
“Invisible”
Counters
Both
counter
modes
are
switchable
at
any
time,
with
the
one
selected
appearing
on
the
display
and
the
other
functioning
in
mem-
ory.
For
example,
when
the
conventional
tape
counter
is
selected
with
the
COUNTER
MODE
button,
counting
of
the
tape-run-
time
also
takes
place
and
its
reading
can
be
called
up
at
any
time
by
pressing
the
COUNTER
MODE
button.
Pressing
the
CLEAR
button
resets
only
the
counter
whitch
is
visible.
Both
counters,
“visible”
and
“invisible”
are
reset
when
power
is
switched
off.
Tune
Blank
More
than
approx,
Tune
Blank_4
sec,
needed
|
BD
Direction
of
Fastforward
Play
{NMI
ORR
e
UU
Fastforward
Play
tape
travel
Approx,
10
sec.
INTRO
CHECK
facility
INTRO
CHECK
Function
This
feature
makes
searching
for
a
specific
selection
much
easier.
1.
Press
the
INTRO
CHECK
button.
2.
The
deck
enters
the
fast
forward
mode
(CP
1
appears
on
the
Multi
Counter)
to
search
for
the
beginnings
of
selections,
When
a
selection
is
detected
(CP
0
ap-
pears),
the
deck
will
play
approximately
the
first
ten
seconds
of
the
recording
and
then
fast-forward
to
the
beginning
of
the
next
selection,
To
cancel
the
INTRO
CHECK
function,
press
the
STOP
button.
4.
If
STOP
is
not
pressed,
the
INTRO
CHECK
function
is
released
when
the
tape
reaches
the
end,
oe
INTRO
CHECK-CPS
Function
Repeatedly
pressing
the
CPS
button
during
the
fast
forward
made,
while
the
CP
1
is
displayed
increases
the
CPS
number.
The
CPS
function
makes
the
deck
skip
to
a
se-
lected
recording
and
enter
the
play
mode
for
ten
seconds
and
then
resume
the
INTRO
CHECK
function,
(Pressing
the
CPS
button
during
the
play-
back
in
INTRO
CHECK
cancels
the
INTRO
CHECK
function.)
To
cancel
the
INTRO
CHECK-CPS
function,
press
any
of
the
trans-
port
control
buttons,
Notes:
Pressing
the
INTRO
CHECK
button
is
possible
in
any
tape
operation
mode,
During
intro
check,
if
STOP,
»
,
»»
or
#<_is
pressed,
the
intro
check
function
is
canceled
and
the
corresponding
mode
is
entered.
eFor
the
intro
check
function
to
work
properly,
there
must
be
a
blank
of
at
least
4
seconds
or
more
between
selections,
See
also:
“Notes
common
to
INTRO
CHECK,
CPS,
COS”,
CPS
(Computomatic
Program
Search)
Function
CPS
allows
playback
to
start
up
to
15
tunes
ahead
of
or
before
the
one
being
played.
This
function
is
performed
by
detecting
blank
spaces
of
at
least
4
seconds
between
tunes,
Blanks
can
be
created
using
the
REC
MUTE
facility.
1,
Press
the
CPS/CDS
button
repeatedly
until
the
number
of
tunes
to
be
skipped
appears
in
the
MULTI
COUNTER
(CP
1,
CP
2,
...
CP
15),
Refer
to
chart
“How
to
Select
a
Desired
Tune
Using
CPS”.
elf the
displayed
number
exceeds
the
required
one,
press
the
COUNTER
CLEAR
button
and
redo
CPS
setting,
How
to
Select
a
Desired
Tune
Using
CPS
Ex.
See
(1),
To
select
the
3rd
tune
past
the
current
tape
position,
select
“CP
3”.
(1)
Current
tape
position
(2)
In
example
(1),
if
“t’'
is
lessthan
Ahead
|
Before
4
seconds,
it
will
not
be
counted
H
as
a
blank
space.
Designate
|
“CP
2"
instead
of
“CP
3”
t
select
the
3rd
tune
in
this
case.
(3
Current
tape
position
(4)
eS
CFS}
&
T
pees
|
Before

2.
Press
the
<4
or
»®
button
depending
on
the
search
direction,
3.
As
the
tape
is
fast
wound
and
the
blank
spaces
between
tunes
are
detected,
the
displayed
number
will
decrease
until
it
reaches
CP
0,
at
which
point
playback
will
start,
Notes:
©
CPS
setting
is
possible
in
any
tape
opera-
tion
mode
except
rewind
and
fast-
forward.
To
cancel
the
CPS
function
after
search
run
has
started,
press
the
44,
>>
|
>
or
STOP
button,
The
corresponding
mode
will
be
entered
and
the
display
will
return
to
the
previously-engaged
counter
made,
«To
cancel
the
CPS
function
before
press-
ing
the
#4
or
>»
button,
press
the
COUNTER
CLEAR
or
COUNTER
MODE
button,
The
display
will
return
to
the
previously-engaged
counter
mode
and
the
current
tape
operation
mode
will
continue,
\f
the
STOP
or
»
button
is
pressed,
they
will
supersede
the
current
mode.
@See
also:
“Notes
Common
to
INTRO
CHECK,
CPS,
CDS”,
CDS
(Computomatic
Direct
Selection)
Function
CDS
system
allows
direct
access
to
any
one
of
tunes
recorded
by
presetting
the
tune
number
(up
to
15)
counted
from
the
be-
ginning
or
end
of
the
tape.
The
tune
number
can
be
preset
by
pushing
the
<4
or
p>
button
depending
on
the
search
direction
and
then
CPS/CDS
button.
“PL
1°
will
appear
on
the
MULTI
COUN-
TER
as
the
CPS/CDS
button
is
pushed
first,
the
PL
number
will
increase
by
one
each
time
the
CPS/CDS
button
is
pushed
repeatedly.
Thus
“PL
5”
will
appear
if
the
button
is
pushed
5
times,
For
example,
if
you
wish
to
search
the
3rd
tune
from
the
beginning
of
tape,
push
the
44°
button
to
rewind
the
tape
at
its
begin-
ning,
then
the
CPS/CDS
button
3
times
to
set
the
counter
to
“PL
3”,
In
the
same
way
if
you
wish
to
search
the
4th
tune
from
the
end
of
tape,
push
the
pp
button
and
CPS/CDS
button
4
times
to
set
the
counter
to
“PL
4".
After
reaching
the
beginning
of
the
desired
tune,
the
tape
is
automatically
played
back
until
the
play
mode
is
cancelled,
To
exit
from
the
CDS
mode:
Press
the
COUNTER
CLEAR
or
MODE
button
while
the
tape
is
being
rewound
{or
fast
forwarded),
before
reaching
the
beginning
(or
end)
of
tape.
elf
the
tape
has
already
reached
the
begin-
ning
(or
end)
and
is
being
fast
forwarded
(or
rewound)
to
search
for
a
tune,
press
the
€4
(or
b>),
»
or
STOP
button.
eSee
also:
“Notes
Common
to
INTRO
CHECK,
CPS,
CDS.”
Notes
Common
to
INTRO
CHECK,
CPS,
cos
:
Various
search
functions
—
INTRO
CHECK,
CPS,
CDS
—
are
performed
by
detecting
and
counting
blanks
of
about
4
seconds,
such
as
intervals
between
tunes,
Therefore,
with
the
following
types
of
tapes,
search
functions
may
not
work
correctly.
When
the
intervals
between
tunes
cannot
be
detected.
—
Intervals
of
less
than
4
seconds,
—
High
levels
of
noise
in
intervals
(due
to
recording
old
scratched
records,
poor
FM
or
AM
reception,
etc.).
When
parts
of
the
program
are
likely
to
be
detected
as
intervals
between
tunes:
—
Long
low
level
sections
in
classical
music,
etc.
—
Momentary
pause
in
a
speech
at
a
conference,
etc.
—
Continuing
low
level
portions
created
by
fading
out,
ete,
ln
the
case
of
tapes
containing
fade-outs,
because
the
length
of
the
blanks
can
differ
depending
on
how
the
fade-out
was
performed,
some
tune
intervals
may
be
detected
and
others
may
not.
This
problem
can
be
corrected
using
the
REC
MUTE
facility.
Tape
Memory
Functions
Memory
Start
Playback
1,
Press
the
START
MEMO(ry)
button
at
the
desired
position
on
the
tape
during
play,
play-pause,
record,
record-
pause
or
record-mute.
2.
Press
the
4
button
after
playback
or
re-
cording.
When
the
memorized
position
is
reached,
the
deck
will
automatically
start
playback,
Memory
Stop
1.
Press
the
STOP
MEMO
button
at
the
desired
position
on
the
tape
during
play,
play-pause,
record,
record-pause
or
re-
cord-mute.
2.
Press
the
#4
button
after
playback
or
recording,
When
the
memorized
pasi-
tion
is
reached,
the
tape
will
stop
auto-
matically.
Notes:
Memory
start
and
stop
are
also
possible
during
fast-forward.
Memory
stop
is
also
possible
during
play-
back.
For
memory
start
and
stop
to
function
properly,
the
difference
between
a
mem-
orized
position
and
the
position
where
rewind
or
fast-forward
is
engaged
must
be
10
or
larger
in
the
counter
reading,
Tape
transport
may
not
always
start
or
stop
exactly
at
the
memorized
counter
index
due
to
the
force
of
inertia
from
fast
winding,
Memory
start
and
stop
can
be
cancelled
by
pressing
the
corresponding
button
a
second
time
(the
relevant
indicator
goes
off).
Memory
position
setting
is
not
possible
during
rewind,
fast-forward
or
stop,
though
the
indicator
will
light.
In
this
case,
memory
start
or
stop
will
take
place
at
the
previously-memorized
posi-
tion,
New
start
and
stop
positions
are
mem-
orized
whenever
the
START
MEMO
or
STOP
MEMO
button
is
pressed
(in
a
functional
mode).
The
memory
is
cleared
when
power
is
switched
off
or
the
cassette
is
ejected.
Block
Repeat
Playback
1.
Set
the
START
MEMO
position
as
described
before
(the
START
MEMO
in-
dicator
lights)
at
ths
start
of
the
‘block’
you
want
to
repeat.
2.
Set
the
STOP
MEMO
position
(the
STOP
MEMO
indicator
lights)
at
the
end
of
the
black.
3.
Press
the
<4
button
to
initiate
block
repeat
playback.
eThe
tape
will
rewind
to
the
START
MEMO
position.
The
tape
will
play
automatically
from
this
position
to
the
STOP
MEMO
pasi-
tion.
eThe
tape
will
rewind
to
the
START
MEMO
position
again.
eThus
the
designated
block
will
be
played
back
repeatedly.
(a)
STOP
MEMO
START
MEMO
(8)
START
MEMO
}
‘STOP
MEMO
T
End
H
“Beginning
Sia
!
T
|
Hl
Beginning
Direction
of
tape
travel
Play
a
Rewind
>
Diection
of
ape
travel
2
Fastforward
Play
~

4.
Press
the
STOP
button
to
stop
block
repeat
playback.
(See
illustration
A.)
If
the
STOP
MEMO
position
comes
before
the
START
MEMO
position,
the
block
repeat
function
works
differently.
(See
illustration
B.
1,
After
setting
both
positions,
press
the
44
or
D>
button
to
reach
the
START
MEMO
position.
2.
Playback
will
be
repeated
in
the
fol-
lowing
loop:
The
tape
will
play
from
the
START
MEMO
position
to
the
end.
The
tape
will
rewind
to
the
beginning.
The
tape
will
play
from
the
beginning
to
the
STOP
MEMO
position.
The
tape
will
fast-forward
to
the
START
MEMO
position.
Notes:
eFor
block
repeat
playback
to
function,
the
difference
between
the
START
MEMO
and
STOP
MEMO
positions
on
the
tape
counter
must
be
at
least
a
two-
digit
number
(10
or
larger),
Tape
memory
functions
including
block
repeat
playback
are
not
compatible
with
the
CPS,
CDS
and
INTRO
CHECK
func-
tions;
they
have
priority.
Timer-Controlled
Operation
(Fig.
5)
Timer-Controlled
Recording
Operation
1.
Connect
your
deck
and
stereo
system
to
a
commercially
available
audio
timer
as
shown
in
the
diagram.
2.
Make
all
the
preparations
as
for
normal
recording,
but
leave
the
deck
in
the
stop
mode,
3.
Set
the
audio
timer
to
the
required
start
(power
on)
and
stop
(power
off)
times.
4.
Set
the
TIMER
switch
on
the
deck
to
REC.
When
the
preset
start
time
is
reached,
power
will
be
supplied
and
recording
will
start.
Timer-Controlled
Playback
Operation
1.
Check
that
the
deck
is
correctly
con-
nected
to
the
amplifier
for
normal
play-
back
operation.
2.
Connect
the
deck
and
amplifier
to
a
audio
timer
as
for
timer-controlled
re-
cording
(above).
3.
Make
all
preparation
as
for
normal
play-
back,
but
do
not
set
the
tape
in
motion.
4.
Set
the
audio timer
to
the
required
start
(power
on)
and
stop
(power
off)
times.
5.
Set
the
TIMER
switch
on
the
deck
to
PLAY,
When
the
preset
start
time
is
reached,
power
will
be
switched
on
and
play-
back
will
start.
Maintenance
(Fig.
4)
The
heads
and
tape
path
should
be
cleaned
and
demaynetized
periodically.
Cleaning
Tape
Path
Apply
head
cleaning
fluid*
to
special
cotton
swabs
or
a
soft
cloth,
and
lightly
rub the
heads,
capstans
and
all
metal
parts
in
the
tape
path,
Also
clean
the
pinch
rollers
using
rubber
cleaning
fluid*.
*Both
are
available
in
TEAC
HC-1
and
RC-1
in
the
U.S.A,
or
TEAC
TZ-261
Tape
Recorder
Cleaning
Kit
in
other
areas,
Demagnetizing
Heads
Be
sure
that
the
power
is
off,
then
demag-
netize
the
heads
using
a
TEAC
E-3
demag-
netizer
or
equivalent.
For
details
of
its
use,
read
its
instructions,
Caution:
If
the
surface
of
the
unit
gets
dirty,
wipe
with
a
soft
cloth
or
use
a
diluted
neutral
cleaning
liquid.
Clean
off
throughly.
Do
not
use
thinner,
benzine
or
alcohol
as
they
may
damage
the
surface
of
the
unit.
Troubleshooting
ee
Basic
troubleshooting
of
a
cassette
tape
deck
is
similar
to
troubleshooting
any
other
electrical
or
electronic
equipment.
Always
check
the
most
obvious
possible
causes
first.
To
give
you
a
few
ideas
of
what
to
look
for,
check
the
following:
No
power:
Is
the
power
cord
connected?
Tape
begins
running
when
power
is
turned
on:
Is
the
TIMER
function
on?
eNo
audio
output.
Are
all
connections
properly
made?
Degraded
sound
quality:
Are
the
heads
dirty
or
magnetized?
Are
you
using
good
quality
tape?
Is
the
proper
NR
System
select
switch
on?
eUnable
to
select
record
mode:
Are
the
record
protection
tabs
on
the
tape
in
place?
Specifications
Se
Track
System
4-Track
2-Channel
Stereo
Heads
3:
1
Erase,
1
Record
and
1
Playback
(Combination)
Type
of
Tape
Cassette
tape
C-60
and
C-90
(Philips
type)
Tape
Speed
4.76
cm/sec.
(1-7/8
ips)
Motors
3:
1
DC
Servo
capstan
motor
1DC
reel
motor
1
OC
mechanism
motor
Wow
and
Flutter
(WRMS)
0.03
%
Frequency
Response
(Overall,
-20
dB)
20
—
21,000
Hz
(25
—
20,000
Hz +3
dB),
Metal
20
-
19,000
Hz
(25
—
19,000
Hz
+3
dB),
CrO2
20
—
18,000
Hz
(25
—
17,000
Hz
+3
dB),
Normal
Signal-to-Noise
Ratio
(Overall)
60
dB
(3
%
THD
Level,
Weighted)
70
dB
(Dolby
B
NR
in,
over
5
kHz)
80
dB
(Dolby
C
NR
in,
over
1
kHz)
Fast
Winding
Time
Approximately
80
seconds
for
C-60
Inputs
Line:
87
mV,
40
kohms
Outputs
Line:
0.43
V
for
load
impedance
of
50
kohms
or
more
Headphones:
8
ohms
Power
Requirements
120/220/240
V
AC,
50/60
Hz
(General
export
model)
120
V
AC,
60
Hz
(USA/Canada)
220
V
AC,
50 Hz
(Europe)
240
V
AC,
50
Hz
(U.K./Australia)
Power
Consumption
17
W
Dimensions
(W
x
H
x
D)
435
x
120
x
265
mm
(17-1/8"
x
4-3/4"
x
10-7/16")
Weight
4.9
kg
(10-9/10
Ibs)
net
eSpecifications
were
determined
using
metal
tape
except
as
noted,
improvements
may
result
in
specification
or
feature
change
without
notice.
Photos
and
illustrations
may
differ
slightly
from
production
models.

Précautions
a
observer
[
mmmrimnnnimeeensmmeeneee
el
Environnement
Eviter
d’utiliser
I’appareil
dans
les
condi-
tions
suivantes:
eTempérature
élevée
(par
exemple,
un
radiateur,
les
rayons
directs
du
soleil).
¢
Températures
extrémement
basses.
¢
Humidité
excessive.
«
Atmosphere
poussiéreuse.
«Dans
les
endroits
ol
les
fluctuations
de
la
tension
de
ligne
d’alimentation
sont
importantes
(l'utilisation
d'un
régulateur
de
tension
est
recommandée
dans
certains
cas).
Bandes
(Fig.
2)
Sélection
de
bande:
Pour
que
la
fonction
de
sélection
auto-
matique
de
bande
agisse
correctement,
les
bandes
4
formule
métal
et
chrome
(cobalt)
doivent
posséder
des
trous
d‘identi-
fication,
Manipulation
des
bandes:
Ne
pas
entreposer
les
bandes
dans
les
endroits
suivants:
Sur
des
radiateurs,
au
soleil
ou
dans
un
endroit
ou
la
température
est
élevée.
@Prés
de
haut-parleurs,
sur
des
téléviseurs
ou
amplificateurs
ou
encore
prés
de
champs
magnétiques
puissants.
¢
Dans
des
endroits
aii
I’humidité
est
élevée
ou
poussiéreux
et
sales.
Eviter
aux
cassettes
les
chutes
et
les
chocs
excessifs.
Conversion
de
tension
(pour
les
modéles
‘exportation
générale)
(Fig.
3)
S'il
est
nécessaire
de
changer
la
tension
de
votre
appareil
pour
qu’elle
corresponde
a
celle
de
votre
région,
procéder
comme
suit:
1,
DEBRANCHER
LE
CORDON
D’ALI-
MENTATION.
2.
Avec
un
tournevis,
tourner
le
sélecteur
jusqu’é
ce
que
la
marque
de
la
tension
voulue
apparaisse,
*
Réduction
de
bruit
Dolby
et
extension
de
hauteur
HX
PRO
fabriquées
sous
licence
de
Dolby
Laboratories
Licensing
Corpora-
tion.
HX
PRO
vient
de
Bang
and
Olufsen.
“Dolby”,
le
symbole
double-D
et
“HX
PRO”
sont
des
marques
déposées
de
Dolby
Laboratories
Licensing
Corpora-
tion.
Raccordements
(Fig.
1)
Couper
|’alimentation
de
tous
les
appareils
avant
d’effectuer
les
raccordements.
Lire
les
instructions
concernant
chacun
des
appareils
que
vous
avez
|‘intention
d'utiliser
avec cette
platine.
Caractéristiques
et
commandes
(Fig.
6)
oo
———
©
Interrupteur
d’alimentation
(POWER)
Le
presser
pour
alimenter
la
platine.
Le
compteur
polyvalent,
etc.
vont
s‘allumer.
Une
nouvelle
pression
coupe
I’alimentation.
Remarque:
En
coupant
I’alimentation,
bien
s‘assurer
d’attendre
au
moins
2
secondes
avant
de
remettre
I’alimentation,
@
Touche
d’éjection
(EJECT)
En
mode
darrét,
la
presser
pour
ouvir
le
porte-cassette.
®
Porte-cassette
©
Affichage
polyvalent
(MULTI
DIS-
PLAY)
1)
Comptage
polyvalent
Mode
compteur
de
bande
Dans
ce
mode
de
fonctionnement,
le
comp-
teur
fonctionne
de
maniére
conventionnelle,
donnant
des
valeurs
croissantes
lorsque
la
bande
défile
en
marche
avant
et
décroissan-
tes
lorsqu’elle
est
réembobinée.
On
peut
remettre
les
valeurs
4
zéro
en
appuyant
sur
la
touche
CLEAR,
le
compteur
revient
a
“0000”.
i
(7
[-~
=
Mode
compteur
de
durée
de
défilement
de
la
bande
Dans
ce
mode
de
fonctionnement,
le
défile-
ment
de
la
bande
est
mesuré
en
minutes
et
secondes
croissantes
jusqu’a
99.59
(99
minutes
59
secondes).
On
peut
remettre
a
zéro
le
compteur
en
appuyant
sur
la
touche
CLEAR
pour
obtenir
la
valeur
"00.00".
Pour
changer
le
mode
d’affichage,
presser
sur
la
touche
MODE.
Affichage
CPS
Indique
le
nombre
présélectionné
au
moyen
du
dispositif
de
programmation
“Computo-
matic”
(CPS).
—Y4os
Affichage
CDS
Indique
le
nombre
préréglé
par
le
systéme
CDS
(systéme
de
sélection
directe
Com-
putomatic).
i]
m
[+
@
Indicateurs
de
contdle
audio
(AUTO
MONITOR)
(TAPE/SOURCE)
TAPE:
S‘allume
quand
le
signal
de
la
bande
est
contralé,
SOURCE:
S’allume
quand
le
signal
d’entrée
est
contralé.
Pour
plus
de
détails,
voir
la
touche
de
sélec-
tion
AUTO
MONITOR
@.
3
Indicateurs
de
répétition
de
blocs
(BLOCK
REPEAT)
START
MEMO:
S’allume
lorsque
la
touche
START
MEMO
@®
est
appuyée,
indiquant
que
la
demande
de
mémorisation
est
ac-
ceptée.
STOP
MEMO:
S’allume
dans
les
mémes
conditions
lorsque
la
touche
STOP
MEMO
©
est
appuyée,
4)
Indicateur
de
niveau
de
créte
(PEAK
LEVEL
METER)
Cet
indicateur
montre
le
niveau
de
créte
du
signal
d’entrée
ou
de
lecture.
Dans
le
mode
d‘enregistrement,
‘indicateur
montre
le
niveau
des
signaux
de
la
source
qui
ont
6té
réglés
avec
les
commandes
RECORDING
LEVEL.
La
plus
haute
créte
a
enregistrer
ne
doit
généralement
pas
dépasser
la
lecture
de
référence
pour
le
type
de
bande
utilisée.
Pendant
la
lecture,
l'indicateur
montre
le
niveau
des
signaux
enregistrés
sur
la
bande.
5)
Indicateurs
de
type
de
bande/Indicateurs
de
référence
La
platine
détecte
automatiquement
le
type
de
bande
qui
a
été
chargée,
et
ces
indi-
cateurs
(NORM,
CrO,
et
METAL)
indi-
quent
le
type
de
bande
utilisée.
Un
trait
indicateur
au-dessous
de
indi-
cateur
de
type
de
bande
approprié
est
prévu
comme
lecture
de
référence
pour
le
type
de
bande
utilisé.
©
Indicateurs
de
mode
de
transport
(lec-
ture/enregistrement/pause)
(PLAY/REC/
PAUSE)
PLAY:
S’allume
quand
Ja
platine
est
en
mode
de
lecture
et
d’enregistrement.
REC:
S‘allume
quand
la
platine
est
en
mode
d’enregistrement
ou
prét
a
I‘enregis-
trement.
Il
clignote
dans
le
mode
d’enregis-
trement
silencieux,
PAUSE:
S'allume
quand
la
platine
est
en
mode
d’attente
de
lecture
ou
d’enregis-
trement.
7
Indicateur
HX
PRO
OO
Lindicateur
s‘allume
pendant
le
mode
d’enregistrement-lecture
ou
de
pause
d’en-
registrement
et
clignote
pendant
le
mode
d’enregistrement
silencieux.

Pour
la
description
détaillée
de
HX
PRO
OO
,
voir
la
page
31.
@
Indicateur
de
filtre
MPX
(MPX
FILTER)
Cet
indicateur
s‘allume
pour
montrer
que
le
filtre
MPX
est
en
circuit.
@
Indicateurs
de
systémes
de
réduction
de
bruit
(NR
SYSTEM)
Ces
indicateurs
montrent
le
systéme
de
réduction
de
bruit
sélectionné.
©
Indicateurs
et
touche
de
sélection
AUTO
MONITOR
Cette
touche
vous
permet
de
sélectionner
le
signal
4
contréler
et
dont
le
niveau
sera
affiché
sur
|‘indicateur,
TAPE:
Sélectionne
le
signal
de
la
bande
en
mode
de
lecture
ou
d'enregis-
trement,
SOURCE:
Sélectionne
le
signal
d’entrée
présent
aux
prises
LINE
IN,
Le
niveau
montré
par
l‘indi-
cateur
dépend
du
réglage
des
commandes
RECORDING
LEVEL.
Quand
Ialimentation
est
mise,
le
mode
de
contrdle
est
placé
sur
TAPE.
Chaque
pression
sur
cette
touche
change
le
mode
de
contréle
et
I'indicateur
s‘allume
pour
montrer
le
mode
de
contrdle
actuel.
La
fonction
AUTO
MONITOR
change
automatiquement
le
mode
de
contrdle
en
enregistrement
et
en
pause-enregistrement,
En
enregistrant,
le
contréleur
doit
étre
réglé
sur
TAPE
pour
contrdler
les
sons
enregistrés,
En
passant
en
mode
de
pause-
enregistrement
en
appuyant
sur
la
touche
PAUSE,
le
signal
contralé
sera
changé
en
SOURCE.
En
reprenant
|’enregistrement
en
appuyant
4
nouveau
sur
la
touche
>
,
le
contrdle
repassera
automatiquement
sur
TAPE.
@
Touche
»
(lecture)
Une
pression
sur
cette
touche
fait
défiler
la
bande
a
vitesse
normale
(de
la
gauche
vers
la
droite).
Si
la
platine
est
en
mode
de
pause-enregis-
trement,
une
pression
sur
la
touche
>
fait
reprendre
|’enregistrement.
Pour
lancer
le
mode
d’enregistrement,
tout
en
pressant
la
touche
RECORD,
appuyer
simultanément
surla
touche
>
@
Touche
de
réembobinage/avance
rapide
(
««
/
p>
)
En
appuyant
sur
le
coté
<4
la
bande
est
réembobinée
a
grande
vitesse
(de
droite
4
gauche),
En
appuyant
sur
le
coté
>>
la
bande
avance
rapidement
(de
gauche
4
droite).
En
fin
de
bande,
le
systéme
d’arrét
automatique
arréte
la
bande,
©
Touche
d’arrét
(STOP)
La
presser
pour
arréter
la
bande
et
relacher
tout
autre
mode,
©
Touche
d’enregistrement
(RECORD)
Appuyer
sur
cette
touche
ensemble
avec
latouche
>»
pour
lancer
l’enregistrement.
©
Touche
de
pause
(PAUSE)
Utiliser
la
touche
PAUSE
pour
arréter
momentanément
le
mouvement
de
la
bande
en
lecture
ou
en
enregistrement.
Appuyer
sur
la
touche
»
pour
libérer
le
mode
de
pause.
Dans
le
mode
d’arrét;
une
pression
sur
la
touche
PAUSE
fait
entrer
la
platine
dans
le
mode
de
pause-lecture
et
en
ap-
puyant
sur
les
touches
PAUSE
et
RECORD
ensemble,
le
mode
de
pause-enregistrement
est
lancé,
@®
Touche
d’enregistrement
silencieux
(REC
MUTE)
Presser
cette
touche
pendant
|’enregistre-
ment
pour
laisser
une
section
non
en-
registrée
d’environ
4
secondes
sur
la
bande.
La
platine
entrera
alors
en
mode
de
pause
d'enregistrement,
Presser
la
touche
>
pour
reprendre
|"enregistrement.
(Voir
“Fonctionnement
de
|’enregistrement
silen-
cieux”.)
@®
Prise
de
casque
d’écoute
(PHONES)
Raccorder
un
casque
stéréophonique
de
8
ohms
4
cette
prise
pour
écouter
en
privé
ou
pour
effectuer
un
contréle
d’écoute.
®Commande
de
niveau
de
casque
d’écoute
(PHONES
LEVEL)
Ce
bouton
est
utilisé
pour
ajuster
le
niveau
de
sortie
de
la
prise
PHONES.
Ce
bouton
n’a
aucun
effet
sur
le
niveau
de
sortie
des
prises
OUTPUT
du
panneau
arriére
ni
sur
le
niveau
indiqué
par
le
compteur
PEAK
LEVEL
METER.
@
Commande
de
réglage
fin
de
la
polarisation
(BIAS
FINE)
Cette
commande
permet
un
réglage
fin
du
niveau
de
polarisation
en
enregistrant.
La
position
centrale
4
déclic
fournit
la
valeur
nominale
de
courant
de
polarisation
en
fonction
du
type
de
la
bande.
Tourner
la
commande
vers
+
augmente
le
courant
de
polarisation
et
ainsi
fait
tember
la
réponse
en
haute
fréquence.
Tourner
la
commande
vers
-
diminue
le
courant
de
polarisation
et
ainsi
augmente
la
réponse
en
haute
fréquence.
Conserver
cette
commande
dans
sa
position
centrale
quand
elle
n’est
pas
utilisée.
©
Touche
de
sélection
du
systéme
de
réduction
de
bruit
(NR
SYSTEM)
Utilisée
pour
sélectionner
le
systéme
de
réduction
de
bruit
NR,
Commutateur
IN/OUT:
Utiliser
ce
commutateur
pour
activer
et
désactiver
le
systéme
de
réduction
de
bruit.
Commutateur
O08/O0C:
DOB
est
pour
|’enregistre-
ment
ou
la
lecture
avec
la
p=
réduction
de
bruit
Dolby
de
type
B.
DOC
est
pour
|’en-
registrement
ou
la
lecture
avec
la
réduction
de
bruit
Dolby
de
type
C.
©
Touches
de
mémoire
de
répétition
de
blocs
(BLOCK
REPEAT)
Appuyer
sur
la
touche
START
MEMO
(mémoire)
a
la
position
voulue
pour
le
début
de
la
lecture
puis
la
touche
STOP
MEMO,
4
celle
voulue
pour
I'arrét.
(Pour
plus
de
détails,
se
référer
4
la
page
15.)
®
Touche
CPS/CDS
Cette
touche
est
prévue
pour
les
fonctions
CPS,
CDS
et
INTRO
CHECK-CPS,
Voir
les
paragraphes
suivants
pour
les
explications
détaillées
de
ces
fonctions:
©
MULTI
DISPLAY
Fonction
INTRO
CHECK
(page
13.)
Fonction
CPS
(Computomatic
Program
Search)
(page
14)
Fonction
CDS
(Computomatic
Direct
Selec-
tion)
(page
14)
©®Touche
de
vérification
d’intro-
ductions
(INTRO
CHECK)
Lorsqu’elle
est
pressée,
la
platine
lit
les
10
premiéres
secondes
(environ)
de
chaque
morceau
et
avance
rapidement
le
temps
des
sections
entre
les
morceaux.
(Voir
page
13)
®
Touche
de
filtre
MPX
(MPX
FILTER)
Appuyer
sur
cette
touche
pour
faire
un
enregistrement
avec
réduction
de
bruit
Dolby
d‘une
émission
FM;
le
filtre
élimine
le
signal
d’identification
(19
kHz)
et
la
sous-porteuse
(38
kHz)
des
émissions
FM
qui
pourraient
perturber
le
bon
fonctionne-
ment
du
systéme
de
réduction
de
bruit
Dolby.
Pour
libérer
cette
fonction,
appuyer
sur
cette
touche
sur
OUT.
@
Commutateur
pour
fonctionnement
par
minuterie
(TIMER)
PLAY:
Pour
la
lecture
par
minuterie,
©
OUT:
Position
repos:
la
commande
par
minuterie
n’est
pas
possible,
e
REC:
Pour
I‘enregistrement
par
minuterie.
ATTENTION:
Fonctionnement
du
commu-
tateur
de
minuterie
Ce
commutateur
doit
étre
sur
QUT
lorsque
la
fonction
de
minuterie
n’est
pas
utilisée,
Si
le
commutateur
de
minuterie
est
placé
sur
REC
ou
PLAY,
lorsque
I’alimentation
parviendra
4
la
platine,
celle-ci
se
mettra
en
enregistrement
ou
en
lecture,
Méme
si
la
platine
est
réglée
pour
effectuer
un
en-
registrement
par
minuterie,
celle-ci
n’en-
registrera
pas
si
les
languettes
de
sécurité
de
la
cassette
ont
été
enlevées,
@
Commandes
de
niveau
d‘enregistre-
ment
(RECORDING
LEVEL)
Ces
commandes
curseur
sont
utilisées
pour
régler
le
niveau
du
signal
d’entrée
avant
d’8tre
enregistré
sur
la
bande.
Les
canaux

gauche
et
droit
peuvent
étre
réglés
séparé-
ment
si
nécessaire.
La
créte
la
plus
haute
a
enregistrer
ne
doit
généralement
pas
dépasser
la
lecture
de
référence
pour
le
type
de
bande
utilisée.
@
Touche
de
mode
du
compteur
(COUNTER
MODE)
Sert
4
sélectionner
I‘un
des
modes
d’affi-
chage
(compteur
de
bande
conventionnel
ou
compteur
en
durée
de
défilement).
®
Touche
de
remise
a
zéro
du
compteur
(COUNTER
CLEAR)
Appuyer
sur
la
touche
CLEAR
pour
re-
mettre
4
zéro
soit
le
compteur
de
bande
conventionnel,
soit
celui
en
durée
de
dé-
filement.
Fonctionnements
el
Lecture
et
enregistrement
Lecture
stéréo
1,
Placer
le
commutateur
TIMER
sur
OUT.
2.
Appuyer-
sur
I'interrupteur
POWER
sur
ON.
3,
Mettre
en
place
une
cassette
pré-
enregistrée.
4.
Sélectionner
le
systéme
de
réduction
de
bruit
avec
les
sélecteurs
NR
SYSTEM.
5.
Appuyer
surla
touche
>
6.
Régler
le
volume
avec
les
commandes
de
I’amplificateur.
Enregistrement
stéréo
Enregistrement
a
partir
d’une
chaine,
1,
Placer
le
commutateur
TIMER
sur
OUT.
2,
Appuyer
sur
l‘interrupteur
POWER
sur
ON.
3.
Mettre
en
place
une
cassette
enre-
gistrable.
4.
Sélectionner
le
systéme
de
réduction
de
bruit
avec
les
sélecteurs
NR
SYSTEM,
5.
Enfoncer
la
touche
MPX
FILTER
en
faisant
un
enregistrement
Dolby
NR
d'une
émission
en
FM.
6.
Appuyer
ensemble
sur
les
touches
PAUSE
et
RECORD
(les
deux
indi-
cateurs
s’allument).
Ainsi
vous
pouvez
régler
le
niveau
d'enregistrement
sans
enregistrer
sur
la
bande.
7.
Régler
la
commande
de
réglage
BIAS
FINE
décrite
dans
le
réglage
fin
de
la
polarisation
(BIAS
FINE),
a
droite.
8.
Régler
les
commandes
RECORDING
LEVEL
pour
que
la
créte
la
plus
forte
enregistrer
fasse
tout
juste
atteindre
briévement
la
lecture
de
référence
de
Vindicateur
pour
le
type
de
bande
utilisée.
9.
Appuyer
sur
la
touche
»
pour
commencer
l’enregistrement
et
AUTO
MONITOR
sera
automatiquement
changé
sur
TAPE.
Remarque:
Pour
arréter
momentanément
|‘enregistre-
ment,
appuyer
sur
la
touche
PAUSE.
Réglage
du
niveau
d’enregistrement
Un
réglage
correct
du
niveau
d’enregistre-
ment
est
primordial
pour
obtenir
un
en-
registrement
de
bonne
qualité.
Si
ce
niveau
est
insuffisant,
l’enregistrement
sera
bruité;
s‘il
est
trop
élevé,
il
en
résulte
des
dis-
torsions
du
son
enregistré
sur
la
bande.
En
général,
il
convient
de
régler
le
niveau
d’enregistrement
de
maniére
a
ce
que
les
indicateurs
marquent
briévement
la
lecture
de
référence
pour
le
type
de
bande
utilisée.
Si
les
indicateurs
dépassent
cette
marque
de
référence,
abaisser
le
niveau
d’enregistre-
Ment
en
ramenant
en
arriére
les
commandes
de
niveau
RECORDING
LEVEL
jusqu’a
ce
que
les
passages
les
plus
forts
soient
maintenus
au
niveau
de
la
marque
de
référence.
Néanmoins
certains
types
d’enregistrement
ou
de
bande
peuvent
nécessiter
un
niveau
d’enregistrement
plus
haut
ou
plus
bas.
Avec
un
peu
de
pratique,
on
peut
arriver
facilement
4
trouver
le
niveau
idéal
qui
produit
les
meilleurs
enregistrements
haute
fidélité
possibles.
Il
convient
également
de
tenir
compte
du
type
de
bande
utilisée
et
du
type
de
musique
4
enregistrer,
car
ces
facteurs
ont
également
une
influence
sur
le
réglage
du
niveau
d’enregistrement.
Utilisation
de
la
commande
de
réglage
fin
de
fa
polarisation
(BIAS FINE)
1.
Placer
la
platine
en
mode
d’enregistre-
ment
et
commencer
a
enregistrer
en
utilisant
un
disque
ou
une
bande
pré-
enregistrée
dont
la
qualité
sonore
vous
est
familiére.
2.
Placer
le
commutateur
AUTO
MONI-
TOR
sur
TAPE
pour
contréler
le
son
reproduit.
Si
le
son
des
hautes
fré-
quences
semble
plus
élevé
que
I'original
de
comparaison,
tourner
la
commande
BIAS FINE
vers
+
pour
obtenir
le
meilleur
son
de
contréle
4
vos
oreilles.
Par
contre,
si
le
son
haute
fréquence
semble
faible,
tourner
la
commande
vers
-
pour
obtenir
le
courant
de
polari-
sation
appropri
3.
Comme
contréle
final,
passer
alternative-
ment
AUTO
MONITOR
sur
SOURCE
et
TAPE
pour
s‘assurer
du
bon
réglage
de
la
commande
de
réglage
de
polarisation
BIAS FINE
en
comparant
le
son
en-
registré
avec
l’origianl.
ee
ps
Fonctionnement
de
l’enregistrement
silencieux
:
La
possibilité
de
créer
des
zones
non
enregis-
trées
(effacées)
sur
une
bande
pendant
un
enregistrement
est
un
réel
avantage
dans
bien
des
situations
d’enregistrement.
Par
exemple,
vous
pouvez
éliminer
des
zones
indésirées
d’une
émission
FM
que
vous
enregistrez,
comme
les
publicités
ou
les
annonces,
Vous
pouvez
enregistrer
un
programme
complet
avec
des
espaces
contrlés
entre
chaque
morceau.
Ainsi
les
portions
de
“blanc”
sur
la
bande
peuvent
étre
facilement
laissées
en
utilisant
la
fonction
REC
MUTE.
1,
Fonctionnement
de
I’espacement
auto-
matique
—
pour
un
blanc
de
4
secondes
—
(pendant
I’enregistrement)
Presser
la
touche
REC
MUTE
pendant
Venregistrement.
Le
mouvement
de
la
bande
continue
et
un
espace
blanc
d’en-
viron
4
secondes
est
enregistré
(I'indi-
cateur
REC
clignote).
La
platine
commute
alors
automatique-
ment
en
mode
de
pause
d’enregistrement
(les
deux
indicateurs
REC
et
PAUSE
allumés).
Pour
commencer
a
enregistrer
le
morceau
suivant,
presser
la
touche
>
(I'indicateur
PAUSE
s’éteint).
2.
Fonctionnement
de
I‘espacement
auto-
matique
—
pour
un
blanc
de
4
secondes
—
(pendant
la
pause
d’enregistrement)
En
mode
de
pause
d’enregistrement,
une
pression
sur
la
touche
REC
MUTE
fait
clignoter
I'indicateur
REC
pour
montrer
le
mode
d’attente
de
silencieux
d’enregistrement.
Aussitat
que
la
touche
>
est
pressée,
la
bande
défile
et
le
fonctionnement
d’espacement
automa-
tique
mentionné
ci-dessus
sera
démarré.
3.
Pour
un
blanc
de
plus
de
4
secondes
Pendant
|’enregistrement,
maintenir
pres-
sée
la
touche
REC
MUTE
pour
un
blanc
plus
long.
Relacher
la
touche
pour
entrer
en
mode
de
pause
d’enregistre-
ment.
Pour
commencer
a
enregistrer,
presser
la
touche
>
.
4.
Pour
un
blanc
de
moins
de
4
secondes
Aprés
avoir
pressé
la
touche
REC
MUTE
pendant
Ienregistrement,
presser
la
touche
PAUSE,
avec
que
|'intervalle
de
4
secondes
ne
soit
écoulé,
pour
annuler
le
mode
de
silencieux
et
engager
le
mode
de
pause
d’enregistrement.
Pour
commencer
|'enregistrement,
pres-
ser
latouche
»
.
Qu
presser
4
nouveau
la
touche
REC
MUTE
pour
reprendre
lenregistrement
sans
arréter
le
défile-
ment
de
la
bande.

La
copie
de
bande
de
platine
a
platine
peut
se
faire
sans
utiliser
d’amplificateur
externe.
Le
fonctionnement
est
le
méme
que
pour
les
processus
d’enregistrement
et
de
lecture
standard
décrits
dans
les
sections
d’en-
registrement
et
de
lecture,
Cette
platine
peut
étre
employée
comme
magnétophone
“maitre”
avec
un
autre
magnétophone
utilisé
comme
enregistreur
“esclave”.
Raccorder
la
sortie
du
magnéto-
phone
“maitre”
a
l’entrée
de
|’enregistreur
esclave.
Pour
utiliser
cette
platine
et
un
second
magnétophone
avec
les
réles
in-
versés,
il
suffit
d’inverser
les
raccordements
de
l’entrée
et
de
la
sortie.
Enregistrement
Punch-in
Pendant
la
lecture,
vous
pouvez
passer
de
lecture
a
enregistrement
en
pressant
la
touche
RECORD
tout
en
appuyant
simul-
tanément
sur
la
touche
»
.
Un
nouvel
enregistrement
commencera
a
partir
de
ce
point.
Ce
fonctionnement
vous
permet
de
surenregistrer
ou
de
corriger
une
partie
enregistrée
de
la
bande
sans
avoir
d
appuyer
d’abord
sur
la
touche
STOP
et
puis
engager
le
mode
d’enregistrement.
Une
bande
préalablement
enregistrée
sera
automatiquement
effacée
en
effectuant
un
nouvel
enregistrement
dessus.
Ou
bien
elle
peut
étre
effacée
en
“enregistrant”
dessus
avec
les
commandes
RECORDING
LEVEL
réglées
sur
MIN.
‘Fonctions
du
compteur
polyvalent.
——
Les
dispositifs
du
compteur
polyvalent
de
cet
appareil
permettent
deux
modes
de
fonctionnement
différents,
selon
le
réglage
de
la
touche
COUNTER
MODE,
Compteur
de
bande:
Le
compteur
fonc-
tionne
de
maniére
conventionnelle.
Compteur
en
durée
de
défilement:
Le
compteur
mesure
le
défilement
de
la
bande
en
minutes
et
en
secondes.
Utilisation
en
compteur
normal
Avec
la
touche
COUNTER
MODE,
faire
apparaitre
le
mode
de
compteur
de
bande;
vous
obtenez
quatre
chiffres
au
cadran.
Cette
fonction
est
identique
a
celle
des
compteurs
de
repérage
habituels.
Le
com-
pteur
est
additif,
la
bande
défilant
de
gauche
a
droite.
Lorsque
celle-ci
défile
de
droite
4
gauche,
le
compteur
est
soustractif.
Les
nombres
affichés
n‘ont
aucune
relation
avec
le
temps
écoulé
ou
les
valeurs
de
compteur
d'autres
platines.
Vous
pouvez
vous
servir
de
ce
type
de
compteur
par
exemple
de
la
maniére
suivante:
Mettez
en
place
une
cassette
et
avant
d’enregistrer
ramenez
le
compteur
4
0000"
en
appuyant
sur
la
touche
CLEAR.
Notez
les
chiffres
au
compteur
au
début
de
chaque
morceau
pour
faciliter
son
repérage
la
lecture.
Utilisation
en
compteur
de
durée
de
défilement
Avec
la
touche
COUNTER
MODE,
faire
apparaitre
le
mode
de
durée
de
défilement;
un
point
apparaft
entre
le
22et
le
3@
chiffre.
Dans
ce
mode
de
fonctionnement,
le
dé-
filement
de
la
bande
est
mesuré
en
minutes
et
secondes
croissantes
lorsque
la
bande
défile
a
vitesse
normale
a
|’enregistrement
(y
compris
silencieux)
et
a
la
lecture.
Verification
d’introductions
(INTRO
CHECK)
Ce
dispositif
rend plus
facile
la
recherche
d'une
sélection
particuliére.
1.
Appuyer
sur
la
touche
INTRO
CHECK.
2.
La
platine
entre
en
mode
d’avance
rapide
(CP
1
apparait
sur
le
compteur
poly-
valent)
pour
rechercher
les
débuts
des
sélections.
Quand
une
sélection
est
détectée
(CP
0
apparait),
la
platine
lira
environ
les
dix
premiéres
secondes
de
lenregistrement
et
puis
passera
rapide-
ment
au
début
de
la
sélection suivante.
3.
Pour
annuler
la
fonction
de
vérification
d’introductions,
appuyer
sur
la
touche
STOP.
4.
Si
STOP
n’est
pas
pressée,
la
fonction
de
vérification
d'‘introductions
est
libérée
quand
la
bande
arrive
a
la
fin.
Fonction
INTRO
CHECK-CPS
En
appuyant
plusieurs
fois
sur
la
touche
CPS
pendant
le
mode
d’avance
rapide,
le
nombre
CPS
sur
CP
1
augmente.
La
fonction
CPS
permet
4
la
platine
de
sauter
a
un
enregistrement
sélectionné
et
d’entrer
en
Le
compteur
s’arréte
pour
l’avance
rapide
ou
le
réembobinage.
Ce
dispositif
est
utile
pour
mesurer
la
longueur
approximative
d‘un
morceau
ou
pour
évaluer
la
longueur
de
bande
restant
disponible.
Compteurs
“visible”
et
“invisible”
On
peut
passer
d‘un
type
de
compteur
4
l'autre
4
tout
moment,
I'un
apparaissant
sur
le
cadran
et
l'autre
fonctionnant
en
mémoire.
Par
exemple,
lorsqu’on
sélec-
tionne
le
compteur
conventionnel
avec
la
touche
COUNTER
MODE,
la
mesure
du
temps
écoulé
s‘effectue
également
et
I’on
peut
en
obtenir
la
valeur
n‘importe
quand
en
agissant
sur
la
touche
COUNTER
MODE.
En
appuyant
sur
la
touche
CLEAR,
on
ne
remet
4
zéro
que
le
compteur
visible.
Les
deux
compteurs
sont
remis
4
zéro
quand
on
arréte
l’appareil.
mode
de
lecture
pour
dix
secondes
et
de
puis
de
revenir
en
fonction
INTRO
CHECK.
(Une
pression
sur
fa
touche
CPS
pendant
la
lecture
en
vérification
d’introductions
annule
la
fonction
INTRO
CHECK.)
Pour
annuler
la
fonction
INTRO
CHECK-CPS,
appuyer
sur
n’‘importe
quelle
touche
de
transport.
Remarques:
eAppuyer
sur
la
touche
INTRO
CHECK
est
possible
dans
tout
mode
de
fonctionne-
ment
de
la
bande.
Pendant
la
vérification,
si
STOP,
»
,
b>
ou
<4
est
pressé,
la
fonction
de
vérification
d’introductions
est
annulée
et le
mode
correspondant
est
engagé.
ePour
un
fonctionnement
correct
de
la
fonction
de
vérification
d'introductions,
il
doit
y
avoir
un
blanc
d’au
moins
4
secondes
ou
plus
entre
les
élections.
Voir
également:
“Remarques
communes
pour
INTRO
CHECK,
CPS,
CDS”.
Morceau
Blanc
Plus
Genviron
4
Morceau
Blanc
secondes
nécessaires
f
Direction
du
defilement
Lecture
ecture
tT
de
la
bande|
LTT
AAI
ecture
Environ
10
secondes
~
Avance
rapide
“Avance
rapide
Dispositif
INTRO
CHECK
=13
=

Le
CPS
permet
de
faire
commencer
la
lec-
ture
jusqu’a
15
morceaux
aprés
ou
avant
celui
qui
est
alors
lu,
Cette
fonction
est
effectuée
par
la
détection
des
sections
vierges
d‘au
moins
4
secondes
entre
les
morceaux.
Ces
sections
sont
créées
avec
le
einai
REC
MUTE.
.
Appuyer
plusieurs
fois
sur
la
touche
CPS/CDS
jusqu‘’a
ce
que
le
nombre
de
morceaux
a
sauter
apparaisse
sur
le
MULTI
COUNTER
(CP
1,
CP
2...
CP
15).
Se
référer
au
tableau
“Sélection
du
morceau
désiré
utilisant
la
CPS”.
Si
le
nombre
affiché
dépasse
celui
qui
était
désiré,
appuyer
sur
la
touche
COUNTER
CLEAR
et
refaire
le
réglage
CPS,
2.
Appuyer
sur
la
touche
44
ou
>»
selon
la
direction
de
la
recherche.
Alors
que
la
bande
est
rapidement
en-
roulée
et
que
les
espaces
vierges
entre
les
morceaux
sont
détectés,
le
numéro
affiché
diminuera
d'une
unité
&
chaque
morceau
jusqu’a
CP
0,
moment
ow
la
lecture
reprendra.
o
Remarques:
Le
réglage
CPS
est
possible
dans
tous
les
modes
de
fonctionnement
de
la
bande
sauf
le
rebobinage
et
I‘avance
rapide.
«Pour
annuler
la
fonction
CPS
aprés
que
la
recherche
ait
commencé,
appuyer
sur
la
touche
44,
>»
,
»
ou
STOP.
Le
mode
correspondant
sera
engagé
et
Vaffichage
retournera
au
mode
de
compteur
indiqué
auparavant.
«Pour
annuler
la
fonction
CPS
avant
de
presser
les
touches
¢4
ou
>>
,
appuyer
sur
la
touche
COUNTER
CLEAR
ou
COUNTER
MODE.
L’affichage
retournera
au
mode
de
compteur
engagé
précédemment
et
le
mode
de
fonctionnement
actuel
de
la
bande
continuera.
Si
la
touche
STOP
ou
>
est
pressée,
elle
supprimera
le
mode
actuel.
Voir
aussi:
“Remarques
communes
pour
INTRO
CHECK,
CPS,
CDS”.
Fonction
de
sélection
directe
de
programme
(CDS)
Le
dispositif
CDS
permet
l’accés
direct
de
tout
morceau
enregistré
par
présélection
du
numéro
de
morceau
(jusqu’a
15)
compté
a
partir
du
début
ou
de
la
fin
de
la
bande.
Le
numéro
de
morceau
peut
étre
préréglé
en
appuyant
sur
la
touche
#4
ou
p>,
en
fonction
du
sens
se
la
recherche,
et
puis
sur
la
touche
CPS/CDS.
“PL
1”
apparaitra
sur
le
MULTI
COUNTER
comme
la
touche
CPS/CDS
est
appuyée
une
fois,
le
némbre
PL
augmentera
a
chaque
fois
que
la
touche
CPS/CDS
est
appuyée.
Ainsi
“PL
5"
va
apapraitre
si
la
touche
est
enfoncée
5
fois.
Par
exemple,
si
vous
désirez
rechercher
le
3éme
morceau
a
partir
du
début
de
la
bande,
appuyer
sur
la
touche
44
pour
rémbobiner
la
bande
a
son
début,
puis
appuyer
3
fois
sur
la
touche
CPS/CDS
pour
régler
le
compteur
4 “PL
3”.
De
la
méme
facon,
si
vous
désirez
rechercher
le
4éme
morceau
a
partir
de
la
fin
de
la
bande,
appuyer
sur
la
touche
>»
et
4
fois
sur
la
touche
CPS/CDS
pour
régler
le
compteur
a
“PL
4”.
Aprés
avoir
atteint
le
début
du
morceau
désiré,
la
bande
est
lue
auto-
matiquement
jusqu’a
|’annulation
du
mode
lecture.
Pour
sortir
du
mode
CDS:
Appuyer
sur
la
touche
COUNTER
CLEAR
ou
MODE
tandis
que
la
bande
est
en
réem-
bobinage
(ou
en
avance
rapide),
avant
datteindre
le
début
(ou
la
fin)
de
la
bande.
Si
la
bande
a
déja
atteint
le
début
(ou
la
fin)
et
est
en
avance
rapide
(ou
en
réem-
bobinage)
pour
chercher
un
morceau,
appuyer
sur
la
touche
#4
(ou
p>
),
>
ou
STOP.
Voir
aussi:
“Remarques
communes
pour
INTRO
CHECK,
CPS,
CDS”.
Remarques
communes
pour
INTRO
CHECK,
CPS,
CDS
sat
ba
Les
différentes
fonctions
de
recherche
—
INTRO
CHECK,
CPS,
CDS
—
fonctionnent
par
détection
et
comptage
de
zones
vierges
d’environ
4
secondes,
comme
des
intervalles
entre
les
morceaux,
Toutefois,
avec
les
types
suivants
de
bandes,
les
fonctions
de
re-
cherche
peuvent
ne
pas
fonctionner
cor-
rectement.
Lorsque
les
intervalles
entre
les
morceaux
ne
peuvent
pas
étre
détectés:
—
Intervalles
de
moins
de
4
secondes.
—
Hauts
niveaux
de
bruit
dans
les
inter-
valles
(dis
a
I‘enregistrement
de
vieux
enregistrements
effacés,
4
une
récep-
Sélection
du
morceau
désiré
utilisant
la
CPS
Ex.:
Voir
(1).
Pour
sélectionner
le
32M
morceau
aprés
la
position
actuelle
de
la
bande,
sélectionner
“CP
3”.
(1)
Position
actuelle
de
la
bande
(2)
Direction
du
défilement
de
la
bande
“CP
2’
au
lieu
de
“CP
Dans
I’exemple
(1),
si
“t’
est
in-
férieur
4
4
secondes,
il
ne
sera
pas
compté
comme
un
espace
|
vierge.
Dans
ce
cas,
sélectionner
Aprés
Avant
>
(3)
Position
actuelle
de
la
bande
(4)
Tey
cra
oa
IE
rs
[oem
)
esi
¢
Aprés
|
Avant
>
®
Direction
du
défilement
de
la
bande
-14-

tion
faible
en
AM
ou
FM,
etc.).
eLorsque
des
parties
du
programme
peu-
vent
@tre
assimilés
4
des
intervalles
entre
morceaux:
—
Longues
parties
4
faible
niveau
en
musique
classique,
etc.
—
Pauses
momentanées
dans
un
dis-
cours
4
une
conférence,
etc.
—
Parties
a
faible
niveau
continuant
crées
par
fondu,
etc.
Dans
le
cas
des
bandes
contenant
des
fondus,
comme
la
longueur
des
espaces
peut
différer
en
fonction
de
la
fagon
de
réaliser
le
fondu,
certains
intervalles
de
morceaux
peuvent
étre
détectés
et
d‘autres
pas,
Ce
probléme
peut
étre
corrigé
en
utilisant
les
possibilités
de
REC
MUTE.
Fonctions
mémoirede
bande
Lecture
par
mémoire
Appuyer
sur
la
touche
START
MEMO
(mémoire)
a
la
position
voulue
de
la
bande
pendant
la
lecture,
la
pause
de
lecture,
|’enregistrement,
la
pause
d’en-
registrement
ou
I’enregistrement
silen-
cieux,
2,
Appuyer
sur
la
touche
<4
aprés
la
lecture
ou
I'enregistrement.
quand
la
position
mémorisée
est
atteinte,
la
platine
commencera
automatiquement
la
lecture.
Arrét
par
mémoire
1,
Appuyer
sur
la
touche
STOP
MEMO
a
la
position
voulue
de
la
bande
pendant
la
lecture,
la
pause
de
lecture,
I’en-
registrement,
la
pause
d’enregistrement
ou
I‘enregistrement
silencieux.
2.
Appuyer
sur
la
touche
<4
aprés
la
lecture
ou
l’enregistrement.
Quand
la
position
mémorisée
est
atteinte,
la
platine
commencera
4
lire
automatique-
ment.
Remarques:
eLa
mise
en
marche
et
a
l’arrét
est
aussi
possible
pendant
I‘avance
rapide.
eL’arrét_
par
mémoire
est
aussi
possible
pendant
la
lecture.
Pour
que
la
mise
en
marche
et
a
l'arrét
fonctionne
correctement,
la
différence
entre
la
position
mémorisée
et
celle
ol
le
rebobinage
ou
I‘avance
rapide
est
engagé
doit
étre
de 10
ou
plus,
a
l'affi-
chage
du
compteur,
‘START
MEMO
(a)
‘STOP
MEMO
«Le
défilement
de
la
bande
ne
commence
ou
ne
s‘arréte
pas
toujours
exactement
a
Vindexation
du
compteur
mémorisée
a
cause
de
la
force
d’inertie
provenant
de
l‘enroulement
rapide.
eLa
mise
en
marche
et
4
l'arrét
peut
étre
annulée
en
appuyant
sur
la
touche
cor-
respondant
une
seconde
fois
(I’indicateur
en
rapport
s‘éteint).
Le
réglage
de
la
position
mémorisée
n‘est
pas
possible
pendant
le
rebobinage,
\‘avance
rapide
ou
I’arrét
bien
que
|’indi-
cateur
s’allume.
Dans
ce
cas,
la
mise
en
marche
ou
4
l’arrét
par
mémoire
s‘effectuera
a
la
position
mémorisée
auparavant.
De
nouvelles
positions
de
marche
ou
d’arrét
sont
mémorisées
4
chaque
pres-
sion
sur
la
touche
START
MEMO
ou
STOP
MEMO
(dans
un
mode
de
fonc-
tionnement).
La
mémoire
est
annulée
quand
l'alimentation
est
coupée
ou
que
la
cassette
est
éjectée.
Lecture
de
répétition
de
bloc
1,
Régler
la
position
START
MEMO
comme
écrit
ci-dessus
{I’indicateur
START
MEMO
s’allume)
au
début
du
bloc
que
vous
voulez
répéter.
2.
Régler
la
position
STOP
MEMO
(I'in-
dicateur
STOP
MEMO
s’allume)
a
la
fin
de
ce
bloc.
3.
Appuyer
sur
la
touche
¢4
pour
com-
mencer
la
lecture
de
répétition
de
bloc.
La
bande
sera
rebobinée
4
la
position
START
MEMO.
«
Elle
sera
lue
automatiquement
de
cette
position
a
la
position
STOP
MEMO.
Elle
sera
4
nouveau
rebobinge
jusqu’d
la
position
START
MEMO.
«De
cette
maniére
le
bloc
désigné
sera
répété
sans
arrét.
4.
Appuyer
sur
la
touche
STOP
pour
arréter
la
lecture
de
répétition
de
bloc.
(voir
l‘illustration
A.)
Si_la
position
STOP
MEMO
se
trouve
avant
la
position
START
MEMO,
la
fonction
de
répétition
de
bloc
fonctionne
différemment.
Woir
Villustration
B.)
1.
Aprés
avoir
régié
les
deux
positions,
appuyer
sur
la
touche
4
ou
>>
pour
atteindre
la
position
START
MEMO.
2.
La
lecture
sera
répétée
par
le
circuit
suivant:
La
bande
sera
lue
depuis
la
position
START
MEMO
jusqu’a
la
fin.
Elle
sera
rebobinée
jusqu‘au
début.
e@Elle
sera
lue
depuis
le
début
jusqu‘’a
Remarques:
«Pour
que
la
lecture
de
répétition
de
bloc
fonctionne,
la
différence
entre
les
posi-
tions
START
MEMO
et
STOP
MEMO
au
compteur
de
la
bande
doit
@tre
re-
présentée
par
un
nombre
de
deux
chiffres
(10
ou
plus).
eLes
fonctions
de
mémoire
de
bande
y
compris
la
lecture
de
répétition
de
bloc
ne
sont
pas
compatibles
avec
les
fonctions
CPS,
CDS
et
INTRO
CHECK;
ces
fonctions
ont
priorité,
Fonctionnement
commandé
par
minuterie
(Fig.5).
Fonctionnement
de
I’enregistrement
com-
mandé
par
minuterie
1.
Raccorder
votre
platine
et
votre
chaine
stéréo
4
une
minuterie
audio
en
vente
dans
le
commerce
comme
indiqué
sur
le
schéma.
2.
Faire
tous
les
préparatifs
comme
pour
un
enregistrement
normal
mais
laisser
la
platine
en
mode
d’arrét.
Régler
la
minuterie
audio
aux
heures
voulues
de
mise
en
marche
(alimentation
fournie)
et
de
mise
a
l’arrét
(alimen-
tation
coupée),
4.
Régler
le
commutateur
TIMER
de
la
platine
sur
REC.
Quand
I’heure
de
mise
en
marche
pré-
réglée
est
atteinte,
|’alimentation
sera
fournie
et
l’enregistrement
commencera.
bod
Fonctionnement
de
la
lecture
commandée
par
minuterie
1.
Vérifier
que
la
platine
est
correctement
raccordée
4
l’amplificateur
pour
le
fonc-
tionnement
de
lecture
normale.
2.
Raccorder
la
platine
et
I‘amplificateur
4
une
minuterie
audio
comme
indiqué
pour
I‘enregistrement
commandé
par
minuterie
(ci-dessus).
3,
Faire
tous
les
préparatifs
comme
pour
une
lecture
normale
mais
ne
pas
faire
se
déplacer
la
bande.
4.
Régler
la
minuterie
audio
aux
heures
voulues
de
mise
en
marche
(alimentation
fournie)
et
de
mise
a
I'arrét
(alimenta-
tion
coupée).
5.
Régler
le
commutateur
TIMER
de
la
platine
sur
PLAY.
Quand
I’heure
de
mise
en
marche
pré-
réglée
est
atteinte,
l’alimentation
sera
Lecture
la
position
STOP
MEMO.
fournie
et
la
lecture
commencera.
eElle
sera
avancée
rapidement
jusqu’a
la
position
START MEMO.
(8)
‘START
MEMO
|
STOP
MEMO
a
fo
{
|
pas
Dirwetion
du
u
OS
Ovection
du
orks
Cy
ce
Rebobinaye
_15-—

Entretien
(Fig.
4)
ee
Les
tétes
et
le
chemin
de
la
bande
doivent
@tre
nettoyés
et
démagnétisés
périodique-
ment.
Nettoyage
du
chemin
de
bande
eAppliquer
un
liquide*
de
nettoyage
de
téte
sur
le
coton-tige
spécial
ou
sur
un
chiffon
doux
et
frotter
légérement
les
tétes,
cabestans
et
toutes
les
piéces
de
métal
du
chemin
de
bande.
e
Nettoyer
aussi
les
galets
presseur
avec
un
liquide
de
nettoyage
pour
caoutchouc*.
*Tous
deux
disponibles
dans
les
ensembles
de
nettoyage
pour
magnétophones
TEAC
HC-1
et
RC-1
aux
Etats-Unis
ou
TEAC
TZ-261
dans
les
autres
pays.
Démagnétisation
des
tétes
S‘assurer
que
l'alimentation
est
coupée,
puis
démagnétiser
les
tétes
avec
le
demagnétiseur
TEAC
E-3
ou
équivalent,
Pour
plus
de
détails
sur
son
utilisation,
consulter
son
manuel
d'instructions.
Attention:
Si
la
surface
de
l‘appareil
devient
sale,
nettoyer
celle-ci
4
l'aide
d’un
chiffon
doux
ou
utiliser
un
liquide
de
nettoyage
neutre,
La
nettoyer
entiérement.
Ne
pas
utiliser
de
diluant,
de
benzine
ou
d’alcool
car
ils
risquent
d’endommager
la
surface
de
|‘appareil..
Guide
de
dépannage
Les
procédures
de
dépannage
qu'une
platine
de
magnétophone
4
cassette
exige
ne
sont
pas
différentes
de
celles
de
tous
les
autres
appareils
électroniques;
la
premiére
chose
a
faire
consiste
4
vérifier
les
causes
“*habituel-
les”.
Nous
donnons
ci-aprés
un
tableau
de
procé-
dures
de
dépannage
qui
vous
permettra,
quoi
qu’il
soit
trés
simple,
de
corriger
d’éventuels
ennuis.
ePas
d’alimentation?
Vérifier
le
branche-
ment
du
cordon
secteur.
«La
bande
se
met
4
défiler
au
moment
of
\appareil
est
mis
sous
tension?
Vérifier
le
réglage
des
commandes
TIMER.
«Absence
de
sortie?
Vérifier
toutes
les
connections,
Une
mauvaise
qualité
de
son?
Nettoyer
les
tétes.
Essayer
une
nouvelle
bande
de
bonne
qualité.
Démagnétiser
les
tétes
et
le
chemin
de
bande.
Vérifier
le
réglage
des
touches
de
réduction
de
bruit.
Impossible
d’engager
le
mode
d’enregis-
trement?
Vérifier
si la
cassette
n’est
pas
dépourvue
de
ses
languettes
de
protection.
-~16—
Caractéristiques
techniques
a
Systéme
de
piste
4
pistes,
2
canaux
stéréo
Tétes
3:
effacement,
enregistrement
et
lecture
(combinaison)
Type
de
cassettes
Cassettes
C-60
et
C-90
(de
type
Philips)
%
Vitesse
de
défilement
4,76
cm/s
Moteurs
3;
1
servomoteur
CC
pour
le
cabestan
1
moteur
CC
pour
le
bobinage
1
moteur
CC
pour
le
mécanisme
Pleurage
et
scintillement
(WRMS)
0,03%
Bande
passante
(globale,
-20
dB)
20
—
21.000
Hz
(25
—
20.000
Hz
43
dB),
métal
20
—
19.000
Hz
(25
—
19.000
Hz
+3
dB),
CrO,
20
—
18.000
Hz
(25
—
17.000
Hz
+3
dB),
normale
Rapport
signal/bruit
(global)
60
dB
(3%
de
distorsion
harmonique
totale,
pondéré)
70
dB
(Dolby
B
NR
en
circuit,
a
5
kHz)
80
dB
(Dolby
C
NR
en
circuit,
4
1
kHz)
Durée
de
bobinage
rapide
Environ
80
secondes
pour
une
cassette
C-60
Entrées
Ligne:
87
mV,
40
k
ohms
Sorties
Ligne:
0,43
V
pour
impédance
de
charge
de
50
k
ohms
ou
plus
Casque:
8
ohms
Alimentation
120/220/240
V
CA,
50/60
Hz
(modéle
exportation
générale)
120
V
CA,
60
Hz
(modéle
Etats-Unis
et
Canada)
220
V
CA,
50
Hz
(modéle
Europe)
240
V
CA,
50
Hz
(modéle
Royaume-
Uni,
Australie)
Consommation
17
W
Dimensions
(L
x
H
x
P)
435
x
120
x
265
mm
Poids
4,9
kg
net
ees
caractéristiques
techniques
ont
été
déterminées
avec
une
bande
métal
sauf
indication
contraire.
«Pour
des
améliorations,
il
se
peut
que
des
caractéristiques
techniques
et
générales
soient
modifiées
sans
préavis.
eLes
photos
et
les
illustrations
peuvent
différer
quelque
peu
du
produit
final.

Vorsichtsmanahmen
ey
Umgebung
Dieses
Gerat
sollte
nicht
folgenden
Um-
gebungsbedingungen
ausgesetzt
sein:
eHohen
Temperaturen
(Heizung,
direkte
Sonneneinstrahlung)
Extrem
niedrige
Temperaturen
e
Hohe
Luftfeuchtigkeit
Staub
eAuftreten
starker
Spannungsschwankun-
gen
(die
Verwendung
eines
Netzspannungs-
reglers
wird
empfohlen).
Kassetten
(Abb,
2)
Bandsorte:
Die
automatische
Bandsortenwah!
arbeitet
nur
einwandfrei,
wenn
Metall-
und
Chrom
(Kobalt)-Bander
mit
Identifikationséffnun-
gen
versehen
sind.
Kassettenhandhabung
Kassetten
nicht
aufbewahren:
eAuf
Heizkérpern
etc,
an
direkter
Son-
neneinstrahlung
und
sonstigen
hohen
Temperaturen
ausgesetzten
Orten,
eln
der
Nahe
von
Lautsprechern,
TV-
Geraten,
Verstarkern
oder
sonstigen
Magnetfelder
ausstrahlenden
Geraten,
eAn
hoher
Luftfeuchtigkeit
oder
Staub
ausgesetzten
Orten,
Kassetten
nicht
fallenlassen
oder
sonstigen
Erschiitterungen
aussetzen,
Spannungs-Umstellung
(nur
fiir
allgemeine
Exportmodelle)
(Abb.
3)
Falls
eine
Umstellung
des
Spannungswahlers
erforderlich
ist,
wie
folgt
vorgehen:
1.
DAS
NETZKABEL
ABZIEHEN!
2.
Mit
einem
Schraubenzieher
den
Span-
nungswahler
auf
den
erforderlichen
Wert
(Valtzahl)
einstellen.
*
Dolby-Rauschunterdriickung
und
HX
PRO
Headroom
Extension
werden
unter
Lizenz
der
Dolby
Laboratories
Licensing
Corpora-
tion
hergestellt.
HX
PRO
wurde
von
Bang
&
Olufsen
entwickelt.
“Dolby”,
das
Doppel-D-Symbol
und
“HX
PRO”
sind
eingetragene
Warenzeichen
der
Dolby
Laboratories
Licensing
Corporation.
Anschliisse
(Abb.
1)
eVor
der
Durchfihrung
von
Anschliissen
bei
allen
betroffenen
Geraten
die
Span-
nungsversorgung
abschalten.
Die
Bedienungsanleitung
aller
verwende-
ten
Gerate
durchlesen,
Ausstattungsmerkmale
und
Bedienungselemente
(Abb.
6)
Ie
©
Netzschalter
(POWER)
Fiir
Einschaltung
(Multi-Zahlwerk
etc.
leuch-
ten)
und
Ausschaltung
des
Decks.
Hinweis:
Nach
Ausschalten
mindestens
zwei
Sekunden
warten,
ehe
erneut
eingeschaltet
wird!
©
Auswurftaste
(EJECT)
Bei
Stopbetrieb
betatigen,
um
den
Kassetten-
halter
zu
offnen.
©
Kassettenhalter
©
Mehrfach-Display
1)
Multi-Zahlwerk
Bandzahlwerk-Betriebsart
In
dieser
Betriebsart
arbeitet
das
Zahlwerk
wie
ein
konventionelles
Bandzahlwerk.
Es
zahlt
aufwarts,
wenn
das
Band
vorwarts
lauft,
und
abwérts,
wenn
das
Band
riick-
warts
lauft.
Durch
Driicken
der
CLEAR-
Taste
kann
das
Zahlwerk
auf
“0000”
zuriickgestellt
werden,
rar)
try
ri
Se
Echtzeit-Bandzahlwerk-Betriebsart
In
dieser
Betriebsart
wird
der
Bandlauf
zu-
nehmend
in
Minuten
und
Sekunden
bis
zu
einem
Maximum
von
99.59
(99
Minuten,
59
Sekunden)
gemessen.
Durch
Driicken
der
CLEAR-Taste
kann
die
Anzeige
auf
“00.00”
Zuriickgestelit
werden.
Durch
Driicken
der
MODE-Taste
wird
die
Betriebsart
des
Bandzahlwerks
geandert,
md ae
eS
ee
CPS
Display
Dieses
Display
zeigt
die
Titelnummer,
die
mit
CPS
(Computer-Programm-Suchauf)
vor-
eingestellt
wurde.
rc
|
i
Le
1
CDS-Display
Zeigt
die
Nummer
an,
die
mit
CDS
(Com-
aA7
=
puter-Direkt-Selektion)
voreingestelit
wurde.
I
Vy
ie
!
m
2
Angeigen
fiir
Monitorautomatik
(AUTO
MONITOR,
TAPE/SOURCE)
TAPE:
Leuchtet
bei
Wiedergabe
des
Band-
signals,
SOURCE:
Leuchtet
bei
Uberwachung
des
Eingangssignals.
Weitere
Anga-
ben
hierzu
siehe
@
AUTO
MONITOR-Taste.
3)
Anzeigen
fir
Blockwiederholung
START
MEMO
(Startspeicher):
Leuchtet
bei
gedriickter
START
MEMO-Taste
@
und
signalisiert
Speicherbereitschaft,
STOP
MEMO
(Stopspeicher):
Leuchtet,
wenn
die
STOP
MEMO-Taste
@
gedriickt
ist.
4)
Spitzenpegelanzeige
(PEAK
LEVEL
ME-
TER)
Anzeige
fiir
den
Spitzenpegel
von
Eingangs-
oder
Wiedergabesignal.
Bei
Aufnahmebetrieb
wird
der
iiber
die
RECORDING
LEVEL-
Pegelregler
eingestellte
Signalpegel
der
Pro-
grammquelle
angezeigt.
Die
Spitzenpegel-
anzeige
sollte
bei
Aufnahme
nicht
die
fiir
die
spezifische
Bandsorte
angegebene
Be-
zugsmarke
iiberschreiten.
Bei
Wiedergabe
wird
der
Bandsignalpegel
angezeigt.
@®
Bandsortenanzeigen/Aussteuerungs-
marken
Das
Deck
schaltet
automatisch
auf
die
Bandsorte
der
eingelegten
Kassette
um,wobei
die
entsprechende
Anzeige
(NORMal,
CrO2
bzw.
METAL)
leuchtet.
Unter
der
leuchtenden
Bandsortenanzeige
erscheint
eine
Linie,
die
als
Aussteuerungs-
Bezugsmarke
fiir
diese
Bandsorte
dient.
©
Bandfunktionsanzeigen
(PLAY/REC/
PAUSE)
PLAY:
Leuchtet
bei
Wiedergabe-
und
Auf-
nahmebetrieb.
REC:
Leuchtet
bei
Aufnahmebetrieb
und
Aufnahmebereitschaft.
Blinkt
bei
Stummauf-
nahmebetrieb.
PAUSE:
Leuchtet
bei
Wiedergabe-
und
Auf-
nahmepause.
@
OO
HX
PRO-Anzeige
Leuchtet
bei
Aufnahme/Wiedergabe
oder
Aufnahmepause,
blinkt
bei
Stummaufnahme-
betrieb.
Weitere
Angaben
zu
OO
HX
PRO
siehe
Riickseite.
8)
MPX-Filter-Anzeige
Diese
Anzeige
signalisiert
die
Verwendung
des
MPX-Filters.
9)
Rauschunterdriickungsanzeigen
(NR
SYSTEM)
Anzeigen
fiir
das
gewahlte
Rauschunter-
diickungssystem,

©
Taste
und
Anzeigen
fiir
Auto-
Toniiberwachung
(AUTO
MONITOR)
Ober
diese
Taste
kann
die
Toniiberwachung
vorbestimmt
werden
und
damit
die
in
der
Spitzenpegelanzeige
angegegebene
Messung.
TAPE:
Bandsignal
bei
Wiedergabe
und
Aufnahme
(Hinterbandkontrolle),
SOURCE:
Eingangssignal
der
LINE
IN-
Buchsen.
Der
Pegel
kann
iiber
die
RECORDING
LEVELRegler
eingestellt
werden,
Bei
Gerateeinschaltung
wird
automatisch
auf
TAPE-Anzeige
geschaltet.
Durch
Betatigen
der
Tasten
kann
ab-
wechselnd
zwischend
beiden
Funktionen
und
den
entsprechenden
Anzeigen
umge-
schaltet
werden.
Die
Auto-Toniiberwachung
wird
bei
Aufnahme
und
Aufnahmepause
automatisch
umgeschaltet.
Bei
Aufnahme
kann
auf
Hinterbandkontrolle
(TAPE)
ge-
schaltet
werden.
Wird
mit
der
PAUSE-
Taste
auf
Aufnahmepause
geschaltet,
wechselt
die
Toniiberwachung
auf
SOURCE
und
bei
Aufnahmefortsetzung
durch
Be-
tatigen
der
»
Taste
erneut
auf
TAPE,
©
Wiedergabetaste
(
>
)
Mit
dieser
Taste
wird
auf
normalen
Band-
transport
(von
links
nach
rechts)
geschaltet.
Mit
der
»
Taste
wird
auch
von
Aufnahme-
pause
auf
Aufnahmefortsetzung
geschaltet.
Zum
Aufnahmestart
die
»
Taste
bei
ge-
driickt
gehaltener
RECORD-Taste
betatigen.
©
Taste
fiir
Umspulen
vorwarts/riickwarts
(
<<
/
>»
)
Durch
Betatigen
des
«4
-Abschnitts
wird
das
Band
schnell
riickgespult
(von
rechts
nach
links),
Durch
Betatigen
des
Pp»
-Ab-
schnitts
wird
das
Band
schnell
vorwarts
ge-
spult
(von
links
nach
rechts).
Nach
komplett
durchgefiihrtem
Umspulen
wird
das
Lauf-
werk
automatisch
abgeschaltet.
©
Stoptaste
(STOP)
Zum
Bandstop
und
zur
Abschaltung
aller
anderen
Funktionen
betatigen.
©
Aufnahmetaste
(RECORD)
Zum
Aufnahmestart
diese
Taste
zusammen
mit
der
®
Taste
betatigen.
©
Pausetaste
(PAUSE)
Mit
dieser
Taste
kann
bej
Aufnahme
oder
Wiedergabe
der
Bandtransport
kurzzeitig
unterbrochen
werden.
Zur
Abschaltung
der
Pausefunktion
die
®
Taste
betatigen.
Bei
eingeschalteter
Stopfunktion
erfolgt
durch
Betatigen
der
PAUSE-Taste
Umschal-
tung
auf
Wiedergabepause,
durch
gleich-
zeitiges
Betatigen
von
PAUSE-
und
RE-
CORD-Taste
Umschaltung
auf
Aufnahme-
pause,
®
Stummaufnahmetaste
(REC
MUTE)
Diese
Taste
bei
Aufnahme
zur
Einfiigung
eines
Leerabschnitts
von
4
Sekunden
Dauer
betatigen.
Hierauf
schaltet
das
Deck
auf
Aufnahmepause.
Zur
Aufnahmefortsetzung
die
»
Taste
betatigen.
(Siehe
“Stummauf-
nahmebetrieb”.)
®
Kopfhéreranschlu&
(PHONES)
Fiir
individuelles
Hren
oder
fiir
die
Toniiber-
wachung
einen
Stereokopfhorer
mit
8
Ohm
an
diese
Buchse
anschlieRen.
®
Kopfhérer-Lautstarkeregler
(PHONES
LEVEL)
Lautstarkeregler
fir
den
an
der
PHONES-
Buchse
angeschlossenen
Kopfhérer.
Dieser
Schieberegler
ist
ohne
Funktion
fiir
die
OUTPUT-Buchsen
an
der
Riickplatte
und
den
im
PEAK
LEVEL
METER
angezeigten
Pegel,
©
Regler
fiir
Vormagnetisierungsfein-
abstimmung
(BIAS
FINE)
Dieser
Regler
ermdglicht
bei
Aufnahme
die
Feinregelung
des
Vormagnetisierungspegels.
In
der
einrastbaren
mittleren
Position
ist
der
Vormagnetisierstrom
auf
den
fiir
die
ver-
wendete
Bandsorte
erforderlichen
Nennwert
eingestelit.
Durch
Drehen
des
Reglers
in
Richtung
“+”
wird
der
Vormagnetisie-
tungsstrom
erhdht,
der
Hochfrequenzbe-
reich
leicht
abgesenkt.
Durch
Drehen
in
Richtung
“-"
wird
der
Vormagnetisierungsstrom
leicht
reduziert,
der
Hochfrequenzbereich
leicht
angehoben.
Bei
Nichtverwendung
diesen
Regler
auf
seine
Mittenposition
einstellen.
®
Rauschunterdriickungssystem-
Wahlschalter
(NR
SYSTEM)
Das
erforderliche
Rauschunterdriickungs-
system
einstellen.
IN/OUTSchalter:Fiir
die
Ein-/Abschaltung
des
Rauschunterdriickungs-
systems.
O00
8/
OO
C-Schalter:
OO
B
fiir
Auf-
name
und
Wiedergabe
mit
Dolby
B.
DO
C
fiir
Auf-
nahme
und
Wiedergabe
mit
Dolby
C.
©
Blockwiederholung-Speichertasten
(BLOCK
REPEAT)
Die
START
MEMO
(Startspeicher)-Taste
an
der
vorgesehenen
Wiedergabestart-Position,
die
STOP
MEMO-Taste
an
der
vorgesehenen
Wiedergabestop-Position
betatigen.
(Weitere
Angaben
auf
Seite
22.)
®
CPS/CDS-Taste
Diese
Taste
ist
fiir
die
CPS/CDS-Funktion
relevant,
Weitere
Angaben
zu
diesen
Funk-
tionen
wie
INTRO
CHECK-CPS
siehe
folgende
Punkte:
@
MULTI
DISPLAY
INTRO
CHECK-Funktion
(Seite
20)
CPS-Funktion
(CPS:
Computer-Programm-Suchlauf)
(Seite
20)
CDS-Funktion
(CDS:
Computer-Direkt-Selektion)
(Seite
21)
—18—
©
Taste
fiir
Anspielfunktion
(INTRO
CHECK)
Nach
Betatigen
dieser
Taste
werden
alle
Titel
jeweils
fir
10
Sekunden
angespielt.
Zwischen
diesen
Abschnitten
wird
das
Band
jeweils
schnell
umgespult,
(Siehe
Seite
20.)
®
MPX-Filter-Taste
(MPX
FILTER)
Diese
Taste
betatigen
wenn
eine
UKW-
Sendung
mit
Dolby-Rauschunterdriickung
aufgenommen
werden
soll,
Der
19-kHz-
Pilotton
und
das
38-kHz-Hilfstragersignal
der
UKW-Sendung
werden
eliminiert,
die
ansonsten
zu
Fehlfunktionen
des
Dolby-
Systems
fiihren
konnten,
Zur
Abschaltung
dieser
Funktion
die
Taste
nochmals
be-
tatigen.
®
Schaltuhrschalter
(TIMER)
ePLAY:
Fir
schaltuhrgesteuerte
Wieder-
gabe.
OUT:
Normale
Position.
Schaltuhrsteue-
rung
ist
bei
dieser
Ejinstellung
nicht
moglich.
e
REC:
Fiir
schaltuhrgesteuerte
Aufnahme.
ACHTUNG:
Bedienung
des
TIMER-Schalters
Wenn
die
Schaltuhrfunktion
nicht
benutzt
wird,
die
OUT-Position
verwenden.
Falls
der
TIMER-Schalter
beim
Einschalten
des
Decks
auf
REC
oder
PLAY
steht,
wird
das
Deck
auf
Aufnahme-
oder
Wiedergabe-
betrieb
schalten,
Auch
wenn
das
Deck
auf
schaltuhrgesteuerte
Aufnahme
eingestellt
ist,
erfolgt
Wiedergabebetrieb,
wenn
die
Aufnahmeschutzlaschen
der
Kassette
ent-
fernt
wurden,
@
Aufnahmepegelregler
(RECORDING
LEVEL)
Mit
diesen
Schiebereglern
kann
der
Auf-
nahmepegel
der
Eingangssignale
vor
der
Aufnahme
eingestellt
werden.
Linker
und
rechter
Kanal
k6nnen
einzeln
geregelt
werden,
Die
Spitzenpegelanzeige
sollte
die
fiir
die
spezifische
Bandsorte
angegebene
Marke
nicht
iberschreiten.
®
Zahlwerkbetriebsarttaste
(COUNTER
MODE)
Fiir
die
Vorwahl
der
Anzeigen
(Bandzahl-
werk
oder
Laufzeitanzeige).
®
Zahlwerkléschtaste
{COUNTER
CLEAR)
Mit
dieser
Taste
wird
das
Bandzahlwerk
bzw.
die
Laufzeitanzeige
auf
die
Null-
anzeige
zuriickgestellt.

Betrieb
ST
‘Woe
Rmtne
Stereo-Wiedergabe
1,
Den
TIMER-Schalter
auf
Position
OUT
einstellen,
2,
Mit
der
POWER-Taste
einschalten,
3.
Eine
bespielte
Kassette
einlegen,
4.
Das
Rauschunterdriickungssystem
mit
den
NR
SYSTEM-Tasten
einstellen.
5.
Die
»
Taste
betitigen.
6.
Die
Lautsarke
am
Verstarker
einstellen,
Stereo-Aufnahme
Aufnahme
von
einem
Stereosystem
1.
Den
TIMER-Schalter
auf
Position
OUT
einstellen,
2,
Mit
der
POWER-Taste
einschalten,
3,
Eine
bespielbare
Kassette
einlegen,
4.
Das
Rauschunterdriickungssystem
mit
den
NR
SYSTEM-Tasten
einstellen,
5.
Bei
Aufnahme
einer
UKW-Radiosendung
mit
Dolby-Rauschunterdriickung
die
MPX
FILTER-Taste
auf
IN
driicken.
6.
PAUSE-
und
RECORD-Taste
gleichzeitig
betatigen
(beide
Anzeigen
leuchten),
Somit
kann
die
Aufnahmeaussteuerung
ohne
stattfindende
Aufnahme
geregelt
werden,
Den
BIAS
FINE-Regler
wie
auf
dieser
Seite
im
Abschnitt
“Verwendung
der
BIAS
FINE-Regler”
beschrieben
ein-
stellen,
8.
Den
RECORDING
LEVEL-Regler
so
einstellen,
da
das
starkste
Eingangs-
signal
in
der
Pegelanzeige
bei
der
far
die
verwendete
Bandsorte
vorgegebenen
Bezugsmarke
angezeigt
wird.
9,
Zum
Aufnahmestart
die
»
Taste
betatigen,
AUTO
MONITOR
wechselt
automatisch
auf
TAPE,
Hinweis:
Zur
kurzzeitigen
Aufnahmeunterbrechung
die
PAUSE-Taste
betatigen.
~
org
des
Aufshmepenes
Die
korrekte
Einstellung
des
Aufnahmepegels
ist
ausschlaggebend
fiir
hochqualitative
Aufnahmen,
Ist
der
Aufnahmepegel
zu
nied-
rig,
wird
die
Aufnahme
Rauschstérungen
aufweisen,
Ist
der
Aufnahmepegel
zu
hoch
eingestellt,
wird
die
Aufnahme
verzerrt.
Im
allgemeinen
sollte
der
Aufnahmepegel
so
eingestellt
sein,
da&
die
Spitzenwerte
nur
kurzzeitig
die
fiir
die
verwendete
Bandsorte
vorgegebene
Berugsmarke
erreichen.
Wenn
die
MeRinstrumente
iiber
die
Markierungen
hinaus
anzeigen,
die
RECORDING
LE-
VEL-Pegelreger
zuriickschieben,
bis
der
Spitzenlautsstarkewert
innerhalb
der
Markie-
rungen
liegt.
Jedoch
ist
es
méglich,
da8
ein
bestimmtes
Aufnahmematerial
bei
einer
Bandsorte
hdhere
bzw.
niedrigere
Aut-
nahmepegel
erfordert.
Nach
einiger
Zeit
und
einiger
Ubung
werden
Sie
imstande
sein,
den
Aufnahmepegel
so
einzustellen,
da&
Sie
eine
optimale
HiFi-
Aufnahme
erhalten.
Das
verwendete
Band
und
das
Aufnahmematerial
haben
auf
jeden
Fall
einen
groRen
Einflu
auf
die
optimale
Einstellung
des
Aufnahmepegels.
‘Verwendung
der
BIAS
FINE-Regler
1.
Auf
Aufnahme
schalten,
Als
Signal-
quelle
eine
Schallplatte
oder
eine
be-
spielte
Kassette
verwenden,
mit
deren
Klangbild
und
-qualitat
Sie
vertraut
sind.
2.
Den
AUTO
MONITOR-Schalter
auf
Posi-
tion
TAPE
einstellen,
um
Hinterband-
kontrolle
durchzufiihren.
Falls
die
hohen
Frequenzen
im
Vergleich
zum
Original
Zu
stark
betont
werden,
den
BIAS
FINE-
Regler
in
Richtung
“+
drehen.
Wenn
umgekehrt
die
hohen
Frequenzen
zu
schwach
reproduziert
werden,
den
Reg-
ler
in
Richtung
“-"'
drehen.
Somit
kann
die
Vormagnetisierung
den
jeweiligen
Klanganforderungen
angepasst
werden.
3.
Zur
abschlieRenden
Uberpriifung
ab-
wechselnd
mit
dem
AUTO
MONITOR-
Schalter
zwischen
SOURCE
und
TAPE
umschalten,
um
das
Eingangssignal
mit
dem
aufgezeichneten
(Hinterband)
Signal
vergleichen
zu
kénnen,
Stummaufnahmebetrieb
Die
Maglichkeit,
bei
der
Aufnahme
unbe-
spielte
Abschnitte
(Léschungen)
einzufiigen,
ist
bei
vielen
Anwendungen
von
Vorteil.
So
kGnnen
Musikprogramme
mit
gleichmaBigen
Abstanden
zwischen
den
einzelnen
Titeln
versehen
werden
oder
Werbespots,
Ansagen
etc.
eliminiert
werden.
Mit
der
Stummauf-
nahmefunktion
kénnen
solche
Einfiigungen
bequem
hergestellt
werden.
1.
Leerabschnitteinfiigung
von
4
Sekunden
Dauer
(bei
Aufnahme)
Bei
Aufnahme
die
REC
MUTE-Taste
betatigen.
Das
Band
wird
weiter
trans-
portiert
und
ein
4
Sekunden-Leerab-
schnitt
eingefiigt
(die
REC-Anzeige
blinkt).
Dann
schaltet
das
Deck
automatisch
auf
Aufnahmepause
(REC-
und
PAUSE-
Anzeige
leuchten).
Zur
Aufnahmefortset-
zung
die
»
Taste
betatigen
(die
PAUSE-
Anzeige
erlischt),
-.
Leerabschnitteinfiigung
von
4
Sekunden
Dauer
(bei
Aufnahmepause)
Bei
Aufnahmepause
gibt
die
REC-An-
zeige
nach
Betatigen
der
REC
MUTE-
Taste
ein
Blinksignal
und
signalisiert
damit
Stummaufnahme-Betriebsbereit-
schaft.
Nach
Betatigen
der
»
Taste
B49
=.
wird
das
Band
transportiert
und
der
oben
beschriebene
Leerabschnitt
wird
hergestellt.
3.
Leerabschnitte
von
iiber
4
Sekunden
Dauer
Bei
Aufnahme
die
REC
MUTE
gedriickt
halten
(solange
wie
erforderlich).
Bei
Freigabe
der
Taste
wird
auf
Aufnahme-
pause
geschaltet.
Zur
Aufnahmefort-
setzung
die
>
Taste
betatigen.
4.
Leerabschnitte
von
weniger
als
4
Sekun-
den
Dauer
Nach
Betatigen
der
REC
MUTE-Taste
die
PAUSE-Taste
vor
Ablauf
von
4
Sekunden
betatigen.
Damit
wird
auf
Aufnahmepause
geschaltet
und
die
Aufnahme
kann
durch
Betatigen
der
>
Taste
fortgesetzt
werden.
Soll
das
Band
nicht
gestoppt
werden,
zur
Auf-
nahmefortsetzung
die
REC
MUTE-Taste
nochmals
betatigen,
Oberspielen
Uberspielbetrieb
von
Deck
zu
Deck
kann
ohne
externen
Verstarker
durchgefiihrt
werden.
Die
Bedienschritte
entsprechen
denjenigen
von
Abschnitt
Aufnahme
bzw.
Wiedergabe.
Dieses
Deck
kann
als
Aufnahme-
gerat,
mit
einem
zusatzlichen
Deck
als
Zuspielgerat,
verwendet
werden.
Den
Aus-
gang
dieses
Decks
mit
dem
Eingang
des
Zuspielgerats
verbinden.
Um
die
An-
wendung
in
umgekehrter
Konstellation
vorzunehmen,
brauchen
nur
die
Eingang-/
Ausgang-Verbindungen
ausgetauscht
werden,
Einstanzaufnahme
Von
Wiedergabe
kann
direkt,
ohne
Band-
stop,
auf
Aufnahme
geschaltet
werden.
Hierzu
bei
gedriickt
gehaltener
RECORD-
Taste
die
»
Taste
betatigen.
Bei
der
ent-
sprechenden
Bandposition
wird
eine
neue
Aufnahme
“eingestanzt”.
Somit
kénnen
Neuaufnahmeabschnitte
oder
Korrekturen
eingefiigt
wurden,
ohne
das
Band
erst
auf
Stop
schalten
zu
miissen.
Lischen
Eine
zuvor
hergestellte
Aufnahme
wird
bei
einer
neuen
Aufnahme
automatisch
geldscht.
Die
Laschfunktion
ist
auch
verfiigbar,
wenn
bei
Schaltung
auf
“Aufnahme”
die
RE-
CORDING
LEVEL-Pegelregler
auf
“MIN”
eingestellt
werden.

Multi-Bandzahlwerk-Funktion
Abhangig
von
der
Einstellung
der
COUN-
TER
MODE-Taste
sind
zwei
verschiedene
Anczeigearten
des
Multi-Bandzahlwerks
mog-
lich,
Bandzahlwerk-Betriebsart:
Das
Multi-Band-
zihlwerk
arbeitet
wie
ein
konventionelles
Bandzah\werk.
Bandlaufzeit-Betriebsart:
Das
Multi-Zahl-
werk
mit
die
Bandlaufzeit
in
Minuten
und
Sekunden,
Verwendung
als
Bandzahlwerk
Mit
der
COUNTER
MODE-Taste
das
Multi-
Display
auf
Bandzahlwerk-Betriebsart
stel-
len.
Die
Funktion
entspricht
der
eines
konventionellen
Bandzahiwerks.
Wenn
das
Band
von
links
nach
rechts
lauft,
zahlt
das
Zahlwerk
aufwarts.
Beim
Riic!
spulen,
wenn
das
Band
von
rechts
nach
links
lauft,
zahit
das
Zahlwerk
abwéarts.
Die
angezeigten
Zahlen
haben
keinen
Bezug
zur
abgelaufenen
Zeit
und
entsprechen
nicht
den
Bandzéhlwerken
anderer
Kassetten-
decks,
Ein
typisches
Beispiel
der
Verwen-
dung
des
Multi
Iwerks
als
konventionelles
Bandzahlwerk
ist:
Eine
Kassette
einlegen
und
vor
der
Aufnahme
das
Zahlwerk
mit
der
CLEAR-Taste
auf
“0000”
stellen.
Dann
am
Beginn
jedes
Musikstiicks
die
Zahlwerk-
Anzeige
notieren,
um
spater
bei
der
Wieder-
gabe
die
einzelnen
Stiicke
leichter
finden
zu
kénnen,
Verwendung
als
Bandlaufzeitanzeige
Mit
der
COUNTER
MODE-Taste
das
Multi-
Zahlwerk
auf
die
Bandlaufzeit-Betriebsart
stellen.
Zwischen
der
zweiten
und
drit-
ten
Ziffernstelle
erscheint
ein
Punkt.
In
dieser
Betriebsart
wird
der
Bandlauf
zu-
mehmend
in
Minuten
und
Sekunden
ge-
messen,
wahrend
das
Band
mit
normaler
Geschwindigkeit
bei
Aufnahme
(einschlieR-
lich
Stummaufnahme)
und
Wiedergabe
lauft.
Wahrend
Riickspulen
und
Schnellvorlauf
wird
nicht
gezahit,
Diese
Funktion
ist
hilfreich,
um
die
ungefahre
Lange
eines
aufgenommenen
Titels
zu
messen
oder
um
zu
berechnen,
wieviel
Band
noch
vorhanden
ist.
“Sichtbare”
und
“unsichthare”
Zahlwerke
Beide
Zahlwerk-Betriebsarten
sind
jederzeit
umschalthar.
Die
gewahite
Funktion
ist
auf
dem
Display
sichtbar,
die
andere
Funktion
zahit
im
Speicher
weiter.
Wenn
zum
Beispiel
das
konventionelle
Zahlwerk
mit
der
COUN-
TER
MODE-Taste
gewahlt
ist,
wird
auch
die
Bandlaufzeit
gemessen
und
kann
jederzeit
durch
Driicken
der
COUNTER
MODE-Taste
abgerufen
werden.
Durch
Driicken
der
CLEAR-Taste
wird
nur
das
angezeigte
ZahI-
werk
zuriickgestellt.
Beide
Zahlwerke,
das
“sichtbare”
und
das
“unsichtbare”,
werden
zuriickgestellt,
wenn
das
Deck
ausgeschaltet
wird,
Anspielfunktion
(INTRO
CHECK)
Diese
Funktion
erleichtert
die
Titelsuche.
1.
Die
INTRO
CHECK-Taste
betatigen.
2.
Das
Deck
schaltet
auf
Vorspulfunktion
(Im
Multi-Zahlwerk
erscheint
die
An-
zeige
CP
1)
und
tastet
Titelanfange
ab.
Bei
Abtastung
eines
Titelbeginns
(die
Anzeige
wechselt
auf
CP
0)
erfolgt
fir
ca.
zehn
Sekunden
Wiedergabe
und
hierauf
die
Suchlauffortsetzung
zum
nachsten
Titelbeginn.
3.
Zur
Abschaltung
der
Anspielfunktion
die
STOP-Taste
betatigen,
4.
Bei
Nichtverwendung
der
STOP-Taste
schaltet
diese
Funktion
automatisch
bei
Erreichen
des
Bandendes
ab.
Anspiel-Computer-Suchlauffunktion
(INTRO
CHECK-CPS)
Durch
mehrmaliges
Betatigen
der
CPS-Taste
bei
Vorspulbetrieb,-
wahrend
der
Anzeige
CP
1,
wird
die
Ziffer
fiir
den
CPS-Suchlauf
erhoht.
Dies
bedeutet,
da&
andere
Titel
bis
zu
einem
gewinschten
Titelbeginn
iber-
sprungen
werden,
bei
dem
die
normale
Anspielfunktion
fortgesetzt_
wird.
(Durch
Betatigen
der
CPS-Taste
bei
Anspielfunk-
tion-Wiedergabe
wird
die
Anspielfunktion
abgeschaltet.)
Zur
Abschaltung
der
Anspiel-
Computer-Suchlauffunktion
eine
beliebige
Bandtransporttaste
betatigen.
Hinweise:
Bei
jeder
beliebigen
Betriebsart
kann
mit
der
INTRO
CHECK-Taste
auf
die
Anspiel-
funktion
geschaltet
werden,
eWird
wahrend
Ourchfiihrung
der
Anspiel-
funktion
STOP,
»,
>»
oder
44
Taste
betatigt,
erfolgt
Umschaltung
auf
die
der
Taste
entsprechende
Betriebsart.
«Zur
Gewahrleistung
eines
einwandfreien
Anspielbetriebs
mu
das
Band
zwischen
den
Titeln
Leerabschnitte
von
midestens
4
Sekunden
Dauer
enthalten,
¢Siehe
auch
“Hinweise
zu
den
Suchlauf-
funktionen”.
Mehr
als
4
Sek,
Titel
Leerabschnitt___
Titel
Leerabschnitt
erforderlich
fF
:
Bandlaut-
richtung
MU
EEE
TET
PTTL
Tce.
10
sex.
Wiedergabe
Wiedergabe Wiedergabe
jergabe
Vorspulen
Vorspulen
INTRO
CHECK-Funktion|
CPS-Funktion
(Computer-Programm-Suchlauf)
Die
CPS-Funktion
erlaubt
den
Wiedergabe-
Hinweise:
start
bei
nachfolgenden
Titeln
(bis
zu
15
Titel
nach
dem
jeweils
gerade
laufenden).
Der
einwandfreie
Betrieb
dieser
Funktion
ist
nur
bei
vorhandenen
Leerabschnitten
von
mindestens
4
Sek.
Dauer
méglich.
Diese
Abschnitte
sind
mit.
der
REC
MUTE-Taste
herstellbar.
1.
Die
CPS/CDS-Taste
wiederholt
betatigen,
bis
im
MULTI
COUNTER
die
erforder-
liche
Zahi
der
zu
iiberspringenden
Titel
erscheint
(CP
1,
CP
2,
...
CP
15).
Siehe
Tabelle
“Anwahlen
eines
gewiinschten
Titels
mit
der
CPS-Funktion”,
eWurde
die
Anzeige
2u
weit
geschaltet,
die
COUNTER
CLEAR-Taste
betatigen
und
erneut
die
CPS-Einstellung
durch-
fiihren.
2.
Entsprechend
der
Suchlaufrichtung
die
44
oder
>>
Taste
betatigen.
3.
Die
bei
Umspulen
des
Bandes
durchge-
fiihrte
Abtastung
der
Leerabschnitte
wird
im
Zahlwerk
durch
abnehmende
Ziffern
angezeigt;
bei
Anzeige
CP
0
startet
die
Wiedergabe.
20
=
Die
CPS-Einstellung
ist
bei
jeder
Band-
Betriebsart
méglich,
jedoch
nicht
bei
Umspulbetrieb.
Zur
Abschaltung
der
CPS-Funktion,
nachdem
der
Suchlauf
gestartet
wurde,
die
<¢
,
>»
,
»
oder
STOP-Taste
betatigen.
Die
entsprechend
gewahite
Funktion
wird
ausgefiihrt,
und
die
Anzeige
schaltet
auf
die
zuvor
gezeigte
Zahlwerkfunktion
zuriick.
*Soll
die
CPS-Funktion
vor
Betatigen
der
4
oder
>>
Taste
abgeschaltet
werden,
die
COUNTER
CLEAR
oder
COUNTER
MODE-Taste
betatigen.
Die
Anzeige
schaltet
auf
die
zuvor
gezeigte
Zahlwerk-
funktion
zuriick,
und
die
eingeschaltete
Band-Betriebsart
wird
beibehalten.
STOP-
und
®
Taste
schalten
die
jeweils
gerade
eingestellte
Betriebsart
um.
eSiehe
auch
“Hinweise
zu
den
Suchlauf-
funktionen”.
Table of contents
Languages:
Other Teac Cassette Player manuals