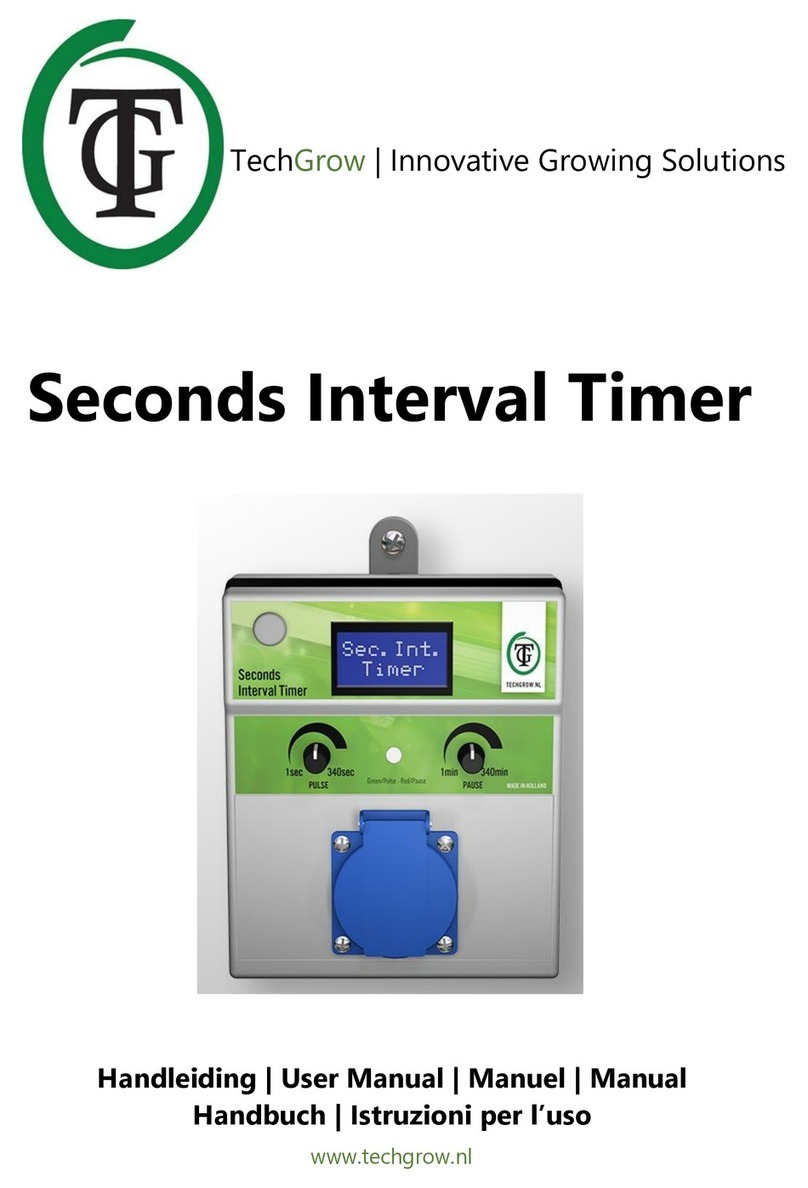
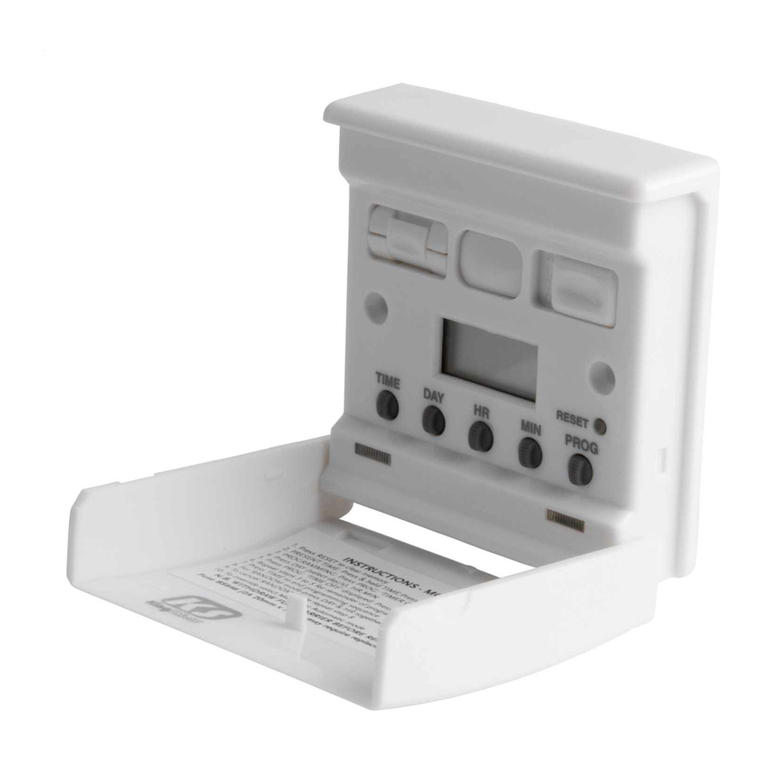
TechGrow Pro User manual

TechGrow | Innovative Growing Solutions
Interval Timer Pro
Handleiding | User Manual | Manuel | Manual
Handbuch | Istruzioni per l’uso
www.techgrow.nl

____________________________________________________________________________________________________________________________
TechGrow | Innovative Growing Solutions 2
Inhoud | Contents | Contenu | Contenido | Inhalt | Indice
Inhoud van de doos ______________________________________________________________________________________________ 5
Eigenschappen____________________________________________________________________________________________________ 5
Technische specificaties__________________________________________________________________________________________ 5
1. Werking van de Interval Timer Pro___________________________________________________________________________ 6
2. Bedienen en instellen van de Interval Timer Pro ____________________________________________________________ 6
2.1 Instellen dag-, nacht- of 24-uursfunctie ___________________________________________________________ 6
2.2 Eenheid pulstijd instellen ___________________________________________________________________________ 6
2.3 Eenheid pauzetijd instellen _________________________________________________________________________ 6
2.4 Startmodus cyclus instellen_________________________________________________________________________ 7
3. Puls- en pauzeperiode instellen ______________________________________________________________________________ 7
4. Actuele instellingen ___________________________________________________________________________________________ 7
5. Betekenis leds __________________________________________________________________________________________________ 7
6. Vervangen van de zekering ___________________________________________________________________________________ 7
Box contents ______________________________________________________________________________________________________ 8
Features ___________________________________________________________________________________________________________ 8
Technical specifications __________________________________________________________________________________________ 8
1. Operation of the Interval Timer Pro__________________________________________________________________________ 9
2. Control and set the Interval Timer Pro_______________________________________________________________________ 9
2.1 Set day, night or 24-hour mode ____________________________________________________________________ 9
2.2 Set time unit pulse time_____________________________________________________________________________ 9
2.3 Set time unit pause time ____________________________________________________________________________ 9
2.4 Set start mode ______________________________________________________________________________________10
3. Set pulse and pause interval _________________________________________________________________________________10
4. Real-time overview ___________________________________________________________________________________________10
5. Meaning leds__________________________________________________________________________________________________10
6. Fuse replacement _____________________________________________________________________________________________10
Contenu de la boîte _____________________________________________________________________________________________11
Caractéristiques__________________________________________________________________________________________________11
Spécifications techniques _______________________________________________________________________________________11
1. Fonctionnement du minuteur d'intervalle Pro _____________________________________________________________12
2. Contrôler et régler le minuteur d'intervalle Pro ___________________________________________________________12
2.1 Régler le mode jour, nuit ou 24 heures ___________________________________________________________12
2.2 Réglage du temps d'impulsion de l'unité de temps _____________________________________________12

____________________________________________________________________________________________________________________________
TechGrow | Innovative Growing Solutions 3
2.3 Réglage du temps de pause de l'unité de temps_________________________________________________13
2.4 Définir le mode de démarrage_____________________________________________________________________13
3. Définir l’impulsion et l'intervalle de pause _________________________________________________________________13
4. Aperçu en temps réel_________________________________________________________________________________________13
5. Signification des LEDs ________________________________________________________________________________________13
6. Remplacement des fusibles __________________________________________________________________________________14
Contenido de la caja_____________________________________________________________________________________________15
Características ___________________________________________________________________________________________________15
Especificaciones técnicas________________________________________________________________________________________15
1. Funcionamiento del Temporizador por intervalos Pro ____________________________________________________16
2. Control y configuración del Temporizador por intervalos Pro____________________________________________16
2.1 Establecer el modo día, noche o 24 horas ________________________________________________________16
2.2 Establecer la unidad de tiempo del tiempo de pulso ____________________________________________16
2.3 Establecer la unidad de tiempo del tiempo de pausa____________________________________________17
2.4 Establecer el modo de inicio _______________________________________________________________________17
3. Establecer el intervalo de pulso y pausa ____________________________________________________________________17
4. Vista general en tiempo real _________________________________________________________________________________17
5. Significado de los LED ________________________________________________________________________________________17
6. Reemplazo del fusible ________________________________________________________________________________________18
Inhalt der Box____________________________________________________________________________________________________19
Merkmale ________________________________________________________________________________________________________19
Technische Daten ________________________________________________________________________________________________19
1. Bedienung des Intervalltimer Pro ___________________________________________________________________________20
2. Steuern und Einstellen des Intervalltimers Pro_____________________________________________________________20
2.1 Einstellen des Tag-, Nacht- oder 24-Stunden-Modus ___________________________________________20
2.2 Zeiteinheit Impulszeit einstellen __________________________________________________________________20
2.3 Zeiteinheit Pausenzeit einstellen __________________________________________________________________21
2.4 Startmodus einstellen ______________________________________________________________________________21
3. Impuls- und Pausenintervall einstellen _____________________________________________________________________21
4. Echtzeit-Übersicht ____________________________________________________________________________________________21
5. Bedeutung der LEDs __________________________________________________________________________________________21
6. Austausch der Sicherung _____________________________________________________________________________________21
Contenuto della confezione ____________________________________________________________________________________23
Caratteristiche ___________________________________________________________________________________________________23
Specifiche tecniche ______________________________________________________________________________________________23
1. Utilizzare il dispositivo _______________________________________________________________________________________24
2. Impostazioni __________________________________________________________________________________________________24

____________________________________________________________________________________________________________________________
TechGrow | Innovative Growing Solutions 4
2.1 Modalità giorno, notte o H-24 ____________________________________________________________________24
2.2 Impostazione unità di misura tempo “attivo” (pulse) ___________________________________________24
2.3 Impostazione unità di misura tempo “stop” (pause) ____________________________________________24
2.4 Set start mode ______________________________________________________________________________________25
3. Impostazione durata intervalli_______________________________________________________________________________25
4. Stato del sistema______________________________________________________________________________________________25
5. Spie LED _______________________________________________________________________________________________________25
6. Sostituzione del fusibile______________________________________________________________________________________25

____________________________________________________________________________________________________________________________
TechGrow | Innovative Growing Solutions 5
__________________________________________________________________________________________________________
Bedankt voor het aanschaffen van de Interval Timer Pro. Met de Interval Timer Pro van TechGrow stelt u zeer
nauwkeurig intervaltijden in voor het aansturen van diverse apparaten. Hierbij kunt u kiezen uit verschillende
intervalprogramma’s puls/pauze: sec/sec, sec/min, sec/uren, sec/dagen, min/sec, min/min, min/uren,
min/dagen, uren/dagen, uren/uren, uren/min, uren/sec, dagen/dagen, dagen/uren, dagen/min, dagen/sec.
Inhoud van de doos
1. Interval Timer Pro
2. Bevestigingskit
3. Handleiding
Eigenschappen
•Plug & play
•Eenvoudig in te stellen
•Zeer nauwkeurige tijdklok
•Ingebouwde lichtsensor
•Instelbereik “pause”-tijd: 1 –99
•Instelbereik “pulse”-tijd: 1 –99
•Overzichtelijk lcd-scherm
•Uitgevoerd met relay tot 10 A
•Dag-, nacht- en 24-uursprogramma
Technische specificaties
•Stroomverzorging: 100 tot 240 V
•Opname: 3 W
•Schakelvermogen: 2300 W/10 A
Interval Timer Pro
Intervaltimer

____________________________________________________________________________________________________________________________
TechGrow | Innovative Growing Solutions 6
1. Werking van de Interval Timer Pro
Met de Interval Timer Pro van TechGrow stelt u zeer
nauwkeurig intervaltijden in voor het aansturen van
diverse apparaten. Hierbij kunt u kiezen uit verschillende
intervalprogramma’s puls/pauze: sec/sec, sec/min,
sec/uren, sec/dagen, min/sec, min/min, min/uren,
min/dagen, uren/dagen, uren/uren, uren/min, uren/sec,
dagen/dagen, dagen/uren, dagen/min, dagen/sec met
een instelbereik van 1 –99. Deze cyclus herhaalt zich.
De Interval Timer Pro heeft een ingebouwde LDR (Light
Dependant Resistor –lichtsensor) en biedt keuze uit drie
programma’s: dag, nacht en 24-uurs. Tijdens het
dagprogramma functioneert de timer alleen als de
ingebouwde lichtsensor daglicht detecteert. In dit geval
schakelt de lichtsensor de Interval Timer Pro
automatisch uit wanneer er geen licht meer
waargenomen wordt. Wanneer de lichtsensor weer licht
detecteert, start het intervalprogramma opnieuw op.
Tijdens het nachtprogramma is dit precies andersom.
Voor een continuprogramma kiest u de 24-uursoptie.
Door het extra zware relais kunt u apparaten schakelen
tot en met 10 ampère.
2. Bedienen en instellen van de
Interval Timer Pro
Met één druk-en-draaiknop (DDK) stelt u de Interval
Timer Pro makkelijk en snel in.
Tijdens het opstarten van de Interval Timer Pro ziet u het
volgende scherm. De rode en groen led knipperen om
de beurt:
Vervolgens komt u in het hoofdscherm:
Als u in het hoofdscherm bent, drukt u gedurende 7
seconden op de DDK. U komt in het hoofdmenu waar u
de gewenste instellingen programmeert.
2.1 Instellen dag-, nacht- of 24-uursfunctie
U bent in het eerste scherm van het hoofdmenu:
Tijdens de dagfunctie is de Interval Timer Pro actief
zolang de LDR licht waarneemt. Als de LDR geen licht
detecteert, gaat de Interval Timer Pro in de rustmodus.
Dit wordt in het scherm weergegeven als “Sleep”. Kiest u
voor de nachtfunctie, dan is de Interval Timer Pro actief
zolang de LDR geen licht waarneemt. Als de LDR licht
detecteert, gaat de Interval Timer Pro in de rustmodus.
Ook dit wordt in het scherm weergegeven als “Sleep”.
Tijdens de 24-uursfunctie is de Interval Timer Pro
continu in bedrijf.
Door aan de PTK te draaien kiest u de gewenste functie:
dag (DAY), nacht (NIGHT) of 24-uurs (24H).
Bevestig uw keuze door op de PTK te drukken.
U komt in het volgende scherm.
2.2 Eenheid pulstijd instellen
U bent in het tweede scherm van het hoofdmenu:
Draai aan de PTK om de gewenste eenheid voor de
pulstijd te kiezen: seconden (Seconds), minuten
(Minutes), uren (Hours) of dagen (Days).
Bevestig uw keuze door op de PTK te drukken.
U komt in het volgende scherm.
2.3 Eenheid pauzetijd instellen
U bent in het derde scherm van het hoofdmenu:
Int. Timer Pro
v. 181029b
Pulse 1 seconds
Pause 0:00:00:00
Select function
DAY
Pulse 1 seconds
Sleep
Pulse Unit
Seconds

____________________________________________________________________________________________________________________________
TechGrow | Innovative Growing Solutions 7
Draai aan de PTK om de gewenste eenheid voor de
pauzetijd te kiezen: seconden, minuten, uren of dagen.
Bevestig uw keuze door op de PTK te drukken.
U komt in het volgende scherm:
2.4 Startmodus cyclus instellen
U bent in het vierde scherm van het hoofdmenu:
Draai aan de PTK om de gewenste startmodus te kiezen:
puls (Pulse) of pauze (Pause).
Bevestig uw keuze door op de PTK te drukken.
U keert terug naar het hoofdscherm.
3. Puls- en pauzeperiode instellen
U bent in het hoofdscherm:
Druk eenmaal op de DDK.
Indien de Interval Timer Pro start met de pulsmodus en
u heeft bijvoorbeeld gekozen voor seconden, dan
verschijnt het volgende scherm:
Draai aan de PTK om de gewenste waarde in te stellen (1
–99).
Bevestig door op de PTK te drukken. U komt in het
volgende scherm (indien u bij pauze bijvoorbeeld voor
uren heeft gekozen):
Draai aan de PTK om de gewenste waarde in te stellen (1
–99).
Druk op de PTK om te bevestigen. U keert terug naar
het hoofdscherm.
4. Actuele instellingen
In het hoofdscherm ziet u de actuele gegevens.
Regel 1:afwisselend ziet u hier de instellingen van de
pauze- en pulsmodus.
Regel 2:hier ziet u de gegevens van de huidige modus.
In dit geval de pulsmodus, die nog 29 minuten
en 54 seconden duurt. De groene led is aan.
Hierna treedt de pauzemodus 2 uren in werking.
De rode led gaat dan aan.
5. Betekenis leds
De Interval Timer Pro beschikt over twee leds:
•Groen: de Interval Timer Pro geeft een puls.
•Rood: de Interval Timer Pro is in pauzemodus.
6. Vervangen van de zekering
In het geval van overbelasting of kortsluiting zal de
interne zekering van de Interval Timer Pro kapot gaan.
Om de zekering te vervangen dient u de Interval Timer
Pro open te schroeven. U doorloopt daarbij de volgende
stappen:
1. Verwijder de stekker uit het stopcontact.
2. Open de behuizing door de 4 schroeven aan de
achterzijde los te draaien.
3. Lokaliseer de zekering en verwijder deze.
4. Plaats een nieuwe zekering van 10 A.
5. Sluit de behuizing met de 4 schroeven.
6. Uw Interval Timer Pro is weer klaar voor gebruik.
Pause Unit
Seconds
Start cycle with
Pulse
Pulse 1 seconds
Pause 0:00:00:00
Set Pulse time
00 Seconds
Set Pause time
00 Hours
Pause 2 hours
Pulse 0:00:29:54

____________________________________________________________________________________________________________________________
TechGrow | Innovative Growing Solutions 8
__________________________________________________________________________________________________________
Thank you for purchasing the Interval Timer Pro. The Interval Timer Pro switches any device on and off at
accurately determined intervals. You can choose from different time units: sec/sec, sec/min, sec/hours,
sec/days, min/sec, min/min, min/hours, min/days, hours/days, hours/hours, hours/min, hours/sec, days/days,
days/hours, days/min, days/sec.
By means of the built-in light cell you can determine when the set program is active. You can choose from:
day, night or 24 hours.
Box contents
1. Interval Timer Pro
2. Mounting kit
3. Manual
Features
•Plug & play
•Easy to operate
•Very accurate timer
•Built-in LDR
•Adjustment range time units “pause”time: 1 –99
•Adjustment range time units “pulse”time: 1 –99
•Clear LCD display
•Relay capacity up to 10 A
•3 modes: day, night and 24-hour
Technical specifications
•Power supply: 100 V to 240 V
•Consumption: 3 W
•Switching capacity: 2300 W / 10 A
Interval Timer Pro
Interval timer

____________________________________________________________________________________________________________________________
TechGrow | Innovative Growing Solutions 9
1. Operation of the Interval Timer
Pro
The Interval Timer Pro switches any device on and off at
accurately determined intervals. You can choose from
different time units: sec/sec, sec/min, sec/hours,
sec/days, min/sec, min/min, min/hours, min/days,
hours/days, hours/hours, hours/min, hours/sec,
days/days, days/hours, days/min, days/sec, with an
adjustment range of 1 –99. For instance: pause 4
hours/pulse 15 minutes. This cycles repeats itself.
The Interval Timer Pro has a built-in LDR (Light
Dependent Resistor –light sensor) and offers a choice
of three programs: day, night and 24-hour. During day
mode, the timer only works if the built-in light sensor
detects light. In this case, the light sensor automatically
switches off the Interval Timer Pro when no more light
is detected. When the light sensor detects light again,
the interval program restarts. During night mode this is
exactly the other way around. For continuous operation,
choose the 24-hour option.
The heavy relay allows you to switch devices up to 10
amperes.
2. Control and set the Interval Timer
Pro
You can complete all settings with the Push-and-Turn
Knob (from now on PTK).
During the startup of the Interval Timer Pro you will see
the following screen. The red and green LEDs flash
alternately:
After a few seconds you enter the main screen:
To enter the main menu press the PTK for 7 seconds
while in the main screen. In the main menu you can
define your preferences.
2.1 Set day, night or 24-hour mode
The first screen of the main menu appears:
During day mode, the Interval Timer Pro is active as
long as the LDR detects light. If the LDR does not detect
light, the Interval Timer Pro enters sleep mode. This is
displayed as "Sleep" in the screen. If you select night
mode, the Interval Timer Pro is active as long as the
LDR does not detect light. If the LDR detects light, the
Interval Timer Pro enters sleep mode. This is shown in
the screen as "Sleep".
During the 24-hour mode, the Interval Timer Pro is
continuously in operation.
By turning the PTK you select the desired mode: day
(DAY), night (NIGHT) or 24-hour (24H).
Press the PTK to confirm.
You enter the next screen.
2.2 Set time unit pulse time
The second screen of the main menu appears:
Turn the PTK to select the desired time unit for the
pulse time: seconds, minutes, hours or days.
Press the PTK to confirm.
You enter the next screen.
2.3 Set time unit pause time
The third screen of the main menu appears:
Int. Timer Pro
v. 181029b
Pulse 1 seconds
Pause 0:00:00:00
Select function
DAY
Pulse 1 seconds
Sleep
Pulse Unit
Seconds

____________________________________________________________________________________________________________________________
TechGrow | Innovative Growing Solutions 10
Turn the PTK to select the desired time unit for the
pause time: seconds, minutes, hours or days.
Press the PTK to confirm.
You enter the next screen.
2.4 Set start mode
The fourth screen of the main menu appears:
Turn the PTK to select the desired start mode: pulse or
pause.
Press the PTK to confirm.
You return to the main screen.
3. Set pulse and pause interval
You are in the main screen:
Press the PTK once.
When the Interval Timer Pro starts in pulse mode and
the selected time unit is “seconds”, the next screen
appears:
Turn the PTK to set the desired value (1 –99).
Press the PTK to confirm.
You enter the next screen (for example if the time unit
for pause time is “hours”):
Turn the PTK to set the desired value (1 –99).
Press the PTK to confirm.
You return to the main screen.
4. Real-time overview
The main screen displays the current data.
Line 1: the settings of pause and pulse time are
displayed alternately.
Line 2: the data of the current mode are displayed. In
this example the pulse mode, which still lasts 29
minutes and 54 seconds. The green LED is on.
After this period of time, the pause mode is
activated for 2 hours. Then, the red LED comes
on.
5. Meaning leds
The Interval Timer Pro has two LEDs:
•Green: pulse mode is active.
•Red: pause mode is active.
6. Fuse replacement
In the event of overload or short circuit, the internal
fuse of the Interval Timer Pro will break. To replace the
fuse you have to open the Interval Timer Pro. Go
through the following steps:
1. Remove the plug from the socket.
2. Open the housing by unscrewing the 4 screws on
the back of the Interval Timer Pro.
3. Locate the fuse and remove it.
4. Insert a new 10 amp fuse.
5. Screw the 4 screws to close the housing.
6. Your Interval Timer Pro is ready for use again.
Pause Unit
Seconds
Start cycle with
Pulse
Pulse 1 seconds
Pause 0:00:00:00
Set Pulse time
00 Seconds
Set Pause time
00 Hours
Pause 2 hours
Pulse 0:00:29:54

____________________________________________________________________________________________________________________________
TechGrow | Innovative Growing Solutions 11
___________________________________________________________________________________________________________________
Merci d’avoir acheté le minuteur Interval Pro. La minuterie d'intervalle Pro allume et éteint n'importe quel
appareil à des intervalles déterminés avec précision. Vous pouvez choisir parmi différentes unités de temps :
sec / sec, sec / min, sec / heure, sec / jour, min / sec, min / min, min / heure, min / jour, heure / jour, heure /
heure, heure / min, heures / secondes, jours / jours, jours / heures, jours / minutes, jours / secondes.
À l'aide de la cellule lumineuse intégrée, vous pouvez déterminer quand le programme défini est actif. Vous
pouvez choisir entre : jour, nuit ou 24 heures.
Contenu de la boîte
1. Minuterie d'intervalle Pro
2. Kit de montage
3. manuel
Caractéristiques
•Branchez & utilisez-le
•Facile à utiliser
•Minuterie très précise
•LDR intégré
•Plage de temps de réglage des unités de temps « pause » : 1 - 99
•Plage de temps unités de temps « impulsion » : 1 - 99
•Écran LCD clair
•Capacité de relais jusqu’à 10 A
•3 modes : jour, nuit et 24 heures
Spécifications techniques
•Alimentation : 100 V à 240 V
•Consommation : 3 W
•Capacité de commutation : 2300 W / 10 A
Interval Timer Pro
Minuterie d’intervalle

____________________________________________________________________________________________________________________________
TechGrow | Innovative Growing Solutions 12
1. Fonctionnement du minuteur
d'intervalle Pro
La minuterie d'intervalle Pro allume et éteint n'importe
quel appareil à des intervalles déterminés avec précision.
Vous pouvez choisir parmi différentes unités de temps :
sec / sec, sec / min, sec / heure, sec / jour, min / sec, min
/ min, min / heure, min / jour, heure / jour, heure /
heure, heure / heure min, heures / secondes, jours /
jours, jours / heures, jours / minutes, jours / secondes,
avec une plage de réglage de 1 à 99. Par exemple :
pause 4 heures / impulsion 15 minutes. Ce cycle se
répète.
La minuterie d'intervalle Pro possède une LDR intégrée
(résistance dépendante de la lumière - capteur de
lumière) et offre un choix de trois programmes : jour,
nuit et 24 heures. En mode jour, la minuterie ne
fonctionne que si le capteur de lumière intégré détecte
la lumière du jour. Dans ce cas, le capteur de lumière
éteint automatiquement Interval Timer Pro lorsqu'il ne
détecte plus de lumière. Lorsque le capteur de lumière
détecte à nouveau la lumière, le programme d'intervalle
redémarre. En mode nuit, c'est exactement l'inverse.
Pour un fonctionnement continu, choisissez l'option 24
heures.
Le relais lourd vous permet de changer d'appareil
jusqu'à 10 ampères.
2. Contrôler et régler le minuteur
d'intervalle Pro
Vous pouvez effectuer tous les réglages avec le bouton
Push-and-Turn (à partir de maintenant sur PTK).
Lors du démarrage de la minuterie d'intervalle, l'écran
suivant apparaît. Les LED rouge et verte clignotent
alternativement :
Après quelques secondes, vous entrez dans l'écran
principal :
Pour entrer dans le menu principal, appuyez sur le PTK
pendant 7 secondes lorsque vous êtes dans l'écran
principal. Dans le menu principal, vous pouvez définir
vos préférences.
2.1 Régler le mode jour, nuit ou 24 heures
Le premier écran du menu principal apparaît :
En mode jour, la minuterie d'intervalle Pro est active tant
que le LDR détecte la lumière. Si le LDR ne détecte pas
de lumière, Interval Timer Pro passe en mode veille. Ceci
est affiché comme « Veille » sur l'écran. Si vous
sélectionnez le mode nuit, Interval Timer Pro est actif
tant que le LDR ne détecte pas de lumière. Si le LDR
détecte de la lumière, l'Interval Timer Pro passe en mode
veille. Ceci est affiché à l'écran comme « Veille ».
Pendant le mode 24 heures, la minuterie d'intervalle Pro
est en fonctionnement continu.
En tournant le PTK, vous sélectionnez le mode souhaité :
jour (JOUR), nuit (NUIT) ou 24 heures (24H).
Appuyez sur le PTK pour confirmer.
Vous entrez dans l'écran suivant.
2.2 Réglage du temps d'impulsion de l'unité de
temps
Le deuxième écran du menu principal apparaît :
Int. Timer Pro
v. 181029b
Pulse 1 seconds
Pause 0:00:00:00
Select function
DAY
Pulse 1 seconds
Sleep
Pulse Unit
Seconds

____________________________________________________________________________________________________________________________
TechGrow | Innovative Growing Solutions 13
Tournez le PTK pour sélectionner l'unité de temps
souhaitée pour la durée du pouls : secondes, minutes,
heures ou jours.
Appuyez sur le PTK pour confirmer.
Vous entrez dans l'écran suivant.
2.3 Réglage du temps de pause de l'unité de
temps
Le troisième écran du menu principal apparaît :
Tournez le PTK pour sélectionner l’unité de temps
souhaitée pour le temps de pause : secondes, minutes,
heures ou jours.
Appuyez sur le PTK pour confirmer.
Vous entrez dans l'écran suivant.
2.4 Définir le mode de démarrage
Le quatrième écran du menu principal apparaît :
Tournez le PTK pour sélectionner le mode de démarrage
souhaité : impulsion ou pause.
Appuyez sur le PTK pour confirmer.
Vous revenez à l'écran principal.
3. Définir l’impulsion et l'intervalle de
pause
Vous êtes dans l'écran principal :
Appuyez une fois sur le PTK.
Lorsque la minuterie d’intervalle Pro démarre en mode
impulsion et que l’unité de temps sélectionnée est
«secondes», l’écran suivant apparaît. :
Tournez le PTK pour définir la valeur souhaitée (1 - 99).
Appuyez sur le PTK pour confirmer.
Vous entrez dans l'écran suivant (par exemple, l'unité de
temps pour le temps de pause est « heures ») :
Tournez le PTK pour définir la valeur souhaitée (1 - 99).
Appuyez sur le PTK pour confirmer.
Vous revenez à l'écran principal.
4. Aperçu en temps réel
L'écran principal affiche les données actuelles.
Ligne 1: les réglages de pause et de temps
d'impulsion sont affichés
alternativement.
Ligne 2:les données du mode actuel sont
affichées. Dans cet exemple, le mode
impulsion, qui dure encore 29 minutes
et 54 secondes. Le voyant vert est
allumé. Après cette période, le mode
pause est activé pendant 2 heures.
Ensuite, le voyant rouge s'allume.
5. Signification des LEDs
Le minuteur d'intervalle Pro dispose de deux voyants :
•Vert : le mode impulsion est actif.
•Rouge : le mode pause est actif.
Pause Unit
Seconds
Start cycle with
Pulse
Pulse 1 seconds
Pause 0:00:00:00
Set Pulse time
00 Seconds
Set Pause time
00 Hours
Pause 2 hours
Pulse 0:00:29:54

____________________________________________________________________________________________________________________________
TechGrow | Innovative Growing Solutions 14
6. Remplacement des fusibles
En cas de surcharge ou de court-circuit, le fusible interne
de l'Interval Timer Pro se cassera. Pour remplacer le
fusible, vous devez ouvrir Interval Timer Pro. Suivez les
étapes suivantes :
1. Retirez la fiche de la prise.
2. Ouvrez le boîtier en dévissant les 4 vis situées à
l'arrière de l'Interval Timer Pro.
3. Localisez le fusible et retirez-le.
4. Insérez un nouveau fusible de 10 ampères.
5. Vissez les 4 vis pour fermer le boîtier.
6. Votre minuterie d'intervalle Pro est de nouveau
opérationnelle.

____________________________________________________________________________________________________________________________
TechGrow | Innovative Growing Solutions 15
__________________________________________________________________________________________________________
Gracias por comprar el Temporizador por intervalos Pro. El Temporizador por intervalos Pro enciende y apaga
cualquier dispositivo en intervalos determinados con precisión. Usted puede elegir entre diferentes unidades
de tiempo: Seg / seg, seg / min, seg / horas, seg / días, min / seg, min / min, min / horas, min / días, horas /
días, horas / horas, horas / min, horas / seg, días / días, días / horas, días / min, días / seg.
Mediante la célula de luz integrada usted puede determinar cuándo está activo el programa establecido.
Puede elegir entre: Día, noche o 24 horas.
Contenido de la caja
1. Temporizado por intervalos Pro
2. Equipo de montaje
3. Manual
Características
•Llegar y enchufar
•Fácil de utilizar
•Temporizador muy preciso
•LDR integrada
•Rango de ajuste del tiempo de “pausa” de las unidades de tiempo: 1 – 99
•Rango de ajuste de “pulso” de las unidades de tiempo: 1 –99
•Pantalla LCD transparente
•Capacidad del relé de hasta 10A
•3 modos: Día, noche y 24 horas
Especificaciones técnicas
•Fuente de alimentación: De 100V a 240V
•Consumo: 3W
•Capacidad de conmutación: 2300W / 10A
Interval Timer Pro
Temporizador por intervalos

____________________________________________________________________________________________________________________________
TechGrow | Innovative Growing Solutions 16
1. Funcionamiento del Temporizador
por intervalos Pro
El Temporizador por intervalos Pro enciende y apaga
cualquier dispositivo en intervalos determinados con
precisión. Usted puede elegir entre diferentes unidades
de tiempo: Seg / seg, seg / min, seg / horas, seg / días,
min / seg, min / min, min / horas, min / días, horas /
días, horas / horas, horas / min, horas / seg, días / días,
días / horas, días / min, días / seg, con un rango de
ajuste de 1 –99. Por ejemplo: Pausar 4 horas / pulsar 15
minutos. Este ciclo se repite solo.
El Temporizador por intervalos Pro tiene una RDL
integrada (Resistencia Dependiente de la Luz –Sensor
de luz) que ofrece elegir entre tres programas: Día,
noche y 24 horas. Durante el modo día, el temporizador
solo funciona si el sensor de luz integrado detecta la luz
diurna. En este caso, el sensor de luz apaga
inmediatamente el Temporizador por intervalos Pro
cuando ya no se detecte luz. Cuando el sensor de luz
detecta luz de noche, el programa de intervalo se
reinicia. Durante el modo noche, esto ocurre
exactamente al contrario. Para un funcionamiento
continuo, escoger la opción 24 horas.
El relé pesado le permite cambiar dispositivos de hasta
10 amperios.
2. Control y configuración del
Temporizador por intervalos Pro
Puede completar todos los ajustes con la ruleta para
girar y pulsar (de aquí en adelante RGP).
Durante el encendido del Temporizador por intervalos
Pro verá la siguiente pantalla: Los LED rojo y verde
parpadearán alternativamente:
Después de unos segundos entrará en la pantalla
principal:
Para entrar en el menú principal pulse la RGP durante 7
segundos cuando se encuentre en la pantalla principal.
En el menú principal usted puede definir sus
preferencias.
2.1 Establecer el modo día, noche o 24 horas
Aparecerá la primera pantalla del menú principal:
Durante el modo día, el Temporizador por intervalos Pro
estará activo mientras la RDL detecte luz. Si la RDL no
detecta luz, el Temporizador por intervalos Pro entra en
el modo apagado. Esto se muestra como “Apagado” en
la pantalla. Si usted selecciona el modo noche, el
Temporizador por intervalos Pro estará activo mientras
la RDL no detecte luz. Si la RDL detecta luz, el
Temporizador por intervalos Pro entra en el modo
apagado. Esto se muestra en la pantalla como
“Apagado”.
Durante el modo 24 horas, el Temporizador por
intervalos Pro funcionará continuamente.
Al girar la RGP seleccionará el modo deseado: Día (DÍA),
noche (NOCHE) o 24 horas (24H).
Pulse la RGP para confirmar.
Pasará a la siguiente pantalla.
2.2 Establecer la unidad de tiempo del tiempo
de pulso
Aparecerá la segunda pantalla del menú principal:
Int. Timer Pro
v. 181029b
Pulse 1 seconds
Pause 0:00:00:00
Select function
DAY
Pulse 1 seconds
Sleep
Pulse Unit
Seconds

____________________________________________________________________________________________________________________________
TechGrow | Innovative Growing Solutions 17
Gire la RGP para seleccionar la unidad de tiempo
deseada para el tiempo de pulso: Segundos, minutos,
horas o días.
Pulse la RGP para confirmar.
Pasará a la siguiente pantalla.
2.3 Establecer la unidad de tiempo del tiempo
de pausa
Aparecerá la tercera pantalla del menú principal:
Gire la RGP para seleccionar la unidad de tiempo
deseada para el tiempo de pausa: Segundos, minutos,
horas o días.
Pulse la RGP para confirmar.
Pasará a la siguiente pantalla.
2.4 Establecer el modo de inicio
Aparecerá la cuarta pantalla de menú principal:
Gire la RGP para seleccionar el modo de inicio deseado:
Pulso o pausa.
Pulse la RGP para confirmar.
Volverá a la pantalla principal.
3. Establecer el intervalo de pulso y
pausa
Usted se encuentra en la pantalla principal:
Pulse la RGP una vez.
Cuando el Temporizador por intervalos Pro empieza el
modo de pulso y la unidad de tiempo seleccionada es
“segundos”, aparece la siguiente pantalla:
Gire la RGP para establecer el valor deseado (1 –99).
Pulse la RGP para confirmar.
Pasará a la siguiente pantalla (por ejemplo, si la unidad
de tiempo para el tiempo de pausa son “horas”):
Gire la RGP para establecer el valor deseado (1 –99).
Pulse la RGP para confirmar.
Volverá a la pantalla principal.
4. Vista general en tiempo real
La pantalla principal muestra los datos actuales.
Línea 1: Se muestran alternativamente los
ajustes del tiempo de pausa y pulso.
Línea 2: Se muestran los datos del modo actual.
En este ejemplo, el modo de pulso, al
que le quedan 29 minutos y 54
segundos. El LED verde está encendido.
Después de este periodo de tiempo, el
modo de pausa estará activo durante 2
horas. Después, se encenderá el LED
rojo.
5. Significado de los LED
El Temporizador por intervalos Pro tiene dos LED:
•Verde: El modo de pulso está activo.
•Rojo: El modo de pausa está activo.
Pause Unit
Seconds
Start cycle with
Pulse
Pulse 1 seconds
Pause 0:00:00:00
Set Pulse time
00 Seconds
Set Pause time
00 Hours
Pause 2 hours
Pulse 0:00:29:54

____________________________________________________________________________________________________________________________
TechGrow | Innovative Growing Solutions 18
6. Reemplazo del fusible
En caso de sobrecarga o cortocircuito, el fusible interno
del Temporizador por intervalos Pro se romperá. Para
reemplazar el fusible, tiene que abrir el Temporizador
por intervalos Pro. Siga los siguientes pasos:
1. Retire el enchufe de la corriente.
2. Abra la carcasa desatornillando los 4 tornillos de la
parte trasera del Temporizador por intervalos Pro.
3. Localice el fusible y retírelo.
4. Introduzca un nuevo fusible de 10 amperios.
5. Atornille los 4 tornillos para cerrar la carcasa.
6. Su Temporizador por intervalos Pro está listo para
utilizarlo de nuevo.

____________________________________________________________________________________________________________________________
TechGrow | Innovative Growing Solutions 19
_____________________________________________________________________________________________________________________
Vielen Dank, dass Sie sich für den Intervalltimer Pro entschieden haben. Der Intervalltimer Pro schaltet jedes
Gerät in genau festgelegten Intervallen ein und aus. Sie können aus verschiedenen Zeiteinheiten wählen:
sec/sec, sec/min, sec/hours, sec/days, min/sec, min/min, min/hours, min/days, hours/days, hours/hours,
hours/min, hours/sec, days/days, days/hours, days/min, days/sec.
Mit Hilfe der eingebauten Lichtzelle können Sie bestimmen, wann das eingestellte Programm aktiv ist. Sie
können wählen zwischen: Tag, Nacht oder 24 Stunden.
Inhalt der Box
1. Intervalltimer Pro
2. Befestigungssatz
3. Manuell
Merkmale
•Plug & Play
•Einfach zu bedienen
•Sehr genauer Timer
•Eingebauter LDR
•Einstellbereich Zeiteinheiten "Pause" Zeit: 1 - 99
•Einstellbereich Zeiteinheiten "Puls" Zeit: 1 - 99
•Übersichtliches LCD-Display
•Relaiskapazität bis 10 A
•3 Modi: Tag, Nacht und 24-Stunden-Modus
Technische Daten
•Stromversorgung: 100 V bis 240 V
•Verbrauch: 3 W
•Schaltleistung: 2300 W / 10 A
Interval Timer Pro
Intervalltimer

____________________________________________________________________________________________________________________________
TechGrow | Innovative Growing Solutions 20
1. Bedienung des Intervalltimer Pro
Der Intervalltimer Pro schaltet jedes Gerät in genau
festgelegten Intervallen ein und aus. Sie können aus
verschiedenen Zeiteinheiten wählen: sec/sec, sec/min,
sec/hours, sec/days, sec/days, min/sec, min/min,
min/hours, min/days, hours/days, hours/hours,
hours/min, hours/sec, days/days, days/hours, days/min,
days/sec, mit einem Einstellbereich von 1 - 99. Zum
Beispiel: Pause 4 Stunden/Impuls 15 Minuten. Dieser
Zyklus wiederholt sich.
Der Intervalltimer Pro verfügt über einen eingebauten
LDR (Light Dependent Resistor - Lichtsensor) und bietet
eine Auswahl von drei Programmen: Tag, Nacht und 24
Stunden. Im Tagesmodus funktioniert die Zeitschaltuhr
nur, wenn der eingebaute Lichtsensor Tageslicht erfasst.
In diesem Fall schaltet der Lichtsensor den Intervalltimer
Pro automatisch aus, wenn kein Licht mehr erkannt wird.
Wenn der Lichtsensor wieder Licht erkennt, startet das
Intervallprogramm neu. Im Nachtbetrieb ist dies genau
umgekehrt. Für den Dauerbetrieb wählen Sie die Option
24 Stunden.
Das schwere Relais ermöglicht es Ihnen, Geräte bis zu 10
Ampere zu schalten.
2. Steuern und Einstellen des
Intervalltimers Pro
Mit dem Druck- und Drehknopf können Sie alle
Einstellungen vornehmen (ab sofort PTK –Push and
Turn Knob).
Während der Inbetriebnahme des Intervalltimer Pro
sehen Sie den folgenden Bildschirm. Die rote und grüne
LED blinken abwechselnd:
Nach ein paar Sekunden gelangen Sie in den
Hauptbildschirm:
Um in das Hauptmenü zu gelangen, drücken Sie die
PTK-Taste für 7 Sekunden, während Sie sich im
Hauptbildschirm befinden. Im Hauptmenü können Sie
Ihre Einstellungen vornehmen.
2.1 Einstellen des Tag-, Nacht- oder 24-
Stunden-Modus
Der erste Bildschirm des Hauptmenüs erscheint:
Im Tagesmodus ist der Intervalltimer Pro aktiv, solange
das LDR Licht erkennt. Wenn der LDR kein Licht erkennt,
wechselt der Intervalltimer Pro in den Ruhezustand. Dies
wird auf dem Bildschirm als "Sleep" angezeigt. Wenn Sie
den Nachtmodus wählen, ist der Intervalltimer Pro aktiv,
solange der LDR kein Licht erkennt. Wenn der LDR Licht
erkennt, wechselt der Intervalltimer Pro in den
Ruhezustand. Dies wird auf dem Bildschirm als "Sleep"
angezeigt.
Während des 24-Stunden-Modus ist der Intervalltimer
Pro kontinuierlich in Betrieb.
Durch Drehen des PTK wählen Sie den gewünschten
Modus: Tag (DAY), Nacht (NIGHT) oder 24 Stunden
(24H).
Drücken Sie zur Bestätigung die PTK-Taste.
Sie gelangen auf das nächste Bild.
2.2 Zeiteinheit Impulszeit einstellen
Der zweite Bildschirm des Hauptmenüs erscheint:
Drehen Sie die PTK-Taste, um die gewünschte
Zeiteinheit für die Pulszeit auszuwählen: Sekunden,
Minuten, Stunden oder Tage.
Drücken Sie zur Bestätigung die PTK-Taste.
Sie gelangen auf das nächste Bild.
Int. Timer Pro
v. 181029b
Pulse 1 seconds
Pause 0:00:00:00
Select function
DAY
Pulse 1 seconds
Sleep
Pulse Unit
Seconds
Table of contents
Languages:
Other TechGrow Timer manuals
Popular Timer manuals by other brands
Intermatic
Intermatic CT2000 Series quick start guide
PSB
PSB ET-4 NEMA 4 instruction sheet
Electrovision
Electrovision E304CE user manual
AutoChron
AutoChron Wall Switch Timer Installation & programming manual
PSP
PSP DTS-1 Specifications and installation

Colourworks
Colourworks CWDIGTIMDISP24 quick start guide
