IT - MINI ADATTATORE USB WIRELESS DUAL BAND
IT - IMPORTANTI INFORMAZIONI SULLA SICUREZZA
USO PREVISTO
• Your product is not a toy and is not meant for children, because it
contains small parts which can be swallowed and can injure when used
inappropriately!
• Please install the system and devices attached by dropping
or stumbling.
• Please remove the packing materials because children may cut
themselves on them while playing. Furthermore, there is a risk of
swallowing and inhalation of incidentals and insulating material.
• Avoid places with high temperatures, or humidity, or places which
might come into contact with water. Do not install the product close to
openings of air conditioners, or at places with an excessive amount of
dust or smoke.
• Do not install the product at places subject to vibration, or oscillation.
• Do not modify and alter the product and any accessories!
Do not use any damaged parts.
• Keep enough space around all devices for a good ventilation and free
motion and to avoid damages.
• Do not unplug the device when it is in using, keep distance from
flammable and explosive devices.
Gentile Cliente
Grazie per aver acquistato questo prodotto. Per ottenere il massimo
delle prestazioni nella salvaguardia della sua sicurezza, le consigliamo
di leggere con attenzione il presente manuale prima di collegare
e mettere in funzione il prodotto. Tenga sempre a disposizione il
presente manuale per ulteriori esigenze future.
Non è consentito l’uso dell’apparecchio in modi diversi
da quello indicato nel presente manuale. Utilizzare il
prodotto solo in luoghi interni asciutti. Non rispettare le
istruzioni e le precauzioni di sicurezza riportate nel
presente manuale potrebbe causare incidenti mortali, lesioni e danni
a persone e cose. Il costruttore/fornitore non risponde dei danni
risultanti da un utilizzo non conforme all’uso previsto.
• Questo prodotto non è un giocattolo e non è pensato per i bambini,
contiene piccole parti che potrebbero venir ingerite o inalate e
provocare danni se non utilizzato correttamente!
• Installare l’apparecchio e le periferiche ad esso collegate in modo
che non possano provocare danni a persone e oggetti come far
inciampare o causare cadute.
• Rimuovere tutti gli imballi che potrebbero causare soffocamento
se manipolati da bambini.
• Evitare di installare l’apparecchio in luoghi con temperature
o umidità eccessive, o luoghi che potrebbero venire a contatto con
l’acqua. Non installare vicino a bocchette dell’aria condizionata o in
luoghi che presentano polvere o fumi eccessivi.
• Non installare il prodotto in luoghi soggetti a vibrazioni o oscillazioni.
• Non modicare o alterare il prodotto e i suoi accessori!
Non utlizzare parti danneggiate.
• Mantenere sufciente spazio attorno alla periferica per garantire
una buona ventilazione, permettere una maggiore libertà di
movimento ed evitare danni.
• Non scollegare la periferica durante l’uso, mantenere il prodotto
distante da materiali inammabili ed esplosivi.
3
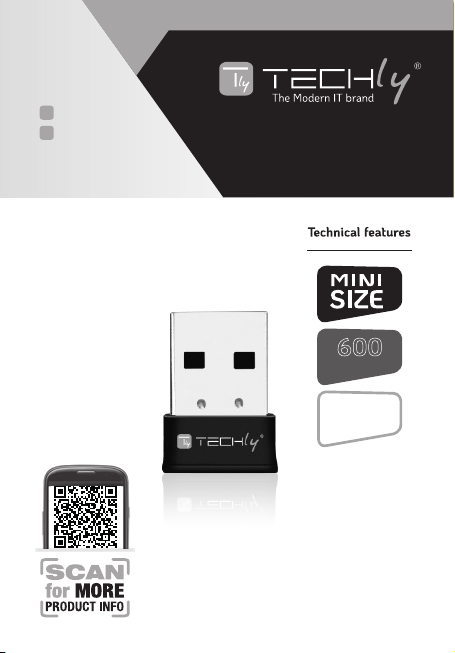
MINI USB WIRELESS
ADAPTER DUAL BAND
3
WWW.TECHLY.COM