LISTA DELLE PARTI FORNITE | SUPPLIED PARTS LIST
(1) Projector Plate-a (4) Mounting Legs-d
(2) M6x22 Hexangular
Head Bolt-q
(3) Concrete Anchor-m(3) Lag Bolt-l(4) M3/M4 Washer-i (1) Allen Wrench-k
(4) M3x16 Bolt-e (4) M4x12 Bolt-f (4) M5x12 Bolt-g (4) M6x12 Bolt-h
nut
(1) Ceiling Plate-b (1) Tube Set-c
(2) Plastic Knob-p(1) Longer Bolt-n (1) Nut-o
(4) M6x16 Hexangular
Head Bolt-j
(4) M3x10 Bolt-r
(1)ProjectorPlate-a
(1)CeilingPlate-b
(1)TubeSet-c
(4)MountingLegs-d
(4)M3x16Bolt-e
(1) Projector Plate-a (4) Mounting Legs-d
(2) M6x22 Hexangular
Head Bolt-q
(3) Concrete Anchor-m(3) Lag Bolt-l(4) M3/M4 Washer-i (1) Allen Wrench-k
(4) M3x16 Bolt-e (4) M4x12 Bolt-f (4) M5x12 Bolt-g (4) M6x12 Bolt-h
nut
(1) Ceiling Plate-b (1) Tube Set-c
(2) Plastic Knob-p(1) Longer Bolt-n (1) Nut-o
(4) M6x16 Hexangular
Head Bolt-j
(4) M3x10 Bolt-r
(4)M4x12Bolt-f
(4)M5x12Bolt-g
(4)M6x12Bolt-h
(4)M3/M4Washer-i
(4)M6x16Hexangular
HeadBolt-j
(1) Projector Plate-a (4) Mounting Legs-d
(2) M6x22 Hexangular
Head Bolt-q
(3) Concrete Anchor-m(3) Lag Bolt-l(4) M3/M4 Washer-i (1) Allen Wrench-k
(4) M3x16 Bolt-e (4) M4x12 Bolt-f (4) M5x12 Bolt-g (4) M6x12 Bolt-h
nut
(1) Ceiling Plate-b (1) Tube Set-c
(2) Plastic Knob-p(1) Longer Bolt-n (1) Nut-o
(4) M6x16 Hexangular
Head Bolt-j
(4) M3x10 Bolt-r
(1)AllenWrench-k
(3)LagBolt-l
(3)ConcreteAnchor-m
(1)LongerBolt-n
(1)Nut-o
(1) Projector Plate-a (4) Mounting Legs-d
(2) M6x22 Hexangular
Head Bolt-q
(3) Concrete Anchor-m(3) Lag Bolt-l(4) M3/M4 Washer-i (1) Allen Wrench-k
(4) M3x16 Bolt-e (4) M4x12 Bolt-f (4) M5x12 Bolt-g (4) M6x12 Bolt-h
nut
(1) Ceiling Plate-b (1) Tube Set-c
(2) Plastic Knob-p(1) Longer Bolt-n (1) Nut-o
(4) M6x16 Hexangular
Head Bolt-j
(4) M3x10 Bolt-r
(2)PlasticKnob-p
(2)M6x22Hexangular
HeadBolt-q
(4)M3x10Bolt-r
Selezionare gli elementi di fissaggio adeguati
Selecting the Proper Mounting Hardware
UNIVERSAL PROJECTOR CEILING MOUNT
ATTENTION: You can tighten this nut if you want to
makethebigtiltingforyourprojector.Butpleasedon't
over-tighen,otherwiseyoumayhaveproblemtodothe
tilting.
ATTENZIONE:
-
STOP
DONOTOVER-TIGHTENYOURMOUNTINGSCREWSTOTHEPROJECTORCHASSIS.
STOPUSINGTHEINCORRECTSCREWDEPTHMAYCAUSEDAMAGETOYOURPROJECTOR.
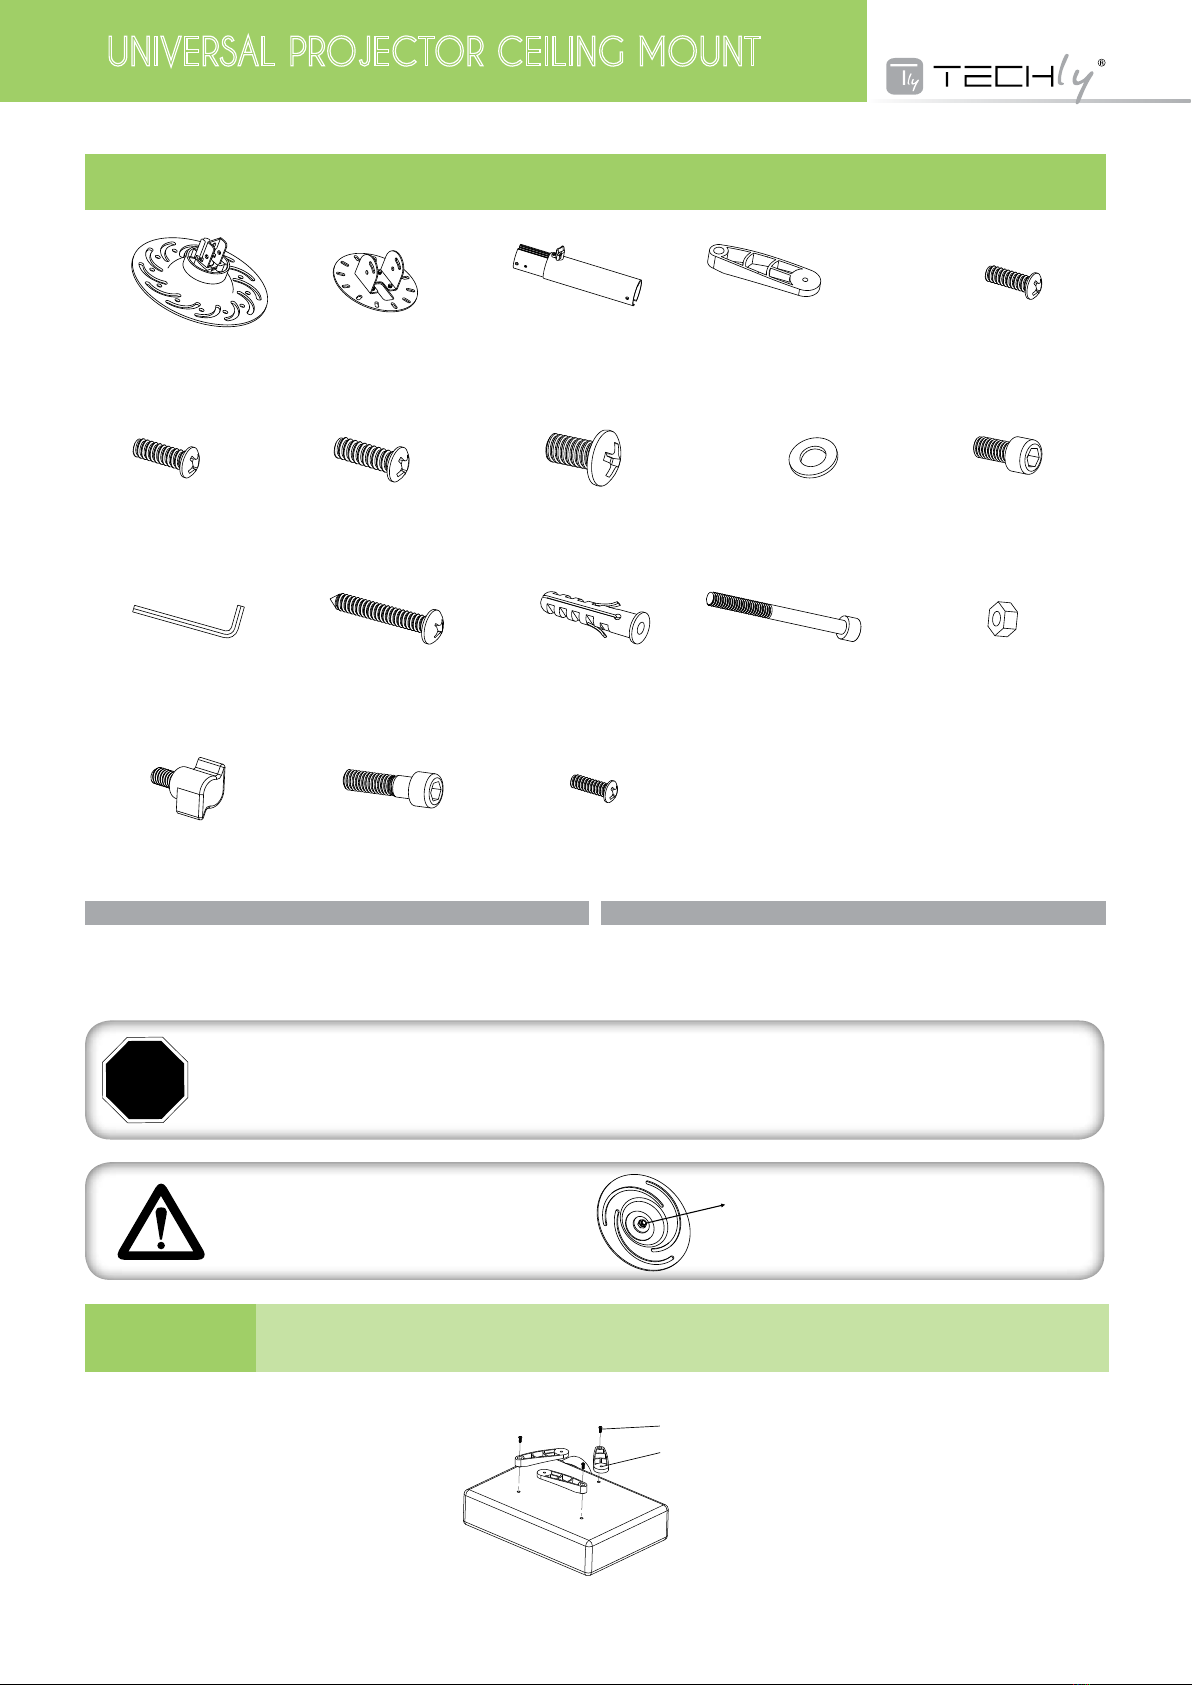
STEP 1 Installazione dei piedini di montaggio sul proiettore
Install the Mounting Legs on the Projector
1.Locatethemountingpointsonthebottomofthe
projector.
2.AttachtheappropriatenumberofMounting
Legs(d)totheprojectorusingtheappropriate
mountingBolts(e,f,g,h,r).
3.Donottightentheseboltscompletelyatthis
time.
4.TheM3/M4Washers(i)havetobeusedifyou
usetheM3/M4bolts.
d
e, f, g, h,r
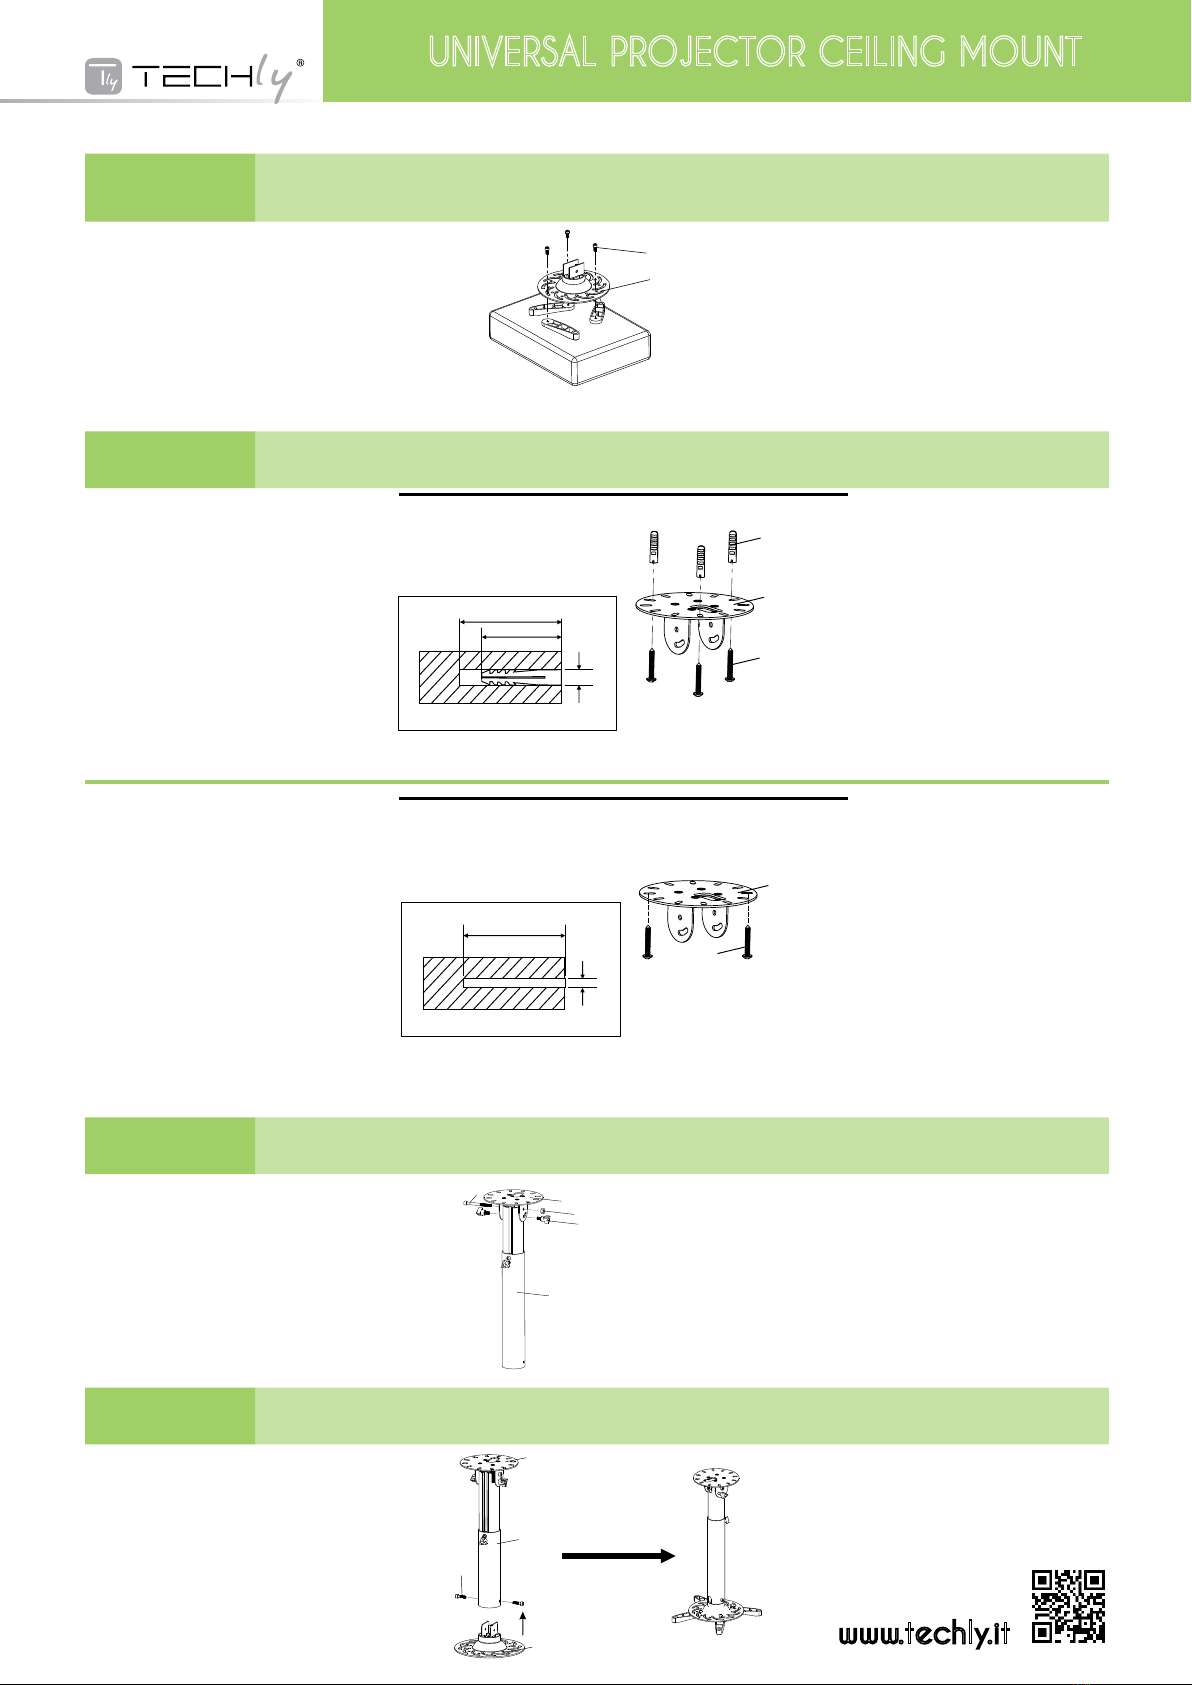
5 0 m m
3 . 8 m m
4 0 m m
5 0 m m
8 m m
m
l
b
b
l
d
e, f, g, h, r