Technaxx TX-116 User manual

Technaxx®* User Manual
Endoscope Camera TX-116
The Declaration of Conformity for this device is under the Internet link:
www.technaxx.de/ (in bottom bar “Konformitätserklärung”). Before using the
device the first time, please read the user manual carefully.
Service phone No. for technical support: 01805 012643 (14 cent/minute from
German fixed-line and 42 cent/minute from mobile networks).
Under no circumstances shall the manufacturer or supplier assume
responsibility or be liable for any direct or indirect, incidental or
consequential damages, or for any injury, resulting from the installation
or use of this system.
Keep this user manual for future reference or product sharing carefully. Do
the same with the original accessories for this product. In case of warranty,
please contact the dealer or the store where you bought this product.
Warranty 2 years
Introduction
The endoscope camera TX-116 is an optical inspection device which is not
approved for medical use. It can be used in inaccessible places to aid
inspection and fault analysis, because it has a 1m flexible gooseneck and
adjustable LED lighting.
To display the image on a TV screen, use the built-in video-out port.
The gooseneck is waterproof (protection class IP67) and suitable for use in
aqueous liquids provided the immersion depth does not exceed 90cm.
NOTE: only the gooseneck may be exposed to moisture, NOT the control
panel (TFT monitor with handle). To use of the device in oils, lyes or acids is
NOT permitted.
WARNING: The endoscope camera is not suitable for medical
applications or use and should never be inserted into body orifices.

Features
Waterproof mini endoscope camera with monitor & 1m flexible gooseneck
Exploration and measurement hard-to-reach, narrow and dark areas and
corners (pipes, waterpipes, engine compartment, under/behind cabinets, etc.)
Various attachements (magnet, mirror, hooks) help to recover keys, rings,
etc. Rescue a ring or key, which e.g. fell into a drain, by attaching the
magnet or hook on the endoscope camera head Find things under
cupboards or shelfs with the attachable mirror
2.31" TFT LCD colour monitor (5.9cm)
Stepless dimmable camera illumination (8 stages) with 4 white LED lights
Easy operation via ON/OFF button
3 buttons for 90° image rotation, display brightness and endoscope light
Lightweight, handy design, flexible and convenient to use
Gooseneck protection class IP67 (dustproof & protection against temporary
immersion)
Small handy hard shell case for easy storage and take away
Package contents
A Endoscope camera TX-116 F Double hook camera attachment
B Hard shell case G Mirror camera attachment
C Flexible gooseneck with camera
head and LED lighting H 2x attachment fixtures
D Magnet camera attachment I 4x AA batteries (LR6) 1.5V
E Hook camera attachment J User Manual
& AV cable (1m) with jack-to-cinch (to show live pictures on TV)

Overview: controls & button functions
1 Monitor
2 Power indicator
3 ON / OFF button
4 View/rotate image button
5 Camera head illumination
button
6 Handle
7 Brightness adjustment display
button
8 Battery compartment (at the
back of the device)
9 Video-out port
10
Flexible gooseneck
11
Camera head with LEDs
Inserting & replacing the batteries
Ensure that the camera is switched off. The battery compartment [8] is
located at the back of the device. Remove the battery compartment cover by
pressing the release mechanism and lifting the cover upwards. The ribbon in
the battery compartment is intended to facilitate the subsequent removal of
the batteries. When inserting the batteries, make sure that this ribbon runs
completely under all 4 batteries and that you can still access the end of the
ribbon after the batteries have been inserted.
Insert 4x AA (LR6) batteries 1.5V
with the correct polarity in the
battery compartment.
Note the markings in the battery
compartment and on the
batteries.
Remove the batteries if you will
not be using the device for an
extended period of time.

.1. The end of the ribbon should lie smoothly
between the batteries and battery compartment
cover.
.2. Close the battery compartment by first
inserting the two plastic tabs of the battery
compartment cover into the slots provided for
this purpose on the housing of the endoscope
camera.
.3. Then press it downwards until it audibly
engages.
Attaching & detaching the gooseneck
To ensure the tightness of the screw connection,
remove any impurities on the rubber ring (a) and on
the screw thread (b) with a slightly damp cloth.
To maintain the flexibility of the rubber ring, you
should lubricate it occasionally, for example, with
vaseline.
The gooseneck can only be attached in one direction
due to the polarity protection feature. Insert the
polarity protection for this purpose into the slot
provided (c).
The gooseneck can then be screwed on.
Turn the screw connection to the right until it is firmly
secured.
To detach the gooseneck, turn the screw connection
to the left until it is released.
The gooseneck can then be pulled off by exerting a
little force.

Use of the device
Switching the endoscope camera on and off
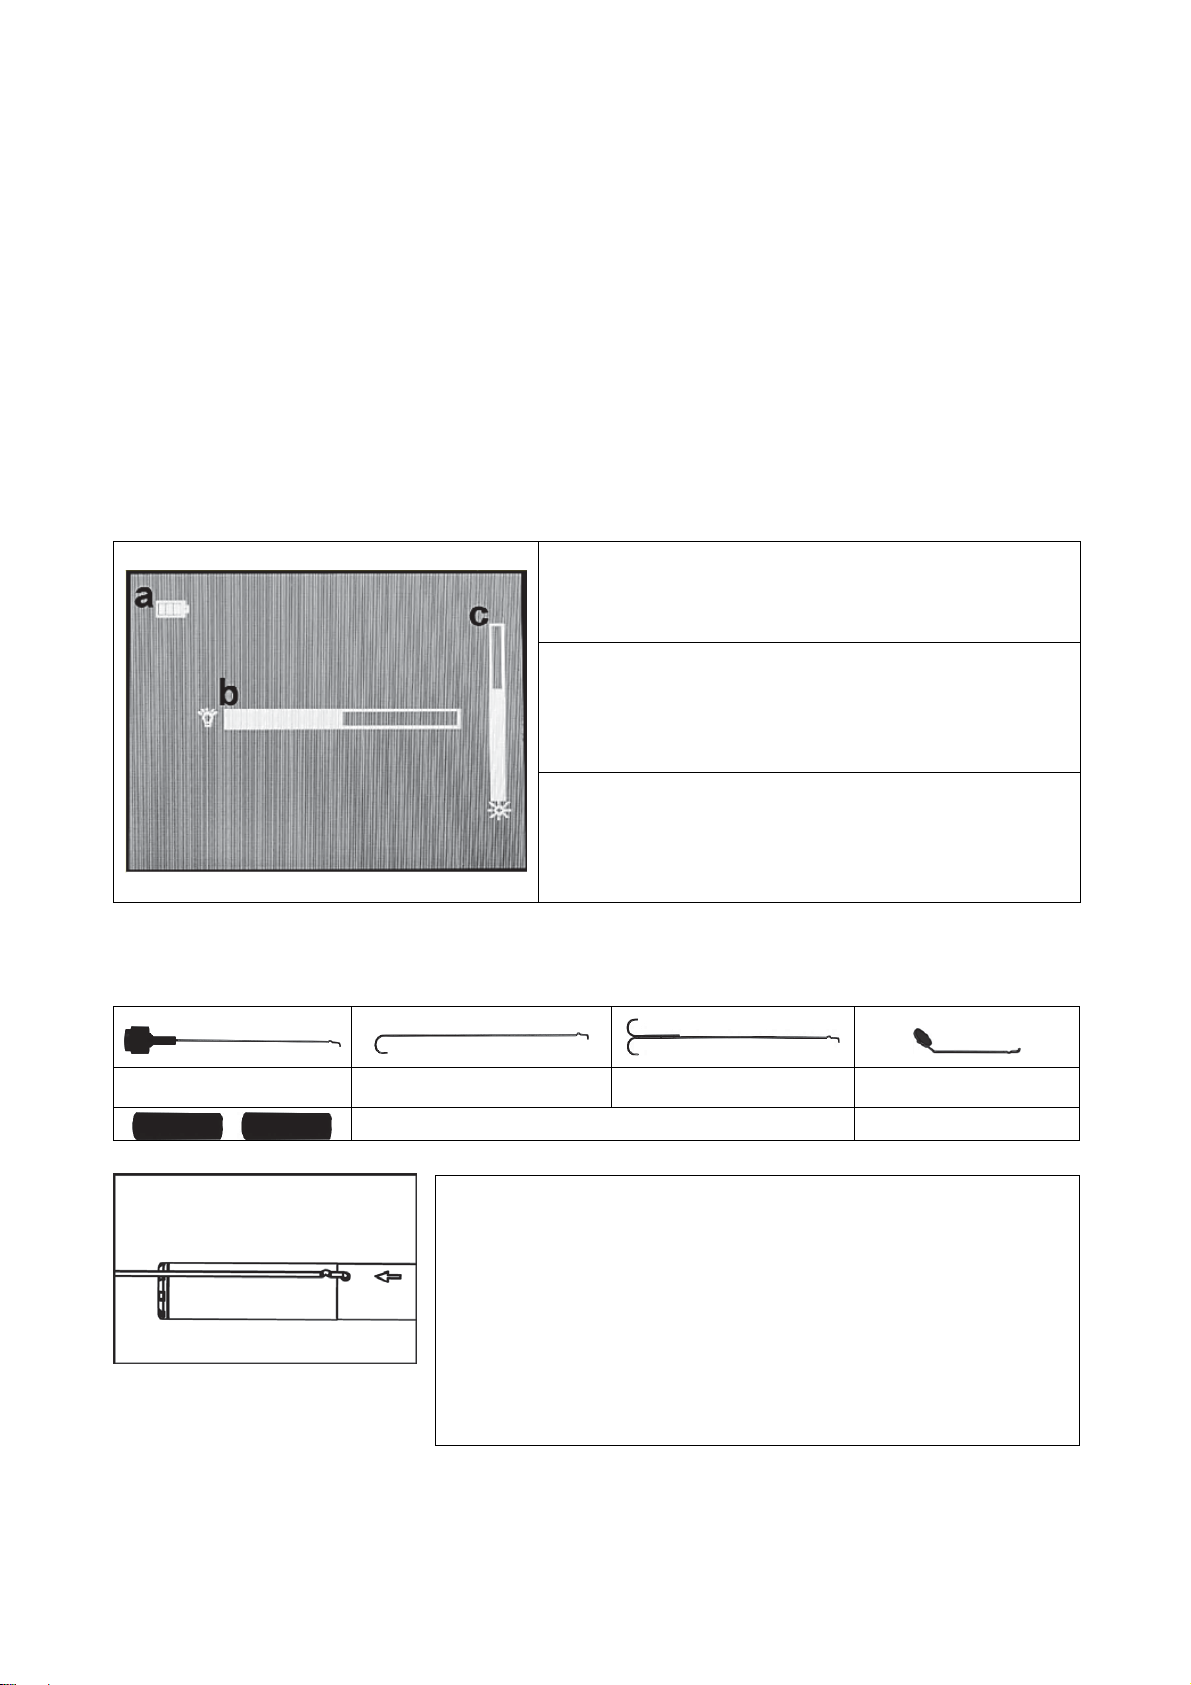
The endoscope camera is switched on and off by pressing the on/off switch
[3] for approximately 2 seconds. The power indicator [2] lights up green and,
after a short delay, the image is shown on the monitor [1].
Lighting
The camera head is equipped with 4 LEDs. This lighting can be switched on
with the illumination button [5]. This button can also be used to gradually
increase the brightness of the LEDs by pressing it several times. 8 different
levels can be set. When the highest level is reached and the illumination
button [5] is pressed again, the lighting switches itself off.
Monitor brightness
The brightness of the monitor can be changed with the brightness adjustment
display button [7]. The brightness of the monitor is gradually increased when
this button is pressed several times. 8 different levels can be set. When the
highest level is reached and the brightness adjustment display button [7] is
pressed again, the brightness adjustment is reset to the default value.
Changing the display
The camera image can be rotated by 180° and mirrored vertically or
horizontally by pressing the view/rotate image button [4]. This setting enables
you to display four different views of your image. If the display is changed, the
default display is shown after the camera has been switched off and then
switched on again.
Video-out function
You can use this function, for example, to display the images of the camera
on a TV. Depending on the device on which you want to perform the
playback, you will require a connection cable which must have a 3.5mm jack
plug on one side for connecting to the video-out port [9] of the endoscope
camera. Put the Cinch (RCA) connector into your playback device. For further
details, read the user manual for your playback device.
To use the video-out function, proceed as follows:
Switch off the endoscope camera.
Connect the video-out port [9] of the endoscope camera to your
playback device. Note the corresponding user manual to adjust your playback
device correctly.
Table of contents