Technaxx TE16 User manual

Technaxx
®
* User Manual
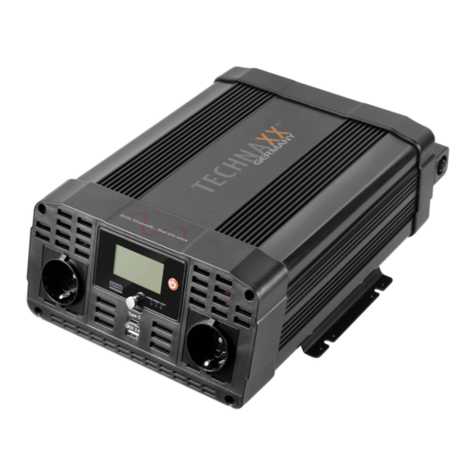
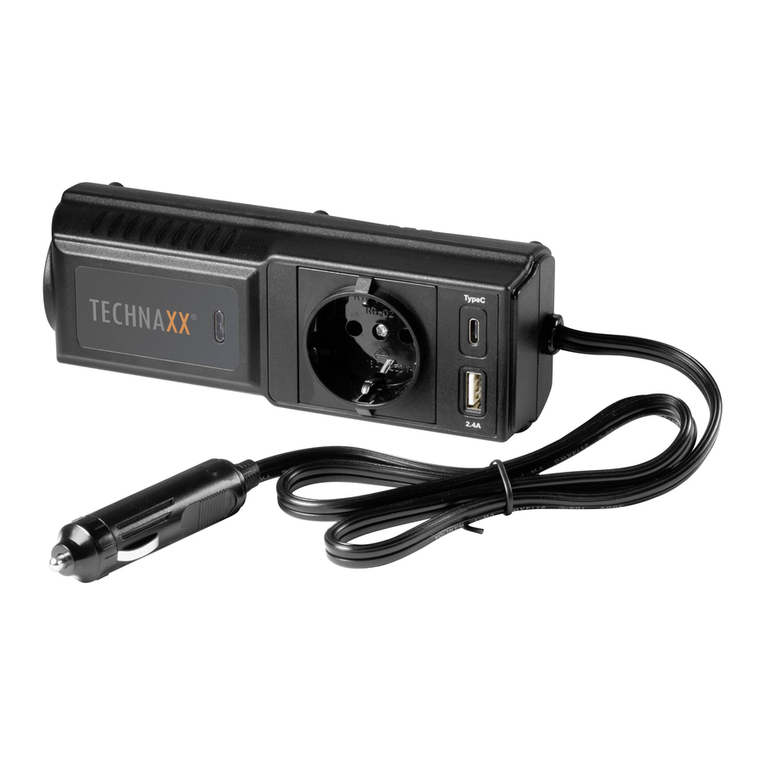
Power Inverter 1200W TE16
Do not use electric charge that need higher watts than
maximum 1200W continuously! This device is only suitable for
vehicle with 12V electrical systems!
The Declaration of Conformity for this device is under the Internet link: www.technaxx.de/
(in bottom bar “Konformitätserklärung”). Before using the device the first time, please read
the user manual carefully.
Service phone No. for technical support: 01805 012643 (14 cent/minute from German
Keep this user manual for future reference or product sharing carefully. Do the same with
the original accessories for this product. In case of warranty, please contact the dealer or
the store where you bought this product. Warranty 2 years
Features
For mobile use of electronic devices via 12V connection
2x 5V USB ports with max. 3.1A (in total)
2x 230V safety contact sockets with power switch
Converts 12V DC battery power into standard 230V AC (household) power,
to run a variety of electronics, e.g. tablets, smartphones, laptop computers,
game systems, TVs, DVD/MP3 players, camping accessories, GPS units and
much more
Output power max. 1200W (continuous) & 2400W (peak)
Automatic safety shutdown to secure the car battery (alarm at ~10.5 & ~16V)
Protection against overload, short circuit & reverse polarity
Overheating protection through built-in ventilation
Hints for Environment Protection: Packages materials are
raw materials and can be recycled. Do not disposal old devices
or batteries into the domestic waste. Cleaning: Protect the
device from contamination and pollution (use a clean drapery).
Avoid using rough or coarse-grained materials or solvents or
aggressive cleaner. Wipe the cleaned device accurately.
Distributor: Technaxx Deutschland GmbH & Co.KG, Kruppstr.
105, 60388 Frankfurt a.M., Germany

Technical specifications
Input voltage of the battery DC 12V (10.5V–16V)
Output voltage per socket / AC frequency AC 230V / 50Hz nominal
Permanent current / Input current 115A / max. 125A
Output power 1200W (maximum, continuously)
2400W (peak)
Output
waveform
MSW The power inverter’s MSW [Modified Sine Wave] is
especially suitable for light and heat with max. 1200W. MSW
output can produce "humming" when connected to audio
equipment and is generally unsuitable for sensitive electronics.
Nominal load efficiency 90%
USB output ports 2x 5V USB ports with max. 3.1A (in total)
AC output 2x 230V safety contact sockets
Circuit protection (DC overload) 3x 40A internal fuses
Weight / Dimensions 2.3kg (with cables)
(L) 28.8 x (W) 15.9 x (H) 9.9cm
Package Contents Power Inverter 1200W TE16, 2x 90cm
connection cable, User Manual
Warnings & Caution
Use of the device in life support applications where failure of the device can
reasonably be expected to cause the failure of the life support equipment or to
significantly affect its safety or effectiveness is not recommended. Do not
use the device in the presence of a flammable anesthetic mixture with air,
oxygen or nitrous oxide, and also not near flammable materials, fumes or
gases. Since the device requires adequate ventilation during operation, do
not block fan or cooling vents and do not cover the device. Do not operate
near car heating vents or in direct sunlight. Keep the device dry at all times
and disconnect when not in use. Turn OFF connected equipment before (!)
starting your engine. DO NOT plug a surge protector, line conditioner or UPS
system into the device. If you attach AC extension cords, use the heaviest
practical gauge. Before connecting a battery charger or adapter, check its
manual to make sure that the technical specifications of the device (including
output waveform) fall within the recommendations of the external battery
charger or adapter.

Normal use
The power inverter is intended to convert 12V direct current voltage to
alternating current voltage 230V / 50Hz and/or
direct current voltage of 5V / max. 2.1A (2.0 USB).
The power inverter is only intended for permanent installation.
This power inverter is not intended for use by children or persons with
limited mental capacity or lacking experience and/or lacking expertise.
Children should be supervised to ensure they do not play with the power
inverter.
The power inverter is not intended for commercial use.
Any other use or modification of the device is considered improper and
involves significant risks. The manufacturer assumes no liability for damages
due to improper use.
Intended sites
The power inverter is intended for installation in
Automobiles and lorries
Caravans
Boats
with 12V batteries.
Do not place the power inverter:
near heat sources (radiators, direct sunlight), flammable materials, battery
compartment or starter battery,
moist locations or locations exposed to dripping or splashing water,
in environments with explosion hazards

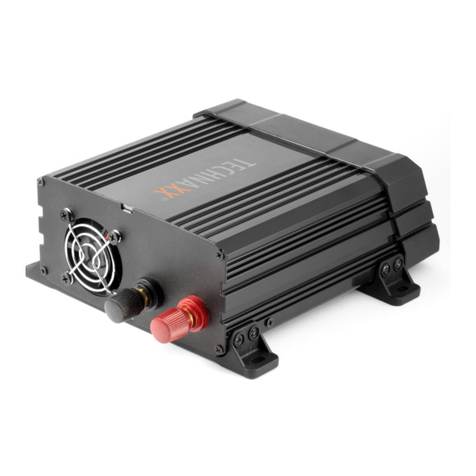
Product Overview
1 Positive power input (protective cap) 5 Safety contact socket
2 Negative power input (protective cap) 6 ON / OFF Switch
3 High speed cooling fan 7 USB port
4 Ground 8 Indicator LED
9 Ventilation holes
(3) When the temperature inside the inverter exceeds a preset limit, the
cooling fan automatically turns on to cool the inverter. When the temperature
reduces, the fan turns off.
(7) Both USB ports together have in total the max. of 3.1A; e.g. when the first
USB port delivers 2.1A, is the second one only able to deliver 1A.
(8) Green = OK; Red = Problem (see protective features)

Determine Battery Capacity
Battery type and battery size strongly affect the performance. Therefore, you
need to identify the type of loads your inverter will be powering and how much
you will be using them between charges. Once you know how much power
you will be using, you can determine how much battery capacity you need.
Technaxx recommends that you purchase as much battery capacity as
possible.
CAUTION: Risk of inverter damage.
The inverter must only be connected to a battery that has a nominal output
of 12V.
Not operate if connected to a 6/24V battery.
Voltage converter installation
Install the power inverter with suitable screws (not included):
in sturdy and even locations
on clean, dry and non-flammable surfaces,
in well ventilated areas.
Please be sure not to cover the vents.
Connecting the inverter
This Inverter has two DC cable connections, one positive and one negative.
The order of steps in the following procedure minimizes the danger of sparking
near the battery bank.
Prepare all cable set ends with ring terminals at the battery ends.
Select the OFF position on the inverter.
Remove the red positive(+) screw connector cap.
Slide the red positive(+) cable lead onto the red positive(+) screw connector
stud. Tighten the screw connector cap securely.
Remove the Black negative(-) screw connector cap.
Slide the Black negative(-) cable lead onto the Black negative(-) screw
connector stud. Tighten the screw connector cap securely.
Securely connect the red positive (+) cable lead to the positive (+) terminal
of the battery or power source.
Securely connect the black negative (-) cable lead to the negative (-)
terminal of the battery or power source.
Connect a 0.75mm² wire or larger insulated wire between the chassis
ground connector on the Inverter and a clean electrical grounding point on the
vehicle. This will minimize possible electrical noise interference when using
TVs or radios.
Note: Sparking is normal for first connection.
Operation
Before using the power inverter determine your
equipment’s total watts!
Do not connect more watt than the Output Power (maximum continuous
watt) of the device (see technical specifications).
Determine Total Wattage Required, Watt ratings are usually listed in
equipment manuals or on nameplates. If your equipment is rated in Amp,
multiply that number times AC utility voltage to determine watts.
(Mathematic example: a drill requires 1.5A 1.5A x 230Volt = 345Watt. No
problem to use the drill.)
Remember the vehicle‘s battery will be discharged when the vehicle is not
running.
To Determine DC Battery Amps Required, divide the total wattage
required (from above) by the nominal battery voltage to determine the DC
amps required. 345 Watt : 12V = 28.75A DC.
To Estimate Battery Amp-Hours Required multiply the DC amps required
(from above) by the number of hours you estimate you will operate your
equipment exclusively from battery power before you have to recharge your
batteries with utility- or generator-supplied AC power. Compensate for
inefficiency by multiplying this number by 1.2. This will give you a rough
estimate of how many amp-hours of battery power (from one or several
batteries) you should connect to your inverter/charger.
28.75A DC x 0.5h runtime x 1.2 inefficiency rating = 17.25 amp-hours.

To Estimate Battery Recharge Required given Your Application You must
allow your batteries to recharge long enough to replace the charge lost during
inverter operation or else you will eventually run down your batteries.
To estimate the minimum amount of time you need to recharge your batteries
given your application, divide your required battery amp-hours (from above) by
your Inverter/Charger’s rated charging amps (depending on the ON/OFF
settings). 17.25 amp-hours / 40Ainverter/charger rating = 0.43h recharge
Operation
Turn ON the inverter:
Turn ON/OFF switch on the front panel. The GREEN LED indicator light will
light verifying the inverter is receiving power.
Turn OFF the inverter:
Turn ON/OFF switch on the front panel. When you have confirmed that the
appliance to be operated is turned off, plug an appliance cord into one of the
230V AC outlets on the front panel of the inverter.
Turn Inverter ON/OFF Switch to the ON position
Turn the appliance ON.
To disconnect, reverse the above procedure.
Power switch can be off when you only use the USB output ports.
Note: If you are going to operate several loads from the inverter, turn them on
separately after you have turned the inverter on. This will ensure that the
inverter does not have to deliver the starting current for all the loads at once.

Using the Inverter to Operate a TV or Audio Device
The inverter is shielded and filtered to minimize signal interference. Despite
this, some interference may occur with your television picture, especially with
weak signals. Below are some suggestions to try and improve reception.
Make sure the television antenna produces a clear signal under normal
operating conditions (i.e. at home plugged into a standard 230V AC wall
outlet). Also, ensure that the antenna cable is adequately shielded and of
good quality.
Try altering the position of the inverter, antenna cables, and television power
cord. Add an extension cord from the inverter to the TV so as to isolate its
power cord and antenna cables from the 12 volt power source. Try coiling the
television power cord and the input cables running from the 12 volt power
source to the inverter.
Affix one or several “Ferrite Data Line Filters” to the television power cord.
Ferrite Data Line Filters can be purchased at most electronic supply stores.
Try grounding the inverter with a minimum (0.75mm²) wire, using as short a
length as possible.
Protective Features
Low Voltage Alarm (Red LED on Inverter)
This state is not harmful to the Inverter, but could damage the power source.
The Inverter shuts off when the input voltage drops to 10.5 volts and an
audible alarm sounds same time. When ample power is supplied, the Inverter
may then be turned back on.
Over-Voltage Protection (Red LED on Inverter)
The Inverter will automatically shut down when the input voltage exceeds
15.8±0.5V DC.

Overload Protection (Red LED on Inverter)
The Inverter will automatically shut down if the continuous draw exceeds its
maximum wattage rating. When the Inverter is at or near maximum output, an
alarm will sound. When the alarm sounds you need to disconnect the device(s)
to bring the Inverter output down to an acceptable level.
If you continue to use the Inverter at or near the maximum output, it will
eventually overheat and shut down. If you exceed the maximum Inverter
output, the alarm will sound and the Inverter will automatically shut down. The
red fault indicator will light and the alarm will continue to sound. The Inverter
must be reset after an overload condition.
Temperature Protection
The Inverter is equipped with a cooling fan. Depending upon the load output
and the temperature of the Inverter, the cooling fan will turn on and off as
required to cool the Inverter if needed. If the temperature reaches
approximately 80°C the Inverter will shut down automatically. Turn off the
Inverter and allow it to cool for a minimum of 15 minutes. Before starting up
again, verify the total wattage of the devices being powered.
To Reset the Inverter
1. Turn off the Inverter using the ON/OFF switch on the Inverter, depending
upon how the Inverter was controlled.
2. Unplug all devices.
3. Turn the Inverter back on using the ON/OFF switch on the Inverter. Before
devices are reconnected, verify the total wattage of the devices to ensure they
are less than the rating of the Inverter.

TROUBLESHOOTING
No Power on
Fault connection Turn the inverter’s power switch off; Verify cable are
tightly connected to the inverter and the power source
Battery voltage below 10V Recharge or replace battery
Equipment being operated draws too much power Allow the inverter to
cool down. Ensure there’s adequate ventilation around the inverter. Ensure
that load is no more than it’s maximum rating for continuous operation
Low Voltage alarm turns on immediately
The input voltage at input of the Inverter needs to be raised
Recharge/Replace battery or add additional batteries. Run the vehicle engine
when using a 12V DC plug
Low voltage arm is on all the time
Power battery condition with voltage drops Replace battery
Inadequate power or voltage drops Check condition of battery cables
and cable leads. Clean or replace as necessary
Low power output
Battery condition may be poor Recharge or replace a battery
Fault connection Make sure the battery and Inverter terminal are clean
Inverter does not work after connecting the cables in reverse
The internal protection has disabled the inverter Contact vendor
company for help
Enjoy your product * Share your experience and opinion on one of the
well-known internet portals such as Amazon or idealo.de
Other manuals for TE16
1
Table of contents
Other Technaxx Inverter manuals

Technaxx
Technaxx TE16 User manual

Technaxx
Technaxx TE21 User manual

Technaxx
Technaxx TE22 User manual

Technaxx
Technaxx TX-214 User manual

Technaxx
Technaxx TE19 User manual

Technaxx
Technaxx TX-200 User manual

Technaxx
Technaxx TX-203 User manual

Technaxx
Technaxx TE20 User manual

Technaxx
Technaxx TE23 User manual

Technaxx
Technaxx TE24 User manual
Popular Inverter manuals by other brands

AIMS Power
AIMS Power PWRI300012S instruction manual

Briggs & Stratton
Briggs & Stratton FORTRESS Series Installation and operation manual

SolaX Power
SolaX Power X1-Smart Series user manual

Srne
Srne HF4825U80-145 user manual

Vonsch
Vonsch RU CONTROL Series Configuration and Diagnostics

Sensata
Sensata SSI-12HF3.5N owner's manual