Technomark Multi 4 User manual

®
1 PRODUCT - 4 CONFIGURATIONS
NEW GENERATION!
®
w
w
w
.
t
e
c
h
n
o
m
a
r
k
-
m
a
r
k
i
n
g
.
c
o
m
w
w
w
.
t
e
c
h
n
o
m
a
r
k
-
m
a
r
k
i
n
g
.
c
o
m
On Site
demonstration!
On Site
demonstration!
®
CREATIVE TRACEABILITY

®
PRESENTATION
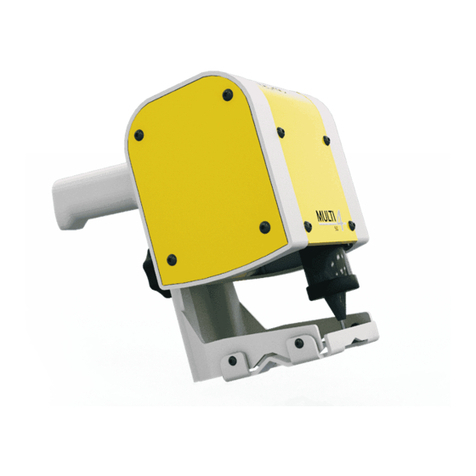
MULTI4 BENEFITS
• Easier to use : simplied user interface, intuitive
navigation, new and improved features (zooming,
cutting/pasting, test …)
• Resolution : high denition color screen
• Intuitive : icon based navigation menu allows for
quick understanding and operation of the software
• Ergonomics : new design with a second handle
(optional accessory)
• Handling : support foot, controller handgrip and
handle on the marking head (optional)
• Light weight : marking head weight reduced by
around 0.88 lbs (400 grams)
• Robust : use of cast aluminum parts
• Performance : increase of the marking speed by
20% and optimization of the overall X/Y movement,
standard management of 3 axes
• Resourceful : 40Mb of memory can accommodate
up to 20,000 stored, marking les (40 characters,
1 line), serial communication, USB, Ethernet (option)
and Inputs/Outputs
IDI Track :
Real-time Multi4 monitoring for analysis of maintenance needs,
stylus wear and detection faults (auto-diagnosis feature with 5
control points).
TECHNOLOGICAL INTELLIGENCE
IDI Mark :
The quality of marking is ensured, whatever the difference in
height between the part (at or cylindrical) and the stylus. Its
adjustment is managed by the Multi4 software.
(1)
(2) (1) Marking with IDI Track
(2) Marking without IDI Track
Patent n°EP-06 764715.6
Patent No. US-9, 421, 598
mark

®
MULTI4 / QUICK USER GUIDE N°1 USER’S MANUAL
STEP 1 : Read the safety instructions
STEP 2 : Unpacking, assembly and starting up
•Depending on your
application, we
strongly recommend to
wear protective glasses
and gloves, as well as
safety shoes.
•Keep the machine
away from heat,
humidity, and radio
interferences sources
(ex : welding machine).
•Never tighten or
release the knurled nut
of the percussion sub
assembly* using a
plier or any other tool.
Hand tightening is
sufcient (See User’s
guide 1-B-2).
•Avoid violent impact
on the marking head
or the control box.
•Never cover the
control box.
•Do not insert your
ngers between the
stylus and the part to
be marked.
•Never activate the
machine when empty
(without part to mark
under the marking head).
•Think about positioning
stylus between 0.039’’
and 0.37’’ (1mm and
9.5 mm) from the
surface to be marked.
Optimal conguration
is 0.12’’ (3 mm).
•In hand held position,
do not point or position
the active part of the
stylus towards yourself
or anybody else.
Connect the power cable to the
controller.
Tighten the locking handle on the
column (see assembly plan ASC10
included in the packing box).
Unpack the different parts
comprising the machine.
Plug in the power supply cable into
a power socket.
Mount the marking head on the
column (1), using the knurled nut at
the back of the head (2).
Assemble the base and the column
(see assembly plan ASC10
included in the packing box).
Power up the machine by switching
the main switch to ( I ).
Connect the marking-head
cable to the controller (1) and
lock it (2).
Fix the xing plate on the column
(see assembly plan ASC10
included in the packing box).
3
6
9
2
5
8
1
4
7
11
22
* Part where the stylus is located.

®
USER’S MANUAL
01 - Return to home page
02 - Character height, position
and marking force
03 - Setting point density,
spacing, ...
04 - Cancel input/operation
05 - Start/stop battery (optionnal)
06 - Space bar
07 - "Shift" key. Allow minuscule
when kept pressed + letter
08 - Marking or test stop button
09 - Insert special characters
10 - File (Open an existing
le, create a new le,
save, adjusting speed,
activate D axis)
11 - Marking simulation function
without marking
12 - Parameters setting (zoom,
time, language, accessory,
window size, …)
13 - Secondary functions
(see step 4 underneath)
14 - Battery and sleep mode
indicator
15 - Erase characters
16 - Conrm input/operation
17 - Marking or test start button
Enter data: text,
gures… Select point density Testing outline of all the
lines (le)
Edit Menu: copy/stick,
insert, ... Setting space between
characters Marking test of all the
lines (le) without impact
Setting marking force Open existing le Users, licences and
password
Modify marking
parameters Select character font Test beginning/end of
the line
File conguration: speed,
accessory and IDI
activation, ... Back to default values Zoom
Adjust characters
height/width New le Interface parameters
(language, ...)
Add mechanical
function: pause, ... Italic mode Marking test of the line
without impact
Manual positioning
of data Save le Setting date and time
Adjustment of slope
angle and radius Import/Export data with
USB key Machine parameters
(maintenance,
window,...)
Centring text X, Y, or XY Testing outline of the
selected line
STEP 3 : Main functions
STEP 4 : Secondary functions (once the main function has been selected)
Yellow buttons open action windows
10
13
11
12
06
09
14
15
16
01
04
02
05
03
08
07
17

®
STEP 5 : Producing a "simple" marking
Press "position" key
Select key: "character dimension" and
adjust height/width with arrows
Position the stylus tip between
0.039’’ and 0.37’’ (1 mm and 9.5
mm); ideally (default value) 0.12’’
(3 mm)
Position part under the marking head
Position marking following X and Y
within the window, using arrows
Enter "data parameters" menu
Enter or modify text, gures; they
are displayed on the screen
Fasten the part to the table
Press "force" key and select 1 to 6
(intermediate setting is 2)
Select "point density" key and select
one of the 4 matrix
Enter the "position" menu
Adjust height of the marking head
(tighten the locking handle (1), adjust
height with the upper wheel (2), release
the locking handle (3)) then lock it
3
6
9
12
2
5
8
11
1
4
7
10
MULTI4 / QUICK USER GUIDE N°1 USER’S MANUAL
02
01-03

®
STEP 6: Reminder of the main technical features
Enter le name and eventually
comments
Start marking
Conrm entered data and
conguration
Conrm entry
Select "le" menu
Select "test" menu
Turn off the mains switch ( o)
Press "save" key
Test marking (choose from: line outline
(1), le outline (2), beginning-end
line (3), line without impact (4), le
without impact (5))
15
18
21
14
17
20
13
16
19
• Power: 250 VA
• Frequency: 50 or 60 Hz
• Controller dimensions (L x W x H): 145.67’’ x 84.65’’ x 54.72’’ (370 x 215 x 139 mm)
• Electrical supply: 90 to 240 V
• Range of working temperature: 0°C to + 45°C (32°F to 115°F)
USER’S MANUAL
1 32 4 5

®
MULTI4 / QUICK USER GUIDE N°2 TECHNICAL HELP
STEP 1: Safety instructions
For safety reasons, you must unplug the power cable before performing any maintenance or service
operation on the machine.
The new Multi 4 generation was designed to keep maintenance as low as possible.
Only the mechanical part (marking head) requires minor maintenance.
01 - Unplug the power cable from the machine, to remove all power.
02 - Refer to the user’s manual.
03 - Contact our after sale customer service team by either:
• Telephone: (936) 270-7180 or (888) 610-0151
Our technicians are committed to helping you identify and rectify the malfunction as quickly as
possible.
04 - If the problem cannot be solved directly, we ask you to return the complete machine
(controller + head).
If required, and depending on the guarantee conditions, our company will supply FREE of
charge a loan machine during the period your equipment is unavailable.
We are committed quotation a repair estimate within 48h from the time we receive the machine.
STEP 2: Maintenance and Daily Service
STEP 3: What to do when faced with a malfunction?
Check if there is no dirt in
the mechanic parts, and
clean as necessary using a
compressed air nozzle.
Check the sharpness of the
stylus (Standard 90°). It can
be sharpened or replaced
as necessary.
Check the spring condition.
It should not be shorter than
51 mm!
Think about cleaning
and lubricating the stylus,
following the disassembly
instructions as explained in
the user’s manual (6-C).
Regular maintenance with manufacturer origine pieces ensures marking equipment lifetime
of 20% gain. Over a 5-year period, the average operating cost of the product was
reduced by 14% (excluding warranty period)

®
TECHNICAL HELP
STEP 4: Trouble shooting
• Ensure the part is correctly xed in
place
• Check sharpness of the stylus
• Adjust:
- Character height
- Impact force
- Part to stylus distance
The marking quality is bad and/or
the characters are not well formed.
• Check if stylus is moving freely
• Check if force and/or distance are
compatible
• Check position and tightening of the
stylus assembly
• Check if the purple electro-magnet
cable is damaged
The part is not marked.
• Check the main power supply
• Check the On/off switch
The control screen does not work.
• Clean and oil the stylus
• Change the stylus spring
(See user’s manual 6-C)
• Replace the stylus
The stylus stays stuck, tip downwards.
• Check alignment and cleanliness of
X and Y axis (see user’s manual 6-F)
• Check the connection and locking
of the marking head cable on the
controller
The percussion assembly is not moving
or makes a strange noise during the
marking cycle and/or as it returns to
its origin.
For any other malfunction, please refer to the user’s manual.

®
ADMINISTRATIVE
Your support
Many services are available to satisfy all your requirements. Our teams are at your service.
COMMERCIAL DEPARTMENT
For all inquiries concerning:
• Machine and accessory sales
• Maintenance and loan contracts
• Our product offers
LOGISTIC DEPARTMENT
For all inquiries concerning:
• Shipping policy
• Transport
• Return of equipment
ADMINISTRATIVE DEPARTMENT
For all inquiries concerning:
• Invoicing
• Payment facilities
• Contract follow up
AFTER SALES SERVICE
For all inquiries concerning:
• Technical service
• Maintenance
• Loan equipment
• Repairs
MULTI4 / QUICK USER GUIDE N°3

®
Plate support Transport trolleyPart support
Powered Z column base for
automatic part detection
Maintenance kit Bar-end tool
Standard rotary D axisHeavy duty rotary D axis Automatic plate feeder
MAIN ACCESSORIES
photo credit 3D © Comète 2012
Version 2.0 US
Our whole team thank you for choosing Technomark and wish you many good markings!
Magnetic head support Reading systemSoftware
Technomark North America
13626 Poplar Circle, Suite 502 - Conroe, TX 77304
Tel: (936) 270-7180 or (888) 610-0151 / Fax : (936) 230-5679
E-mail : [email protected]
www.technomark-inc.com
®
Table of contents
Other Technomark Measuring Instrument manuals
Popular Measuring Instrument manuals by other brands
Swann
Swann AMI Phosphate-II Operator's manual

TESTO
TESTO 300 XXL instruction manual
LaserLiner
LaserLiner DampFinder Home manual
Velleman Instruments
Velleman Instruments HPS40 Technical documentation
Hansen
Hansen VPIF Specifications, Applications, Service Instructions & Parts

geo-FENNEL
geo-FENNEL FL 105H user manual
