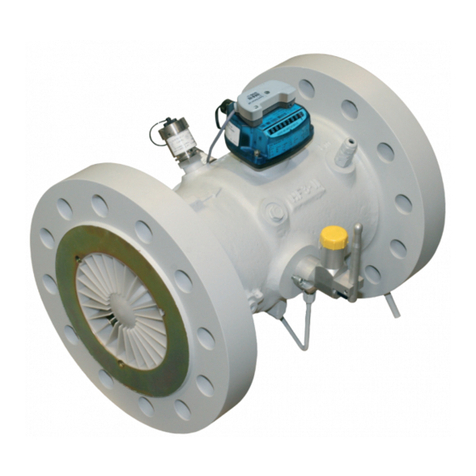
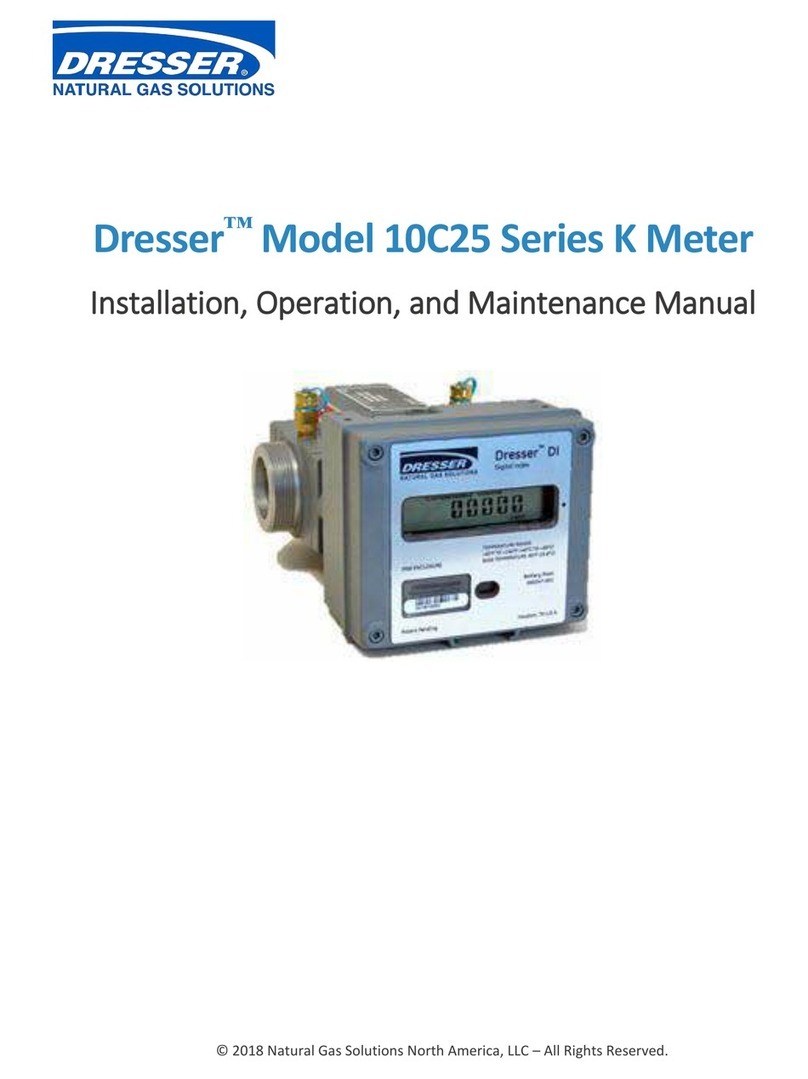
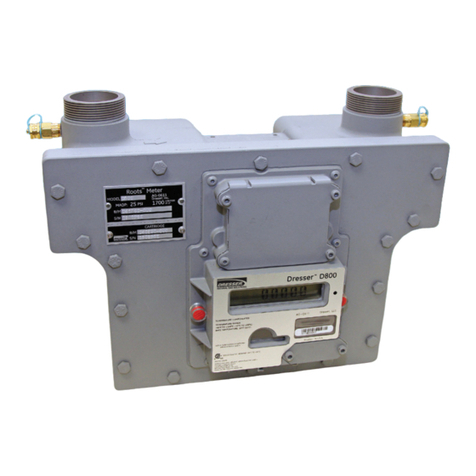
Dresser iRMR Series User manual

Page 1/27
An EN ISO 9001: 2000 certified Company
iTN 30107rev00_ENGLISH
Installation and operation manual
Series: iMRM and iMRM-TWIN

Page 2/27
Installation and operation manual
Series: iMRM and iMRM-TWIN
Document Conventions
Warning
Indicates a procedure that has to be followed strictly as contravention
could result in escaping gas, and cause property damage, serious injury or death
Caution
Highlights a procedure which, if not strictly followed, can result in damage to the meter
Note
Is an important element of the procedure and should be observed
An EN ISO 9001: 2000 certified Company
iTN 30107rev00_ENGLISH

Page 3/27
Installation and operation manual
Series: iMRM and iMRM-TWIN
CONTENTS
1 INTRODUCTION
2 GENERAL DESCRIPTION
3 RECEIVING, HANDLING AND STORAGE
4 INSTALLATION
5 MAINTENANCE
6 TROUBLE SHOOTING
7 TECHNICAL DATA
APPENDIX
An EN ISO 9001: 2000 certified Company
iTN 30107rev00_ENGLISH

Page 4/27
Installation and operation manual
Series: iMRM and iMRM-TWIN
1 INTRODUCTION
The DRESSER iMRM Rotary Piston Gas Meter is a positive displacement type of meter which, by means of
two counter-rotating impellers and a counting mechanism, measures a known volume of gas with each
rotation. As a result of years of development and experience, DRESSER has been able to provide a meter
of unparalleled accuracy and turn down ratio. The construction of the meter and the materials used will
give years of faithful service even under very demanding conditions. The special designed coupling
guarantees flexibility in functionality for the future, since indexes and electronic switches can be replaced
on-site with the meter in-line.
The purpose of this manual is to provide a general guide to the installation, operation and care of a
standard DRESSER rotary gas meter. Every effort has been made to ensure that the information contained
in this manual is as accurate as possible; however, the continuous improvements which DRESSER makes to
its products may result in small inconsistencies. Custom manufactured meters or “specials” may also result
in small differences.
It is therefore prudent to consult the specific technical data sheets and other
documents which accompany the meter. If in any doubt, DRESSER should be
consulted.
2 GENERAL DESCRIPTION
The meter must be considered a part of the pressure containing system.
Operating Principle
The iMRM Rotary Meter is a positive displacement type of meter, passing pre-determined volumes of gas
by means of two counter-rotating impellers. Four times per each revolution a fixed unit of volume is
displaced through the measurement chambers. The flowing gas volume is proportional with the number of
revolutions of the output. The output of this model Rotary Gas Meter is a special designed magnetic
coupling where one part is fitted inside the meter body and the associated part is in the read-out unit. The
read-out unit can either be a mechanical index or an electronic index.
The typical design of the impeller tips allows considerable increased turn down ratios. Since the shape of
the impeller tip is at least two times larger compared to conventional impeller tips, the unregistered
leakage through the meter is significantly reduced resulting in an enlarged turn down ratio whereby the
meter is still less sensitive to installation stress or dirty gas.
The robust design of the iMRM is quite visible:
•the shape of the meter body
•the shape of the impellers
•the design of the main shafts and its bearings
•the material selected for the meter body
•the overall dimensions of the meter
•No bending, no twisting, no torque, no vibrations.
An EN ISO 9001: 2000 certified Company
iTN 30107rev00_ENGLISH

Page 5/27
Installation and operation manual
Series: iMRM and iMRM-TWIN
The bearings are placed on the outside of the timing gears, which allows the connection between the
impellers and the timing gears to be much stronger then conventional type of rotor meters. Consequently,
these rotor meters are far less sensitive for improper start up.
The iMRM series rotary meters are designed to provide maximum comfort for the user. All functions, like
index, sight glass and oil filling plugs are accessible from the front side. This also makes it possible to
install the meter with the back against the wall, and as such saving space in, for instance basements
installations.
The mechanical index is 100% sealed avoiding condensation and accumulation of moisture. The index is
equipped with a slot for an electronic pulse box to allow maximum flexibility. By changing the pulse box,
the meter can be fitted on-site with several types of Low Frequency pick-ups (Reed switches or Wiegand
sensors).
The iMRM series of rotary meters are suitable for handling most types of clean, dry, common gases at
either constant or varying flow rates. The meter is not suitable for handling liquids. Measurement accuracy
and life expectancy can be impeded by excessive deposits of dirt of other types of foreign material present
in the gas stream.
Meters of standard construction are not directly suitable for handling oxygen, acetylene, biogas or sewage
gas. Specially constructed meters made of materials directly compatible with these and other gases are
available. Please contact the DRESSER for details.
The iMRM Series have a Maximum Allowable Operating Pressure (MAOP) rating. (Refer to the basic meter
body type-plate for the MAOP.)
Every meter is leak-tested at 1.1 times its MAOP and strength is tested at 1.5 times its MAOP. All in
accordance with International Standards and Codes. Important: The maximum working pressure of a
rotary meter is limited by casing design. Meters should not be installed where line pressure can exceed the
Maximum Allowable Operating Pressure.
The standard meter operating temperature range is -25°C to +55°C (EN12480 Class TC2).
Displaced volume measurement is completely independent of the gas specific gravity, temperature and
pressure. Displaced volume can be easily converted to volume at Standard conditions for elevated pressure
and varying temperature by application of the Basic or Ideal Gas Laws.
Meter Indexes
In some countries it is not allowed to change the index without supervision by the
local metrological authorities. Removing the seal could invalidate the metrological
status of the meter.
Using a special coupling, the index of the meter can be changed on-site with the meter in-line. This
enables to change the functionality in the future by just “one click”. The Index is already prepared for the
most commonly used functions. For information regarding availability contact DRESSER or the DRESSER
representative.
An EN ISO 9001: 2000 certified Company
iTN 30107rev00_ENGLISH

Page 6/27
Installation and operation manual
Series: iMRM and iMRM-TWIN
Electronic pulse box
In some countries it is not allowed to change the pulse box without supervision by
the local metrological authorities. Removing the seal could invalidate the
metrological status of the meter.
Using a removable/external pulse box, the electronic output of the meter can be changed on-site with the
meter in-line. This enables to change the functionality of the electronic output in the future. The pulse box
is already prepared for the most commonly used functions. For information regarding availability contact
DRESSER or the DRESSER representative.
As there are many options for the electronic pulse box, details about the
functionality and the connectors are indicated on a separate document supplied
with the meter.
Accessories
Various accessories such as volume correctors, pressure and temperature transmitters, etc. can be fitted to
the IMRM. When connecting these accessories, reference should be made to the instructions and other
documents accompanying these products.
The IMRM can be equipped with two thermo wells for mounting a temperature sensor or a temperature
transmitter (max. 6 mm). The position of the two thermo wells allows calibration of volume correctors in
the field.
3 RECEIVING, HANDLING AND STORAGE
iMRM Rotary Meters are precision measurement instruments. Although of very rugged construction,
reasonable care should be taken during handling and storage.
At time of delivery:
1. check the packing list to account for all items received.
2. inspect each item for damage.
3. record any visible damage or shortages on the delivery record.
•file a claim with the carrier
•notify DRESSER or representative immediately
•Do not accept any shipment with evidence of mishandling in transit without making an
immediate inspection for damage and checking each meter for free rotation of the
impellers. All new meters should be checked for free rotation after arrival since damage to
internal working parts can exist without obvious external evidence.
•Should any serious problems be encountered during installation or initial operation of the
meter, notify DRESSER or representative immediately.
•Do not attempt repairs or adjustments, as doing so is a basis for voiding all claims for
warranty.
•If the meter is not tested or installed soon after receipt, store in a dry location. Leave the
protective caps or tape installed at the meter flanges. The caps or tape will provide
reasonable protection against atmospheric moisture.
•Do not add oil to the meter until after the meter has been installed in a permanent
installation and is ready for service.
•When reporting a suspected problem, please provide the following information:
-Your sales order number and/or DRESSER’s order number.
An EN ISO 9001: 2000 certified Company
iTN 30107rev00_ENGLISH

Page 7/27
Installation and operation manual
Series: iMRM and iMRM-TWIN
-Meter model, serial number.
-Description of the problem
-Application information such as gas type, pressure, temperature and flow
characteristics.
Authorization for return is required for all DRESSER Products shipped to the Factory for repair, calibration,
warranty, exchange or credit. To obtain authorization for return of DRESSER products purchased from an
DRESSER Distributor of Representative, please contact the Distributor or Representative from whom the
product was purchased.
4 METER INSTALLATION
Installation only by authorized skilled people.
International, national, local and company safety rules are to be strictly followed
as contravention may result in serious injury or death.
Piping Configurations
The gas should be clean and free of liquids, dust or foreign material, which could
damage or block the meter impellers.
The iMRM series of rotary meters may be installed in either a Top Inlet (vertical) or a Side Inlet (horizontal)
configuration. The preferred or recommended installation is top inlet in a vertical pipe line with gas flow
downward. Although the design of the impellers tends to make the meter inherently self-cleaning, the top
inlet mounting allows gravity to pass dirt, pipe scale, or other debris trough the meter.
An additional recommendation is to install the meter in a side loop with a bypass adjacent to the main line.
Piping should be solid and properly aligned. Eliminate piping strains on the meter body.
Do not install the meter lower than the discharge pipe run to avoid accumulation of condensate and foreign
materials in the metering chamber. Use a Gasket Strainer or other Y-type strainer upstream of the meter to
remove liquids and foreign matter (pipe sealant, tape, weld slag, etc.) from the gas stream. A 100 micron
mesh screen is recommended.
Do not install a lubricated gas valve directly before a meter, as excess valve lubricant or other foreign
material can stop impeller rotation.
If over-speed conditions occur, a restricting flow orifice plate should be installed 2 to 4 pipe diameters
downstream of the meter outlet. Contact DRESSER for sizing, pricing and availability. Warranty does not
cover over-speed conditions.
An EN ISO 9001: 2000 certified Company
iTN 30107rev00_ENGLISH

Page 8/27
Installation and operation manual
Series: iMRM and iMRM-TWIN
Placing meter in line
Remove the plastic protective caps or tape from both meter flanges prior to
meter installation.
1. Before installing a meter:
Make sure the upstream piping is clean by partially opening the valve to let a
sufficient amount of gas blow to atmosphere.
Insure the impellers turn freely and no objects or contaminants are in the measuring chamber.
Depending upon meter condition(for instance used meters), it may be necessary to flush the meter with
an approved solvent. After flushing, drain all solvent from the front cover. Make sure the measuring
chamber is clean and dry and the impellers turn freely.
2. Meter Orientation:
Connect meter inlet to the gas supply side of the line, insuring the gas flow will be in the same direction
as the arrow on the meter body nameplate (i.e., arrow pointing downward for top Inlet). See also fig.1 in
the appendix. Turn the index in the required position.
3. Install the meter without piping strain to prevent a binding of the impellers. Use pipe supports, as
required. Level the iM-RM series rotary gas meters to within 5mm/m, side-to-side and front-to-back.
4. Tighten flange bolts evenly in a cross-pattern. The flange bolts which should intrude at least 16 mm into
the meter should have a maximum torque of:
M12 (1/2 UNC): 55 Nm M16 (5/8 UNC): 130 Nm M20 (3/4 UNC): 180 Nm
5. Connect connectors to the index according to the diaphragms accompanying the meter.
If the meter is installed in a zone classified as hazardous area, then ensure all
connections are to intrinsic safe circuits.
6. There is only one oil reservoir in the iMRM SINGLE Series. Oil is shipped with each new meter in a
quantity sufficient to fill the reservoir in either a Top Inlet or a Side Inlet configuration. The iMRM TWIN
Series have oil reservoirs at the front and rear side of the meter.
Be sure that the meter is depressurized before removing the oil filling plugs.
7. Remove the filling plug in the front end cover. Slowly add oil to the end cover reservoir until the oil level
is to the centre of the oil gauge (sight glass). See also figures in the appendix. For the iMRM TWIN
Series, the same procedure is applicable for the rear side of the meter.
An EN ISO 9001: 2000 certified Company
iTN 30107rev00_ENGLISH

Page 9/27
Installation and operation manual
Series: iMRM and iMRM-TWIN
Meter Start-UP
Slowly pressurize the meter in accordance with the following recommendations.
Do not exceed 5 psig/second (35 kPa/second) maximum when pressurizing. Rapid
pressurization can cause an over-speed condition which may damage the meter.
Resulting damage is not covered by warranty.
a) Open the bypass and outlet (downstream of meter) gas valves.
b) Partially open the meter inlet gas valve until the meter starts operating at low speed. Throttling
of the bypass valve may be necessary to initiate gas flow trough the meter. Verify gas is flowing
trough the meter by watching for movement of index drum. If movement is present, go to step c).
If the index drum is not turning, verify gas is being delivered to the meter. If gas is flowing to the
meter inlet and meter is not moving, go to step e).
c) Let the meter operate at low speed for several minutes. Listen closely for unusual scraping or
knocking sounds.
d) If operation is satisfactory, go directly to step f).
e) If unusual sounds are present or the meter is not turning, stop the installation procedure. Slowly
depressurize and vent all pressure from the meter set before checking for piping misalignment,
piping strain, torsion, or other related problems. Once the problem has been resolved, repeat the
start-up procedure beginning with step a).
f) Gradually open the inlet valve until full line flow is passing trough the meter and the inlet valve is
fully open.
g) Slowly close the bypass valve.
h) Follow your company authorized procedure or common practice to leak test the meter and all
connections. Soapy water and gas analysers are commonly used for this procedure.
An indication of the meter condition can be obtained by analysing the pressure drop
over the meter. It is recommended that the pressure drop over the new meter be
measured and recorded in the meter records. Future measurements can then be
compared to this value.
An EN ISO 9001: 2000 certified Company
iTN 30107rev00_ENGLISH

Page 10/27
Installation and operation manual
Series: iMRM and iMRM-TWIN
5 MAINTENANCE
It is not allowed to carry out any repair or maintenance when the meter is
pressurized or in operation.
A rotary gas meter can be used for measurements of gases with extremely high and
low temperatures. Avoid direct contacts with the meter in operation since touching
the meter can cause serious injuries.
Periodic Inspections
It is not allowed to carry out any inspections when the meter and the adjacent
piping is pressurized.
Like all precision instruments an DRESSER rotary meter is vulnerable to abuse and
operating conditions beyond its specifications and limits.
It is prudent therefore to periodically check the security and running conditions of
the meter. Especially, when a significant over pressure or shock load has occurred,
or the installation is subjected to abnormal vibrations or if the gas is excessively
contaminated.
Removing metrological seals may invalidate the calibration.
Meters installed and maintained in accordance with the DRESSER recommendations can be expected to
operate dependably for many years. Proper oil level and cleanliness have the greatest effect on meter life
expectancy. The oil reservoir should be visually inspected for proper mid-gauge oil levels twice a year. Add
oil as necessary.
Use only Shell Morlina10 Oil or equivalent instrument grade oils approved for service by DRESSER.
Oil change frequency will depend upon the cleanliness of the gas being measured. Change oil when the
level increases significantly, indicating an accumulation of moisture. The iM-RM series of rotary meters
require an oil change once every 5 to 10 years under favourable operating conditions.
An EN ISO 9001: 2000 certified Company
iTN 30107rev00_ENGLISH

Page 11/27
Installation and operation manual
Series: iMRM and iMRM-TWIN
Cleaning and flushing
Before performing the cleaning procedure, drain all oil from the meter. After the
meter has been replaced in the installation again, add oil.
If there is any evidence of dirt or dust in the meter a suggested method for removal is to windmill the
impellers (at a speed less than the maximum capacity) by injecting controlled compressed air from a nozzle
into the meter inlet.
6 TROUBLE SHOOTING
It is not allowed to carry out any repair or maintenance when the meter is
pressurized or in operation.
During operation, irregular rotation or stoppage of the counter may indicate mechanical damage. Damage
to the bearings, impeller or gears usually results in excessive noise and/or vibration.
If it is suspected that the problem is confined to the index, the index can be replaced while the line remains
pressurized. Contact DRESSER or the DRESSER representative for the exchange procedures.
In some countries it is not allowed to change the index without supervision by the
local metrological authorities. Removing the seal could invalidate the metrological
status of the meter.
If an electronic output does not appear to work or does not agree with the mechanical readings, the
electronic pulse box can be exchanged without removing the index. Contact DRESSER or the DRESSER
representative for the exchange procedures.
In some countries it is not allowed to change the pulse box without supervision by
the local metrological authorities. Removing the seal could invalidate the
metrological status of the meter.
Before contacting DRESSER or the DRESSER representative please check the table
below for trouble shooting.
An EN ISO 9001: 2000 certified Company
iTN 30107rev00_ENGLISH

Page 12/27
Installation and operation manual
Series: iMRM and iMRM-TWIN
Trouble Item Possible Cause Remedy
No Flow registered
1
Obstruction in piping or meter
Check piping and valves to assure
an open flow path
Low volume
Registration
2
3
4
Meter oversized for load
Leak at meter bypass
Meter internal friction
Change meter size
Check bypass and valves
See item 5
High differential
5
6
7
8
Build-up of deposits in measuring chamber
Worn bearings or gears
Heavy oil
Impellers rubbing cylinder or side plate,
or timing gears out of time
Flush meter
Repair meter
Replace oil
Check for binding or rubbing. Remove
obstructions. Check the meter level
Vibration Noise 9
10
11
Piping misalignment or strain
Impellers rubbing casing
Contaminations in measuring chamber
Remove piping strain, level meter
See items 6 and 8
See item 5
7TECHNICAL DATA
iMRM SINGLE
iMRM TWIN
An EN ISO 9001: 2000 certified Company
iTN 30107rev00_ENGLISH

Page 13/27
Installation and operation manual
Series: iMRM and iMRM-TWIN
Dimensions
Type V
(dm³)
A
(mm)
B
(mm)
C
(mm)
D
(mm)
E
(mm) N
o. F
(mm)
H
(mm)
Weight
(Kg)
G16 DIN 0,69 85 171 190 40/50 110/125 4 M16 185 10
G16 ANSI 0,69 85 171 190 40/50 98,6/120,7 4 ½ / 5/8UNC 185 10
G25 DIN 0,69 85 171 190 40/50 110/125 4 M16 185 10
G25 ANSI 0,69 85 171 190 40/50 98,6/120,7 4 ½ / 5/8UNC 185 10
G40 DIN 0,69 85 171 190 40/50 110 4 M16 185 10
G40 ANSI 0,69 85 171 190 40/50 98.6 4 ½/ 5/8 UNC 185 10
G65 DIN 0,69 85 171 190 40/50 125 4 M16 185 10
G65 ANSI 0,69 85 171 190 40/50 120,7 4 ½/ 5/8 UNC 185 10
G100 DIN 1,11 100 171 220 80 160 8 M16 185 12
G100 ANSI 1,11 100 171 220 80 152,4 4 5/8UNC 185 12
G160 TWIN DIN 1,73 225 171 280 80 160 8 M16 185 20,5
G160 TWIN ANSI 1,73 225 171 280 80 152,4 4 5/8UNC 185 20,5
G160 DIN 2,31 100 241 240 80 160 8 M16 265 24.5
G160 ANSI 2,31 100 241 240 80 152,4 4 5/8UNC 265 24.5
G250 DIN 2,98 130 241 255 100 180 8 M16 265 27.5
G250 ANSI 2,98 130 241 255 100 190,5 8 5/8UNC 265 27.5
G400 TWIN DIN 3,88 255 241 305 100 180 8 M16 265 45
G400 TWIN ANSI 3,88 255 241 305 100 190,5 8 5/8UNC 265 45
G650 TWIN DIN 5,97 325 241 375 150 240 8 M20 265 53
G650 TWIN ANSI 5,97 325 241 375 150 241,3 8 3/4UNC 265 53
An EN ISO 9001: 2000 certified Company
iTN 30107rev00_ENGLISH

Page 14/27
Installation and operation manual
Series: iMRM and iMRM-TWIN
Specifications
Specification Units G16 G25 G40 G65 G100
G160
TWIN G160 G250 G400
TWIN G650
TWIN
Base Rating (Qmax) m³/h 25 40 65 100 160 250 250 400 650 1000
Max. Operating Pressure KPa 1700
Rangeability (+/- 1%) - 25 : 1 40 : 1 65 : 1 100 : 1 100 : 1 100 : 1 100 : 1 100 : 1 100 : 1 100 : 1
Rangeability (+/- 2%) - 40 : 1 65 : 1 100 : 1 160 : 1 160 : 1 160 : 1 160 : 1 160 : 1 160 : 1 160 : 1
Temperature Range Deg. C -25 to +55
Start Rate m3/h - - < 0.05 < 0.05 < 0.07 - < 0.1 < 0.15 - -
Stop Rate m3/h - - < 0.05 < 0.05 < 0.07 - < 0.1 < 0.15 - -
Pres. Differential
(Qmax), gas Pa - - 100 145 120 - 230 430 - -
Flow Rate @ 1/2" w.c,
gas m3/h - - 65 95 160 - 170 250 - -
Max. Pressurization Rate kPa/sec 35
RPM @ Qmax rpm 600 900 1500 2400 2400 2400 1800 2200 2800 2800
Over Range Capability % of
Qmax 25
Restricting Orifice (to 1.3
Qmax) mm 12.2 or 15.3 12.2 15.3 19.4 - 24.1 30 - -
Displaced Volume/Rev. dm3/rev
. 0.69 0.69 0.69 0.69 1.11 1.73 2.31 2.98 3.88 5.97
Index Resolution m3 0.002 0.002 0.002 0.002 0.02 0.02 0.02 0.02 0.02 0.02
Nominal pipe Size mm 40/50 40/50 40 50 80 80 80 100 100 150
Flange to Flange
Dimension mm 171 171 171 171 171 171 241 241 241 241
Bolts/Flange ANSI/DIN - 4/4 4/4 4/4 4/4 4/8 4/8 4/8 8/8 8/8 8/8
Bolt Size ANSI - ½ or 5/8UNC ½ UNC 5/8UNC ¾ UNC
Bolt Size DIN - M16 M20
Bolt Torque Nm Nm 55 or 130 55 130 180
Meter Oil Capacity
Horizontal cm3 20 20 20 20 20 2 x 20 55 55 2 x 55 2 x 55
Meter Oil Capacity
Vertical cm3 106 106 106 106 106 2 x 10⁶ 340 340 2 x 340 2 x 340
Net Weight kg 10 10 10 10 12 20.5 24.5 27.5 45 53
Materials
Part Material
Meter body and covers Aluminium hard anodized
Impellers Aluminium hard anodized
Synchro plate Aluminium hard anodized
Synchro gears Steel
Main shafts Steel
Timing Gears Steel
Gears Delrin
Bearings front / rear Steel / Stainless Steel
Index Poly Carbonate
An EN ISO 9001: 2000 certified Company
iTN 30107rev00_ENGLISH

Page 15/27
Installation and operation manual
Series: iMRM and iMRM-TWIN
International Reference Material
The IM-RM series of rotary meters are designed in accordance with the following international standards:
OIML R6 :General specifications for Gas Volume Meters
OIML R32 :Rotary Piston Meters and Turbine gas Meters
EN 12480 :Rotary Displacement Meters
ANSI B109.3 :Rotary Displacement Gas meters
Should after reading this manual carefully any doubts or questions remain, contact
DRESSER or the local DRESSER representative before any actions taken.
APPENDIX
Parts List iM-RM standard
Exploded View iM-RM standard
Parts List iM-RM Twin excl. Index
Exploded View iM-RM Twin excl. Index
Figures 1 to 5
An EN ISO 9001: 2000 certified Company
iTN 30107rev00_ENGLISH

Page 16/27
Installation and operation manual
Series: iMRM and iMRM-TWIN
ITEM
NO. QTY. DESCRIPTION MAJOR ASSEMBLIES PART NO.
1 1 Body 1 1/2" ANSI 0020-7112-0110
1 1 Body-2"-ANSI 0020-7112-0100
1 1 Body-3"-ANSI 0020-7112-0102
2 1 Impeller-G65-(upper) 0020-7132-0200
2 1 Impeller-G100-(upper) 0020-7132-0201
3 2 Deep-groove-ball-bearing 7050-2011-2501
4 2 Plain-washer 7151-0530-03001
5 2 Cross-recessed-pan-head-screw---philips 7151-0340-03008
6 1 Impeller-G65-(lower) 0020-7132-0100
6 1 Impeller-G100-(lower) 0020-7132-0101
7 4 O-ring 7070-1010-1501
8 1 Synchronisation-plate 0020-0142-0101
9 2 Gear-wheel 0020-0170-0100
10 2 Hexagon-socket-head-cap-screw 7151-0050-06016
11 6 Disc-spring 7136-0305-20007
12 2 Groove-ball-bearing 7050-2010-3701
13 2 Nut 6020-0110-0100
14 1 Bearing-plate 0020-7181-0100
15 1 Bearing-plate 0020-0181-0101
16 1 Plate-to-secure-gearbox 0020-0149-0100
17 6 Cross-recessed-pan-head-screw---philips 7151-0340-04010
18 1 Gear-box-G65 0020-7160-0118
18 1 Gear-box-G100 0020-7160-0126
19 1 Bearing-pressing-plate- 0020-7211-0100
20 1 Splash-vane 0020-7220-0101
21 1 Seeger-grip-ring 7136-0005-00201
22 2 Main-shaft-gear-wheel 6020-0120-0100
23 2 Round-head-screw---philips 7151-0340-04008
24 1 Cover 0020-7122-0100
25 1 Magnet-coupling 6040-7010-0101
26 1 Spline-rod 6010-0130-0102
27 1 Compression-spring 7136-0600-20580
28 1 Gear-wheel-shaft 6010-7110-0102
29 1 O-ring 7070-2010-3001
30 8 Hexagon-socket-head-cap-screw 7151-0050-08045
31 2 Plug 7107-0655-06301
32 1 Insert 7199-0150-0100
33 1 Index Varies
34 1 Type-plate Varies
An EN ISO 9001: 2000 certified Company
iTN 30107rev00_ENGLISH

Page 17/27
An EN ISO 9001: 2000 certified Company
iTN 30107rev00_ENGLISH
Installation and operation manual
Series: iMRM and iMRM-TWIN

Page 18/27
An EN ISO 9001: 2000 certified Company
iTN 30107rev00_ENGLISH
Installation and operation manual
Series: iMRM and iMRM-TWIN

Page 19/27
Installation and operation manual
Series: iMRM and iMRM-TWIN
Parts List iM-RM Twin – excl. Index
ITEM
NO. QTY. DESCRIPTION MAJOR ASSEMBLIES PART NO.
1 1 Body Twin 3" ANSI 0020-7112-0200
1 1 Body Twin 4" ANSI 0020-7112-0208
1 1 Body Twin 6" ANSI 0020-7112-0206
2 4 Pen 7139-0071-06010
3 2 Bearing bush 0020-0201-0101
4 2 Bearing bush 0020-0201-0100
5 4 Impeller 0020-0132-0102
6 4 Shaft 0020-0150-0101
7 2 Shaft 0020-0150-0100
8 - Loctite
9 4 Groove ball bearing 7050-2011-2501
10 2 Washer 7151-0530-03001
11 2 Cross recessed pan head screw 7151-0340-03008
12 2 Shaft 0020-0150-0102
13 6 Disc spring 7136-0305-13346
14 2 Coupling shaft 6020-0150-0101
15 1 Cross coupling 6020-0150-0100
16 8 O-ring 7070-1010-1501
17 2 Synchro plate 0020-0142-0101
18 4 Gear 0020-0170-0100
19 12 Hexagon socket head cap screw 7151-0050-06016
20 12 Disc spring 7136-0305-20007
21 4 Groove ball bearing 7050-2010-3701
22 4 Nut 6020-0110-0100
23 2 Bearing plate 0020-0181-0100
24 1 Parallel pin 7139-0079-02024
25 2 Bearing plate 0020-0181-0101
26 2 Plate to secure gearbox 0020-0149-0100
27 12 Cross recessed pan head screw 7151-0340-04010
28 1 Gearbox plate 0020-0160-0100
29 7 Needle roller 7050-4010-0222
30 7 Splined hub 6010-0120-0100
31 4 Gear 6010-0110-0218
32 3 Gear 6010-0110-0240
33 9 Spacer 6010-0130-0101
34 8 Circular self-locking ring 7136-0321-00401
35 4 Gear 6010-0110-0245
36 1 Gear 6010-0110-0234
37 7 Grip ring 7136-0005-00201
38 3 Bearing pressure plate 0020-0211-0100
39 2 Splash vane 6020-0130-0100
40 4 Main shaft gearwheel 6020-0120-0100
41 4 Cross recessed pan head screw 7151-0340-04008
An EN ISO 9001: 2000 certified Company
iTN 30107rev00_ENGLISH

Page 20/27
Installation and operation manual
Series: iMRM and iMRM-TWIN
42 1 Cover 0020-0122-0100
43 2 Glass tablet 6050-1010-0100
44 2 Ring oil glass 6020-0140-0100
45 2 Circular self-locking ring 7136-0350-01601
46 2 Hybrid connector 6020-0140-0111
47 1 Separating bush 6020-0140-0102
48 1 Needle roller 7050-4010-0212
49 2 O-ring 7070-2010-2502
50 2 Ring 7070-3010-0100
51 2 O-ring 7070-2010-1001
52 6 Plug 7107-0630-14201
53 1 Magnet 6040-1010-2805
54 1 Magnet holder 6010-0150-0100
55 1 Ball 7050-5010-0202
56 1 Washer 7138-0082-14001
57 1 Spline rod 6010-0130-0102
58 1 Compression spring 7136-0600-20580
59 1 Shaft adjusting wheel 6010-0120-0101
60 1 Ball 7050-5010-0201
61 1 Gear 6010-0110-0263
62 2 O-ring 7070-2010-3001
63 16 Hexagon socket head cap screw 7151-0050-08045
64 2 Plug 7107-0655-06301
65 1 Plug 7199-0150-0100
66 1 Cover 0020-0122-0101
67 1 Separating bush 6020-0140-0101
An EN ISO 9001: 2000 certified Company
iTN 30107rev00_ENGLISH

This manual suits for next models
21
Table of contents
Other Dresser Measuring Instrument manuals