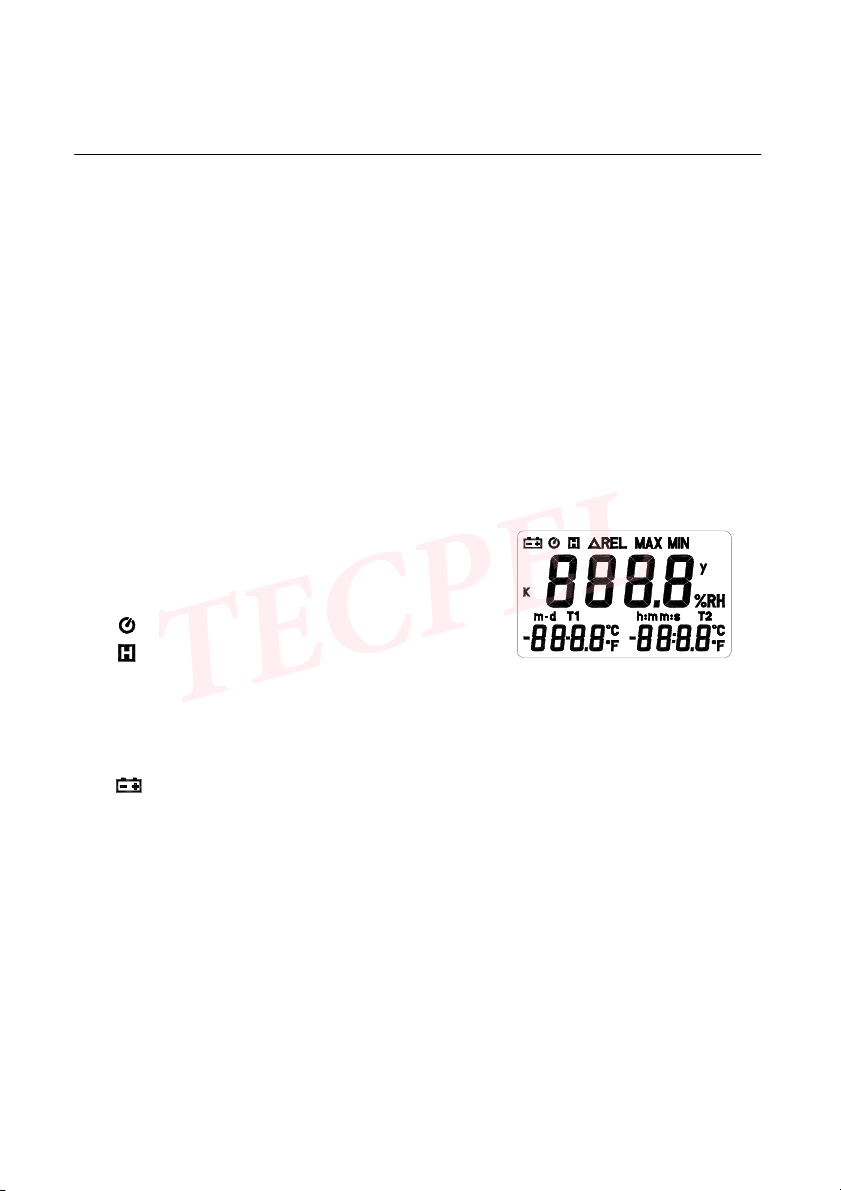
HUMIDITY TEMPERATURE METER
5
VI .Calibration Procedure
Humidity Calibration:
1. Turn the unit off. Press and hold MAX/MIN, HOLD and °C keys. While these three keys are
pressed, turn the power on. Release these keys and all the segments on the LCD will blink.
2. After step one, within 3 seconds, the user have to press °F and REL key at the same time to
enter the calibration mode or the tester will go back to normal operation mode.
3. When the tester get into calibration mode, the humidity reading will blink and “CAL1” will appear
on the second display.
4. Insert the humidity probe into the standard humidity cavity of 32.8%RH@25°C. Wait until the
system to stabilize for 20 minutes then press MAX/MIN button to create the calibration data. If
the unit recognizes the value is out of tolerance, the unit will sound 2 beeps and still remain at
"CAL1”mode. If the tester recognizes the value is within tolerance, new calibration data is
created and the tester will go into “CAL2” mode, which will be indicated by “CAL2” at 2nd display.
5. Insert the humidity probe into the standard humidity cavity of 75.3%RH@25°C. Wait until the
system to stabilize for 20 minutes then press MAX/MIN button to create the calibration data. If
the unit recognizes the value is out of tolerance, the unit will sound 2 beeps and still remain at
"CAL2”mode. If the tester recognizes the value is within tolerance, new calibration data will be
written into the memory and the calibration is done.
Remark:
1. When the user perform the humidity calibration, the environment should be kept at the stable
condition (i.e. Constant temperature and constant humidity in the lab.) to in increase the
accuracy.
2. After the probe insert into the standard humidity cavity, the operator should wait at least 20
minutes to let the condition in the cavity to stabilize.
3. During the calibration, if the user press POWER button at any time, the tester will go back to
normal operation mode and no calibration data will be changed.
4. During the calibration mode, the user can restore the factory default value by press the HOLD
and °C buttons at the same time.
5. Because it takes some time to stabilize the system, we recommend the operator first insert the
probe into the 32.8%RH@25°C standard cavity and wait for at least 20 minutes, then power the
unit on and start the calibration process.
6. During the calibration, all the displayed reading is calibrated with the old calibration data and
the auto power function is disabled. Until the calibration process is done, the tester will enable
auto power function again.
7. During the calibration, the temperature is fixed at °F scale and it is not selectable.
T1 Temperature Calibration:
1. Turn the unit off. Press and hold MAX/MIN, HOLD and °C keys. While these three keys are
pressed, turn the power on. Release these keys and all the segments on the LCD will blink.
2. After step one, within 3 seconds, the user have to press °F and HOLD key at the same time to
enter the calibration mode or the tester will go back to normal operation mode.
3. When the tester get into calibration mode, the temperature reading will blink and “CAL1” will
appear on the second display.