© by WilTec Wildanger Technik GmbH Item 50233–50238, 50453–50455 Page 4
http://www.WilTec.de
http://www.aoyue.eu 09 2021-1
http://www.teichtip.de
Warning notices
•Attention: Make sure that all parts of the pump are intact before switching the pump on.
Do not connect to energy sources the voltage of which differs from the one stated on the device.
•No sand may be inside the pump; otherwise, certain components might be destroyed. Damages
caused by presence of sand are not covered by warranty.
•Keep out of children’s reach because of very strong magnetism.
•Place the magnets on either side of one aquarium wall. Avoid that your fingers or hands be
jammed.
•In case the distance of the magnets is not more than 5 cm, the attractive force between the
magnet, metal parts, and other magnets becomes very strong. To avoid injuries, keep them
sufficiently away from edges, sharp objects, and other magnets.
•These magnets might cause permanent damages to electric or other devices such as pacemak-
ers or credit cards. Therefore, keep them at a minimum distance of 30 cm.
•To avoid that the aquarium be damaged, the two magnets are installed as follows: Never move
the magnets from both sides of the glass wall at a 180° angle towards each other, but place
them offset on both sides and push them towards each other until they overlap.
Properties
•Low energy consumption
•System easy to install
•Suitable for aquaria with soft water and saltwater
•Fixation with suction cups or magnet holder (depending on model)
Installation
1. Clean the aquarium before fixing the pump. Dirt on the aquarium walls prevents proper instal-
lation. (Dirt particles have an impact on the hold of the magnets/suction cups.) In case the pump
slides down, it might be damaged.
2. To avoid a disturbance caused by noise and vibrations and to ensure proper operation, the
pump has to be fixed beneath the water surface (see fig. 1).
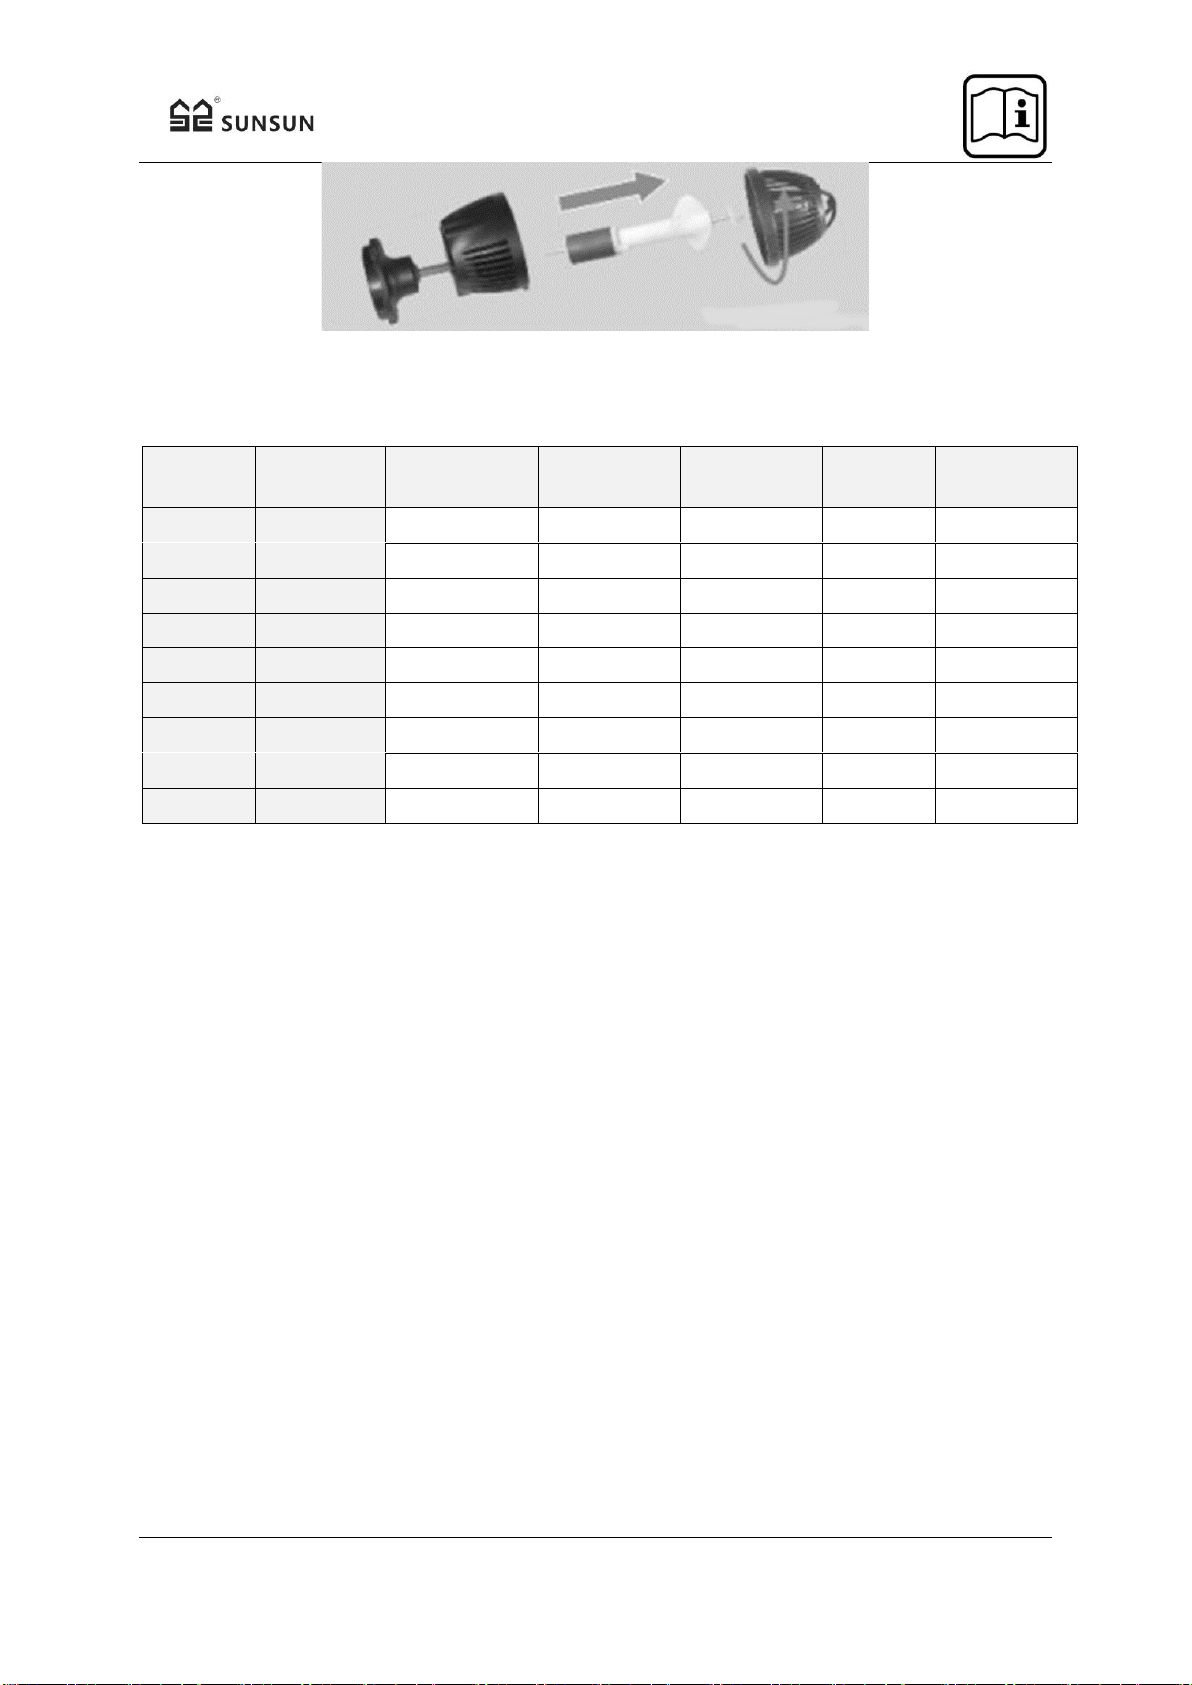
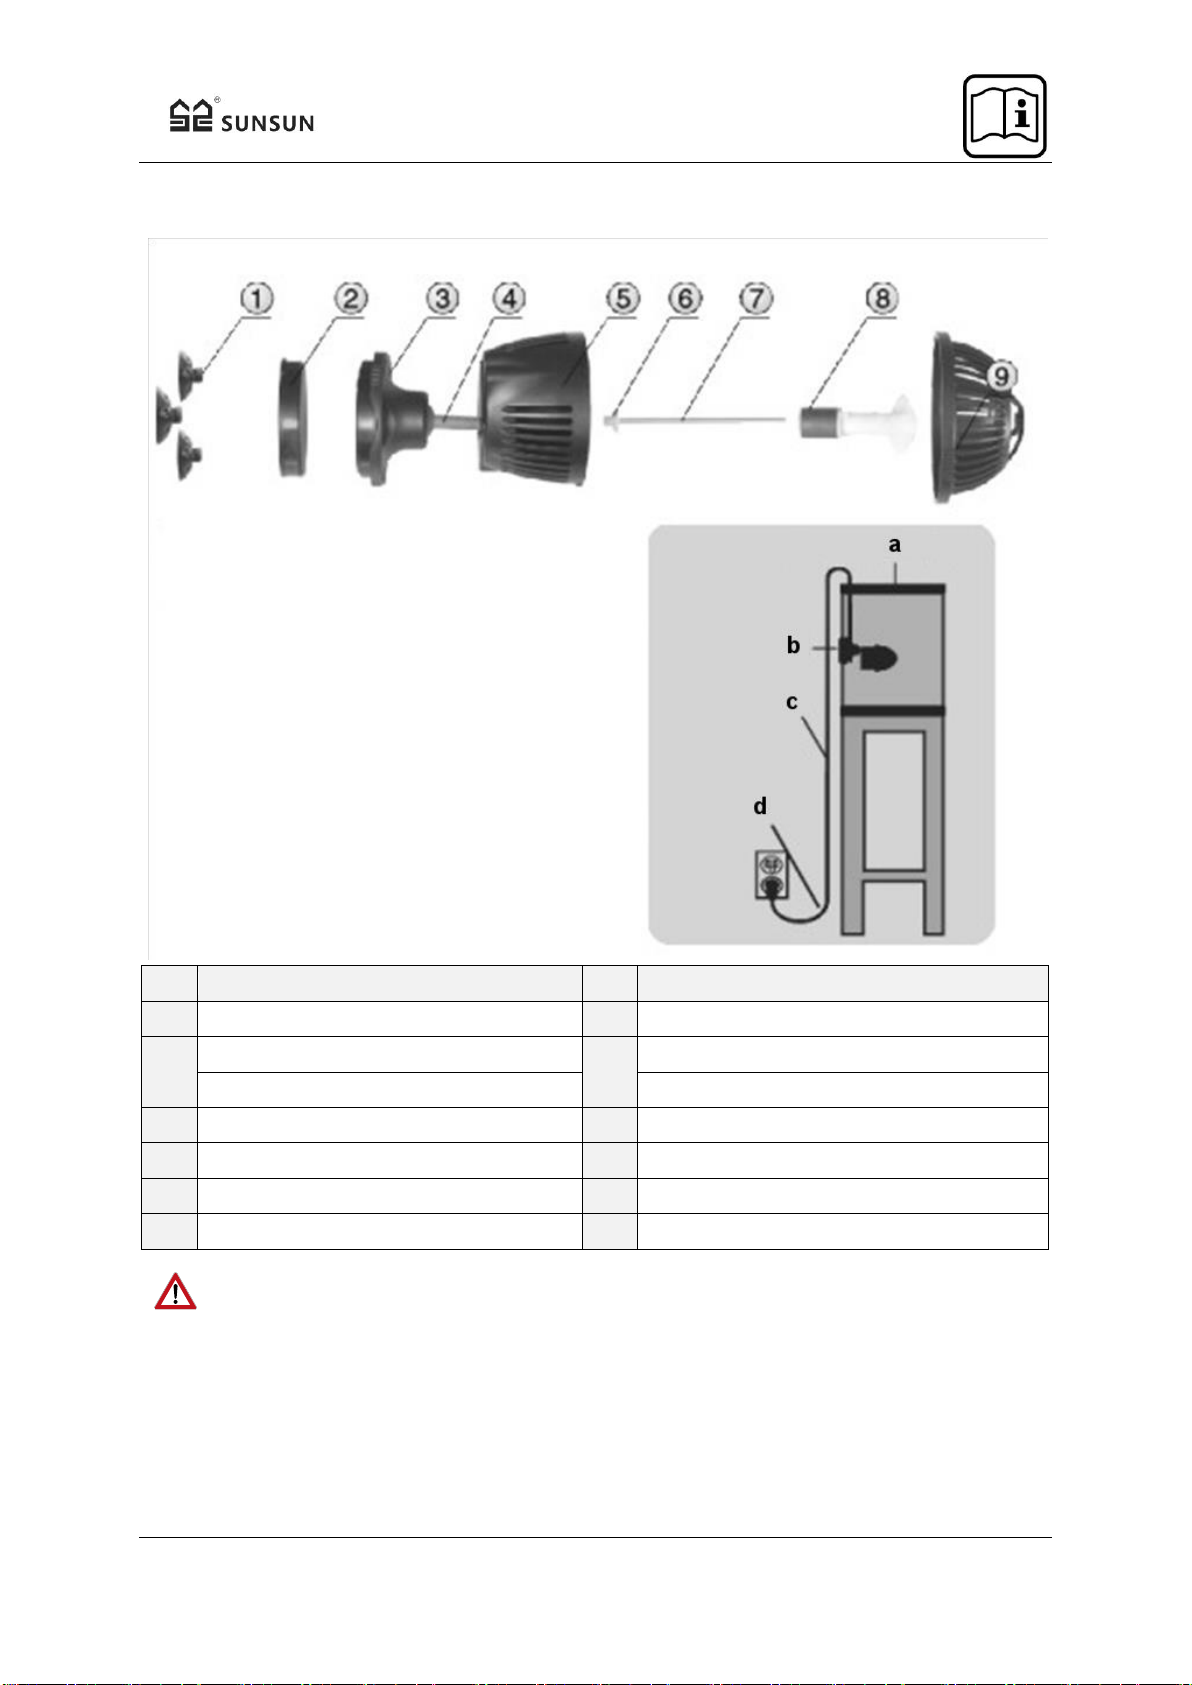
3. To install the pump, first remove the cable.
4. Install the magnets or suction cups by setting the rotating axle into the rear part of the vibration
pump (see fig. 2).
5. Plunge the pump entirely into the water and obey the respective steps to fix it to the walls of
your aquarium. Then, you can connect the pump to the energy source.
Fixing the suction cup
1. Install the suction cup to the appropriate spot making sure that the small lever is not yet firmly
pressed against the suction holder.
2. With the pump being on the desired spot, toggle the lever until it is firmly pressed against the
suction holder (see fig. 3). The suction force will now keep your pump to the wall of the aquar-
ium.