15
ENGLISH
14
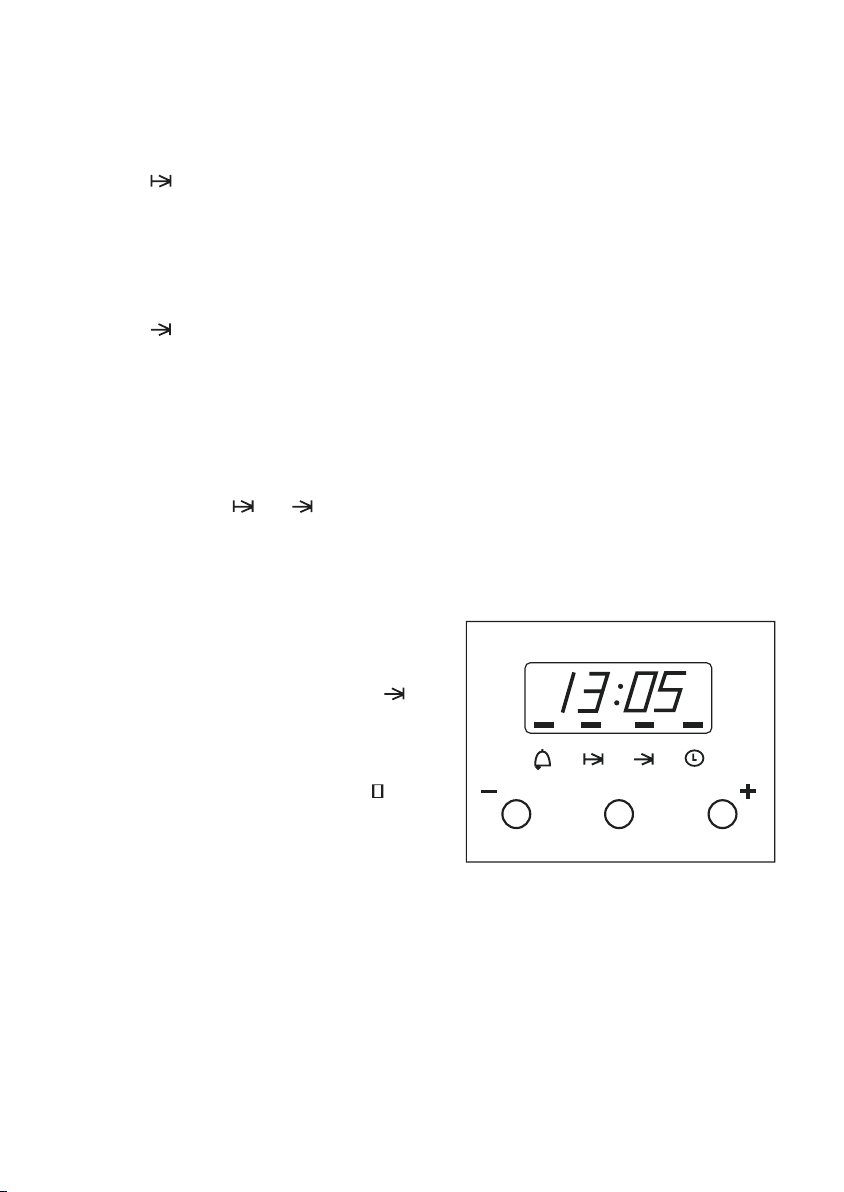
Setting the time on the clock
On connecting the oven, you will notice that
12:00 appears on the clock and that a light
begins to flash above the symbol. Pressing
the “+” and “-“ buttons the correct time can be
set on the clock, which is subsequently stored
and the flashing light goes out.
Manual use
After setting the correct time, the oven is ready
for use. Select a temperature and a cooking
function.
To switch off the oven, set the controls to the
position .
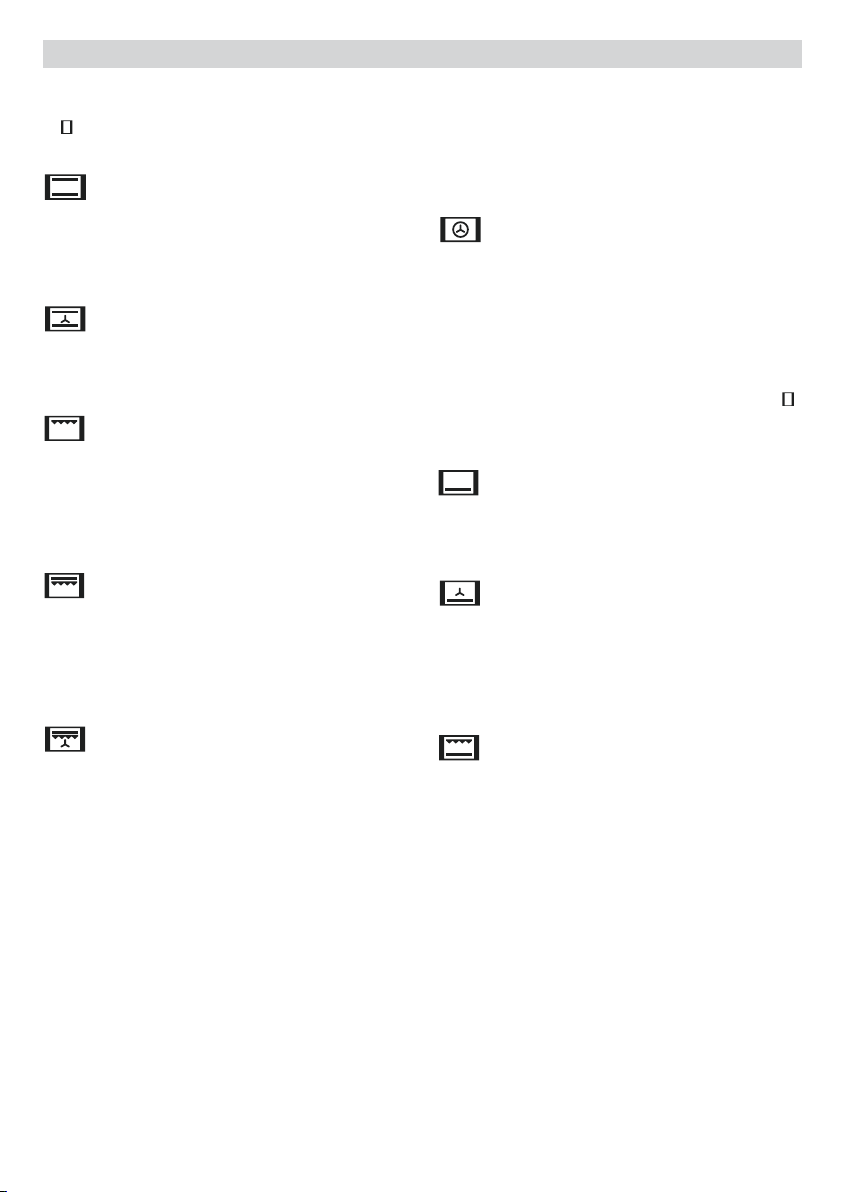
Functions of the Electronic Clock Programmer
Warning function: This function generates a
warning tone at a specified time.
Cooking time: This function allows to
programme the oven to cook for a specified
time, after which it will switch itself off.
End of cooking time: This function allows to
establish the exact hour, after which the oven
will switch itself off.
Duration and automatic stop: This function is
used to control the duration and the time at
which the oven will turn itself off. This function
allows the oven to start and stop
automatically.
Clock light: The clock light can be switched off
when the oven is not in use.
Warning function
1Press the MODE button until the signal
above the symbol begins to flash.
2Choose the time when you want the alarm
to sound, pressing the “+” or “-“ buttons.
3Subsequently, the light will remain on
indicating that the alarm is programmed.
4At the end of the programmed time, an
alarm will sound and the light will begin to
flash.
5Press any button to turn off the alarm and
the screen shows the current time again.
Programming the cooking time
1Press the MODE button until the indicator
above the symbol begins to flash.
2Select the length of time, pressing the “+”
or “-“ buttons.
3Subsequently, the indicator that was
flashing will light, indicating that the oven
will switch itself off automatically.
4The clock will then show the current time.
5Select a temperature and cooking function.
6When the set time has elapsed, the oven
will disconnect, an alarm will sound and the
indicator will begin to flash.
7Press any button to switch off the alarm,
reconnecting the oven.
8Set the controls in the position to switch
off the oven.
Programming the end of cooking time for the
oven
1Press the MODE button until the indicator
above the symbol begins to flash.
2Select the time that cooking is to finish,
pressing the “+” or “-“ buttons.
3Subsequently, the indicator that was
flashing is lit, indicating that the oven will
switch itself off automatically.
4The clock will then show the current time.
5Select a temperature and a cooking
function.
6When the programmed time is reached, the
oven will disconnect, an alarm will sound
and the indicator will begin to flash.
7Press any button to switch off the alarm and
the oven will reconnect.
8Set the controls to the position to switch
off the oven.
This function may be used even though you are
already cooking in your oven. To do so, follow
the instructions given except Nº 5.
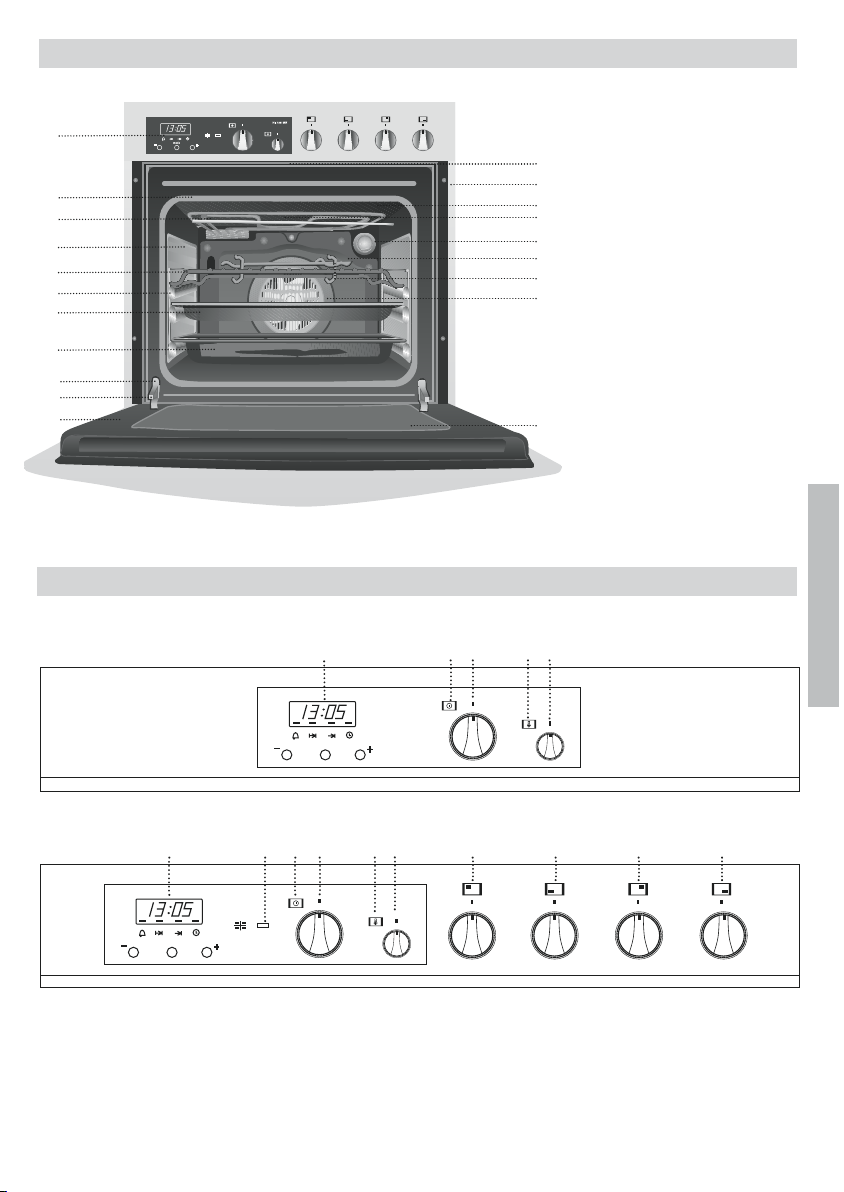
Use of the OvenOven Functions
Switch off oven
Conventional
It is used for sponges and cakes where the
heat received must be uniform to achieve a
spongy texture.
Conventional with fan
Appropriate for roasts and cakes. The fan
spreads the heat uniformly inside the oven.
Grill
For preparing dishes with superficial roasting.
It allows the outer layer to be browned without
affecting the inside of the food. Ideal for flat
food, such as steaks, ribs, fish, toast.
MaxiGrill
Allows greater surfaces to be prepared, than
with the grill, together with higher power
reducing the time required for browning of the
food.
MaxiGrill with fan
Allows uniform roasting at the same time as
surface browning. Ideal for grills. Special for
large volume pieces, such as poultry, game
etc. It is recommended to put the item on a
rack with a tray beneath to collect the stock
and juices.
Caution
While using the Grill, MaxiGrill or MaxiGrill with
fan, the door must be kept closed.
Turbo
The fan distributes the heat produced by an
element located at the rear of the oven. Due to
the uniform heat distribution, it allows roasting
and baking to take place at two heights at the
same time.
This cooking mode allows defrosting of food.
To do this, set the temperature selector to
position.
Lower element
Heats only from beneath. Suitable for heating
dishes and raising pastry and similar.
Lower element with fan
It distributes the heat from the lower part of
the oven and is ideal for cakes with jam or fruit
filling, which only require heating from
beneath. Pre-heating is always necessary.
Grill and Lower element
Special for roasts. It can be used for any
piece, whatever its size.
Note
The pilot light remains on in any cooking
function.