manuals.online logo
Brands
  1. Home
  2. •
  3. Brands
  4. •
  5. Teledyne
  6. •
  7. Security Camera
  8. •
  9. Teledyne CP-6302-31-I User manual

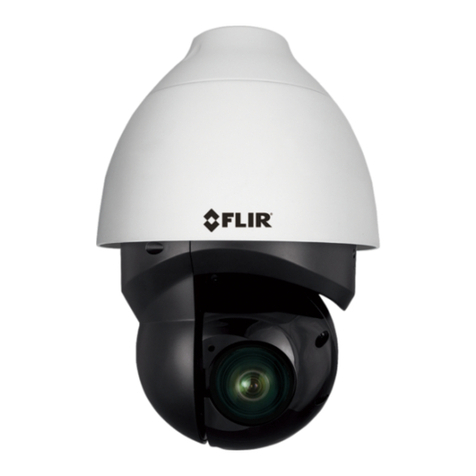
Teledyne CP-6302-31-I User manual

Quick Install Guide
Quasar Gen IlI
CP-6302-31-I
1080p FHD IR PTZ camera
Accessing Camera Documentation and Utility Software from the Web
A. (Optional) Insert SD Card
To locally store snapshots or video recordings triggered by events, insert an SD card or a microSDXC card (up to
1TB, Class 10) with adapter (not supplied) in the SD card slot inside the camera housing (see diagram below).
B. Mount the Camera
Verify that the operating temperature range is between -40°C ~ 50°C (-40°F ~ 122°F) up to 55°C (131°F) with IR
LEDs off, 0-90% relative humidity (non-condensing).
Be sure to have the required accessories and tools available.
Refer to the Installation Manual for mounting instructions.
C. Connect the Camera
3-Pin Power Connector
Power
Connector
Pin
24 VAC
30 VDC
1
L (Live; white;
positive)
Pins 1 and 3
(polarity N/A)
2
Ground (Earth)
3
N (Neutral;
black; negative)
CAUTION:
This product contains a battery that is soldered to the
PCB. There is a risk of explosion if the battery is
replaced by an incorrect type.
Do not replace the battery.
The battery should be disposed of in accordance with
manufacturer’s instructions.
Terminal Connectors
14-pin Terminal
Block
Pin
Definition
Pin
Definition
1
Audio-Out
9
Alarm-In 4
2
Ground (Audio
I/O)
10
Alarm-In 3
3
Alarm-Out A1
11
Alarm-In 2
4
Alarm-Out A2
12
Alarm-In 1
5
Alarm-Out B1
13
Ground
(Alarm I/O and RS-485)
6
Alarm-Out B2
14
Audio-In
7
RS-485 D+
8
RS-485 D-
1. Cat 5e/Cat 6 cable from the switch to the RJ45 connector for 10/100/1000 Mbps Ethernet and Universal
PoE. If using a PoE injector, use CP-POE-4P-60W-US or equivalent. Verify that there are steady green and
flashing yellow LEDs. If using a Universal PoE-capable network switch, use a Teledyne FLIR-recommended
unit. Consult Support.
2. Three-pin power connector (if using a 24VAC / 30VDC power supply or a heater).
3. Factory reset button. To reset factory defaults at any time, press the Default button for at least 20 seconds.
4. 14-pin terminal block connector for alarm and audio in/out
(attach wires from external devices).
5. Analog video output to a DVR (attach coax cable to the BNC
connector for video output).
6. SD card slot.
D. Discover the Camera
1. Download and install the DNA Utility from the
Teldedyne FLIR website as shown.
2. Attach the unit to the same LAN segment as the
computer that is managing the unit.
DNA automatically discovers the unit on the network
and displays the device’s current IP address in the
Discover List.
Configure the Camera's IP address and Video Format
1. Select the unit from the Discover List.
2. If using static IP addressing (as on a Latitude system),
follow the DNA instructions to set the desired IP
address.
3. On a system using DHCP, select the DHCP option in
DNA.
4. To select PAL or NTSC, select the device in the
Discover List, right-click to open the context menu, and
select Change Video Format.
5. Click Update.
E. (Optional) Install the ActiveX Plug-in
The camera’s web interface supports Microsoft Internet Explorer® 10 and higher (32-bit) with the ActiveX® plug-in, Google Chrome®, Mozilla Firefox®, and Microsoft Edge®.
When using Internet Explorer, make sure that ActiveX controls can be downloaded by configuring the ActiveX controls and plug-in settings, or by setting the Internet Security Level
to the Default level. For further details, refer to the camera’s User Guide.
To configure ActiveX:
1. Start Internet Explorer.
2. Select Tools > Internet Options from the main menu
of the browser.
3. Select the Security tab and click Internet.
4. Click Custom level to change ActiveX settings.
5. Set all ActiveX controls and plug-ins settings to Prompt
or Enable.
To set the Internet Security Level:
1. Start Internet Explorer.
2. Select Tools > Internet Options from the main menu
of the browser.
3. Select the Security tab and click Internet.
4. Click Default level.
5. Click OK.
6. Close and reopen the browser window.
7. After the request to install the ActiveX control file
(install.cab) appears on the screen, click Yes.
8. After installing the plug-in, in the pop-up security
warning that opens, click Install to start downloading
the Quasar Player software onto the PC.
9. Click Finish when the Quasar Player installation is
completed.
F. (Optional) Format SD Card
1. Use the Web interface to verify that the card status is
displayed as Mounted on the System > Edge
Recording > SD Card screen.
2. Format the card.
3. Configure the camera to store snapshots and
recordings from the System > Edge Recording
screens.
When logging in to the camera's Web interface for the
first time:
1. Log into the unit with the administrator user name
Admin and the default password 1234.
2. Specify a new password for the administrator and then
log back in using the new password.
For details, refer to the camera's User Guide.
G. Attach to VMS
Once you have completed installation and setup and
found the current IP address with DNA, use your VMS
Discovery/Attach procedures to attach the camera to
your VMS.
CP-6302-31-I_QIG_v7
Teledyne FLIR LLC
Tel: +1-800-254-0632
6769 Hollister Ave.
Goleta, CA 93117
www.teledyneflir.com/security
Other manuals for CP-6302-31-I

1

This manual suits for next models

1

Other Teledyne Security Camera manuals

Teledyne M1 Series Installation and operating instructions

Teledyne

Teledyne M1 Series Installation and operating instructions

Teledyne Quasar Gen III CP-6302-31-P User manual

Teledyne

Teledyne Quasar Gen III CP-6302-31-P User manual

Teledyne TS Series User manual

Teledyne

Teledyne TS Series User manual

Teledyne Piranha4 4K User manual

Teledyne

Teledyne Piranha4 4K User manual

Teledyne CP-6302-30-R User manual

Teledyne

Teledyne CP-6302-30-R User manual

Teledyne Micropublisher6 User manual

Teledyne

Teledyne Micropublisher6 User manual

Teledyne Genie Monochrome Series User manual

Teledyne

Teledyne Genie Monochrome Series User manual

Teledyne Quasar CP-6408-31-I User manual

Teledyne

Teledyne Quasar CP-6408-31-I User manual

Teledyne FLIR FC AI Series User manual

Teledyne

Teledyne FLIR FC AI Series User manual

Teledyne DALSA P3-80-12k40-00-R User manual

Teledyne

Teledyne DALSA P3-80-12k40-00-R User manual

Teledyne P2-2x-xxx40, P2-4x-xxx40, P2-2x-xxx30 User manual

Teledyne

Teledyne P2-2x-xxx40, P2-4x-xxx40, P2-2x-xxx30 User manual

Teledyne CP-6302-30-R User manual

Teledyne

Teledyne CP-6302-30-R User manual

Teledyne DALSA HS-40-04k40-xx-R User manual

Teledyne

Teledyne DALSA HS-40-04k40-xx-R User manual

Teledyne P4-CM-04K07D User manual

Teledyne

Teledyne P4-CM-04K07D User manual

Teledyne Quasar CP-6408-21-I User manual

Teledyne

Teledyne Quasar CP-6408-21-I User manual

Teledyne FLIR Triton FH-Series User manual

Teledyne

Teledyne FLIR Triton FH-Series User manual

Teledyne Quasar Gen III CP-6302-31-P User manual

Teledyne

Teledyne Quasar Gen III CP-6302-31-P User manual

Teledyne Quasar Premium User manual

Teledyne

Teledyne Quasar Premium User manual

Teledyne Genie C640-1/2 User manual

Teledyne

Teledyne Genie C640-1/2 User manual

Teledyne FLIR FC AI Series User manual

Teledyne

Teledyne FLIR FC AI Series User manual

Teledyne SG-14 User manual

Teledyne

Teledyne SG-14 User manual

Teledyne FLIR Quasar CM-640 1-IA Series User manual

Teledyne

Teledyne FLIR Quasar CM-640 1-IA Series User manual

Teledyne Piranha4 User manual

Teledyne

Teledyne Piranha4 User manual

Teledyne Genie Nano Series User manual

Teledyne

Teledyne Genie Nano Series User manual

Popular Security Camera manuals by other brands

Genesis CCTV Standard type Operation manual

Genesis CCTV

Genesis CCTV Standard type Operation manual

Avigilon 1.0C-H4IRPTZ-DP45 installation guide

Avigilon

Avigilon 1.0C-H4IRPTZ-DP45 installation guide

Axis M3204 user manual

Axis

Axis M3204 user manual

Digital Watchdog MEGAPIX PANO DWC-PVF5M1TIR quick start guide

Digital Watchdog

Digital Watchdog MEGAPIX PANO DWC-PVF5M1TIR quick start guide

Toshiba teli BU602M instruction manual

Toshiba teli

Toshiba teli BU602M instruction manual

Brinno TimeLapse BMC100 quick guide

Brinno

Brinno TimeLapse BMC100 quick guide

Dante DLF1325B Installation and operation manual

Dante

Dante DLF1325B Installation and operation manual

Inaxsys IN-BO2MIR22A Hardware user manual

Inaxsys

Inaxsys IN-BO2MIR22A Hardware user manual

Moog Videolarm P1600 Specifications

Moog Videolarm

Moog Videolarm P1600 Specifications

Lorex SG6115X Quick setup guide

Lorex

Lorex SG6115X Quick setup guide

Wisenet TNF-9010 user manual

Wisenet

Wisenet TNF-9010 user manual

Boly SG2060 Series user manual

Boly

Boly SG2060 Series user manual

Nuvico XCEL NCT-4M-OV2 user manual

Nuvico

Nuvico XCEL NCT-4M-OV2 user manual

Asoni CAM422M user manual

Asoni

Asoni CAM422M user manual

Watec WAT-933 user manual

Watec

Watec WAT-933 user manual

Platinum CCTV PTZ-2000-10 installation manual

Platinum CCTV

Platinum CCTV PTZ-2000-10 installation manual

Idis DC-T1232WR installation manual

Idis

Idis DC-T1232WR installation manual

Pyle PLCMTR71 user manual

Pyle

Pyle PLCMTR71 user manual

manuals.online logo
manuals.online logoBrands
  • About & Mission
  • Contact us
  • Privacy Policy
  • Terms and Conditions

Copyright 2025 Manuals.Online. All Rights Reserved.