Telstar TFA004910MD User manual

FREIDORA DE AIRE
TFA004910MD

FREIDORA DE AIRE
TFA004910MD
2
1. Este aparato no debe ser manipulado por menores de 8 años, personas con capacidades sensoriales o
mentales disminuidas, o con falta de experiencia o conocimientos, a menos que estén bajo supervisión.
2. Verique que el voltaje indicado en el aparato corresponda al voltaje de su domicilio antes de conectarlo.
3. No use este aparato si el enchufe, el cable de alimentación o el aparato mismo muestra daños. Siempre
asegúrese de que el enchufe esté correctamente insertado en la toma de corriente.
4. Si el cable de alimentación presenta daños, evite riesgos y acuda al fabricante, su servicio técnico o a
personal calicado para que lo reemplacen.
5. Los niños deben ser supervisados para asegurarse de que no jueguen con este artefacto. Los niños no
limpiarán ni llevarán a cabo el mantenimiento a menos que tengan más de 8 años y se encuentren bajo
supervisión.
6. Mantenga el cable principal alejado de supercies calientes.
7. No enchufe el artefacto ni use el panel de control con las manos húmedas.
8. Nunca conecte este aparato a un interruptor temporizador externo ni a ningún sistema de control remoto
separado para evitar riesgos.
9. No coloque este aparato sobre o cerca de materiales inamables, como manteles o cortinas. Las
supercies del aparato pueden calentarse durante el uso.
10. No coloque este aparato contra la pared u otros aparatos. Deje al menos 10 cm de separación entre la
parte posterior y los lados, y cualquier otra supercie cercana. No coloque nada encima del aparato.
11. No use este aparato para propósitos no especicados en este manual.
12. No deje el aparato funcionando sin supervisión.
13. Durante el freído con aire caliente se libera vapor caliente a través de las ranuras de salida de aire.
Mantenga la cara y las manos alejadas del vapor y de las ranuras de salida de aire. También tenga cuidado
con el aire y vapor calientes al retirar el sartén del aparato.
14. Después de usar el aparato, el revestimiento metálico interior permanece muy caliente, por lo que debe
evitar tocarlo.
15. Si sale humo negro del aparato, desenchúfelo de inmediato. Espere a que se detenga la emisión de humo
para retirar el sartén del aparato.
INSTRUCCIONES DE SEGURIDAD IMPORTANTES

FREIDORA DE AIRE
TFA004910MD
3
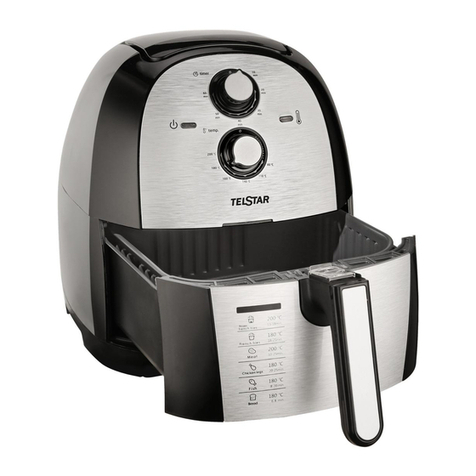
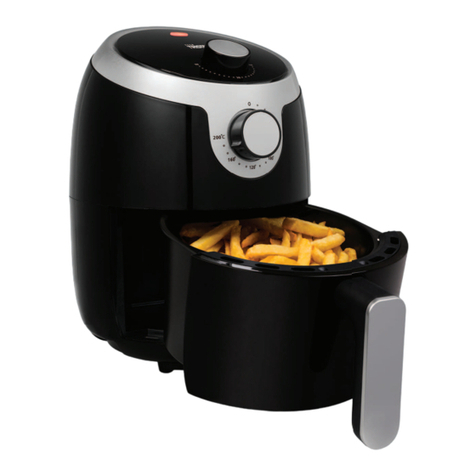
CONOZCA SU FREIDORA DE AIRE
Ranura para
entrada de aire
Luz de
encendido
Luz de temperatura
Temporizador
Control de
temperatura
Botón de
desbloqueo de la
canasta
Asa
Recipiente interior
Recipiente de cocción

FREIDORA DE AIRE
TFA004910MD
4
Antes de usar su freidora de aire por primera vez
1. Retire todo el material de embalaje.
2. Retire los adhesivos o etiquetas del aparato.
3. Lave la cesta y el sartén con agua caliente, detergente para vajilla y una esponja suave.
4. Limpie el interior y el exterior del aparato con un paño húmedo. Nota: Si lo desea, también puede dejar
CÓMO USAR SU FREIDORA DE AIRE
• La freidora funciona con aire caliente.
• No llene el recipiente de cocción con aceite o grasa para freír.
• No llene el recipiente de cocción con aceite u otro líquido.
• No coloque nada encima del aparato.
• Mantenga las ranuras de entrada/salida de aire en ambos lados despejadas.
1. Coloque el aparato sobre una supercie estable, horizontal y resistente al calor.
2. Coloque la canasta en el sartén. Coloque los alimentos en la canasta. (No sobrecargue)
Deslice el sartén en la freidora de aire. Asegúrese de: Nunca utilice el recipiente de cocción sin la cesta.
3. Enchufar el aparato en la toma de corriente.
4. Para encender la freidora de aire, gire la perilla de control de temperatura a la temperatura deseada.
Se encenderán las luces de encendido y de temperatura. Durante el proceso de freído con aire caliente, la
luz de temperatura parpadeará ocasionalmente. Esto indica que el elemento calefactor está conectado y
desconectado para mantener la temperatura seleccionada.
5. Seleccione el tiempo de preparación necesario para los
alimentos (consulte la sección “Ajustes” de este capítulo).
Agregue 3 minutos al tiempo de preparación cuando el aparato
esté frío.
Nota: Si lo desea, también puede dejar que el aparato se
precaliente sin ningún alimento en su interior. En ese caso, gire
la perilla del temporizador a más de 3 minutos y espere hasta
que se apague la luz de calentamiento (después de 3 minutos
TEMPORIZADOR
TEMPERATURA

FREIDORA DE AIRE
TFA004910MD
5
Consejos: Para reducir el peso, puede retirar la cesta del recipiente y agitar la cesta solamente. Para ello,
extraiga el recipiente del aparato, luego colóquelo sobre una supercie resistente al calor y presione el botón
del asa.
Consejos: Si ajusta el temporizador a la mitad del tiempo de preparación, entonces emitirá un sonido indicando
que debe batir los ingredientes. Sin embargo, esto signica que debe volver a ajustar el temporizador para el
tiempo restante de preparación después del batido. (Ver ajustes)
Consejos: Si ajusta el temporizador para el tiempo completo de preparación, no se emitirá ningún sonido
hasta completar el cocinado. Puede retirar el sartén en cualquier momento para vericar el estado de la
cocción de los ingredientes. El aparato se apagará automáticamente y se volverá a encender sólo cuando
vuelva a colocar el sartén dentro del aparato (el temporizador realiza una cuenta regresiva en esta situación).
Nota: También puede apagar el aparato manualmente. Para ello, coloque la perilla de control de temperatura
en 0, o simplemente retire el sartén.
Verique si los alimentos están listos. Si los alimentos aún no están listos, simplemente vuelva a introducir el
recipiente en el aparato y ajuste el temporizador a unos minutos adicionales.
9. Para retirar pequeños ingredientes (por ejemplo, papas fritas), coloque el sartén sobre una supercie plana
resistente al calor, oprima el botón para soltar la cesta, levántela y retírela del sartén.
10. No coloque la cesta boca abajo con el recipiente aún adherido, ya que cualquier exceso de aceite que
se haya acumulado en la parte inferior del recipiente goteará a los alimentos.
11. Después del freído con aire caliente, evite tocar el sartén y los ingredientes. Según el tipo de alimentos que
se cocinen en la freidora, puede escapar vapor del recipiente.
12. Vacíe los alimentos de la cesta en un bol o en un plato.
Consejos: Para retirar ingredientes grandes o frágiles, ¡use un par de pinzas!
aprox.). A continuación, llene la cesta y gire la perilla del temporizador hasta el tiempo de preparación
deseado.
6. Algunos ingredientes necesitan un batido en la mitad del tiempo de preparación (consulte la sección
“Ajustes” en este capítulo). Para agitar los alimentos, retire el recipiente de cocción del aparato sujetándolo
por el asa y luego agítelo. Luego vuelva a introducir el recipiente de cocción en la freidora y continúe
cocinando.
7. Cuando oiga la campana del temporizador, signica que ha transcurrido el tiempo de preparación
seleccionado. Extraiga el recipiente del aparato y colóquelo sobre una supercie resistente al calor.

FREIDORA DE AIRE
TFA004910MD
6
13. Una vez preparada una porción de alimentos, la freidora estará lista para preparar otra porción al instante.
No es necesario precalentar.
Nota: Tenga en cuenta que los siguientes ajustes son indicaciones. No es posible garantizar que los ajustes
sean adecuados para todos los alimentos, ya que su origen, tamaño, forma y marca pueden variar.
ALMACENAMIENTO
• Desenchufe la freidora y déjela enfriar.
• Asegúrese de que todas las piezas estén limpias y secas.
• Coloque la freidora en un lugar limpio y seco
PROBLEMA CAUSA POSIBLE SOLUCIÓN
La freidora no funciona.
El aparato no está enchufado.
No ha establecido ningún valor en el
temporizador.
El recipiente no está colocado
correctamente en la freidora.
Enchufe el artefacto en un tomacorriente
con conexión a tierra.
Seleccione el tiempo de preparación
necesario en el temporizador para que se
encienda la freidora.
Introduzca el recipiente en la freidora
correctamente.
Los alimentos fritos con la
freidora no están cocidos.
La cantidad de ingredientes en la
cesta es muy grande.
La temperatura seleccionada es
demasiado baja.
El tiempo de preparación es
demasiado corto
Ponga pequeñas cantidades de ingredientes
en la cesta para que se frían de forma
pareja.
Seleccione la temperatura necesaria
presionando el botón de control de
temperatura (consulte la sección “Ajustes”
del capítulo “Uso de la freidora”).
Seleccione el tiempo de preparación
necesario en el temporizador (consulte la
sección “Ajustes” del capítulo “Uso de la
freidora”).
La fritura de los alimentos no
es uniforme.
Algunos tipos de alimentos deben
agitarse durante el tiempo de
preparación.
Los alimentos que se encuentran unos
encima de otros o mezclados entre sí (por
ejemplo, las papas fritas) deben agitarse
durante el tiempo de preparación. Consulte
la sección “Ajustes” del capítulo “Uso de la
freidora”.
Los aperitivos fritos no salen
crocantes.
Ha utilizado aperitivos elaborados
para cocción en freidoras
tradicionales.
Utilice aperitivos para horno o úntelos con un
poco de aceite para obtener un resultado
más crocante.

FREIDORA DE AIRE
TFA004910MD
7
CONSEJOS PARA FREÍR CON AIRE
Los alimentos pequeños requieren un tiempo de preparación un poco menor que los ingredientes más
grandes.
• Agitar los ingredientes más pequeños a mitad del tiempo de preparación optimiza el resultado nal y
puede ayudar a prevenir ingredientes fritos de forma irregular.
• Agregue un poco de aceite a las papas frescas y fríalas unos minutos más para obtener un resultado
crocante. Fría los ingredientes en la freidora unos minutos después de agregar el aceite.
• No utilice la freidora para preparar alimentos extremadamente grasos, como salchichas.
• Los snacks aptos para horno también pueden prepararse en la freidora.
• La cantidad óptima para preparar papas fritas es 500 gramos.
• Utilice masa previamente preparada para hacer snacks rápida y fácilmente. La masa previamente
preparada exige un tiempo de preparación menor que la masa casera.
No puedo colocar
adecuadamente el sartén
dentro del aparato.
Hay muchos ingredientes en la cesta.
La cesta no está colocada
correctamente en el recipiente.
La cantidad de alimentos de la cesta no
debe exceder la capacidad máxima.
Consulte la sección “Ajustes”.
Empuje la cesta dentro del recipiente
hasta oir un clic.
La freidora emana humo
blanco.
Está preparando alimentos grasos.
El recipiente aún tiene residuos de
grasa del uso anterior.
Al freír alimentos grasos, se acumula una
gran cantidad de aceite en el recipiente de
cocción. El aceite produce humo blanco
por lo que es posible que el recipiente se
caliente más de lo habitual. Esto no afecta el
funcionamiento de la freidora ni el resultado
nal.
El humo blanco es originado por la grasa
que se calienta en el recipiente de cocción.
asegúrese de limpiar bien el recipiente luego
de cada uso.
Las papas fritas no se fríen de
forma uniforme.
No utilizó el tipo de papa adecuado.
Lave bien las papas antes de
freírlas.
Utilice papas frescas y asegúrese de que se
mantengan rmes durante la fritura.
Enjuague bien los bastoncillos de papa
para eliminar el almidón que los recubre.
Las papas fritas frescas no
salen crocantes.
Las papas fritas salen crocantes
según la cantidad de aceite y agua
en la preparación.
Asegúrese de secar bien los bastoncillos de
papa antes de añadir el aceite.
Corte bastoncillos cortos de papa para que
sean más crujientes. Agregue un poco más
de aceite para obtener un resultado más
crocante.

FREIDORA DE AIRE
TFA004910MD
8
• Coloque un molde o una asadera dentro de la cesta de la freidora para hornear una torta o quiche, así
como para freír alimentos frágiles o rellenos.
• También puede utilizar la freidora para calentar alimentos. Para recalentar los ingredientes, ajuste la
temperatura en 150°C por 10 minutos.
Nota: Debido a que la tecnología de aire caliente rápido calienta instantáneamente el aire dentro del aparato,
el proceso de cocinado no se verá afectado si retira el sartén del aparato por poco tiempo.
Min-Max
Cantidad
(gr)
Tiempo
(min.)
Temperatura
(C)
Agitar Información adicional
Papas fritas
Papas fritas congeladas nas 300-700 9-16 200 Agitar
Papas fritas congeladas gruesas 300-700 11-20 200 Agitar
Papas caseras (8x8mm) 300-800 16-10 200 Agitar Agregar 1/2 cda. de
aceite
Papas Cuñas caseras 300-800 18-22 180 Agitar Agregar 1/2 cda. de
aceite
Cubos de papas caseros 300-750 12-18 180 Agitar Agregar 1/2 cda. de
aceite
Rosti 250 15-18 180 Agitar
Papas al gratín 500 15-18 200 Agitar
Carne y pollo
Filete 100-500 8-12 180
Chuletas de cerdo 100-500 10-14 180
Hamburguesas 100-500 7-14 180
Rollos de salchicha 100-500 13-15 200
Muslo de pollo 100-500 18-22 180
Pechuga de pollo 100-500 10-15 180
Bocadillos
Arrolladitos primavera 100-400 8-10 200 Agitar
Nuggets de pollo congeladas 100-400 6-10 200 Agitar
Palitos de pescado congelados 100-400 6-10 200

FREIDORA DE AIRE
TFA004910MD
9
Queso empanizado congelado 100-400 8-10 180
Verduras rellenas 100-400 10 160
Hornear
Tartas 300 20-25 160
Quiche 400 20-22 180
Panecillos 300 15-18 200
Dulces 400 20 160
Limpieza
Limpie el aparato después de cada uso.
Tenga cuidado de no tocar el metal caliente en el interior del aparato si va a limpiarlo justo después de usar.
¡Deje enfriar antes!
No use utensilios de cocina de metal o productos de limpieza abrasivos para limpiar la sartén o la canasta, ya
que esto podría dañar la cobertura anti-adhesiva.
1. Retire el enchufe de la toma de pared y deje que el aparato se enfríe. Nota: Retirar la sartén para que la
freidora se enfríe más rápidamente.
2. Limpiar el exterior del aparato con un paño húmedo.
3. Limpiar la canasta y la sartén con agua caliente, detergente y una esponja no abrasiva. Puede utilizar un
detergente anti grasas para eliminar cualquier suciedad restante.
Nota: La canasta es apta para lavavajillas.
Consejo: Si hay suciedad adherida a la canasta o a la sartén, llenar la sartén con agua caliente y un poco de
detergente. Poner la canasta en la sartén y dejar reposar por unos 10 minutos.
4. Limpiar el interior del aparato con agua caliente y una esponja no abrasiva.
5. Limpiar el elemento caloríco con un cepillo para eliminar cualquier residuo de comida.

10
AIR FRYER
TFA004910MD
Before using the electrical appliance, the following basic precautions should always be followed including the
following:
1. This appliance is not intended for use by persons (including children younger 8) with reduced physical,
sensory or mental capabilities, or lack of experience and knowledge, unless they have supervision.
2. Check if the voltage indicated on the appliance corresponds to the local main voltage before you
connect the appliance.
3. Do not use the appliance if the plug, the main cord or the appliance itself is damaged. Always make sure
that the plug is inserted properly into a wall outlet.
4. If the main cord is damaged, you must have it replaced by the manufacturer, its service agent or similarly
qualied persons in order to avoid a hazard.
5. Children should be supervised to ensure that they do not play with the appliance. Cleaning and user
maintenance shall not be made by children unless they are older than 8 and supervised.
6. Keep the main cord away from hot surfaces.
7. Do not plug in the appliance or operate the control panel with wet hands.
8. Never connect this appliance to an external timer switch or separate remote-control system in order to
avoid a hazardous situation.
9. Do not place the appliance on or near combustible materials such as a tablecloth or curtain. The accessible
surfaces may become hot during use.
10. Do not place the appliance against a wall or against other appliances. Leave at least 10cm free space
on the back and sides and 10cm free space above the appliance. Do not place anything on top of the
appliance.
11. Do not use the appliance for any other purpose than described in this manual.
12. Do not let the appliance operate unattended.
13. During hot air frying, hot steam is released through the air outlet openings. Keep your hands and face at a
safe distance from the steam and from the air outlet openings. Also be careful of hot steam and air when you
remove the pan from the appliance.
14. After using the appliance, the metal cover inside is very hot, avoid to contact the hot metal inside after
cooking.
15. Immediately unplug the appliance if you see dark smoke coming out of the appliance. Wait for the smoke
emission to stop before you remove the pan from the appliance.
IMPORTANT SAFEGUARDS

11
AIR FRYER
TFA004910MD
CONOZCA SU FREIDORA DE AIRE
Air inlet Vent
Power Light
Temperature Light
Timer
Temperature
Control
Basket Release
Button
Handle
Basket
Pan

12
AIR FRYER
TFA004910MD
Before Using The Air Fryer For The First Time
1. Remove all packaging material.
2. Remove any stickers or labels from the appliance.
Thoroughly clean the basket and pan with hot water, some dishwashing liquid and a non-abrasive sponge.
3. Wipe the inside and outside of the appliance with a moist cloth.
USING YOUR AIR FRYER
• This is an air fryer that works on hot air.
• Do not ll the pan with oil or frying fat.
• Do not ll the pan with oil or any other liquid.
• Do not put anything on top of the appliance.
• Do not put anything on the air vents on the two sides of the appliance.
1. Place the appliance on a stable, horizontal and heat-resistant, level surface.
2. Place the basket in the pan. Put the ingredients in the basket. (Do not overload)
3. Slide the pan into the air fryer, Note: Never use the pan without the basket.
4. Plug in the machine into an electrical wall outlet.
To turn on the air fryer turn the temperature control knob to required temperature. The power and temperature
light will turn on. During the hot air frying process the temperature light goes on and off from time to time. This
indicates that the heating element is switched on and off to maintain set temperature.
5. Determine the required preparation time for the ingredient (see section ‘Settings’ in this chapter). Add 3
minutes to the preparation time when the appliance is cold.
Note: If you want, you can also let the appliance preheat without
any ingredients inside. In that case, turn the timer knob to more
than 3 minutes and wait until the heating-up light goes out (after
approx. 3 minutes). Then ll the basket and turn the timer knob to
the required preparation time.
6. Some ingredients require shaking halfway through the
preparation time (see section “Settings” in this chapter). To shake
TEMPORIZADOR
TEMPERATURA

13
AIR FRYER
TFA004910MD
the ingredients, pull the pan out of the appliance by the handle and shake it. Then slide the pan back into the
air fryer and continue to cook.
7. When you hear the timer bell, the set preparation time has elapsed. Pull the pan out of the appliance and
place it on a heat-resistant surface.
Tip: To reduce the weight, you can remove the basket from the pan and shake the basket only. To do so, pull
the pan out of the appliance, place it on a heat-resistant surface and press the button of the handle.
Tip: If you set the timer to half the preparation time, your timer will ring when you have to shake the ingredients.
However, this means that you have to set the timer again to the remaining preparation time after shaking.
(See settings)
Tip: If you set the timer to full preparation time, there is no timer bell during cooking before nishing, you can pull
out the pan at any time to check the ingredients cooking condition. The power will shut down automatically
and, will only resume after you slide the pan back into the appliance (timer always counts down in this situation).
Note: You can also switch off the appliance manually. To do this, turn the temperature control knob to 0, or
simply pull out the pan.
8. Check if the ingredients are ready. If the ingredients are not ready yet, simply slide the pan back into the
appliance and set the timer to a few extra minutes.
9. To remove small ingredients (e.g. fries), put the pan on a at heat resistant surface, and press the basket
release button and lift the basket out of the pan.
10. Do not turn the basket upside down with the pan still attached to it, as any excess oil that has collected on
the bottom of the pan will leak onto the ingredients.
11. After hot air frying, the pan and the ingredients are hot - avoid touching. Depending on the type of the
ingredients in the air fryer, steam may escape from the pan.
12. Empty the basket into a bowl or onto a plate.

14
AIR FRYER
TFA004910MD
13. When a batch of ingredients is ready, the air fryer is instantly ready for preparing another batch. No preheat
is necessary.
Note: Keep in mind that these settings below are indications. As ingredients differ in origin, size, shape as well
as brand, we cannot guarantee the best setting for your ingredients.
STORAGE
•Unplug the appliance and let it cool down.
•Make sure all parts are clean and dry.
• Put the air fryer on a clean and dry place.

Fresh fries are fried
unevenly in the air
fryer.
You did not use the right
potato type.
Use fresh potatoes and make sure they stay firm
during frying.
You did not rinse the
potato sticks properly
before you fried them.
Rinse the potato sticks properly to remove starch
from the outside of the sticks.
Fresh fries are not
crispy when they
come out of the air
fryer.
The crispiness of the
fries depends on the
amount of oil and water
in the fries.
Make sure you dry the potato sticks properly before
you add the oil.
Cut the potato sticks smaller for a crispier result.
Add slightly more oil for a crispier result.
15
AIR FRYER
TFA004910MD
AIR FRYING TIPS
• Smaller ingredients usually require a slightly shorter preparation time than larger ingredients.
• Shaking smaller ingredients halfway through the preparation time optimizes the end result and can help
prevent unevenly fried ingredients.
• Add some oil to fresh potatoes for a crispy result. Fry your ingredients in the air fryer within a few minutes
after you added the oil.
• Do not prepare extremely greasy ingredients such as sausages in the air fryer.

16
AIR FRYER
TFA004910MD
Min-max
Amount
(g)
Time
(min.)
Temperature
(C)
Shake Extra information
Potatoes & fries
Thin frozen fries 300-700 9-16 200 shake
Thick frozen fries 300-700 11-20 200 shake
Home-made fries (8×8mm) 300-800 16-10 200 shake Add 1/2 tbsp of oil
Home-made potato wedges 300-800 18-22 180 shake Add 1/2 tbsp of oil
• Snacks that can be prepared in a oven can also be prepared in the air fryer.
• The optimal amount for preparing crispy fries is 500 grams.
• Use pre-made dough to prepare lled snacks quickly and easily. Pre-made dough also requires a shorter
preparation time than home-made dough.
• Place a baking tin or oven dish in the air fryer basket if you want to bake a cake or quiche or if you want
to fry fragile ingredients or lled ingredients.
• You can also use the air fryer to reheat ingredients. To reheat ingredients, set the temperature to 150°C
up to 10 minutes.
Note: Because the rapid hot air technology instantly reheats the air inside the appliance, pulling the pan out
of the appliance during use, for a short amount of time, will not effect the process.
Home-made potato cubes 300-750 12-18 180 shake Add 1/2 tbsp of oil
Rosti 250 15-18 180 shake
Potato gratin 500 15-18 200 shake
Meat & Poultry
Steak 100-500 8-12 180
Pork chops 100-500 10-14 180
Hamburger 100-500 7-14 180
Sausage roll 100-500 13-15 200
Drumsticks 100-500 18-22 180
Chicken breast 100-500 10-15 180
Snacks
Spring rolls 100-400 8-10 200 shake
Frozen chicken nuggets 100-400 6-10 200 shake

17
AIR FRYER
TFA004910MD
Frozen sh ngers 100-400 6-10 200
Frozen bread crumbed cheese
snacks 100-400 8-10 180
Stuffed vegetables 100-400 10 160
Baking
Cake 300 20-25 160
Quiche 400 20-22 180
Mufns 300 15-18 200
Sweet snacks 400 20 160
Cleaning
Clean the appliance after every use.
Don’t touch the hot metal inside before cleaning while just after frying. Cool down the appliance is needed
before cleaning!
The pan, the basket, do not use metal kitchen utensils or abrasive cleaning materials to clean them, as this
may damage the non-stick coating.
1. Remove the mains plug from the wall socket and let the appliance cool down. Note: Remove the pan to
let the air fryer cool down more quickly.
2. Wipe the outside of the appliance with a moist cloth.
3. Clean the pan and the basket with hot water, some washing-up liquid and a non-abrasive sponge.
You can use a degreasing liquid to remove any remaining dirt.
Note: The basket are dishwasher-safe.
Tip: If dirt is stuck to the basket or the bottom of the pan, ll the pan with hot water with some washing-up liquid.
Put the basket in the pan and let the pan and the basket soak for approximately 10 minutes.
4. Clean the inside of the appliance with hot water and non-abrasive sponge.
5. Clean the heating element with a cleaning brush to remove any food residues.

AIR FRYER
TFA004910MD
Table of contents
Languages:
Other Telstar Fryer manuals
Popular Fryer manuals by other brands

Welbilt
Welbilt Frymaster FilterQuick FQE30-T Installation, operation and maintenance manual
Silvercrest
Silvercrest SEF 2000 A1 Operation and safety notes

Ginnys
Ginnys F2000 owner's manual
InstantPot
InstantPot VORTEX PLUS 4QT user manual

Silvercrest
Silvercrest 285003 operating instructions
TriStar
TriStar FR-9006PR instruction manual
