Telstra TELSTRA DECTCORDLESS HEADSET User manual

TELSTRA DECT
CORDLESS HEADSET
USER GUIDE
This cordless headset has been designed for ease of
use. Please read the instructions and keep it handy for
future reference. If you have any problems with your
headset, refer to the Help section of this User Guide.

2
3
INTRODUCTION
To your Telstra DECT Cordless Headset
Cordless headset - Work wirelessly with your Telstra
telephone base. Enjoy the convenience with the easy
one-button answer, and simple controls of volume and
mute. By attaching accessories to the headset, you can
freely choose from multiple wearing styles: over the ear,
over the head or behind the neck.
This User Guide provides you with all the information
you need to get the most from your headset. Before
using, you will need to set up your headset. Follow the
simple instructions on the next few pages.
NEED HELP?
PLEASE LOOK IN THE HELP SECTION AT THE END OF THE
USER GUIDE IF YOU EXPERIENCE ANY OPERATIONAL
DIFFICULTIES WITH YOUR TELSTRA PRODUCT, OR PLEASE
CONTACT THE TECHELP INFORMATION LINE 1300 369 193
OR CONTACT US BY EMAIL AT: tcpsupport_au@vtech.com
GOT EVERYTHING?
The package contains the following items:
Telstra DECT cordless headset
Telstra DECT headset charger unit
Headset charger unit power adapter
Lithium polymer rechargeable battery pack
Head band & neck band
2 Ear hooks
3 Earbuds
User guide
•
•
•
•
•
•
•
•

2
3
IN THIS GUIDE
Connect your headset 5
Headset charger unit installation 5
Headset battery installation 6
Charge the headset 7
Attaching accessories to your headset 8
Earbuds 8
Over-the-ear hook 9
Over-the-head band 12
Behind-the-neck band 15
Getting to know your Headset 17
Front of headset 17
Back of headset 18
Top of headset 19
Headset lights overview 20
Headset alert tones overview 21
Using the headset 22
Turn the headset on or off 22
Answer or end a call 22
Volume control 22
Temporary ringer silencing 23
Mute 23

4
5
Call Waiting 23
Join a call in progress 24
Intercom 24
Answer an incoming call during an intercom call 26
Call transfer using intercom 26
Help 28
General information 31
Replacing the headset battery 31
Safety 31
Cleaning 32
Environmental 33
Customer service & Product warranty 34
4
5
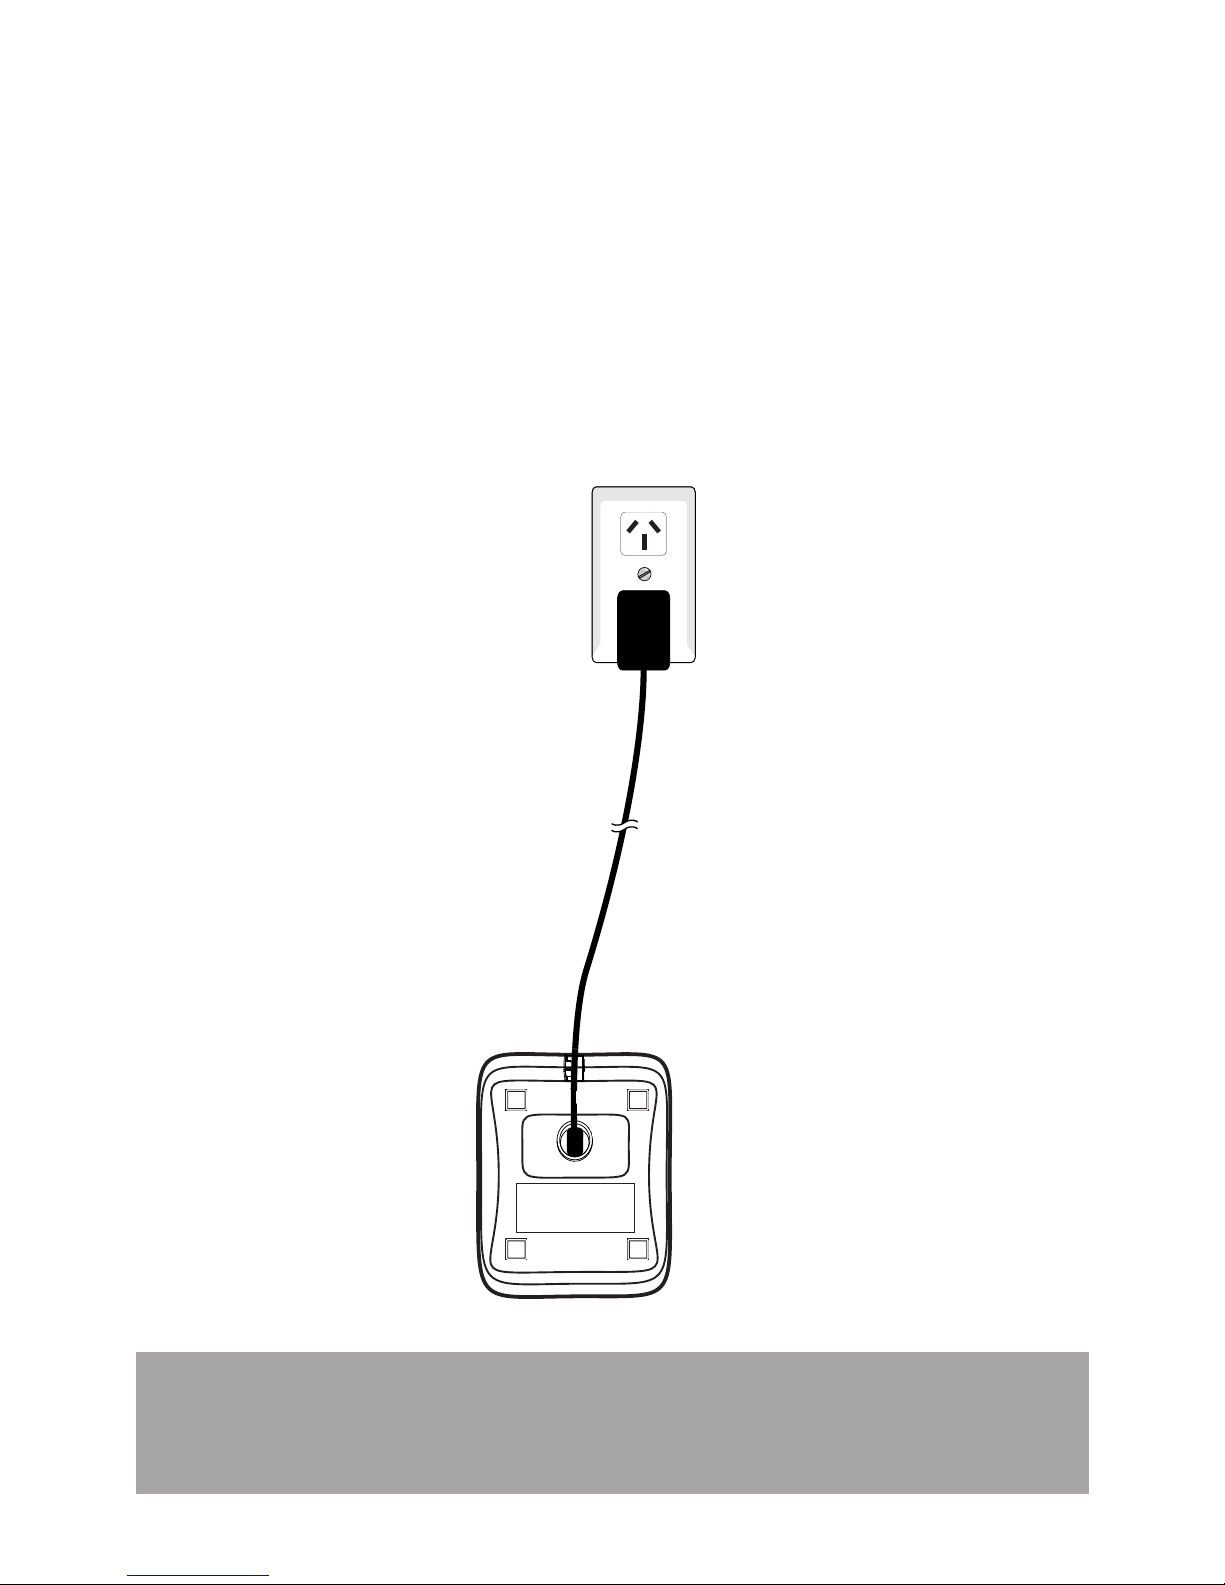
Note: Ensure power cord is fed through slot on
charger unit so the unit sits ush with the desk.
CONNECT YOUR HEADSET
VOL
ON/OFF
1
2
HEADSET CHARGER UNIT INSTALLATION
Plug the mains power adaptor into the socket on the
bottom of the headset charger unit.
Plug the other end into the wall power socket and
switch on.
1.
2.
6
7
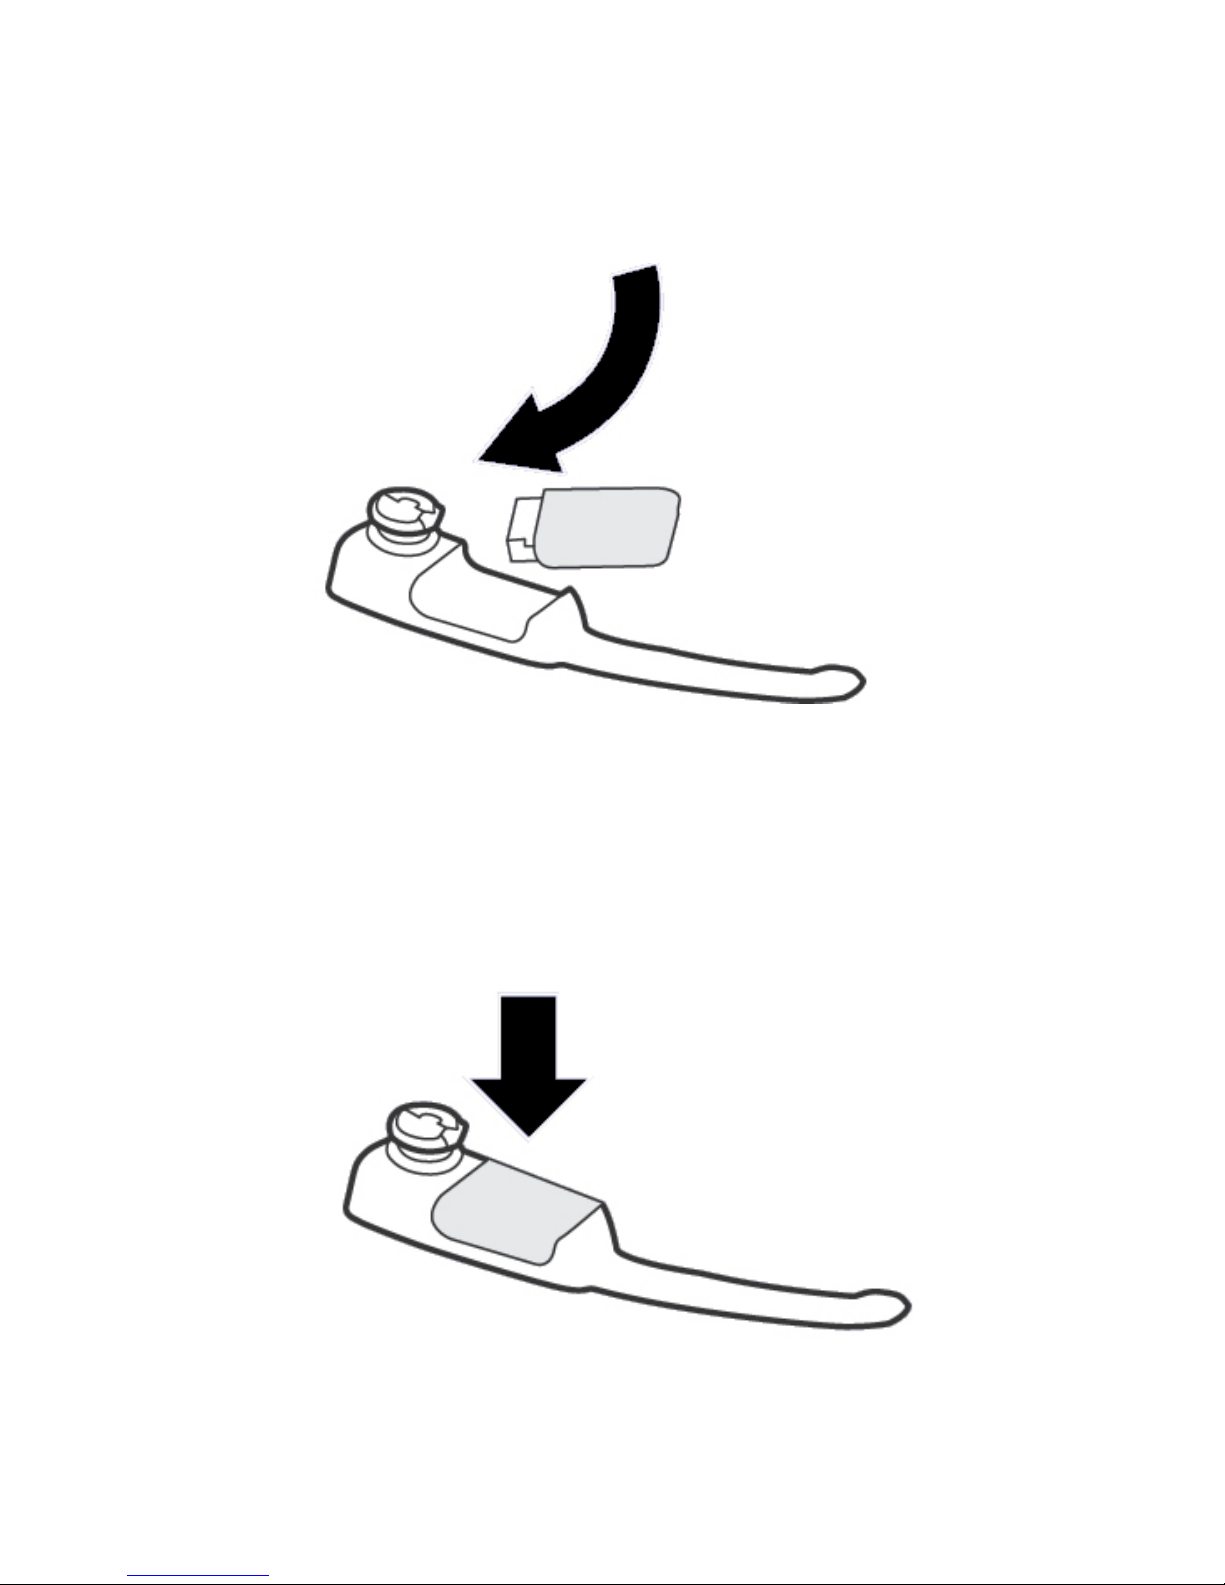
HEADSET bATTERY INSTALLATION
Insert the battery pack into the battery
compartment.
1.
Press the battery pack down gently until it clicks
into place..
2.

6
7
CHARGE THE HEADSET
Insert the headset into the magnetic charging mount
on the headset charger unit and leave it to charge for
at least 3 hours before use. The light will ash red
to indicate the battery is charging.
1.
8
9
ATTACHING ACCESSORIES TO
YOUR HEADSET
EARbUDS
There are three sizes of earbuds provide in the package.
The medium-sized earbud is already attached to
the headset.
To remove an earbud from the headset earpiece:
Hold both sides of the earbud and twist, then pull the
earbud gently until it separates from the earpiece.
To attach an earbud to the headset earpiece:
Choose the earbud of your desired size.
Attach the earbud to the earpiece as shown in the
diagram on the next page.
Press the earbud down gently on the earpiece until it
clicks into place. Move the earbud around so that the
protruding bump on the earbud is pointing towards
your mouth when placed on your ear.
1.
2.
3.

8
9
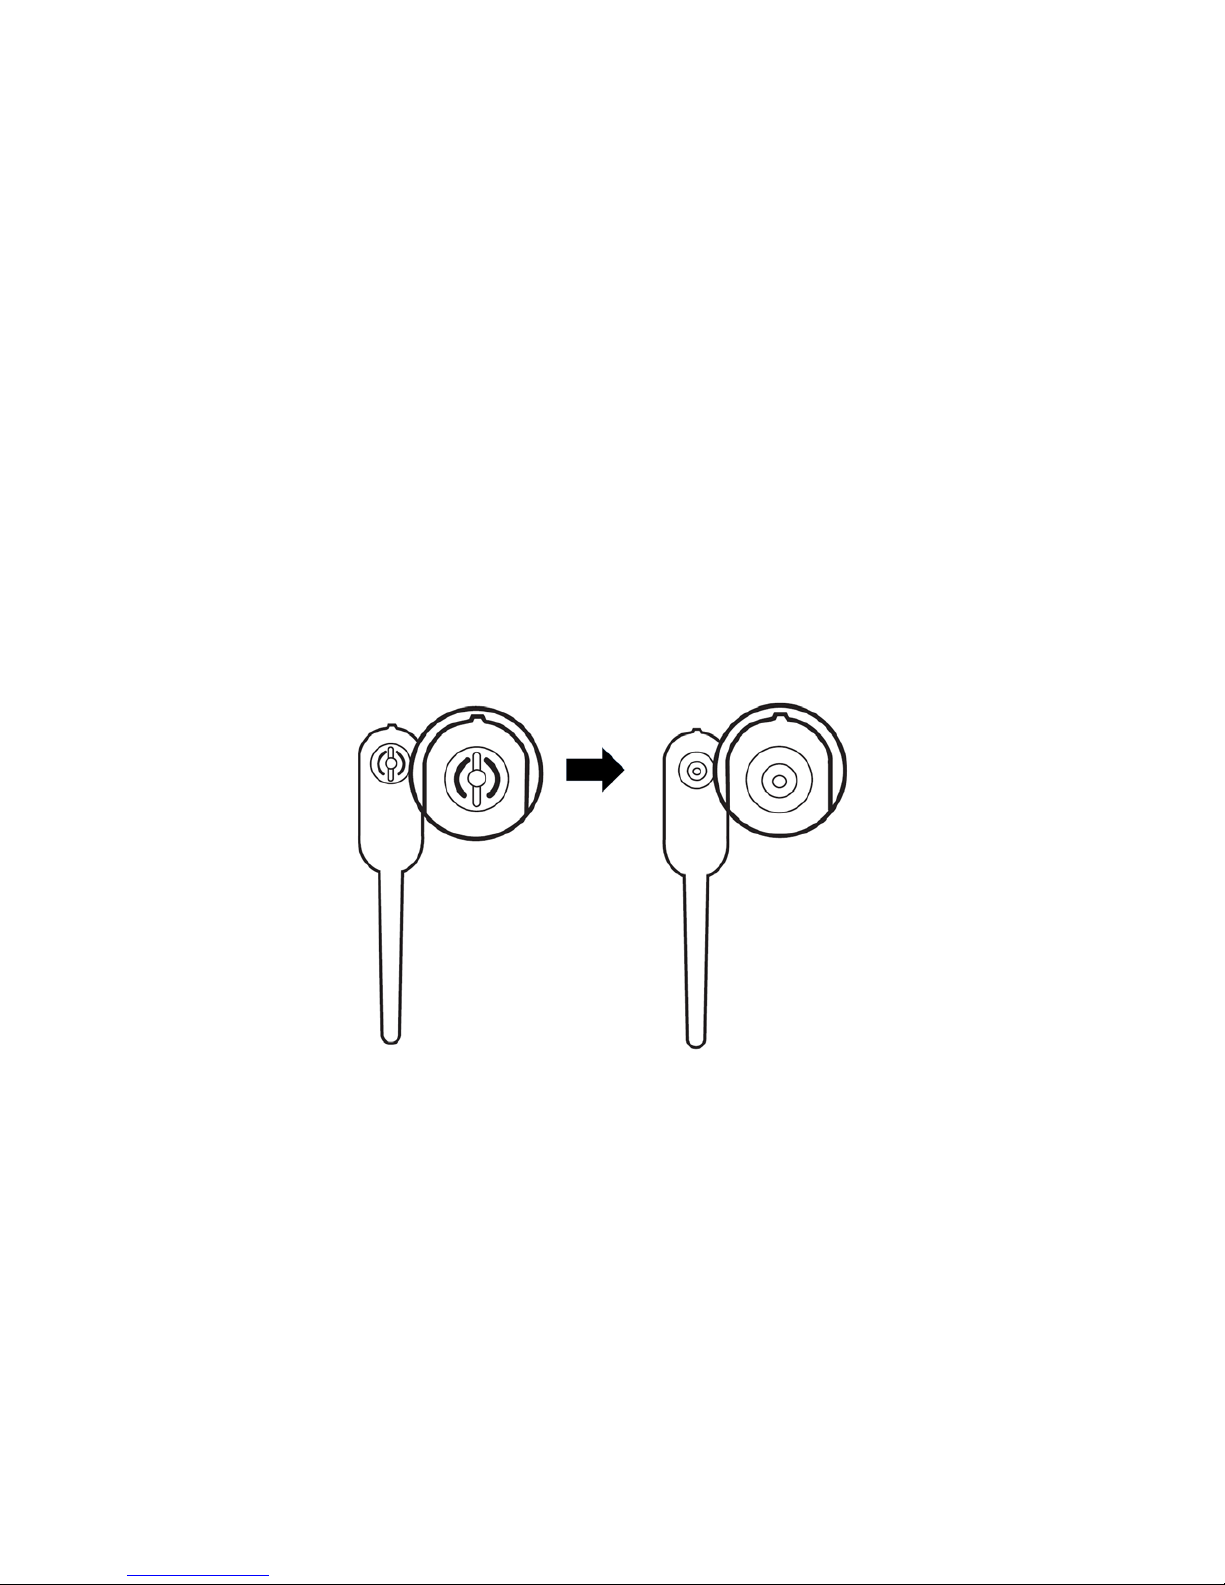
OVER-THE-EAR HOOk
There are two sizes of ear hooks provided in the package.
You can choose the most suitable ear hook and then
attach it to the headset.
To adjust the headset to wear on the left or right ear:
To wear on the left ear:
Make sure the ear hook ring is positioned as shown
in the diagram below before installation.
Then, attach the ear hook ring to the headset.
1.
2.
10
11
To wear on the right ear:
1. Make sure the ear hook ring is positioned as shown
in the diagram below before installation.
2. Then, attach the ear hook ring to the headset.
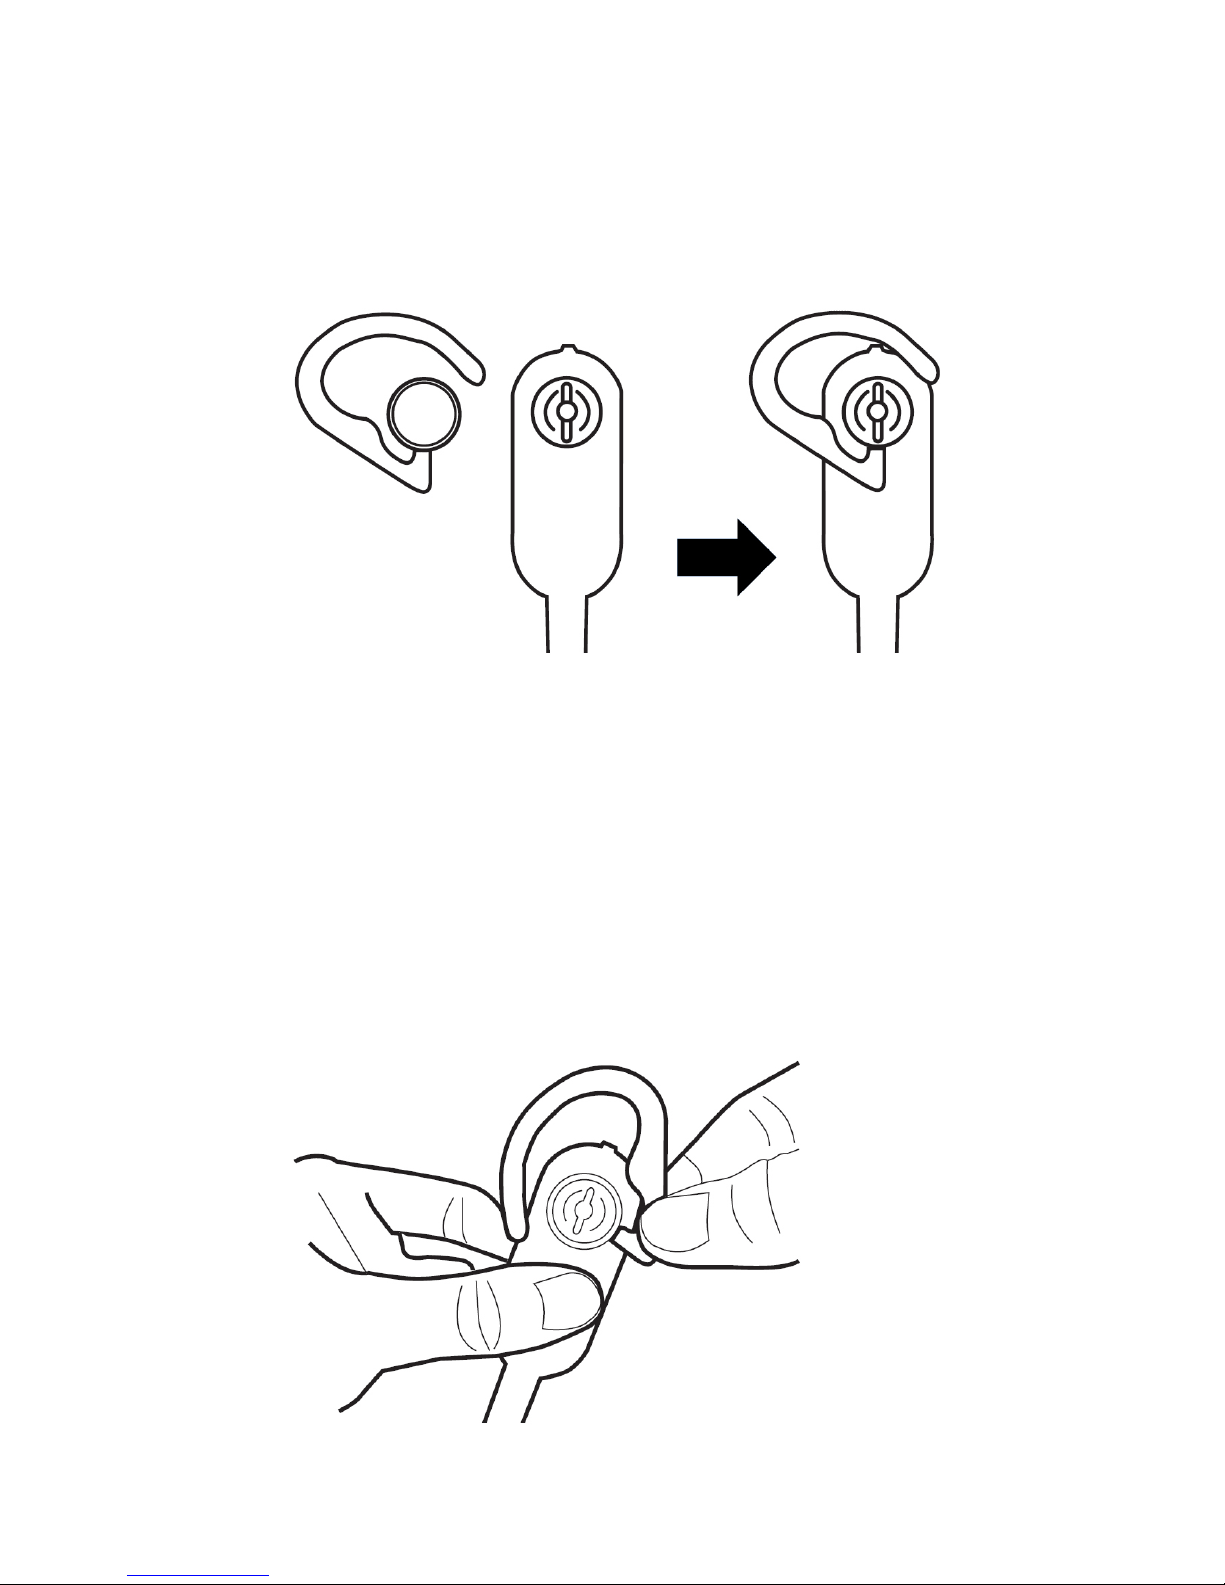
To attach the ear hook to the headset:
To wear on the left ear:
Remove any headset attachment connected to the
headset earpiece (except the ear bud).
Insert the earpiece into the ear hook.
1.
2.
This manual suits for next models
1
Table of contents
Other Telstra Headset manuals


