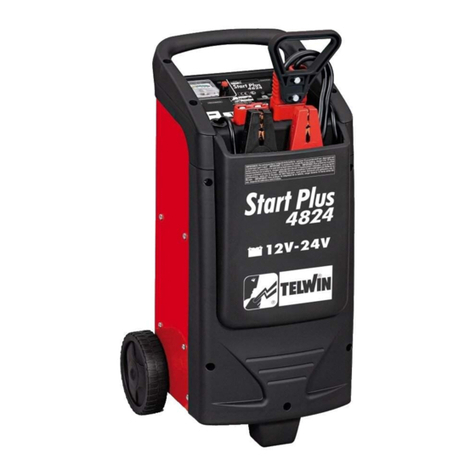
Telwin START PLUS 4824 User manual

1
Cod.953686
GB EXPLANATION OF DANGER, MANDATORY AND
PROHIBITION SIGNS.
I LEGENDA SEGNALI DI PERICOLO, D’OBBLIGO
E DIVIETO.
F LÉGENDE SIGNAUX DE DANGER,
D’OBLIGATION ET D’INTERDICTION.
E LEYENDA SEÑALES DE PELIGRO, DE
OBLIGACIÓN Y PROHIBICIÓN.
D LEGENDE DER GEFAHREN-, GEBOTS- UND
VERBOTSZEICHEN.
P LEGENDA DOS SINAIS DE PERIGO,
OBRIGAÇÃO E PROIBIDO.
NL LEGENDE SIGNALEN VAN GEVAAR,
VERPLICHTING EN VERBOD.
H A VESZÉLY, KÖTELEZETTSÉG ÉS TILTÁS
JELZÉSEINEK FELIRATAI.
INTERZICERE.
S BILDTEXT SYMBOLER FÖR FARA, PÅBUD OCH
FÖRBUD.
DK OVERSIGT OVER FARE, PLIGT OG
FORBUDSSIGNALER.
N SIGNALERINGSTEKST FOR FARE,
FORPLIKTELSER OG FORBUDT.
SF VAROITUS, VELVOITUS, JA KIELTOMERKIT.
SK VYSVETLIVKY K SIGNÁLOM
SI LEGENDA SIGNALOV ZA NEVARNOST, ZA
PREDPISANO IN PREPOVEDANO.
HR/SCG LEGENDA OZNAKA OPASNOSTI, OBAVEZA I
ZABRANA.
EE OHUD, KOHUSTUSED JA KEELUD.
NAKAZU I ZAKAZU.
(GB) DANGER OF ELECTRIC SHOCK - (I) PERICOLO SHOCK ELETTRICO - (F) RISQUE DE CHOC ÉLECTRIQUE - (E)
- (H) ÁRAMÜTÉS VESZÉLYE - (RO) PERICOL DE ELECTROCUTARE - (S) FARA FÖR ELEKTRISK STÖT - (DK) FARE
SZOKU ELEKTRYCZNEGO.
(GB) DANGER OF EXPLOSION - (I) PERICOLO ESPLOSIONE - (F) RISQUE D’EXPLOSION - (E) PELIGRO EXPLOSIÓN
(NL) GEVAAR ONTPLOFFING - (H) ROBBANÁS VESZÉLYE - (RO) PERICOL DE EXPLOZIE - (S) FARA FÖR EXPLOSION
(GB) GENERAL HAZARD - (I) PERICOLO GENERICO - (F) DANGER GÉNÉRIQUE - (E) PELIGRO GENÉRICO - (D)
ALGEMEEN GEVAAR - (H) ÁLTALÁNOS VESZÉLY - (RO) PERICOL GENERAL - (S) ALLMÄN FARA - (DK) ALMEN
(GB) DANGER OF CORROSIVE SUBSTANCES - (I) PERICOLO SOSTANZE CORROSIVE - (F) SUBSTANCES
CORROSIVES DANGEREUSES - (E) PELIGRO SUSTANCIAS CORROSIVAS - (D) ÄTZENDE GEFAHRENSTOFFE
GB ............pag. 03
I.................pag. 05
F...............pag. 07
E...............pag. 09
D............... pag. 11
RU ............pag. 13
P...............pag. 15
GR ............pag. 17
NL.............pag. 19
H...............pag. 21
RO ............pag. 23
S...............pag. 25
DK ............pag. 27
N...............pag. 29
SF.............pag. 31
CZ.............pag. 33
SK.............pag. 35
SI ..............pag. 37
HR/SCG....pag. 39
LT .............pag. 41
EE.............pag. 43
LV .............pag. 45
BG ............pag. 47
PL.............pag. 49

2
LUNETTES DE PROTECTION OBLIGATOIRE - (E) OBLIGACIÓN DE USAR GAFAS DE PROTECCIÓN - (D) DAS TRAGEN
BESKYTTELSESBRILLER - (N) DET ER OBLIGATORISK Å HA PÅ SEG VERNEBRILLEN - (SF) SUOJALASIEN KÄYTTÖ
PORT DES VÊTEMENTS DE PROTECTION OBLIGATOIRE - (E) OBLIGACIÓN DE LLEVAR ROPA DE PROTECCIÓN - (D)
AT ANVENDE BESKYTTELSESTØJ - (N) FORPLIKTELSE Å BRUKE VERNETØY - (SF) SUOJAVAATETUKSEN KÄYTTÖ
(GB) Symbol indicating separation of electrical and electronic appliances for refuse collection. The
user is not allowed to dispose of these appliances as solid, mixed urban refuse, and must do it through
authorised refuse collection centres. - (I) Simbolo che indica la raccolta separata delle apparecchiature
municipale solido misto, ma di rivolgersi ai centri di raccolta autorizzati. - (F) Symbole indiquant la
collecte différenciée des appareils électriques et électroniques. L’utilisateur ne peut éliminer ces
appareils avec les déchets ménagers solides mixtes, mais doit s’adresser à un centre de collecte autorisé.
- (E) Símbolo que indica la recogida por separado de los aparatos eléctricos y electrónicos. El usuario tiene
la obligación de no eliminar este aparato como desecho urbano sólido mixto, sino de dirigirse a los centros
de recogida autorizados. - (D) Symbol für die getrennte Erfassung elektrischer und elektronischer Geräte.
toestellen. De gebruiker is verplicht deze toestellen niet te lozen als gemengde vaste stadsafval, maar moet
zich wenden tot de geautoriseerde ophaalcentra. - (H) Jelölés, mely az elektromos és elektronikus felszerelések
(S) Symbol som indikerar separat sopsortering av elektriska och elektroniska apparater. Användaren får inte
sortera denna anordning tillsammans med blandat fast hushållsavfall, utan måste vända sig till en auktoriserad
insamlingsstation. - (DK) Symbol, der står for særlig indsamling af elektriske og elektroniske apparater.
Brugeren har pligt til ikke at bortskaffe dette apparat som blandet, fast byaffald; der skal rettes henvendelse til et
autoriseret indsamlingscenter. - (N) Symbol som angir separat sortering av elektriske og elektroniske apparater.

3
____________________( GB )____________________
INSTRUCTION MANUAL
GENERAL INFORMATION
A real, portable, battery-powered starter. Ideal for anyone
needing a starter. Its applications include boats, cars,
trucks, power generators, and yet more.
Fully compatible with any 12-volt or 24-volt starter system.
The Starter uses SEALED MAINTENANCE-FREE
BATTERIES (AGM) which means that the unit can be
installed in any position, in any location, without the fear
of any acid leaks.
Keep this manual.
The manual should be read, paying attention to all the
warnings and safety precautions to be taken when using
and maintaining the device, the list of components and all
Please keep this manual in a secure and dry place for
future reference.
PLEASE READ ALL THE INSTRUCTIONS BEFORE
USING THE STARTER!
and damage to equipment, it is highly recommended
to comply with all essential safety measures and
precautions when using the starter.
1- Protect the eyes. Always wear protective
goggles when using acid lead accumulators.
2- Avoid contact with battery acid. If annul
operator should be sprayed or come into
contact with the acid, rinse the parts
immediately under clean running water. Continue to
rinse the area until the physician arrives.
3- It is important to connect the cables with the
poles in the right direction. Connect the red
clamp (+) to the positive battery terminal,
and the black clamp (-) to the negative terminal.
Use the starter in well ventilated areas. Do not
attempt to use the starter when there is gas or
4- Make sure that the black and red clamps
never come into contact or touch a common
conductor as this could cause them to fuse
together or with other metal objects.
by accidental contact, disconnect the mounting
socket (12V / 24V) from the starter panel and
place the clamps in the holder.
5- FOR 12 or 24 VOLT SYSTEMS ONLY! This device
is destined for use on embarkations and vehicles
running on 12 or 24 Volt electrical systems only.
6- USE ONLY IN EMERGENCIES: do not use the
starter instead of the vehicle battery. Use it during
start-up operations only.
7- Do not work alone. If there is an accident, the
assistant can be of assistance to the operator.
8- Try to avoid electrical shocks. Be very
cautious when applying the clamps to non-
insulated conductors or bus bars. Avoid all
body contact with surfaces of tubes, radiators, and
metal power substations whilst testing the voltage.
9- Keep the work area clean at all times. Untidy
cumbersome areas can lead to injuries.
10- Protect the starter appropriately from all possible
damage. It must only be used as indicated in this
Instruction Manual.
11- Ensure compliance with the indications in the work
area. Do not use in humid or wet facilities. Never
leave it out in the rain. Always work in well lit areas.
12- Do not expose to direct sunlight, heat sources or
humidity.
13- Keep out of children’s reach: they must
never be allowed to access work areas or
handle any machines, tools or extensions.
14- When the starter is not being operated, it must be
stored in a dry area to prevent rust from forming.
Always store the starter under lock and key and keep
out of reach of children.
15- Always wear suitable clothing.
Never wear baggy clothing or
jewellery that can get caught up in
moving parts. During all operations, the use of
electrically insulated protection clothing and non-slip
boots must be worn at all times. Persons with long
hair must wear a hair net.
16- Only experts are allowed to do repair work on the
inexperienced workers.
17- Replacing parts and accessories: when performing
maintenance operations, use identical spare parts
only (see Spare Part list). Use of any other spare
parts invalidates all warranties.
18- Make sure that the device is always positioned in a
stable and well supported manner.
Never climb over cables or electrical structures.
19- Careful attention must be paid when maintaining the
starter. Check the condition of cables on a regular
basis and if any damage is detected, have the same
repaired by an authorised technician.
20- Check there are no damaged parts. Before using this
starter, carefully check all seemingly damaged parts
and assess whether or not they can operate correctly.
Check that the cables are securely fastened to the
allowed to repair or replace damaged parts.
INSTALLATION
ASSEMBLY (Fig. C)
Unpack the starter and assemble the separate parts
included in the package.
OPERATING PROCEDURES
electrical conductors.
The starter is designed for use on vehicles or boats. It
does not need another vehicle or a 230VAC power supply
socket.
This starter can also be used as a portable, 12VDC,
power supply for remote areas or in emergencies.
meticulously, and always in the order given
below!
- Check that the starter clamps are NOT powered up: the
mounting socket (Fig. A-1) must be disconnected.
- Make sure that the vehicle or boat to be started is
switched off - switch or ignition key in the OFF position.
- First connect the red clamp to the positive terminal on
the vehicle battery.
- Then connect the black clamp to a non-movable metal
part of the engine; do not connect the clamp to the
negative terminal on the battery.

4
Connect the mounting socket (Fig. A-1) to the starter’s
12V or 24V power supply, checking the voltage
required for the vehicle to be started, and only after
being absolutely certain that the clamps have been
connected to the battery polarities correctly.
- Connect the mounting socket following the instructions
above.
- Turn the ignition switch or key of the vehicle or boat to
ON. Wait about one minute. Turn the vehicle ignition
switch or key to the start position for no more than 5÷6
seconds. If the vehicle or boat does not start, wait at
least 3 minutes before trying again.
clamps to come into contact with each other
or to touch a common conductor.
- Whilst the engine is running, disconnect the mounting
socket from the starter and the clamps from the vehicle
in the exact order seen below:
1. the mounting socket.
2. the black (negative) clamp.
3. the red (positive) clamp.
- Return the clamps to their housing on the starter.
It is highly recommended to recharge the starter as
soon as possible!
Using the starter as a 12 V power supply unit by
means of the cigar-lighter type socket (Fig. A-4).
In case of overload the re-settable safety
switch will trip. To restore operation, remove
the cause of overload and press the button shown
in Fig.A-6.
- Take the cover off the cigar-lighter type socket (Fig.
A-4).
- Insert the cigar-lighter plug of the device to be powered
into the socket (Fig. A-4).
Recharging using a 230V AC power supply
Important! To protect the battery and lengthen
its working life, charge it for 12 hours before
it is used and, in any case, at least every 3 months.
It is possible to recharge the unit using the 230V AC
power adapter supplied. We recommend keeping the
battery fully charged at all times. A low charge level could
shorten the life of the battery. Bear in mind that the time
needed to recharge the battery depends on the number
of times it has been used. It is possible to check whether
the battery level is low by pressing the red button (Fig.
The voltmeter (Fig. A-3) will indicate the battery charge
level. The green area of the voltmeter indicates that the
battery is charged.
adapter only and exclusively to charge the
starter.
1- To start with, insert the power supply adaptor plug
(Fig. B-1) into a 230V AC socket.
Then insert the relative output plug (Fig. B-2) into the
charger socket (Fig. A-2).
2- Leave the starter to recharger for about 8 hours.
Press the red button to check the recharge level (Fig.
A-5).
The voltmeter (Fig. A-3) will indicate the battery
charge level.
The starter has a device for monitoring the charge
status of the batteries, therefore the power supply can
be connected for as long as desired; when charging is
complete it is reset automatically, depending on the
charge status of the batteries.
Pb
DISPOSING OF THE BATTERY
When the starter battery is completely run down it should
be taken to a re-cycling depot. In some countries this is
mandatory. Contact the local special refuse authority for
information on recycling.
Do not burn the battery to dispose of it.
This could cause an explosion. Before disposing of the
battery, apply insulating tape to the bare terminals to
prevent shorting. Do not expose the battery to intense
STARTER SPECIFICATIONS
- rechargeable factory-sealed 12V acid-lead batteries.
- 50Ah.
- 2200A peak current;
- 800A starter current;
- 4400A peak current;
- 1600A starter current;
- PVC insulated 16mm2.
- 180cm
- 12VDC / max. current 10A;
- re-settable safety switch for output overload;
- automatic charging level reset switch;
- “cigar-lighter” type socket, 12VDC;
- 38.5kg
-
Power supply adaptor (Fig. B-3) INPUT 230V - OUTPUT
12V-12V / 2A.

5
_____________________( I )_____________________
MANUALE ISTRUZIONE
GENERALITA’
Un vero avviatore a batteria trasportabile. L’ideale
applicazioni includono imbarcazioni, automobili, camion,
moto generatori e altro ancora.
avviamento a 12 volt o 24 volt.
L’avviatore utilizza BATTERIE ERMETICHE SENZA
MANUTENZIONE (AGM) che consentono di collocare
pericolo di versare acido.
Conservare questo manuale.
Il manuale è necessario per consultare le avvertenze
e precauzioni relative alla sicurezza, per le procedure
di funzionamento e di manutenzione, per l’elenco dei
Conservare il manuale per eventuali future consultazioni
in un luogo sicuro ed asciutto.
PRIMA DI USARE L’AVVIATORE LEGGERE TUTTE LE
ISTRUZIONI!
AVVERTENZE E PRECAUZIONI SULLA SICUREZZA
lesioni personali e di danni all’attrezzatura, vi
raccomandiamo di usare l’avviatore rispettando
sempre le fondamentali misure precauzionali sulla
sicurezza.
1- Proteggere gli occhi. Indossare sempre
accumulatori al piombo acido.
2- Evitare il contatto con l’acido della batteria.
Nel caso si venga spruzzati o si venga a
medico.
3- È importante collegare i cavi alle corrette
polarità. Collegare la pinza rossa (+) al
morsetto positivo della batteria, e la pinza
nera (-) alla massa negativa.
Usare l’avviatore in aree ben ventilate. Non tentare
4- Impedire sempre alle pinze nera e rossa di
venire in contatto o di toccare un conduttore
contatti accidentali, scollegare la presa volante
(12V / 24V) dal pannello dell’avviatore e riporre le
pinze nella tasca.
5- SOLO PER SISTEMI A 12 o 24 VOLT! Usare in
modo appropriato solo su imbarcazioni e veicoli con
sistemi elettrici a 12 o 24 volt.
6- USARE SOLO IN CASO DI EMERGENZA: non
usare l’avviatore al posto della batteria del veicolo.
Usare esclusivamente per effettuare l’avviamento.
7- Evitare di lavorare da soli. Nel caso di incidente
8- Evitare le scosse elettriche. Usare estrema
cautela nell’applicare le pinze a conduttori o
barre di distribuzione non isolati. Evitare il
armadi metallici mentre si sta testando il voltaggio.
9- Tenere pulita l’area di lavoro. Le aree ingombre
possono provocare lesioni.
10- Evitare di danneggiare l’avviatore. Utilizzare
11- Rispettare le indicazioni relative all’area di lavoro.
Non usare in luoghi umidi o bagnati. Non esporre
alla pioggia. Lavorare in aree bene illuminate.
12- Non esporre alla luce del sole diretta, a fonti di calore
dirette o all’umidità.
13- Tenere lontani i bambini: non dovrà mai
essere loro consentito di accedere alle aree
di lavoro né di maneggiare macchine,
strumenti o prolunghe.
14- Quando l’avviatore non è in uso deve essere riposto
in un luogo asciutto per evitare la formazione di
ruggine. Custodire sempre l’avviatore sotto chiave e
tenerlo lontano dalla portata dei bambini.
15- Vestirsi in maniera appropriata. Non
indossare abiti larghi o gioielli che
possano impigliarsi in parti mobili.
Durante i lavori si raccomanda l’uso di abiti protettivi
isolati elettricamente nonché di calzature
antisdrucciolo. Nel caso di capigliatura lunga
indossare copricapi contenitivi.
16- Le riparazioni devono essere effettuate
esclusivamente da esperti altrimenti potrebbero
comportare pericoli considerevoli per l’ utilizzatore.
17- Sostituzione di parti ed accessori. Nell’effettuare la
manutenzione, usare solo parti di ricambio identiche
pezzo renderà nulla la garanzia.
18- Mantenere in ogni momento un’ adeguata posizione
di stabilità e punti stabili di appoggio.
Non spostarsi sopra cavi o strutture elettriche.
19- Effettuare con cura la manutenzione dell’avviatore.
Controllarne periodicamente i cavi e nel caso di
danni fare effettuare la riparazione ad un tecnico
autorizzato.
20-
tutte le parti che sembrano danneggiate per stabilire
se siano in grado di funzionare correttamente.
Si raccomanda di far riparare o sostituire le parti
INSTALLAZIONE
ALLESTIMENTO (Fig. C)
Disimballare l’avviatore, eseguire il montaggio delle parti
staccate, contenute nell’imballo.
FUNZIONAMENTO
provocare lesioni o morte. Evitare di
toccare conduttori di elettricità scoperti.
L’avviatore è progettato per l’uso su veicoli o imbarcazioni.
Non sarà necessario disporre di un altro veicolo o di una
presa di alimentazione a 230VAC.
di energia portatile a 12 VDC in aree remote o in casi di
emergenza.
scrupolosamente l’ordine sotto riportato!
- Accertarsi che le pinze dell’avviatore NON siano in
tensione: la presa volante di Fig. A-1 deve essere
scollegata.

6
- Accertarsi che l’interruttore o la chiave di accensione
del veicolo o dell’imbarcazione da avviare sia in
posizione OFF.
- Collegare prima la pinza rossa al terminale positivo
posto sulla batteria del veicolo.
non-mobile del motore; non collegare la pinza al
morsetto negativo della batteria.
Collegare la presa volante (Fig. A-1) al 12V o 24V
dell’avviatore rispettando la corretta tensione del
veicolo da avviare e solo se assolutamente sicuri
di aver collegato le pinze alle corrette polarità della
batteria.
- Collegare la presa volante come raccomandato in
precedenza.
- Posizionare l’interruttore o la chiave di accensione
del veicolo o dell’imbarcazione su ON. Aspettare per
un minuto circa. Portare l’interruttore o la chiave alla
posizione di avviamento per un tempo non superiore
ai 5÷6 secondi. Se l’auto o l’imbarcazione non si avvia,
aspettare almeno 3 minuti prima di riprovare.
e rossa di venire in contatto o di toccare un
conduttore comune.
- Mentre il motore è in funzione, scollegare la presa
1. la presa volante.
2. la pinza nera (negativo).
3. la pinza rossa (positivo) .
- Riporre le pinze nella tasca dell’avviatore.
Si raccomanda di ricaricare appena possibile
l’avviatore.
Utilizzo dell’avviatore come dispositivo di
alimentazione a 12V mediante presa tipo
accendisigari (Fig. A-4).
ATTENZIONE! OUTPUT SOLO 12V!
In caso di sovraccarico interviene la
protezione ripristinabile. Per ripristinare il
funzionamento eliminare la causa di sovraccarico e
premere il pulsante (Fig. A-6).
- Sollevare il coperchio della presa tipo accendisigari
(Fig. A-4).
- Inserire la spina accendisigari del dispositivo da
alimentare nella presa (Fig. A-4).
Ricarica con alimentazione A 230V AC
Importante! Per salvaguardare l’integrità
della batteria, caricare per 12 ore prima
dell’uso, dopo ogni uso e comunque ogni 3
mesi.
E’ possibile ricaricare l’unità servendosi dell’alimentatore
in dotazione a 230VAC. Si raccomanda di mantenere
la batteria completamente carica in ogni momento. Un
Ricordare che il tempo necessario per ricaricare la
batteria dipende dal numero degli avviamenti effettuati.
Per controllare se il livello di carica della batteria è basso,
premere il tasto rosso (Fig. A-5).
Il voltmetro (Fig. A-3) mostrerà il livello di carica della
batteria. L’area verde del voltmetro indica che la batteria
è carica.
dotazione esclusivamente per la ricarica
dell’avviatore.
1- Inserire dapprima la spina dell’alimentatore (Fig.
B-1) in una presa a 230VAC.
Inserire successivamente l’apposita spina di uscita
(Fig. B-2) nella presa di ricarica (Fig. A-2).
2- Lasciare ricaricare l’avviatore per circa 8 ore.
pulsante rosso (Fig. A-5).
Questo permetterà di visualizzare il livello di carica
della batteria sul voltometro (Fig. A-3).
L’avviatore è munito di un dispositivo di controllo dello
stato di carica delle batterie che permette di lasciare
collegato l’alimentatore per tutto il tempo desiderato; al
termine della ricarica il ripristino della stessa avverrà in
modo automatico in funzione dello stato di carica delle
batterie.
Pb
SMALTIMENTO DELLA BATTERIA
La batteria esausta dell’avviatore dovrebbe essere
relative al riciclaggio.
Non smaltire la batteria bruciandola.
Questo potrebbe causare un’esplosione. Prima di
smaltire la batteria, coprire i terminali scoperti con nastro
isolante adeguato allo scopo di evitare i corti circuiti. Non
esporre la batteria a calore intenso o a fuoco poiché
SPECIFICHE DELL’AVVIATORE
- batterie 12V al piombo ermetiche, ricaricabili.
- 50Ah.
- 2200A corrente di picco.
- 800A corrente di avviamento.
- 4400A corrente di picco;
- 1600A corrente di avviamento.
- 16mm2isolati in PVC.
- 180cm.
- 12VDC / corrente max 10A.
- protezione ripristinabile in uscita contro i sovraccarichi;
- interruzione automatica del livello di carica;
- presa tipo “accendisigari” 12VDC.
- 38.5kg.
-
Alimentatore (Fig. B-3) INPUT 230V - OUTPUT 12V -12V
/ 2A.

7
______________________( F )____________________
MANUEL D’INSTRUCTION
GÉNÉRALITÉS
Un vrai démarreur à batterie transportable. L’idéal pour
incluent des bateaux, automobiles, camions, motos
générateurs et autre.
démarrage à 12 volts ou à 24 volts.
Le démarreur utilise des BATTERIES HERMÉTIQUES
Conserver ce manuel.
Le manuel est nécessaire pour consulter les
avertissements et précautions concernant la sécurité,
pour les procédures de fonctionnement et d’entretien,
Conserver le manuel dans un lieu sûr et sec pour les
éventuelles consultations futures.
AVANT D’UTILISER LE DÉMARREUR, LIRE TOUTES
LES INSTRUCTIONS!
AVERTISSEMENTS ET PRÉCAUTIONS SUR LA
SÉCURITÉ
personnelles et de dommages à l’équipement, nous
vous recommandons d’utiliser le démarreur en
précaution sur la sécurité.
1- Protéger les yeux. Toujours porter des
avec des accumulateurs au plomb acide.
2- Eviter le contact avec l’acide de la batterie.
En cas d’éclaboussures ou de contact avec
l’acide, rincer immédiatement la partie
concernée avec de l’eau propre. Continuer à rincer
3- Il est important de brancher les câbles aux
polarités correctes. Brancher la pince rouge
(+) à la borne positive de la batterie, et la
pince noire (-) à la masse négative.
Utiliser le démarreur dans des milieux bien ventilés.
4- Toujours empêcher aux pinces noire et
rouge d’entrer en contact ou de toucher un
leur fusion ou celle d’autres objets en métal.
des contacts accidentels, débrancher la prise
volante (12V / 24V) du panneau du démarreur et
remettre les pinces dans la poche.
5- SEULEMENT POUR SYSTÈMES À 12 ou 24
VOLTS! Utiliser de façon appropriée seulement sur
ou à 24 volts.
6- UTILISER SEULEMENT EN CAS D’URGENCE: ne
pas utiliser le démarreur à la place de la batterie du
véhicule. Utiliser exclusivement pour effectuer le
démarrage.
7- Éviter de travailler seul. En cas d’accident, l’assistant
peut aider.
8-
pinces à conducteurs ou à barres de
distribution non isolés. Éviter le contact corporel
avec des surfaces comme les tubes, radiateurs et
le voltage.
9- Conserver l’aire de travail propre. Les aires
10- Éviter d’endommager le démarreur. Utiliser
manuel.
11- Respecter les indications concernant l’aire de travail.
Ne pas utiliser en lieux humides ou mouillés. Ne pas
exposer à la pluie. Travailler dans des aires bien
illuminées.
12- Ne pas exposer à la lumière du soleil directe, à des
sources de chaleur directes ou à l’humidité.
13- Garder loin de la portée des enfants: ils ne
doivent pas pouvoir accéder aux aires de
travail ni manipuler machines, instruments
ou rallonges.
14- Quand le démarreur n’est pas en service, il doit être
rangé dans un lieu sec pour éviter la formation de
rouille. Toujours garder le démarreur sous clé et le
tenir loin de la portée des enfants.
15- S’habiller de manière appropriée.
Ne pas porter de vêtements larges
accrochés dans des parties mobiles. Durant les
travaux, nous recommandons l’utilisation de
cas de cheveux longs, porter un chapeau pour les
couvrir.
16- Les réparations doivent être effectuées
exclusivement par des experts sinon elles pourraient
comporter des dangers considérables pour
l’utilisateur.
17- Substitution de parties et d’accessoires. Lors des
opérations d’entretien, utiliser seulement des pièces
pièce rendra la garantie nulle.
18- Maintenir à tout moment une position de stabilité
Ne pas se déplacer au-dessus de câbles ou de
19- Effectuer avec soin l’entretien du démarreur. En
contrôler régulièrement les câbles et, en cas de
dommages, faire effectuer la réparation à un
technicien autorisé.
20-
Avant d’utiliser ce démarreur, contrôler attentivement
pour établir si elles sont en mesure de fonctionner
réparer ou de substituer les parties endommagées
INSTALLATION
AGENCEMENT (Fig. C)
Déballer le démarreur, exécuter le montage des pièces
détachées, contenues dans l’emballage.
FONCTIONNEMENT
peut provoquer des lésions ou la
mort. Éviter de toucher des conducteurs d’électricité
découverts.

8
Le démarreur est projeté pour l’utilisation sur des
véhicules ou sur des bateaux. Il ne sera pas nécessaire de
disposer d’un autre véhicule ou d’une prise d’alimentation
à 230V AC. Il est aussi possible d’utiliser ce démarreur
comme source d’énergie portable à 12 VDC dans des
aires distantes ou en cas d’urgence
suivant scrupuleusement l’ordre reporté ci-
dessous!
PAS sous tension: la prise volante (Fig. A-1) doit être
débranchée.
véhicule ou du bateau à démarrer est en position OFF.
- Brancher d’abord la pince rouge au terminal positif
placé sur la batterie du véhicule.
non-mobile du moteur; ne pas brancher la pince à la
borne négative de la batterie
Brancher la prise volante (Fig. A-1) au 12V ou au
24V du démarreur en respectant la bonne tension
du véhicule à démarrer et seulement si l’on est
absolument sûr d’avoir branché les pinces aux
bonnes polarités de la batterie.
- Brancher la prise volante selon les recommandations
précédentes.
- Positionner l’interrupteur ou la clé d’allumage du
véhicule ou du bateau sur ON. Attendre pendant
une minute environ. Mettre l’interrupteur ou la clé
en position démarrage pendant au maximum 5÷6
secondes. Si le véhicule ou le bateau ne démarre pas,
attendre au moins 3 minutes avant de ressayer.
noire et rouge d’entrer en contact ou de
toucher un conducteur commun.
volante du démarreur et les pinces du véhicule dans
cet ordre:
1. la prise volante.
2. la pince noire (négative).
3. la pince rouge (positive).
- Remettre les pinces dans la poche du démarreur.
Nous recommandons de recharger dès que
possible le démarreur.
Utilisation du démarreur comme dispositif
d’alimentation à 12V à l’aide d’une prise type allume-
cigare (Fig. A-4).
ATTENTION! SORTIE SEULEMENT 12V!
En cas de surcharge la protection pouvant
fonctionnement, éliminer la cause de surcharge et
appuyer sur le bouton (Fig. A-6).
- Soulever le couvercle de la prise type allume-cigare
(Fig. A-4).
dans la prise (Fig. A-4).
Rechargement avec alimentation à 230V AC
Important! Pour sauvegarder l’intégrité de la
batterie, charger pendant 12 heures avant
l’utilisation, après chaque utilisation et, quoi
qu’il en soit, tous les 3 mois.
Il est possible de recharger l’unité en se servant de
l’alimentateur à 230V AC fourni. Nous recommandons
de maintenir les batteries complètement chargées à tout
moment. Un niveau de charge bas peut raccourcir la vie
recharger la batterie dépend du nombre de démarrages
effectués
Pour contrôler si le niveau de charge de la batterie est
bas, appuyer sur la touche rouge (Fig. A-5).
Le voltmètre (Fig. A-3) montre le niveau de charge de la
est chargée.
exclusivement pour le rechargement du
démarreur.
1- (Fig. B-1)
dans une prise à 230VAC.
(Fig. B-2) dans la prise de rechargement (Fig. A-2).
2- Laisser recharger le démarreur pendant environ
appuyer sur le bouton rouge (Fig. A-5).
batterie sur le voltmètre (Fig. A-3).
Le démarreur est muni d’un dispositif de contrôle de
l’alimentateur branché pendant tout le temps nécessaire;
au terme du rechargement, le rétablissement de celui-
charge des batteries.
Pb
ÉLIMINATION DE LA BATTERIE
La batterie épuisée du démarreur devrait être recyclée.
Dans certains États, ceci est obligatoire. Contacter les
autorités locales s’occupant des déchets solides pour
recevoir des informations relatives au recyclage.
Ne pas éliminer la batterie en
la brûlant, ceci pourrait causer une explosion. Avant
d’éliminer la batterie, isoler les terminaux découverts
dans le but d’éviter les courts-circuits. Ne pas exposer
la batterie à la chaleur intense ou au feu car ceci pourrait
causer une explosion.
SPÉCIFICATIONS DU DÉMARREUR
- 50Ah.
- 2200 A courant de pointe.
- 800A courant de démarrage.
- 4400 A courant de pointe;
- 1600A courant de démarrage.
- 16 mm2isolés en PVC.
- 180cm.
- 12VDC / courant max 10A.
- protection pouvant être rétablie en sortie contre les

9
surcharges;
- prise type “allume-cigare” 12VDC.
- 38.5kg.
-
Alimentateur (Fig. B-3) ENTRÉE 230V - SORTIE 12V
-12V / 2A.
_____________________( E )____________________
MANUAL DE INSTRUCCIONES
INFORMACIÓN GENERAL
Un verdadero arrancador de batería transportable. Lo
aplicaciones incluyen embarcaciones, coches, camiones,
motogeneradores y otros dispositivos.
El arrancador utiliza BATERÍAS HERMÉTICAS SIN
peligro de derramamiento de ácido.
Conservar este manual.
El manual es necesario para consultar las advertencias
y las precauciones relativas a la seguridad, para los
procedimientos de funcionamiento y de mantenimiento,
para la lista de los componentes y para las
Conservar el manual para las posibles consultas futuras
en un lugar seguro y seco.
ANTES DE UTILIZAR EL ARRANCADOR, LEER
TODAS LAS INSTRUCCIONES
ADVERTENCIAS Y PRECAUCIONES SOBRE LA
SEGURIDAD
lesiones personales y de daños en el equipo,
les recomendamos usar el arrancador siempre
cumpliendo las medidas fundamentales de
precaución para la seguridad.
1- Proteger los ojos. Siempre utilizar las gafas
acumuladores de plomo ácido.
2- Evitar el contacto con el ácido de la batería.
En caso de ser golpeados por una
salpicadura o de entrar en contacto con el
ácido, enjuagar inmediatamente la parte interesante
con agua limpia. Seguir enjuagando hasta la llegada
del médico.
3- Es importante conectar los cables con las
polaridades correctas. Conectar la pinza
roja (+) al borne positivo de la batería, y la
pinza negra (-) a la masa negativa.
Utilizar el arrancador en áreas bien ventiladas. No
4- Siempre impedir a las pinzas negra y roja
entrar en contacto o tocar un conductor
o la de otros objetos metálicos.
debidos a contactos accidentales, desconectar
el conector volante (12 V / 24V) del panel del
arrancador y guardar las pinzas en el bolsillo.
5- ¡SOLAMENTE PARA SISTEMAS DE 12 o 24
VOLTIOS! Utilizar de forma apropiada solamente
en embarcaciones y vehículos con instalaciones
eléctricas de 12 o 24 voltios.
6- UTILIZAR SOLAMENTE EN CASO DE
EMERGENCIA: no utilizar el arrancador en lugar de
la batería del vehículo. Utilizar exclusivamente para
7- Evitar trabajar solos. En caso de accidente, el
asistente puede prestar ayuda.
8- Evitar las electrocuciones. Prestar una
pinzas a conductores o barras de
metálicos, mientras se está probando el voltaje.
9- Mantener limpia el área de trabajo. Las áreas no
libres pueden causar lesiones.
10- Evitar dañar el arrancador. Utilizar exclusivamente
11- Observar las indicaciones relativas al área de
trabajo. No usar en lugares húmedos o mojados.
No exponer a la lluvia. Trabajar en áreas bien
iluminadas.
12- No exponer a la luz directa del sol, a fuentes de calor
directas o a la humedad.
13- Mantener lejos a los niños: nunca se les
deberá permitir acceder a las áreas de
o extensiones.
14- Cuando el arrancador no se esté utilizando, debe
mantenerlo lejos del alcance de los niños.
15- Vestirse adecuadamente. No
puedan engancharse en las partes
eléctricamente, y además de calzado antiresbalones.
En caso de cabello largo, ponerse los gorros de
16- Las reparaciones deben ser realizadas
exclusivamente por expertos; de lo contrario podrían
comportar peligros considerables para el usuario.
17-
realiza el mantenimiento, utilizar solamente los
repuestos idénticos (véase la lista de los repuestos).
garantía.
18-
de estabilidad y puntos estables de apoyo.
No desplazarse arriba de cables o estructuras
eléctricas.
19- Ejecutar cuidadosamente el mantenimiento del
correspondiente a un técnico capacitado.
20-
de utilizar el presente arrancador, controlar
para establecer si tienen la capacidad de funcionar
reparar o sustituir las partes dañadas a un técnico
capacitado.
INSTALACIÓN
PREPARACIÓN (Figura C)
Desembalar el arrancador y realizar el montaje de los
componentes sueltos contenidos en el embalaje.

10
FUNCIONAMIENTO
causar lesiones o la muerte. Evitar
tocar conductores eléctricos descubiertos.
El arrancador se ha diseñado para el uso en vehículos
de 230V AC.
Además es posible utilizar este arrancador como fuente
de energía portátil de 12V DC, en áreas remotas o en
casos de emergencia.
siguiendo escrupulosamente el orden
indicado a continuación!
alimentadas eléctricamente: el conector volante
representado en la Figura A-1 debe encontrarse
desconectado.
- Primero conectar la pinza roja al borne positivo situado
en la batería del vehículo.
- Luego conectar la pinza negra a una parte metálica no-
de la batería.
Conectar el conector volante (Figura A-1) al 12V o
24V del arrancador, observando la tensión correcta
absolutamente seguros de haber conectado las
pinzas a las polaridades correctas de la batería.
- Conectar el conector volante como se ha recomendado
antes.
- Posicionar el interruptor o la llave de encendido
aproximadamente un minuto. Llevar el interruptor o la
no arranca, esperar por lo menos 3 minutos antes de
volver a intentar.
- Durante el funcionamiento del motor, desconectar
el conector volante del arrancador y las pinzas del
vehículo, con esta secuencia:
1. el conector volante;
2. la pinza negra (negativo);
3. la pinza roja (positivo).
- Guardar las pinzas en el bolsillo del arrancador.
pronto posible.
Uso del arrancador como dispositivo de alimentación
de 12V mediante conector tipo encendedor de
cigarrillos (Figura A-4).
¡ATENCIÓN! ¡OUTPUT SÓLO 12V!
En caso de sobrecarga interviene la
protección que puede restablecerse. Para
restablecer el funcionamiento, eliminar la causa de
sobrecarga y apretar el pulsador (Figura A-6).
- Levantar la tapa de la toma de corriente tipo
encendedor de cigarrillos (Figura A-4).
- Introducir el enchufe del encendedor de cigarrillos
(Figura A-4).
Recarga con alimentación A 230V AC
¡Importante! Para salvaguardar la integridad
de la batería, cargar durante 12 horas antes
del uso, después de cualquier uso y, de
cualquier forma, cada 3 meses.
Es posible recargar la unidad utilizando el alimentador
entregado de 230V AC. Se recomienda mantener la
Un nivel de carga bajo puede acortar la vida de la batería.
Para controlar si el nivel de carga de la batería es bajo,
apretar la tecla roja (Figura A-5).
El voltímetro (Figura A-3) mostrará el nivel de carga de la
está cargada.
exclusivamente para la recarga del
arrancador.
1- Antes de todo, introducir el enchufe del alimentador
(Figura B-1) en una toma de corriente de 230VAC.
de salida (Figura B-2) en el conector de recarga
(Figura A-2).
2- Dejar recargar el arrancador durante
la recarga apretando el pulsador rojo (Figura A-5).
Eso permitirá visualizar el nivel de carga de la
batería en el voltímetro (Figura A-3).
permite dejar conectado el mismo alimentador durante
recarga el restablecimiento de la misma se ejecutará
baterías.
Pb
La batería agotada del arrancador debería reciclarse. En
algunos países ésta es una medida obligatoria. Ponerse
en contacto con las autoridades locales en materia de
reciclaje.
batería, cubrir los bornes descubiertos con cinta aislante
ESPECIFICACIONES DEL ARRANCADOR
- baterías de 12 V al plomo herméticas, recargables.
- 50Ah.
- 2200 A corriente de pico.

11
- 4400 A corriente de pico;
- 16 mm2aislados en PVC.
- 180cm.
- 12VDC / corriente máxima 10A.
las sobrecargas;
- conector tipo “encendedor de cigarrillos” 12VDC.
- 38.5kg.
-
Alimentador (Figura B-3) INPUT 230V - OUTPUT 12V
-12V / 2A.
____________________( D )_____________________
BETRIEBSANLEITUNG
ALLGEMEINES
Ein echter transportabler batteriebetriebener Starter.
Das Ideale für alle, die für Anwendungen beispielsweise
auf Booten, bei Autos, bei Lastkraftwagen oder bei
Motorgeneratoren einen Starter benötigen.
Er ist voll kompatibel mit allen 12-Volt- oder 24-Volt-
Anlasseranlagen.
Der Starter arbeitet mit WARTUNGSFREIEN
VERSCHLOSSENEN BATTERIEN (AGM), die es
ermöglichen, die Einheit in jeder Position und an jedem
Ort aufzustellen, ohne dass die Gefahr von auslaufender
Säure besteht.
Dieses Handbuch aufbewahren.
Das Handbuch ist erforderlich, um die Sicherheitshinweise
und –vorkehrungen sowie die Betriebs- und
Wartungsprozeduren nachzuschlagen. Außerdem sind
dort die Komponenten aufgelistet und die technischen
Eigenschaften genannt.
Bewahren Sie das Handbuch für ein künftiges
Nachschlagen an einem sicheren und trockenen Ort auf.
VOR DEM GEBRAUCH DES STARTERS LESEN SIE
BITTE DIE GESAMTE ANLEITUNG!
Sachschäden zu senken, empfehlen wir Ihnen, bei der
Verwendung des Starters stets die grundlegenden
zu beachten.
1- Die Augen sind zu schützen. Setzen Sie
stets eine Schutzbrille auf, wenn Sie mit
Blei-Säure-Batterien arbeiten.
2- Vermeiden Sie den Kontakt mit der
Batteriesäure. Falls Sie bespritzt werden
oder mit der Säure in Kontakt kommen, ist
der betroffene Bereich sofort mit sauberem Wasser
abzuspülen. Spülen Sie bis zum Eintreffen des
Arztes weiter.
3- Es ist wichtig, dass die Kabel richtig gepolt
angeschlossen werden. Die rote Zange (+)
an den Pluspol der Batterie legen, die
schwarze Zange (-) an den Minuspol.
Verwenden Sie den Starter in gut belüfteten
Umgebungen. Unternehmen Sie keine
Startversuche, wenn Sie sich inmitten von Gas oder
4- Verhindern Sie stets, dass sich die schwarze
und die rote Zange berühren oder dass
diese einen gemeinsamen Leiter berühren,
weil sie oder andere Metallobjekte dabei schmelzen
können.
ACHTUNG! Um Schäden durch unbeabsichtigten
Kontakt zu vermeiden, trennen Sie die lose Dose
(12V / 24V) vom Paneel des Starters und stecken
Sie die Zangen in die Tasche.
5- NUR FÜR SYSTEME MIT 12 oder 24 VOLT!
Sachgerecht nur auf Booten und an Fahrzeugen mit
Elektroanlagen mit 12 oder 24 Volt benutzen.
6- NUR IM NOTFALL VERWENDEN: Den Starter
nicht anstelle der Fahrzeugbatterie benutzen.
Ausschließlich für den Start benutzen.
7- Vermeiden Sie es, alleine zu arbeiten. Bei einem
Unfall kann der Assistent Hilfe leisten.
8- Vermeiden Sie elektrische Stöße. Gehen
Sie beim Anbringen der Zangen an nicht
isolierte Leiter oder Verteilerschienen
äußerst vorsichtig vor. Vermeiden Sie Körperkontakt
Metallschränken, wenn die Voltspannung getestet
wird.
9- Halten Sie den Arbeitsbereich sauber. Überfüllte
Bereiche sind verletzungsträchtig.
10- Vermeiden Sie es, den Starter zu beschädigen. Er
darf ausschließlich so verwendet werden, wie in
diesem Handbuch beschrieben.
11- Beachten Sie die Angaben zum Arbeitsbereich.
Nicht an Orten verwenden, an denen Feuchtigkeit
oder Nässe herrscht. Nicht dem Regen aussetzen.
Arbeiten Sie in gut beleuchteten Bereichen.
12- Nicht der direkten Sonneneinstrahlung, direkten
13- Halten Sie Kinder fern: Ihnen darf kein
Zugang zu den Arbeitsbereichen gewährt
werden, noch darf ihnen gestattet werden,
mit Maschinen, Werkzeugen oder Verlängerungen
umzugehen.
14- Wenn der Starter nicht benutzt wird, muss er an
einem trockenen Ort abgestellt werden, um der
Rostbildung vorzubeugen. Schließen Sie den Starter
stets weg und halten ihn aus der Reichweite von
Kindern fern.
15- Kleiden Sie sich arbeitsgerecht.
Tragen Sie keine weite Kleidung
oder Schmuckstücke, die sich in
Bewegungsteilen verfangen können. Es wird
empfohlen, während der Arbeiten elektrisch isolierte
Schutzkleidung sowie rutschfestes Schuhwerk zu
tragen. Langes Haar sollte mit einer Kopfbedeckung
gebändigt werden.
16- Reparaturen dürfen ausschließlich von Fachleuten
vorgenommen werden, weil andernfalls erhebliche
Gefahren für den Benutzer entstehen können.
17- Austausch von Teilen und Zubehör. Bei Wartungen
verwenden Sie nur identische Ersatzteile (siehe
Ersatzteilliste). Die Verwendung anderer Teile führt
zum Erlöschen der Gewährleistung.
18- Nehmen Sie jederzeit eine stabile Position ein und
Einrichtungen.
19- Die Wartung des Starters ist sorgfältig vorzunehmen.
Prüfen Sie in regelmäßigen Abständen die Kabel und
lassen sie diese, falls Schäden festgestellt werden,
von einem zugelassenen Fachmann reparieren.

12
20- Prüfen Sie das Gerät auf schadhafte Teile. Vor der
Verwendung dieses Starters kontrollieren Sie bitte
sorgfältig sämtliche Teile, die schadhaft erscheinen,
um zu bestimmen, ob sie in der Lage sind, ihre
Funktion korrekt auszuüben. Kontrollieren Sie, ob
die Kabel fest mit dem Starter verbunden sind. Es
wird empfohlen, die schadhaften Teile von einem
Fachmann reparieren oder ersetzen zu lassen.
INSTALLATION
AUFBAU (Abb. C)
Den Starter auspacken und die im Lieferumfang
enthaltenen losen Teile montieren.
BETRIEB
Verletzungen hervorrufen oder
zum Tode führen. Vermeiden Sie es, freiliegende
elektrische Leiter zu berühren.
Der Starter ist für den Einsatz an Fahrzeugen oder
Booten ausgelegt. Ein anderes Fahrzeug oder eine
Steckdose mit 230Vac ist nicht erforderlich.
Dieser Starter kann außerdem als transportable
abgelegenen Gegenden oder im Notfall benutzt werden.
Verwendung des Starters zum Anlassen eines
der nachstehenden Reihenfolge!
- Vergewissern Sie sich, dass die Zangen des Starters
KEINE Spannung führen: Die lose Dose (Abb. A-1)
darf nicht angeschlossen sein.
- Vergewissern Sie sich, dass sich der Zündschalter
oder der Zündschlüssel des anzulassenden Fahrzeugs
- Schließen Sie zunächst die rote Zange an den Pluspol
der Fahrzeugbatterie an.
- Dann die schwarze Zange an ein nicht bewegliches
Metallteil des Motors anschließen; die Zange darf nicht
mit dem Minuspol der Batterie verbunden werden.
Die lose Dose (Abb. A-1) ist mit dem Anschluss 12V
oder 24V des Starters zu verbinden. Zu beachten
ist dabei die richtige Spannung des anzulassenden
Fahrzeugs. Der Anlassvorgang darf nur dann
durchgeführt werden, wenn vollkommene Sicherheit
darüber besteht, dass die Zangen an die korrekten
Batteriepole gelegt worden sind.
- Die lose Dose anschließen, wie vorstehend empfohlen.
- Den Zündschalter oder Zündschlüssel des Fahrzeugs
oder Bootes auf ON positionieren. Etwa eine Minute
abwarten. Den Schalter oder Schlüssel für eine Dauer
von nicht mehr als 5 bis 6 Sekunden in Startstellung
führen. Wenn das Auto oder Boot nicht anspringt,
warten Sie mindestens 3 Minuten ab, bevor Sie einen
neuen Versuch unternehmen.
schwarze und die rote Zange berühren oder
einen gemeinsamen Leiter berühren.
- Wenn der Motor läuft, die lose Dose in der folgenden
Reihenfolge vom Starter und die Zangen vom Fahrzeug
trennen:
1. die lose Dose
2. die schwarze Zange (Minus)
3. die rote Zange (Plus)
- Die Zangen in die Taschen des Starters zurücklegen.
Es wird empfohlen, den Starter bei nächster
Gelegenheit aufzuladen!
Verwendung des Starters als 12-V-Versorgungsteil
über die Steckdose eines Zigarettenanzünders (Abb.
A-4). ACHTUNG! OUTPUT NUR 12V!
Bei Überlastung schreitet die rückstellbare
der Betriebsbereitschaft ist die Überlastungsursache
zu beseitigen und der Knopf (Abb. A-6) zu betätigen.
- Heben Sie die Abdeckung von der Steckdose des
Zigarettenanzünders ab (Abb. A-4).
- Fügen Sie den passenden Stecker der zu speisenden
Einrichtung in die Dose ein (Abb. A-4).
230Vac Um die Batterien zu schützen, sollte
Gebrauch und spätestens nach 3 Monaten 12
Stunden lang aufgeladen werden.
Das Gerät kann mit dem zum Lieferumfang gehörenden
230-Vac-Netzteil aufgeladen werden. Die Batterien sollten
jederzeit voll aufgeladen sein. Ein niedriger Ladestand
kann die Lebensdauer der Batterien verkürzen. Denken
Zeit von der Anzahl der durchgeführten Startvorgänge
abhängt. Der Ladestand der Batterie kann durch
Betätigung der roten Taste (Abb. A-5) geprüft werden.
Das Voltmeter (Abb. A-3) zeigt den Ladezustand der
Batterie. Der grüne Bereich des Voltmeters besagt, dass
die Batterie aufgeladen ist.
Lieferumfang enthaltene Netzteil
1- Zunächst den Stecker des Netzteils (Abb. B-1) in
eine 230-Vac-Steckdose einfügen.
Dann den zugehörigen Ausgangsstecker (Abb. B-2)
(Abb. A-2) einfügen.
2-
Prüfen Sie den Ladeverlauf durch Drücken des roten
Knopfes (Abb. A-5).
Dadurch lässt sich der Ladestand der Batterie auf
dem Voltmeter anzeigen (Abb. A-3).
Der Starter ist mit einer Einrichtung ausgestattet, die den
Ladezustand der Batterien überwacht und es ermöglicht,
das Netzteil für die gewünschte Dauer angeschlossen
zu lassen. Am Ende des Ladevorganges wird die
automatisch wieder aufgenommen.
Pb
ENTSORGUNG DER ALTBATTERIE
Die Altbatterie des Starters muss der Wiederverwendung
zugeführt werden. In einigen Staaten ist dies
vorgeschrieben. Setzen Sie sich mit den örtlichen, für
Festabfälle zuständigen Stellen in Verbindung, um
Auskunft zum Recycling zu erhalten.
Die Batterie darf nicht durch Verbrennen

13
entsorgt werden, weil dabei Explosionsgefahr besteht. Vor
der Entsorgung der Batterie sind freiliegende Anschlüsse
zu isolieren, um Kurzschlüsse auszuschließen. Die
Batterie darf nicht großer Hitze oder Feuer ausgesetzt
werden, weil dabei Explosionsgefahr besteht.
TECHNISCHE EIGENSCHAFTEN DES STARTERS
- 50Ah.
- 2200A Spitzenstrom.
- 800A Startstrom.
- 4400 A Spitzenstrom;
- 1600A Startstrom.
- 16 mm2, PVC-Isolierung.
- 180cm.
- 12Vdc / max. Strom 10A.
- Rückstellbarer Überlastungsschutz am Ausgang;
- Automatische Ladestandunterbrechung;
- Dose des Typs “Zigarettenanzünder” 12Vdc.
- 38.5 kg.
-
Netzteil (Abb. B-3) INPUT 230V - OUTPUT 12V -12V /
2A.
____________________( RU )____________________
1-
2-
3-
4-
5-
6-
7-
8-
9-
10-
11-
12-
13-
14-

14
15-
16-
17-
18-
19-
20-
1.
2.
3.
A-4).
A-4).
(AC)
.

15
1-
2-
Pb
2
____________________( P )_____________________
MANUAL DE INSTRUÇÕES
INFORMAÇÕES GERAIS
Um verdadeiro arrancador transportável, a bateria. O
motores-geradores e outras.
O arrancador utiliza BATERIAS HERMÉTICAS SEM
perigo de deitar ácido.
Guarde este manual.
O manual é necessário para consultar os avisos e
precauções relativos à segurança, para os procedimentos
componentes e para as características técnicas.
Guarde o manual para eventuais consultas futuras em
um lugar seguro e seco.
ANTES DE USAR O ARRANCADOR LEIA COM
ATENÇÃO TODAS AS INSTRUÇÕES!
AVISOS E PRECAUÇÕES SOBRE A SEGURANÇA
e de danos ao equipamento, recomendamos de
usar o arrancador respeitando sempre as medidas
1-
acumuladores de chumbo ácido.
2- Evite o contacto com o ácido da bateria. Se
porventura o ácido espirrar ou se porventura
entrar em contacto com o ácido, enxagúe
imediatamente a parte interessada com água limpa.
Continue a enxaguar até a chegada do médico.
3-
correctas. Ligue a pinça vermelha (+) ao
borne positivo da bateria e a pinça preta (-)
à massa negativa.
4- Impeça sempre às pinças preta e vermelha
de entrar em contacto ou de tocar um
condutor comum, pois isso pode provocar
contactos acidentais, desligue a tomada volante
(12V / 24V) do painel do arrancador e guarde as
pinças no bolso.
5- SOMENTE PARA SISTEMAS DE 12 ou 24
embarcações e veículos com sistemas eléctricos a
12 ou 24 volts.
6-
use o arrancador no lugar da bateria do veículo. Use
7- Evite trabalhar sozinho. No caso de acidente o
assistente pode prestar ajuda.

16
8-
isoladas. Evite o contacto do corpo com superfícies
como tubos, radiadores e armários metálicos,
9- Mantenha a área de trabalho limpa. As áreas
ocupadas podem causar lesões.
10-
11- Respeite as indicações relativas à área de trabalho.
iluminadas.
12-
directas ou à humidade.
13- Mantenha longe de crianças: nunca deverá
aceder às áreas de trabalho nem manusear
14-
de ferrugem. Guarde o arrancador sempre fechado
com chave e mantenha-o longe do alcance das
crianças.
15- Vista-se de maneira apropriada.
possam se prender nas partes
assim como de calçados antiderrapantes. No caso
de cabelo comprido use coberturas para prender o
cabelo.
16- As reparações devem ser efectuadas exclusivamente
perigos consistentes para o utilizador.
17-
idênticas (veja lista de sobressalentes). O uso de
18-
eléctricas.
19-
Controle periodicamente os cabos e no caso de
autorizado.
20-
arrancador. Recomenda-se de mandar reparar
INSTALAÇÃO
PREPARAÇÃO (FIG. C)
Desembale o arrancador, execute a montagem das
partes separadas contidas na embalagem.
FUNCIONAMENTO
condutores de electricidade descobertos.
O arrancador é projectado para o uso em veículos ou
É possível também utilizar este arrancador como fonte
de energia portátil de 12 VDC em áreas remotas ou em
casos de emergência.
rigorosamente a ordem indicada abaixo!
Fig. A-1 deve ser
desligada.
- Ligue antes a pinça vermelha no terminal positivo
situado na bateria do veículo.
bateria.
Ligue a tomada volante (Fig. A-1) no 12V ou 24V do
a arrancar e somente se absolutamente seguros de
ter ligado as pinças nas polaridades correctas da
bateria.
- Ligue a tomada volante como recomendado
anteriormente.
tentar de novo.
pinças preta e vermelha de entrar em
contacto ou de tocar um condutor comum.
volante do arrancador e as pinças do veículo nesta
1. a tomada volante.
2. a pinça preta (negativo).
3. a pinça vermelha (positivo).
possível.
acendedor de cigarros (Fig. A-4).
ATENÇÃO! OUTPUT SOMENTE 12V!
(Fig. A-6).
- Erga a tampa da tomada tipo acendedor de cigarros
(Fig. A-4).
a alimentar na tomada da (Fig. A-4).
Importante! Para salvaguardar a integridade
da bateria, carregue durante 12 horas antes
do uso, após cada uso e de qualquer maneira
cada 3 meses.
É possível recarregar o aparelho por meio do alimentador
fornecido a 230VAC. Recomenda-se de manter sempre
a bateria totalmente carregada. Um nível baixo de carga
necessário para recarregar a bateria depende do número

17
carga da bateria é baixo, carregue a tecla vermelha (Fig.
A-5).
O voltímetro (Fig. A-3) mostrará o nível de carga da
está carregada.
exclusivamente para a recarga do arrancador.
1-
alimentador (Fig. B-1) em uma tomada a 230VAC.
(Fig. B-2) na tomada de recarga (Fig. A-2).
2- Deixe recarregar o arrancador durante
(Fig. A-5).
Isso permitirá de visualizar o nível de carga da
bateria no voltímetro (Fig. A-3).
O arrancador é munido de um dispositivo de controlo
ligado o alimentador durante todo o tempo desejado; no
baterias.
Pb
ELIMINAÇÃO DA BATERIA
A bateria esgotada do arrancador deverá ser reciclada.
informações relativas à reciclagem.
calor intenso ou ao fogo, pois isso poderá causar uma
ESPECIFICAÇÕES DO ARRANCADOR
- baterias 12V de chumbo herméticas , recarregáveis.
- 50Ah.
- 2200A corrente de pico.
- 4400A corrente de pico;
- 16 mm2isolados em PVC.
- 180cm.
- 12VDC / corrente max 10A.
- tomada tipo “acendedor de cigarros” 12VDC.
- 38.5kg.
-
Alimentador (Fig. B-3) INPUT 230V - OUTPUT 12V -12V
/ 2A.
____________________( GR )____________________
1-
2-
3-
4-
5-
6-
7-

18
8-
9-
10-
11-
12-
13
14-
15-
16-
17-
18-
19-
20-
1.
2.
3.
A-6).
.

19
.
.
1-
B-2 ).
2-
.
.
Pb
- 50Ah.
- 16mm2
- 180cm.
- 38.5kg.
INPUT 230V - OUTPUT 12V
-12V / 2A.
____________________( NL )____________________
INSTRUCTIEHANDLEIDING
ALGEMEENHEDEN
Een echte starter met een draagbare batterij. Het ideaal
voor iedereen die een starter nodig heeft. De toepassingen
omvatten vaartuigen, auto’s, vrachtwagens, generators
en veel meer nog.
Ten volle compatibel met welk startsysteem dan ook aan
12 volt of 24 volt.
De starter gebruikt HERMETISCHE BATTERIJEN
ZONDER ONDERHOUD (AGM); dit staat toe de unit in
gelijk welke stand en op gelijk welke plaats te installeren
zonder het gevaar het zuur uit te gieten.
Deze handleiding bewaren.
De handleiding is noodzakelijk om de waarschuwingen
en voorzorgsmaatregelen m.b.t. de veiligheid, de
procedures van werking en onderhoud, de lijst van de
De handleiding voor eventuele toekomstige
raadplegingen bewaren op een veilige en droge plaats.
VOORDAT MEN DE STARTER GEBRUIKT, ALLE
INSTRUCTIES LEZEN!
M.B.T. DE VEILIGHEID
schade aan de apparatuur te beperken, raden we aan
veiligheidsmaatregelen m.b.t. de veiligheid in acht te
nemen.
1- De ogen beschermen. Altijd een
beschermende bril dragen wanneer men
werkt met accu’s met zuur lood.
2- Het contact met het zuur van de batterij
vermijden. Ingeval men bespat wordt door of
in contact komt met het zuur, het betrokken
gedeelte onmiddellijk spoelen met zuiver water.
Verder blijven spoelen tot de aankomst van de arts.
3- Het is belangrijk dat de kabels worden
verbonden met de correcte polariteiten. De
rode tang (+) verbinden met de positieve
klem van de batterij en de zwarte tang (-) met de
negatieve massa.
De starter gebruiken op goed verluchte plaatsen.
Niet proberen startoperaties uit te voeren wanneer

20
men zich in het midden van gassen of ontvlambare
vloeistoffen bevindt.
4- Altijd vermijden dat de zwarte en rode tang
met elkaar in contact komen of een gemene
geleider aanraken omdat dit hun smelting of
die van andere metalen kan veroorzaken.
toevallige contacten te voorkomen, de
van het paneel van de starter en de tangen terug
in de zak opbergen.
5- ALLEEN VOOR SYSTEMEN AAN 12 of 24 VOLT!
Op een juiste manier gebruiken alleen op vaartuigen
en voertuigen met elektrische systemen aan 12 of 24
volt.
6- ALLEEN GEBRUIKEN IN NOODGEVAL: de starter
niet gebruiken in plaats van de batterij van het
voertuig. Uitsluitend gebruiken om de startoperatie
uit te voeren
7- Vermijden alleen te werken. Bij een ongeval kan de
assistent hulp bieden.
8- Elektrische schokken vermijden. Uiterst
voorzichtig tewerk gaan bij het aanbrengen
van de tangen op niet geïsoleerde leidingen
of verdelingsbalken. Het lichamelijk contact
vermijden met oppervlakken zoals buizen, radiators
en metalen kasten terwijl men de voltage aan het
testen is.
9- De werkzone rein houden. Plaatsen met obstakels
kunnen letsel veroorzaken.
10- Vermijden de starter te beschadigen. Hem uitsluitend
handleiding.
11- De aanwijzingen m.b.t. de werkzone in acht nemen.
Niet gebruiken op vochtige of natte plaatsen. Niet
blootstellen aan de regen. Werken op goed verlichte
plaatsen.
12- Niet blootstellen aan rechtstreeks zonnelicht,
rechtstreekse warmtebronnen of vochtigheid.
13- Uit de buurt van kinderen houden: zij mogen
nooit naar de werkzones gaan, noch de
auto’s, instrumenten of verlengsnoeren
hanteren.
14- Wanneer de starter niet gebruikt wordt, moet hij
opgeborgen worden op een droge plaats om de
vorming van roest te voorkomen. De starter altijd
vergrendeld bewaren en uit de buurt van kinderen
houden.
15- Zich op een gepaste manier kleden.
Geen brede kleren of juwelen
dragen die in de beweeglijke
gedeelten kunnen verstrikt geraken. Tijdens de
werken raadt men het dragen van elektrisch
geïsoleerde beschermende kledij en antislip
schoenen aan. Voor wie lang haar heeft, een alles
omvattend hoofddeksel dragen.
16- De reparaties moeten uitsluitend uitgevoerd worden
door ervaren operators, zoniet kan dit een aanzienlijk
gevaar voor de gebruiker inhouden.
17- Vervanging van onderdelen en toebehoren.
Bij de uitvoering van het onderhoud, alleen
identieke reserveonderdelen gebruiken (zie lijst
reserveonderdelen). Het gebruik van gelijk welk
ander stuk annuleert de waarborg.
18-
stabiele steunpunten behouden.
Zich niet verplaatsen op kabels of elektrische
structuren.
19- Het onderhoud van de starter heel zorgvuldig
uitvoeren. Regelmatig de kabels ervan controleren
en in geval van schade de reparatie laten uitvoeren
door een geautoriseerde technicus.
20-
Voordat men deze starter gebruikt, aandachtig
alle onderdelen controlen die beschadigd blijken
te zijn, om te bepalen of ze in staat zijn correct te
werken. Controleren of de kabels goed bevestigd
zijn aan de starter. Men raadt aan de beschadigde
onderdelen te laten repareren of vervangen door een
INSTALLATIE
INRICHTING (Fig. C)
De starter uitpakken, de montage van de losse gedeelten
uitvoeren die zich in de verpakking bevinden.
blote elektriciteitsgeleiders aan te raken.
De starter is ontworpen voor het gebruik op voertuigen of
vaartuigen. Het is niet nodig over een ander voertuig of
voedingscontact aan 230VAC te beschikken.
Het is eveneens mogelijk deze starter te gebruiken
als draagbare energiebron aan 12 VDC op afgelegen
plaatsen en in noodgeval.
hierna aangegeven volgorde!
- Controleren dat de tangen van de starter NIET onder
spanning staan: de beweeglijke contactdoos van Fig.
A-1 moet losgekoppeld zijn.
- Controleren dat de schakelaar of de startsleutel van
het te starten voertuig of vaartuig in de stand OFF
staat.
- Eerst de rode tang verbinden met het positieve uiteinde
geplaatst op de batterij van het voertuig.
- Vervolgens de zwarte tang verbinden met een niet
beweeglijk metalen gedeelte van de motor; de tang niet
verbinden met de negatieve klem van de batterij.
spanning van het te starten voertuig respecteren, de
operatie alleen uitvoeren indien men ten volle zeker
- De beweeglijke contactdoos verbinden zoals eerder
werd aangegeven.
- Controleren dat de schakelaar of de startsleutel van
het te starten voertuig of vaartuig in de stand ON staat.
Ongeveer een minuut wachten. De schakelaar of de
sleutel naar de stand van start brengen gedurende een
tijd niet langer dan 5÷6 seconden. Indien de wagen of
het vaartuig niet start, minstens 3 minuten wachten
voordat men terug probeert.
rode tang met elkaar in contact komen of een
gemene geleider raken.
- Terwijl de motor in werking is, de beweeglijke
contactdoos loskoppelen van de starter en de tangen
van het voertuig in deze volgorde::
1. de beweeglijke contactdoos.
2. de zwarte tang (negatief)
3. de rode tang (positief) .
- De tangen in de zak van de starter opbergen.
Other manuals for START PLUS 4824
1
Table of contents
Languages:
Other Telwin Controllers manuals
Popular Controllers manuals by other brands
Crestron
Crestron infiNET EX CLC-FANDELVEX-W installation guide
GEM
GEM 639 eSyStep operating instructions
Uponor
Uponor KaMo Combi Port E quick guide

Vacon
Vacon 100 INDUSTRIAL Installation and user manual

Craftmade
Craftmade WUCI-1000 Installation and operating instructions

ETI
ETI PFC6DA TECHNICAL MANUAL OF INSTALLATION
