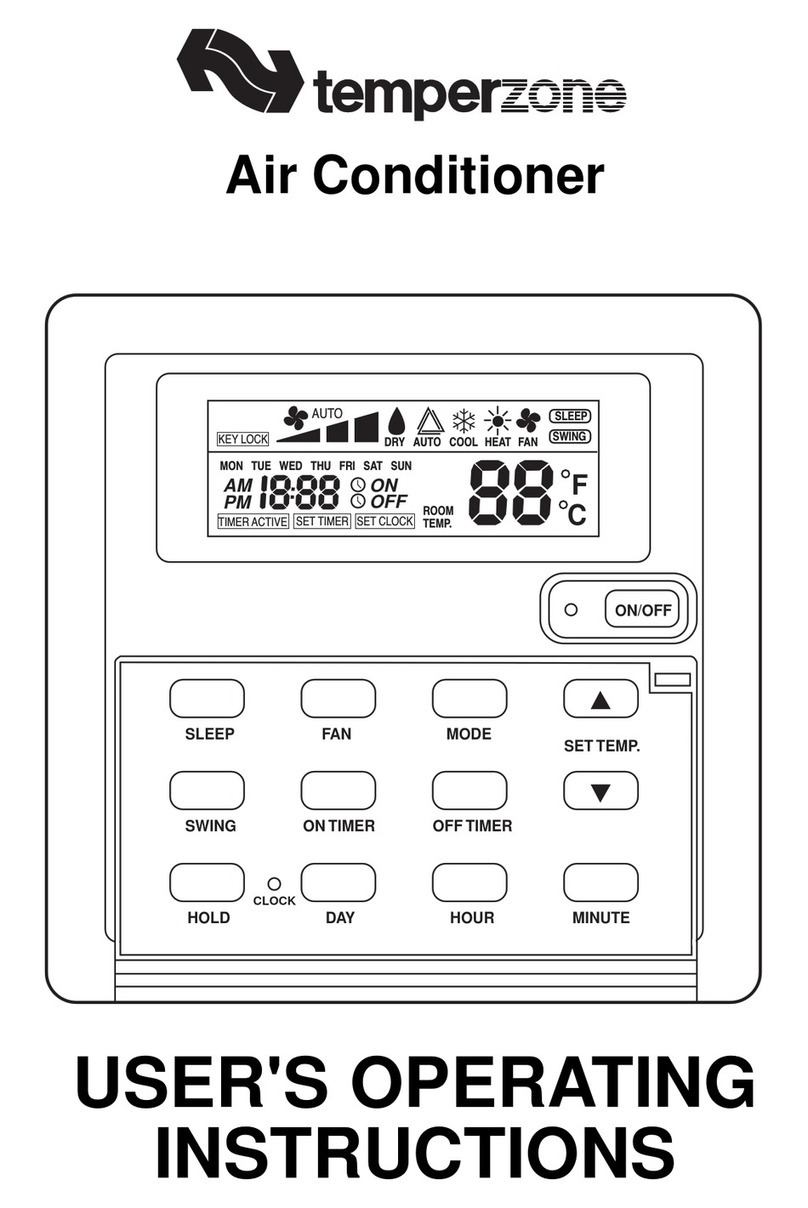
TemperZone TTS-11 Operation instructions

TTS-11 Thermostat
SLEEP FAN MODE SETTEMP.
SWING ONTIMER OFFTIMER
TIMER ACTIVE DAY HOUR MINUTE
CLOCK
ON/OFF
AUTO
DRY AUTO COOLHEAT FAN
SLEEP
SWING
F
C
ROOM
TEMP.
MON TUE WED THU FRI SAT SUN
AM
PM ON
OFF
❄
TIMER ACTIVE
SET TIMERSET CLOCK
KEY LOCK
H 4
USER'S OPERATING
INSTRUCTIONS
Series 2
08/04 Pamphlet No. 2385 Manx Press
AUCKLAND
temperzone Ltd
Phone 0-9-279 5250
Fax 0-9-275 5637
SYDNEY
temperzone australia pty ltd
Phone (02) 8822 - 5700
Fax (02) 8822 - 5711
SINGAPORE
Phone SNG 6733 - 4292
Fax SNG 6235 - 7180
Your local Service Agent is :

Page 2
CONTENTS
Page
Introduction ..................................3
Features Summary....................... 3
Display .........................................4
Operation .....................................5
Remote Control ........................... 8
Troubleshooting ..........................10
Contact for Service back page
Page 11
Display of 'LO' or 'HI'
Room temperature out of range, ie below 8°C or above 40°C. The air conditioner
will operate as normal. As the temperature gets closer to the preset temperature the
correct room temperature will be displayed.
Keypad Will Not Respond
Check the display to see if 'KEY LOCK' is displayed.
Refer to page 7 for unlocking procedure.
Remote Control Doesn't Operate
1. Check the batteries in the remote control aren't flat.
2. The infra red remote control must be pointed directly at the TTS-11 Wall
Thermostat plaque in order for its signal to be received.
3. If there is no light or beep from the wall plaque when the remote controls buttons
are pressed, consult your installer to ensure the wall plaque has been set up
correctly for remote control use.

Page 3
Introduction
Your temperzone air conditioner is supplied with a TTS-11 Wall Thermostat.
This thermostat has been designed to maintain a high level of comfort for room
occupants. Emphasis has been placed on providing controls that are easy to use
— despite the sophisticated microprocessor system that runs it. Use of the Auto and
Timer function settings allows you to "set it and forget it".
Features Summary
• Cool / Dry / Fan modes.
• Heat / Auto modes (Reverse Cycle systems only).
• Auto / High / Medium / Low fan speed selection.
• Temperature setting range from 16°C – 30°C .
• LED to indicate status of the unit (Power On/Off).
• Room temperature display.
• Real time clock.
• 7 days programmable [Start/Stop] timer that programs the unit to two start/stop
sessions per day. The timer can also be set for a single regular session time over
an entire 7 day period.
• Bypass function enables user to bypass the on/off button and any user
programmed times for immediate operation of the air conditioner.
• Battery backup. In the event of a power failure a backup battery will maintain the
real time clock and the integrity of the control’s data. When power is resumed
(returned/switched on again), the unit will automatically restart using the last
settings.
• Key Lock function prevents unauthorised personnel from changing the settings of
the Wall Thermostat.
• Sleep function.
• Air swing function.
• Infra Red remote controller (option)
Page 10
Troubleshooting
Air Conditioner Doesn't Operate
1. Check there is power to the air conditioner. There is no power if the TTS-11's
screen is blank.
2. Check the TTS-11 is on, i.e. the yellow On/Off light is lit.
3. Check if 'TIMER ACTIVE' is displayed. If so, check that you are in the
'switch on' period, or alter the timer settings (refer page 6).
Reduced Cooling or Heating
1. Check the TTS-11 is not in the SLEEP mode (refer page 7).
2. Check to see if the air filter (if any) requires cleaning.
4. Check if any doors or windows are open.
3. Check that there are no obstacles in front of the Outdoor unit.
No Cooling or Heating
Check that the correct operating mode has been selected (Auto, Cool, Heat).
The preset temperature may have been set too high or too low. If the set
temperature appears okay, call for service.
Timer is Not Correctly Triggered
Check the clock is set to the right time (daylight saving?) and the timer has been
correctly programmed.
Loss of Settings
If the TTS-11 fails to retain the preset
temperature and timer settings when the
power supply is off then check the
battery to see if it needs replacing. If the
battery is flat or missing, the LCD
display will still operate, however the
letters 'OP' appear briefly (1-2 seconds)
when the controller is powered on.
When the batteries are low, the time
settings default to:
Monday, 12am, Cool
cycle, 25
°
C setpoint and Low fan speed.
Note: If the controller is connected to
the power via an external time clock
where the power is disconnected frequently (e.g. daily) then the backup battery will
have a reduced life.
The battery is located at the rear of the TTS-11. Separate the thermostat body from
the wall mounting plate by inserting the tip of a small flat screwdriver in the slot at
the bottom centre of the thermostat body. Press vertically up (gently) against the
holding catch. This will disengage the bottom of the thermostat body from the wall
mounting plate and allow it to be lifted free. Remove and check the batteries.
If necessary, replace with twoAAA 1.5V batteries, preferably Energiser.
TOP
BOTTOM
AAA 1.5 VOLT
ALKALINE (x2)
INTERCONNECTING
CABLE
PRINTED
CIRCUIT BOARD
BATTERY HOLDER
+
+

Page 4
Display
A[Current time, Start/Stop Time] Display
Displays the current time as well as the start & stop time programmed.
B[Key Lock] Display
Indicates when the Key Lock function is activated.
C[Session / Bypass] Display
Indicates session number when setting Timer (1, 2 or 3), or
number of hours of operation when setting Bypass operation (H1, H2 or H4).
D[Fan Speed] Display
Displays the fan speed setting [Auto/High/Medium/Low].
E[Operation Mode] Display
Displays the current mode of operation.
F[Sleep] Display
Displays the sleep/energy saving status.
G[Swing] Display
Displays the air swing status (NB not applicable to ducted systems).
H[°C] Display
Displays the temperature in degrees Celcius.
I[On/Off status] LED Display
Displays the status of operation.
J[Set temperature or room temperature] Display
Displays the set or room temperature.
KInfra Red Receiver for optional remote control.
SLEEP FAN MODE SETTEMP.
SWING ONTIMER OFFTIMER
DAY HOUR MINUTE
CLOCK
ON/OFF
AUTO
DRY AUTO COOL HEATFAN
SLEEP
SWING
F
C
ROOM
TEMP.
MON TUE WED THU FRI SAT SUN
AM
PM ON
OFF
❄
TIMER ACTIVE
SET TIMERSET CLOCK
KEY LOCK
TIMER ACTIVE
H 4
A
B D E F
K
H
G
J
I
C
Page 9
Flip open the door on the remote control to
reveal additional function buttons.
SWING
Press to activate or deactivate the air louvre
sweep function.
(NB This function is only applicable to
systems with underceiling indoor units).
SLEEP
Press to activate the energy saving Sleep
function which automatically adjusts the
temperature to provide a more comfortable
sleep, ie for use in bedrooms.
ON TIMER
The timer allows the user to confine air
conditioner operation to a selected duration
over a single 24 hour period.
Press to activate ON TIMER and
to deactivate it.
The first press of button will show
the previous setting and the ON symbol
will flash.
Further pressing of the button will advance
the time setting in 30 minute intervals.
OFF TIMER
Press to turn the air conditioner OFF
when the current status is ON, or to set a
future OFF time (within 24 hour period).
Button operation is similar to the ON TIMER
instructions above. If an OFF time is not
set the system will run continuously, or
until the ON/OFF button is pressed.
CLOCK
Press or for 2 seconds to
activate. The current clock setting will
decrease/increase at 1 minute intervals on
each press.
The speed of interval updating increases
after 4 seconds of continuous key press.
It will update at high speed after 6 seconds
of continuous key press.
AUTO
Note: Use of the Remote Control's timer
functions overrides the wall plaque's own
timer settings, specifically the one regular
session per week (refer page 6).

Page 5
Operation
On/Off
Starting Operation
When the unit is turned off, press the [ON/OFF] button. The operation LED lights
and the system is turned on.
Bypass Operation
To activate the air conditioner outside any pre-set times, follow the instructions
inside the flap cover (or refer page 7).
Stopping Operation
When the unit is turned on, press the [ON/OFF] button. The operation LED light is
extinguished and the system is turned off.
Room Temperature Adjustment
Normally the display will show the current room temperature (not the preset
temperature). Set the temperature of your choice by pressing the Set Temp.
buttons, [ ▲ ] or [ ▼ ].
Each push will change the temperature by 1°C.
Temperature can be set within the range 16°C – 30°C.
During Fan mode the temperature can not be set.
Mode Selection
Press the [MODE] button to switch operation between Cool, Heat, Auto, Dry and
Fan. The display shows which mode is selected at any one time.
Cool
– If the room temperature is too warm, the air conditioner cools the room until
it reaches the set temperature.
Dry
– If the atmosphere in the room is very humid or damp, use this mode to both
reduce the humidity and cool until the room is near the set temperature.
Heat
–If the room temperature is too cool, the air conditioner warms the room until
it reaches the set temperature (Reverse Cycle systems only).
Auto
– The air conditioner will automatically cool or heat the room until it reaches
the set temperature (Reverse Cycle systems only).
Fan
– If the atmosphere in the room is stale, use this mode to circulate the air in
the room, without changing the overall room temperature.
Fan Speed Selection
Press [FAN] button to selectAuto, High, Medium or Low speed.
Auto
– The TTS-11 will automatically select the most suitable fan speed to
maintain the set temperature.
High
,
Medium
,
Low
– A choice of three manually selected fan speeds are available.
Page 8
Remote Control (option)
OPERATION
MODE:
- Heat
- Auto
- Cool
- Dry
- Fan
AUTO
SWING
SLEEP
SIGNAL
CLOCK
& TIMER
FAN SPEED
Operation
A light will blink and a beep will sound when
the wall plaque receives a signal from the
hand held Infra Red Remote Control.
The IR Remote Control must be pointed
directly at the TTS-11 Wall Thermostat
plaque in order for its signal to be received.
ON/OFF
Press to toggle the air conditioner between
ON and OFF status.
ADJUST SET TEMPERATURE
Press ▲or ▼to increase or decrease the
desired room temperature.
Note: A temperature can not be set in
Fan
mode.
MODE
Pressing this button will advance the mode
in the following sequence:
→
Heat
→
Auto
→
Cool
→
Dry
→
Fan
FAN
Pressing this button will advance the fan
speed as follows:
→
Low
→
Medium
→
High
→
Auto
Under
Fan
mode, only Low, Medium and
High are available.
Under
Dry
mode, fan speed will be
inhibited and will not be displayed.
AUTO

Page 6
Swing Activation
This function is only applicable to systems with underceiling indoor units.
Press [SWING] button to activate the air louvre sweep function, or to set the louvre
at a preferred angle.
Time Functions
Setting Clock
a) Press the small recessed [CLOCK] button once to enter the Clock set mode.
b) Adjust the time and day settings by using the following buttons:
[DAY] button – changes the set day between Mon, Tue Wed, Thu, Fri, Sat & Sun.
[HOUR] button – changes the set hour (12 hour AM/PM clock).
[MINUTE] button – changes the set minute.
c) Press the small recessed [CLOCK] button once to exit the Clock set mode.
Setting 7-Day Timer
The timer can be set to turn on and off, two sessions per day, and one regular
session per week.
a) Press the [ON TIMER] or [OFF TIMER] button once to set the timer mode for the
first session. The session number is shown on the display.
b) Adjust the start or finish time and day by pressing the [DAY], [HOUR] or
[MINUTE] buttons.
c) If you don't want the air conditioner to operate on any particular day (e.g. Sat.
and Sun.), set the day using the [DAY] button and use the [HOUR] button to set
the time to show ' – – : – – '.
d) Press the [ON TIMER] or [OFF TIMER] button a second time to set the timer
mode for the second session. Repeat previous two steps to set day/time.
e) Press the [ON TIMER] or [OFF TIMER] button a third time to set the timer
mode for a single common session time and 7 days-a-week operation.
Repeat previous two steps (c) and (d) to set the time.
Note: If sessions overlap then the system will run from the first ON time to the first
OFF time and will not restart until the next day, without manual intervention.
Timer Activation
If 7-day timer is set, the words 'TIMER ACTIVE' are displayed.
To de-activate the timer setting, press the [TIMER ACTIVE] button until the words
'TimerActive' are no longer displayed.
To resume the timer setting, press the [TIMER ACTIVE] button until the word
'TIMER ACTIVE' is displayed.
Note: When 'TIMER ACTIVE' is displayed, the LED light will flash when waiting for
the next start time.
External Time Clock
If the TTS-11 is to be connected to an external time clock, ensure the 7-day timer is
not activated, i.e. 'TIMER ACTIVE' is not displayed.
Note: The TTS-11's battery life is reduced when using an external time clock.
Operation (cont'd)
Page 7
Sleep Activation
Press [SLEEP] button to activate the Sleep option. This option saves energy by
altering the set temperature over a two hour period.
Example Uses:
In Summer, before going to bed at night with the Cool mode set, pressing the
[SLEEP] button gradually raises the set temperature by 2 degrees to compensate
for a person's lower body metabolism when sleeping.
In Winter, with the Heat mode set, pressing the [SLEEP] button gradually lowers the
set temperature by 2 degrees to compensate for heavier Winter bedding.
The Sleep option is only available for Cool, Heat and Auto modes.
Key Lock
This feature protects the control from being tampered with by children or
unauthorised persons.
To activate, press the [MINUTE] button three times quickly. 'Key Lock' will appear on
the display. When the Key Lock is active the [ON/OFF] and [FAN] buttons can still
be used. To cancel the 'Key Lock' function press the [MINUTE] button three times
again. 'Key Lock' will no longer be displayed.
Bypass
This feature provides a quick 'on demand' alternative to the 'pre-programmed' type
of use. Bypass operation permits the user to start the air conditioner immediately,
bypassing the ON/OFF button and any programmed session times.
Bypass is initiated by pushing the [HOUR] button:
– once for 1 hour operation
– twice for 2 hour operation
– three times for 4 hour operation
– four times to cancel.
The display shows how many hours have been selected, ie
H1
,
H2
or
H4
.
To terminate
H1
,
H2
or
H4
before the chosen time has finished, press the [HOUR]
button until
H4
disappears. The 'on demand' timer is now turned off and so is the air
conditioner.
During Bypass operation the LED light will flash.
Table of contents
Other TemperZone Thermostat manuals

TemperZone
TemperZone TZT-100 User manual

TemperZone
TemperZone TTS-10 Operation instructions

TemperZone
TemperZone SAT-2 Operation instructions

TemperZone
TemperZone Climate Touch User manual

TemperZone
TemperZone TZT-701 User manual

TemperZone
TemperZone SAT-3 Operation instructions

TemperZone
TemperZone TTS-10 User manual

TemperZone
TemperZone EASY ZONE TOUCH User manual

TemperZone
TemperZone SAT-1 Operation instructions

TemperZone
TemperZone CLIMATE TOUCH CTC-1 Guide