Tempo Fitness NSH-12 User manual

Instruction Manual
Distributed by Tempo (Aust) Pty Ltd ABN 70 106 100 252
196a Miller St, North Sydney
Sydney, Australia NSW 2060
Telephone: (02) 9954 5388 Fax: (02) 9954 3990
Email: [email protected]
Electric Halogen Heater
NSH-12
Care and Cleaning Instructions
The appliance is not designed to be dismantled without special tools.
Please do not attempt to separate the unit.
1. Ensure appliance is disconnected from the power supply and
switched off before attempting any cleaning.
2. Cleaning the exterior of the unit should only be attempted with a
slightly damp, soapy cloth. After wiping down the unit with the soapy
cloth, dry any wet spots with a dry cloth.
3. Use a vacuum cleaner regularly to remove dust and fluff from the
element and grill.
4. When not in use, pack the heater into its original box for best protec-
tion and store in a cool, clean and dry location.
Caution: Never immerse the heater in water for cleaning.

Important Safety Instructions
Please keep this instruction manual in a safe place, along with
the warranty card, purchase receipt and carton for future refer-
ence. The safety precautions enclosed herein reduce the risk of
fire, electric shock and injury when correctly adhered to.
- If the supply cord is damaged, it must be replaced by the
manufacturer or its service agent or a similarly qualified person in
order to avoid a hazard.
- Before turning on, ensure the electrical voltage and frequency of the
circuit correspond to those indicated on the appliance.
- The appliance is not intended for use by young children or infirm
persons without supervision.
- Young children should be supervised to ensure that they do not play
with the appliance.
- Do not operate the appliance outdoors
- Power plug must be removed from power socket before cleaning,
servicing, maintenance or moving the appliance.
- When the appliance is not in use, switch it off and unplug it.
- The appliance should be placed on a flat surface when operating to
avoid overturning.
- To reduce the risk of electrocution, never operate this product with
wet hands, submerge under water or spill liquids into the product.
- Do not insert any objects into the appliance.
- Do not kink or damage the power cord.
- Improper installation may result in the risk of fire, electric shock and
or injury to persons.
- The manufacturer is not responsible for any eventual damages
caused by improper or faulty use.
- The unit has no user-serviceable parts contained within. Do not
attempt to repair, disassemble or modify the appliance.
Using your Heater
Assembling the Heater
Caution: Ensure the power cord is not plugged in before attempting to
assemble the heater.
1. Find the base plate with the 2 fingernuts and locking bracket
attached.
2. Now attach the base plate onto the unit by first turning the unit
upside down. Position the base over the bottom of the unit by sliding
the unit over the corresponding hole on the base. Ensure the power
cord is slid through first, as it will run from the bottom of the base to
the wall socket.
3. Slide the power cable into the designated slots on the base plate.
Lock the power cable into place by using the locking bracket. The
locking bracket is secure when the 4 little knobs lock over the bracket.
4. Secure the base onto the heating unit by screwing the 2 finger bolts
into the 2 corresponding holes on the base. Turn clockwise until the
bolts can no longer be turned.
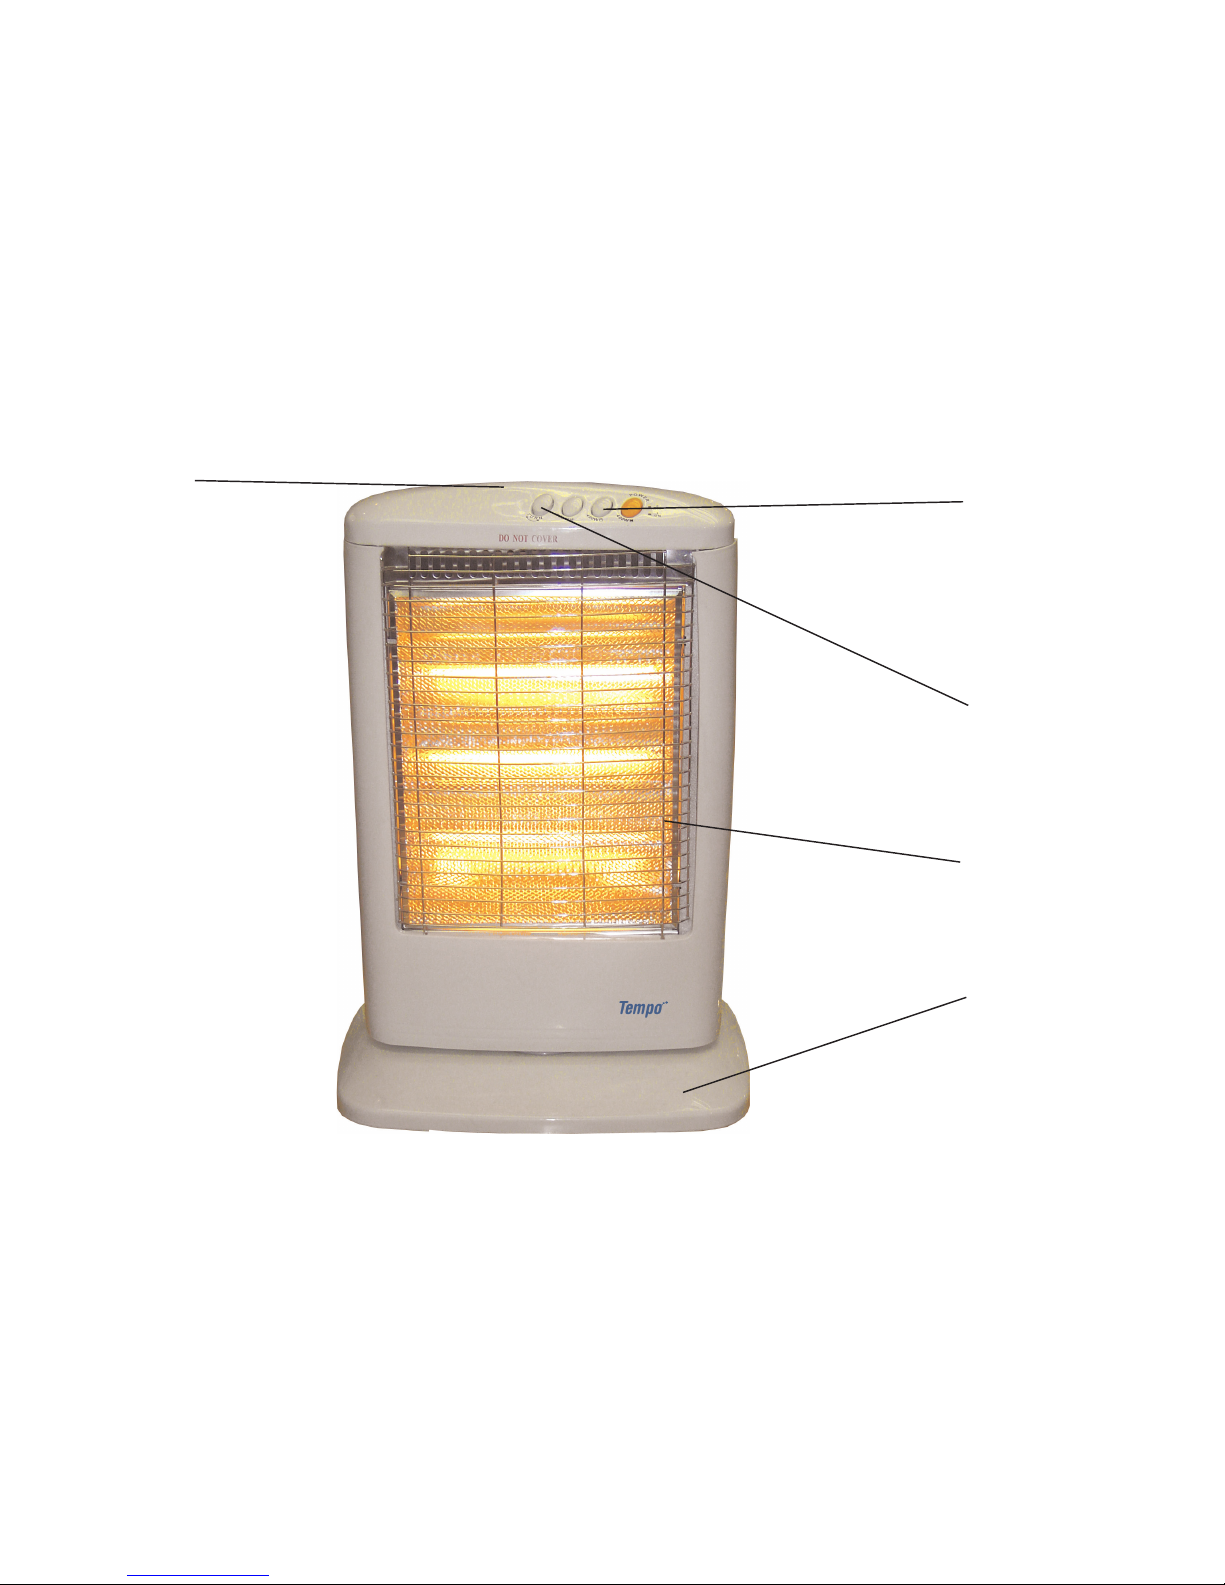
Using the Heater
1. Place the heater on a flat surface, away from flammable objects.
2. Plug in the power cord to the wall socket when ready for use.
3. Press the on/off button to turn the heater on. If more heat is
required, the extra heating buttons can be used to output up to 1200W
of power. Press the oscillation button to make the heater swivel from
side to side, heating the room up evenly.

Use these buttons to activate the heat-
ing unit. The orange button is the
on/off switch which will output 400W of
power when on. The 3 white buttons
labelled ‘400W’ strengthens the heat
output with up to 1600W of heating
power when all 4 buttons are pressed
down. The far left button is the oscilla-
tion button, used to swivel the heater
from side to side.
Important Safety Instructions
- Use the appliance only for the mentioned purpose, namely as a radi-
ator for domestic use. Do not use it as any other application as it
could get dangerous.
- Do not operate the heater near flammable objects (furniture, cur-
tains, shelves etc).
- Do not operate the heater near liquids (bath-tubs, showers, water
basins, swimming pools etc).
- Do not cover the appliance when it is operating to avoid overheating
risks.
- Correct operation of the appliance is obtained when the radiator is
installed vertically.
- Do not put the cable on the appliance when it is still warm.
- Do not connect the appliance to extension cords or multiple outlets.
- Never operate the appliance immediately below an outlet.
- Never connect the appliance to a thermal control device or a time
switch to avoid overheating risks when the radiator is moved or cov-
ered.
WARNING: This appliance gets extremely hot during operation and
should be handled with care. Be careful of getting burnt. Never put
flammable objects on or near the appliance as they could set alight.
Technical Data
- Voltage: 240V ~ 50Hz
- Max power consumption: 1200W
Knowing your parts
A
B
Note also the 2 small holes (B) located either side of the central hole.
This is where the 2 finger bolts will be screwed in to secure the base
onto the unit.
Base frame
Locking bracket
Use the locking bracket to lock the power cord into
place. The locking bracket clicks into place by fitting it
over the corresponding knobs at (A).
Find either 2 wingnuts or 2 bolts packaged with the
base. These 2 finger bolts are needed for securing the
base frame onto the unit via the corresponding holes
(B).
Wingnut Bolt
The base frame needs to be attached
onto the unit before use. Note the hole in
the centre of the base frame. This is
where the unit slides through the base to
be secured. The power cord also needs
to be run through the hole in the centre
and positioned such that it runs through
its designated slots (A).
Heating buttons

Important features of your Heater
Stable base with
safety tilt switch
- The flat sturdy base
ensures stability on the
ground during use.
There is a safety tilt
switch on the bottom of
the base which turns off
the heater if the base is
no longer flat on the
ground (i.e. fallen over)
Whisper-quiet
operation
- The heater operates in
near silence, even dur-
ing oscillation mode.
Carry handle
-The heater has a con-
venient carry handle
located on the top of
the unit, for portability.
Instant heating
- The use of halogen
bulbs as the heating
element ensures heat is
produced instanta-
neously.
Safety grille
- The safety grille pro-
vides protection against
stray objects from
touching the heating
elements.
Oscillation button
- Use this feature to
make the heater move
from side to side. This
ensures an even distri-
bution of heat.
Important features of your Heater
3 heating power
buttons
-The on/off button
when pressed outputs
400W of power. Two
more heating buttons
can increase the power
to 800W and 1200W.
Built-in overheat
protection
- The heater has a built-
in sensor which will turn
the heater off if it is
overheating.

Table of contents
Popular Electric Heater manuals by other brands

IOTA
IOTA IISCN3P Series user manual

Harvia
Harvia KKIP45 Instructions for installation and use

Dynasty Fireplaces
Dynasty Fireplaces EF42D Home owner's installation instructions & operating manual

Tylo
Tylo CROWN COMBI ELITE installation guide

Twin-Star International
Twin-Star International Duraflame 18II332FGL-L operating instructions

Heatstore
Heatstore HSTR 90C Installation and operating instructions

Heat Storm
Heat Storm HS-1500-ILODT User Manual and Safety Instructions

Pentair
Pentair spa heater Operation and installation manual

Dyna-Glo
Dyna-Glo EG5600DG Installation & maintenance instructions

Dimplex
Dimplex Alta Series installation guide

Dimplex
Dimplex XLE050 instruction manual

Truma
Truma Ultraheat S 3004 P operating instructions