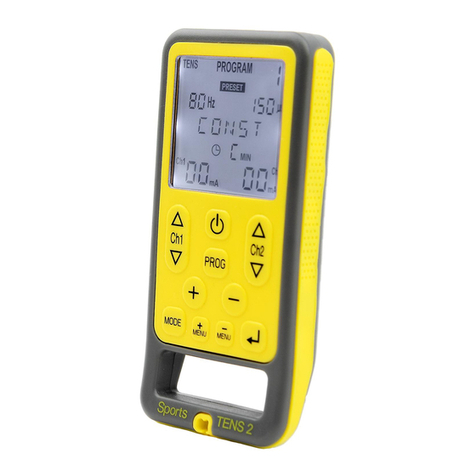
TensCare Unifit User manual


Quickstart Guide
Connect the unit to the electrode pads
Conecte la unidad a los parches de
electrodos
Connectez l’appareil aux électrodes
Verbinden Sie das Gerät mit den Elektroden
Collegare l’unità agli elettrodi
Place the electrodes on the area to be treated
Coloque los electrodos en el área a tratar
Placez les électrodes sur la zone à traiter
Platzieren Sie die Elektrodenpads auf dem zu
behandelnden Bereich
Posizionare gli elettrodi sulla zona da trattare
Press and hold the power button
Mantenga apretado el botón de encendido
Appuyez sur le bouton d’alimentation et
maintenez-le enfoncé
Drücken und halten Sie die Einschalttaste
Tieni premuto il pulsante di accensione
Select a mode by pressing the button MODE
Seleccione un modo pulsando el botón M
Sélectionnez un mode en appuyant sur le
bouton M
Wählen Sie einen Modus durch Drücken die
M-Taste
Scegli una modalità premendo il pulsante M
Select a programme by pressing the P button
Seleccione un programa pulsando el botón P
Sélectionnez un programme en appuyant sur
le bouton P
Wählen Sie ein Programm, indem Sie die
P-Taste drücken
Selezionare un programma premendo il
pulsante P
Regulate the intensity for each channel
Regule la intensidad para cada canal
Régler l’intensité pour chaque canal
Regulieren Sie die Intensität für jeden Kanal
Regolare l’intensità per ciascun canale
1 2
3 4
5 6

4
Dear Customer,
Thank you for choosing Unit. TensCare stands for high-quality, thoroughly tested products
for the applications in the areas of gentle electrotherapy, muscle toning, continence
management and pain relief during labour.
Please read these instructions for use carefully and keep them for later use, be sure to
make them accessible to other users and observe the information they contain.
Best regards,
Your TensCare Team

5
Contents
01. Introduction 6
02. Intended Use 6
03. Contents 6
04. Safety Guidelines 7
05. Unit Device 10
06. Directions for Use 11
07. TENS Programmes 14
08. EMS Programmes 16
09. Massage Programmes 18
10. Pad Placement 19
11. Charging Unit 23
12. Cleaning & Storage 25
13. Replacement
Parts 25
14. Warranty 25
15. Troubleshooting 27
16. EMC 28
17. Disposal of Electronic Products (WEEE) 28
18. Technical Specication 29

6
x4x1
x1
x2
x1
01. Introduction
Unit combines the treatment
capabilities of a TENS device, an EMS or
NMES device, and a relaxing massage
stimulator in one unit.
It sends a small and gentle stimulation
(similar to your natural nerve impulses) to
the muscles being treated via two or four
auto-adhesive electrode pads, in order
to help you to rm and tone your body.
Rehabilitation: neuromuscular
facilitation, muscle re-education, muscle
training, prevention/slowing of atrophy/
hypotrophy. EMS has been shown to
improve blood ow and circulation.
Sports training: improve muscle strength
and performance; warm up, strength,
speed, power, resistance, endurance and
recovery.
Muscle relaxation: loosening up of
muscular tension, improving muscular
fatigue symptoms and reduced fatigue
and muscle tension.
02. Intended Use
Unit is a medical device designed
to be used in the home healthcare
environment to improve muscle tone
and bulk, as well as provide symptomatic
relief and management of acute or
chronic localised pain and muscle
pain. It is suitable for use by all who can
control the device and understand the
instructions.
Do not use the device for any purpose
other than this intended use.
Warning: Not suitable for use in
children without medical
supervision.
03. Contents
The pack contains:
1 x Unit unit
2 x Lead wires (L-CPT)
4 x 50x50mm electrodes (E-CM5050)
1 x Charging adaptor (EU/UK) (X-UNICH)
1 x Detachable belt clip
1 x Storage pouch
1 x Instructions for use

7
04. Safety
Guidelines
Contraindications
• Do not use if you have a pacemaker
(or if you have a heart rhythm
problem) or with any electronic
medical devices. Using this unit with
electronic medical devices may
cause erroneous operation of the
device. Stimulation in the direct
vicinity of an implanted device may
affect some models.
• Do not use during the rst three
months of pregnancy. It is not known
whether TENS and EMS may affect
foetal development.
• Do not use on the abdomen in the
later stages of pregnancy. Stop
using immediately if you experience
unexpected contractions.
Warnings
• Do not use when driving, operating
machinery, or similar actions needing
muscular control. Loose electrode
pads, damaged leads, or sudden
changes in contact may cause brief
involuntary muscle movements.
• Do not use to mask or relieve
undiagnosed pain. This may delay
diagnosis of a progressive condition.
• Do not use if you have, in the area
being treated: active or suspected
cancer or undiagnosed pain with a
history of cancer. Stimulation directly
through a conrmed or suspected
malignancy should be avoided as it
may stimulate growth and promote
spread of cancer cells.
• Do not use simultaneously with
high frequency hospital diagnostic/
therapeutic equipment. Doing so
may result in burns at the site of the
electrodes and possible damage to
device.
• Do not use electrodes on the front of
the neck. Stimulation on the front of
the neck can affect your heart rate or
cause contraction of the throat.
• Do not use electrodes across the
chest. Very strong stimulation
across the chest may cause an
extra heartbeat and/or rhythm
disturbances to your heart, which
could be lethal.
• Do not use in close proximity (e.g. 1
m) to a shortwave or microwave as
this may produce instability in the
stimulator output.
• Do not apply near the thorax because
the introduction of electrical current
may increase the risk of cardiac
brillation.
• Stimulation should not be applied
across or through the head, directly
on the eyes, covering the mouth, on
the front of the neck (especially the
carotid sinus), or from electrodes
placed on the upper back or crossing
over the heart.

8
Cautions
• Caution should be used if you have a
bleeding disorder as stimulation may
increase blood ow to the stimulated
region.
• Caution should be used if you have
suspected or diagnosed epilepsy
as electrical stimulation may affect
seizure threshold.
• Caution should be observed when
using the device at the same time
as being connected to monitoring
equipment with body worn electrode
pads. It may interfere with the signals
being monitored.
• Caution should be used following
recent surgical procedures.
Stimulation may disrupt the healing
process.
• Do not permit use by children unable
to understand the instructions or
persons with cognitive disabilities, i.e.;
Alzheimer’s disease or dementia.
• Keep away from children under 5
years of age, pets and pests. Long
lead wires and charging cables - risk
of strangulation in infants.
• Caution should be observed when
using Unit at high strength settings.
Prolonged use at high settings
may cause muscle injury or tissue
inammation. Unit is capable of
delivering outputs in excess of 10
mA (RMS) or 10 V averaged over any
period of 1 sec.
• Not intended for use in an oxygen rich
environment.
• Not intended for use in conjunction
with ammable anaesthetics or
ammable agents.
• The patient is an intended operator.
• Do not service and maintain the
device while in use with a patient.
• Maintenance and all repairs should
only be carried out by an authorized
agency. The manufacturer will not
be held responsible for the results
of maintenance or repairs by
unauthorized persons.
• If necessary, we will provide circuit
diagrams, component part lists or
other information that will assist
authorized service personnel to repair
the device.
• Do not immerse your device in water
or place it close to excessive heat
such as a replace or radiant heater
or sources of high humidity such as a
nebulizer or kettle as this may cause it
to cease to operate correctly.
• Keep the device away from sunlight,
as long-term exposure to sunlight
may affect the rubber causing it to
become less elastic and crack.
• Keep the device away from lint and
dust, as long-term exposure to lint or
dust may affect the sockets or cause
the battery connector to develop a
bad contact.
• Temperature & Relative Humidity of
storage: -10°C–+45°C (≤ 3 months),
15%-75% R.H. Temperature &
Relative Humidity of transportation:
-10°C–+60°C, 15%-75% R.H.

9
• There are no serviceable user
parts. Do not attempt to open or
modify the unit. This may affect the
safe operation of the unit and will
invalidate the warranty.
Note: There are no known side
effects to use and long-term use is
not harmful. However, the device works
your muscles and unaccustomed
amounts of exercise may produce
muscle ache. If this happens, simply
reduce the strength of the machine or
allow your muscles to rest until the aching
disappears.
Electrode Pad Cautions
• Do not ignore any allergic reaction to
the electrode pads: If a skin irritation
develops, stop using the device, as
this type of electrodes may not be
suitable for you. Alternative electrode
pads specially made for sensitive skin
are available.
• Do not use this device with leads
or electrode pads other than those
recommended by the manufacturer.
Performance may vary from
specication. Electrodes with smaller
surface area may cause tissue
irritation.
• Do not use electrodes smaller than
50x50mm.
Do not place electrode pads:
• On skin, which does not have normal
sensation. If the skin is numb too great
a strength may be used, which could
result in skin inammation.
• On broken skin. The electrode pads
could encourage infection.
• On the front of the neck. This could
cause the airway to close, giving
breathing problems. May cause
sudden drop in blood pressure
(vasovagal response).
• Over the eyes. May affect eyesight or
cause headaches.
• Across the front of the head. Effect
on patients who have had strokes
or seizures is not known. May affect
your sense of balance. The effects of
stimulation on the brain are unknown.

10
05. Unit Device
CH1 ▲ CH1 ▼control the intensity of the
left-hand lead/electrode pads.
CH2 ▲ CH2 ▼control the intensity of the
right-hand lead/electrode pads. Each
press of the ▲and ▼buttons will adjust
the intensity by 1mA. The intensity can
be increased or decreased quickly by
pressing and holding the ▲▼ buttons.
20
mA
CH1
32:00
mA
CH2
30
55 280
-
-
-
-
-
-
-
-
-
-
-
-
-
-
|||||||||||||||||||||||| ||||||||||||||||||||||||rest
PROGP
TENS EMS IIII MASS
5
Warning
Frequency
Keypad Lock
Mode
Programme Type
EMS Phase
Active Output
Indicator
Settings
Increase CH1
Intensity
Decrease CH1
Intensity
Mode Selection
Battery
Pulse Width
Connection Error
Output
Information
CH2 Intensity
Treatment Time
Increase CH2
Intensity
Decrease CH2
Intensity
Programme
Selection
Phase Skip
Programme
Power Button
Power
To turn the device on, press and hold the
power button for 1 second.
To turn the device off, press and hold the
power button for 3 seconds.
Channel Increase/Decrease
Increase and decrease the intensity of
each channel using the increase and
decrease buttons.
CH2 Intensity

11
06. Directions for
Use
Connecting the Lead Wires
and Pads
1. Insert the lead wire plug into the base
of the unit.
2. Attaching the electrode pads to the
lead wire. Push the pin ends rmly into
the pigtail ends of the electrode pads.
3. Before applying the electrode pads to
your body, make sure your skin is clean
and dry.
4. Place the electrode pads on the skin
(see Pad Placement).
Warning: Ensure Unit is switched
off before applying the electrode
pads on the skin.
Turning Unit On
To turn the unit on, press the Power
button on the side of the device for
approximately 1 second until the display
shows. The unit will start with the
programme you used last.
Unit will automatically turn off if both
strength controls are set to zero for 5
minutes.
Mode and Programme
Selection
1. Press the mode selection button to
scroll through and select the desired
mode.
Mode
Press the mode selection button to switch
between modes (TENS, EMS I, EMS II, EMS III
EMS IIII or Massage).
Programme
Press the programme to change the
selected programme.
Settings
Press the settings button to change the
settings of selected programmes. See
full directions for changing settings in
section 6.
Phase Skip
In EMS programmes, press phase skip
button to skip to the next phase of the
programme.
Lock / Unlock
If no key is pressed for 30 seconds, Unit
will auto-lock. To unlock the
keypad, press either CH1- or CH2-.
Keypad Lock Icon
When the keypad is locked, the icon
will be displayed. If the icon is ashing,
this means a button has been
pressed whilst the device is
locked.
Warning Icon
The warning icon will ash in EMS
manual programmes if the Rest
period is less than Rest Time=Work
Time*(WorkHz-16.66)/16.66 seconds.
Connection Error Icon
If the device is incorrectly connected to
the body, this the connection error icon
will ash.

12
2. Once you have selected the mode,
press the programme selection
button to scroll through and select the
programme of choice.
Each time you change the mode or
programme, the intensity level will revert
to zero. This is a safety feature to alleviate
any sudden feeling of a surge, as each
programme gives a different sensation.
Selecting Treatment Time
The default treatime time for preset
programmes is shown. For relevant
programmes, treatment time can be
changed by pressing the settings button.
Use CH2▲▼to select the preferred
treatment time. You can select between
5 - 90 minutes or continuous (marked as
C).
Setting the Intensity
Once the electrode pads have been
connected and applied to the body and
the programme has been selected, the
intensity levels can be adjusted. Unit has
99 levels of intensity.
CH1▲ CH1▼control the intensity of the
left-hand lead/electrode pads. CH2▲
CH2▼control the intensity of the right-
hand lead/electrode pads. Each press
of the ▲and ▼buttons will adjust the
intensity by 1mA. The intensity can be
increased or decreased quickly by
pressing and holding the ▲▼ buttons.
At low intensity levels, it is common for no
sensation to be felt. Continue to increase
the intensity until the sensation is strong
but comfortable.
During a session, your body can beome
used to the sensation. If this is the case,
increase the intensity levels.
The intensity controls will not operate
unless the Unit has been properly
conencted to the body. If the Unit
detects a disconnection on either
channel, the intensity will rest to 0mA and
the connection error icon will ash. This
is a safety feature designed to prevent
sudden surges in stimulation.
When an orange circle is displayed next
to the intensity levels, this means the
output is high enough be harmful if not
used correctly. Please use with caution.
Manual Setting Selection
In most cases, the programmes settings
are preset. These programmes are
identied by ‘P’. When a programme has
manual settings available, ‘M’ will be
displayed.
In these programmes you are able
to select and change the following
parameters:
Frequency (Hz)
Pulse Width (μs)
Treatment Time (min)
Work Time (EMS programmes only) (s)
Rest Time (EMS programmes only) (s)
Note: Treatment time can be
adjusted for all TENS programmes.
1. To adjust the settings of a
programme, press the settings
button.
2. Use the CH1▲▼buttons to cycle

13
between the different settings
you wish to change. The selected
setting will ash.
3. Use CH2▲▼to increase or decrease
these settings.
4. To conrm your manual settings,
press the settings button again.
Alternativelty, the device will
automatically conrm your settings
if no button is pressed for 5 seconds.
Warning: In the EMS manual
programmes a warning triangle
will be displayed if the Rest period is less
than Rest Time=Work
Time*(WorkHz-16.66)/16.66 seconds
Programme settings can be reset by
pressing the mode and programme
buttons simultaneously.
Completing a Session
Once you have correctly connected the
device, electrode pads, selected the
mode, programme and intensity, the
treatment session will be underway.
Note: If the sensation becomes
uncomfortable, reduce the
intensity
The session will run for the selected
treatment time.
After Your Session
Should you wish to start a new session
select mode, programme and intensity
as before.
To turn the Unit off at any stage, press
and hold the power button for 3 - 5
seconds.
After the session is complete and Unit is
switched off, remove the electrode pads
from your skin by holding the electrode
pad itself and gently pulling. Do not pull
on the lead wires or the pigtail wire of the
electrode pad.
Replace the electrode pads to their
protective plastic shield and return them
to the re-sealable plastic bag. Ensure the
bag is sealed.
Usage Memory
To view the usage memory, press and
hold the settings and phase skip buttons
for 3 seconds.
To return to the home screen, press and
hold the settings and phase skp buttons
for 1 second.
The device memory can be reset by
holding the mode and programme
buttons simultaenously for 3 seconds.
This can only be done whilst viewing the
memory screen.

14
07. TENS
Programmes
Transcutaneous Electrical Nerve
Stimulation provides a natural solution to
pain relief in one of two ways:
• Pain Gate
Stimulates sensory nerves to block pain
signals from being received from the
brain.
Pain Gate Stim provides pain relief whist
being used.
• Endorphin Release
Low frequency TENS promotes the release
of endorphins, the body’s natural pain
killer.
Endorphin Release builds up over 40
minutes and will last several hours after
stimulation is ended.
• Programme Selection
There is not one programme for a
particular condition, and the best
choice varies from each person, even
if they have the same type of pain. The
“Recommneded Use” are suggestions to
help with programme selection. However,
each user needs to select both the
programme and the positioning of the
electrode pads that is best for them.
• Intensity Selection
The stimulation sensation should be
strong but comfortable. Further increases
during use may be necessary if your
body becomes used to the sensation.
• Frequency of Use
TENS can be used for as long as it is
necessary. Continuous treatment is
safe, but electrode pads should be
repositioned regularly (at least every 12
hours) to allow the skin to be exposed to
the air.
The Endorphin Release programmes work
best when the strength is high enough
to cause small muscle contractions.
Best results are achieved with a session
duration between 20 and 40 minutes.
Longer use may cause muscle ache.

15
Prog Type of Relief Sensation Recommended Use
1Pain Gate Smooth, constant
sensation For rst use of TENS. These
programmes have slightly different
parameters so choose the one that
works best for you.
2Pain Gate Smooth, constant
sensation
3Endorphin Tapping For chronic pains such as back pain
and arthritis
4Pain Gate +
Endorphin Pulsing For radiating pain in arms and
legs and deep muscular pain
(Osteoarthritic pain in the knee,
Sciatica central pain). These
programmes have slightly different
parameters so choose the one that
works best for you.
5Pain Gate +
Endorphin Pulsing
6Pain Gate +
Endorphin
Alternating tapping
/ constant
For maximum production of the two
central opioid peptides associated
with pain relief. These programmes
have slightly different parameters
so choose the one that works best
for you.
7Pain Gate +
Endorphin
Alternating tapping
/ constant
8Pain Gate +
Endorphin
Relaxing message
sensation
Settings modulate to prevent
accomodation occuring.
9Pain Gate +
Endorphin
Relaxing message
sensation
Settings and intensity modulate to
prevent accomodation occuring.
10 Pain Gate Smooth, constant
sensation
Treating nerve rich areas (e.g. facial
pain, neck pain)
11 Pain Gate or
Endorphin Constant sensation
For manual settings control.
12 Pain Gate +/or
Endorphin Pulsing
For full programme parameters, please see section 18 Specication

16
08. EMS Programmes
Before selecting an EMS programme, you will need to select an EMS Mode:
EMS I
For small muscles such as those in the hands.
EMS II
For medium sized muscles such as arms and feet.
EMS III
For large muscles such as thighs, buttocks and abdomen.
EMS IIII
Advanced muscle mass mode for large muscle mass.
With the mode selected, please choose from one of the following programmes.
Prog Application Description
1Muscle
Calming
Relax the muscles as much as possible and to promote the
body’s natural endorphins to promote pain relief and to
improve the blood circulation and provide oxygen into the
muscle.
2Resume
Training
Promotes slow twitch bres to build muscle strength to help
reduce muscle atrophy ready for resuming training activities.
3Resume
Training Progress from programme 2 as tolerance increases.
4Resistance
Training
Improving the capacity to develop very high level of muscle
force over a long period of time. Improving the efcacy of
oxygen consumption at the muscle level and the capacity
to withstand toxin accretion, such as lactic acid. For sports
activities that require very high levels of prolonged muscle
activity: Rowing, Cycling, Middle distance running.

17
Prog Application Description
5Resistance
Training
Progress from programme 4 as tolerance increases.
Alternative application: Lipolysis
Increasing blood circulation and modifying the metabolism
of the lipocytes. This helps to stimulate the subcutaneous
deposits of fat, reducing or eliminating the ‘Orange Peel’
effect of the skin surface
6
Maximum
Muscle
Contraction
To increase muscle bulk and volume and to improve muscle
force. Searching for muscular hypertrophy.
7Muscle
Toning
Strengthening the muscles, improving blood circulation and
capillary bed density. Ideal for applying to the Thigh, Legs,
Bottom and Abdomen.
8Muscle
Toning
Similar to programme 7, but adding bulk in preference to
endurance
9
Force Output,
Anaerobic
Activity
Increasing the muscle capacity to a level of instantaneous
maximum muscle force, changing muscle force into explosive
action. Used for all activities requiring maximum muscle
output in a very short space of time, such as Judo, short
distance sprinting, throwing the discus or shot-put.
10 Manual Select the frequency, the pulse width, the work and active rest
time. At rst use, the default values are shown. Note: There are
two manual programmes as the device will remember your
previously selected settings. This allows you to create two
custom programmes.
11 Manual
For full programme parameters, please see section 18 Specication

18
Combining Voluntary
Activity
Voluntary muscular activity is more
effective than stimulation, and it may
improve progress if you combine
voluntary contraction with stimulation.
For best results, always try to contract
voluntarily during the work phases.
Frequency of Use
Ideally, use EMS programmes once every
two days for each muscle with a day of
rest in between. It is possible to work on
pairs of muscles, for example thighs and
abdominal muscles, treating one set one
day and the other the next day.
Regular use over a period of 4 - 6 weeks
shouldgive goodinitialresults,depending
on the body shaping, toning, sports
training or rehabilitation and recovery
needs.
09. Massage
Programmes
Massage programmes can be used to
relieve muscle stiffness. Experiment with
the different programmes to nd the one
that you nd the most relaxing.
Programme 1 alternates between two
strong squeezing/kneading feelings.
Programme 2 alternates between slow
and fast tapping.
Programme 3 alternates between gentle
and strong kneading.
Work / Rest Selection
When selecting work and rest times
for manual programmes, the Warning
triangle is displayed if the Active Rest
period is less than:
Rest Time = Work Time * (WorkHz-16.66) /
16.66 seconds.
This is because muscle bres can only
activate a limited number of times a
minute (about 1000) without becoming
fatigued.
Warning: Consult your healthcare
professional before altering these
settings. Correct settings depend on
your muscle tone and exercise goals.
Inappropriate settings could cause
discomfort, undesired muscle balance,
or even muscle injury.
Intensity Selection
The aim of EMS is to produce powerful,
visible muscle contractions. The intensity
should be increased to roughy 3x the
level at which you can rst feel tingling,
or to as high as you can stand without
causing pain.
Use a low intensity for the rst session to
help you to understand how the machine
works.
Intensity should be increased throughout
a session and gradually over time. This
will help produce effective, pain-free
contractions.

19
Programme 4 has ve steps of gradually
increasing strength of kneading,
alternating with tapping.
Programme 5 & 7 alternates between
slow and medium-strong tapping.
Programme 6 is a gentler form of
programme 5.
Programme 8 is a pumping sensation
roughly equivalent to your heart rate, that
slowly increases in speed over the course
of the 20 min treatment. It is especially
effective with swollen legs and veins.
Programme 9 is squeezing/kneading in 6
steps of increasing intensity.
Programme 10 generates a tapping
sensation, gradually speeding up, then
slowing down.
Note: There are no restrictions to
the frequency of use of massage
programmes.
10. Pad
Placement
TENS Pad Placement
The easiest way is to apply the electrode
pads around/near the source of the pain.
TENS activates the nerves best if it travels
along the nerve rather than across it. So,
place one pad further from the spine
than the source of the pain, and one
closer.
If the pain is in, or close to, your spine
you can place one pad either side of the
spine.
Note: See examples of positioning
in the instructions enclosed with
your pads.
EMS Pad Placement
Electrode placement for EMS is important
for obtaining the best results.
Place two electrode pads over the bulk of
the muscle, with one electrode over the
muscle’s motor point. The motor point
is the area on the skin that is located
closest to the motor nerve’s entry into the
muscle – about 1/3 of the way down the
muscle from the spine. Here, it is easiest
to trigger a contraction by electrical
stimulation.
Experiment by moving the electrode
pads across the skin until you locate
the point over the muscle that gives the
cleanest contraction.
Note: The +electrode pad needs
to be plugged in to the red lead
wire connector, the – pad to the black
lead wire connector.

20
Shoulders & Trapezius
Biceps
Triceps
Abdominals
Abdominals
Chest
Table of contents
Languages:
Other TensCare Fitness Equipment manuals
TensCare
TensCare Sure PRO User manual

TensCare
TensCare Ova User manual
TensCare
TensCare iTouch Sure Troubleshooting guide

TensCare
TensCare Sports TENS 2 User manual

TensCare
TensCare MT9000 User manual

TensCare
TensCare Unipro User manual
TensCare
TensCare Elise 2 User manual
TensCare
TensCare Perfect PFE User manual
TensCare
TensCare iTouch Tone User manual

TensCare
TensCare Perfect PFE User manual
