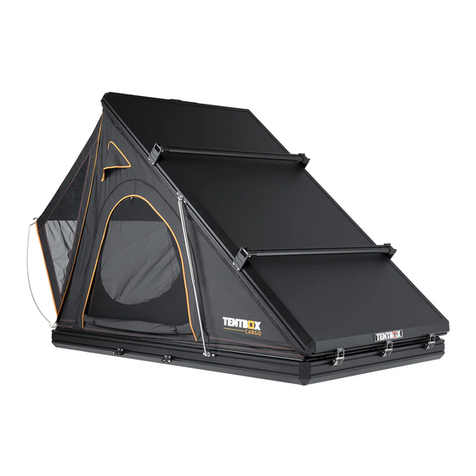
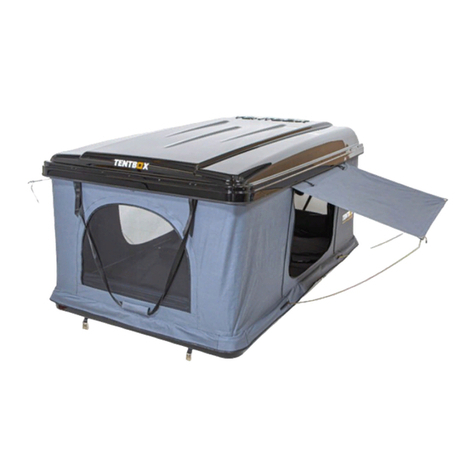
TentBox LITE User manual

LITE
It is essential that you read and
understand this guide before attemting
to mount or use your TentBox
USER GUIDE
WELCOME
TO
THE
ADVENTURE

Installation Video
It is essential to watch the TentBox Lite installation
video.
Available at: www.tent-box.com/learn/installation
Questions
If you have any questions regarding the installation or
use of your TentBox, please get in touch with our
support team. Do not install your TentBox if you do not
understand these instructions.
Email: [email protected]
TentBox Community
Don't forget to join our facebook community to share
stories and TentBox tips.
Find us at: www.tent-box.com/meet-the-community
Become a TentBox Ambassador!
Would you like to become TentBoxambassador? You
can earn free goodies and a commissionon every sale
that you generate.
You'll find a sign up link in one of your order emails. If
you can't find it, email [email protected] and we'll
send you one.

Step 1: Slide the bolts along the rails, and drop them through the pre-drilled holes in
the
base of your TentBox.
Step 2: To secure the rails in place, you apply washers and nuts to the bolts, from the
inside of your TentBox (underneath the mattress).
ⓘ
Make sure to tighten the rails securely using 4x washers and 4x nuts in total.
ⓘ
If you want your TentBox to fold open over the side of your vehicle, position the
rails parallel to the opening hinge. If you want your TentBox to fold open towards the
rear of your vehicle, position the rails perpendicular to the opening hinge.
How to assemble your TentBox
You will need to attach several parts to your TentBox Lite, before it is ready to use. Our
installation videos give a much clearer explanation of this process.
Attaching your Fixing Rails
You will need to securely attach the two fixing rails to the base of your TentBox, in
order to mount it to your vehicle.

Step 1: You need to attach the ladder mounts in a similar way to the fixing rails, by using
the pre-drilled holes, and securing them from inside the TentBox, using the parts
provided.
Step 2: Attach the ladder to these mounts, using the nuts and washers provided.
ⓘ
Make sure you tighten all of the nuts securely, using the nuts, bolts and washers
provided
Attaching your ladder
You must attach the ladder to your TentBox Lite using the brackets provided, it will
remain permanently attached, and never needs to be removed.

Step 1: Remove the PVC cover, undo the velcro straps
Step 2: Fold your TentBox out, using the ladder for leverage
Step 3: Extend the ladder to the correct height. Make sure there is not too much of an
angle, as it will put unnecessary strain on the ladder. The ladder does not act as the sole
support for the fold-out part of your TentBox, but it does add extra support, so must be
kept in place whilst inside.
ⓘ
Ensure that the hinge is correctly engaged, before climbing into your TentBox
How to use your TentBox
Opening your TentBox
There are 8x Tent Poles that come with your TentBox Lite. You use these to prop open
the rain covers for the windows and doors, which is essential to the set-up of your
TentBox Lite.
Step 1: Slot the poles into the holes provided around the base of your TentBox
Step 2: Bend the poles up to hook them into the metal eyelets fitted on the TentBox
fabric
Using your Ladder
Step 1: Pull the ladder outwards to extend it.
Step 2: Push the black buttons inwards to collapse it, but be careful of your fingers, as it
can drop suddenly.

Step 1: Remove all of the tent poles
Step 2: Fold the TentBox closed, using the ladder. Reduce the height of the ladder, so
that it sits flush with the edge of your TentBox. Do not close the ladder all the way,
otherwise it will be hard to open it again next time.
Step 3: Ensure the sides are tucked in thoroughly, otherwise the PVC cover will not fit
properly.
Step 4: Tighten the velcro straps, apply the PVC cover, making sure that it is properly
velcroed down.
Step 5: Apply the two outer velcro straps, to ensure that your TentBox is secure and
ready for the road.
Closing your TentBox

Step 1: Attach a plate to one of the t-shaped bolts, using the nut provided.
Step 2:Making sure the bolt is orientated correctly, and slide it onto the fixing rail.
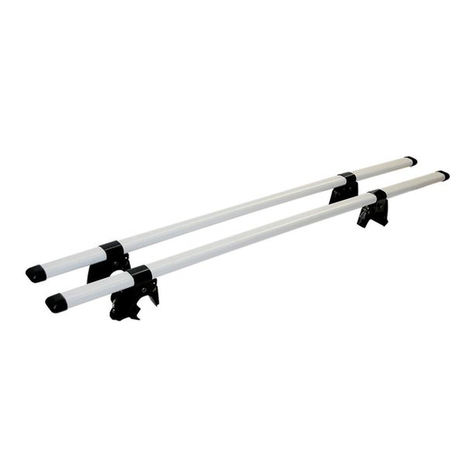
Step 3: Position one bolt on either side of your roof bar, with the plate passing
undernath your roof bar, to act as a clamp.
Step 4: Using the nuts provided, tighten the larger plate to the hanging bolts, so that
it is securely fastened to your roof bar. Ensure that you tighten the nuts fully.
Step 5: Repeat the above steps at all 4 corners of your TentBox, so that you have 4
secure fixing clamps between your TentBox and your roof bars.
How to mount your TentBox
1. With the help of another person, carefully lift your TentBox onto your roof bars
and position centrally.
2. Fix the TentBox to your roof bars at 4 points (4 corners), using the fixing parts, as
shown below. Ensure that you tighten the nuts adequately, and that your TentBox is
secure.

Caring for your TentBox
Condensation and Mould
As with all enclosed spaces, condensation, and resulting dampness can occur. To
reduce condensation, and prevent mould, we advise following these steps:
Step 1: Whist sleeping, leave a couple of window open slightly to improve
ventilation and reduce condensation build up. If this is not possible, because it is too
cold, ensure you follow the next step.
Step 2: If there has been some condensation build up, air your TentBox out before
closing it. If this is not possible, ensure that you open it up again as soon as you can,
to allow it to dry. Ideally within 24 hours.
Before storing your TentBox for longer than 24hrs, ensure that it is completely dry,
inside and out.
Re-waterproofing
To maintain 100% waterproofness, the exterior of your TentBox canvas material can
be reproofed with any standard canvas re-proofer. We would suggest doing this
once a year. You do not need to re-proof your exterior rainfly.
Storage
You can keep your TentBox on your vehicle all year round, as it is designed to
withstand all weathers.
If you would prefer to remove your TentBox from your vehicle when you are not
using it, or over winter time, it is best to store it inside, in a dry place. To save space,
you can store it on its side if you would like, but it is a good idea to put some
protective matting down to stop it getting scratched.

Key Safety Points
Your roof bars are installed safely, and securely as per the manufacturer's
instructions
Your TentBox is installed safely, and securely as per our fitting instructions
You always ensure that your TentBox is closed fully and securely with the closing
straps when driving
You regularly check that your roof bars are still securely fastened, and that none
of the components are damaged.
You regularly check that your TentBox is securely fastened to your roof bars, and
that none of the components are damaged.
You always stick to the National Speed Limit on Motorways of 70mph
You must ensure that:
Please ensure that you also read the ‘further safety information’ section, at the end
of this guide before using your TentBox.
Please note: Your warranty is void if any modifications are made to your
TentBox, including the removal of TentBox logos.
The manufacturer is not liable for any damage or accident that may occur as a result
of non-compliance with our usage instructions, modifications made to parts or the
usage of any parts other than the manufacturer’s original parts. The warnings,
cautions and instructions in this document can’t cover every possible situation, so it
is understood by the operator that common sense and caution must be applied. It is
your responsibility to pass these instructions on to any third party who uses this
TentBox, including second hand sales.
This document extends the warranty of the TentBox for a period of 24 months from
the date of purchase. This warranty covers the repair or the replacement of the
faulty parts at our discretion. The warranty cover is limited to manufacturing faults
and is only valid if the instructions and recommendations in this document have
been adhered to. Second hand sales are not covered, however we will always strive
to help all TentBox owners to repair a damaged TentBox, and will always supply
spare parts.
Warranty Information

•We advise that you DO NOT drive over 70mph (110kmh) whilst using your TentBox
and that you always adhere to speed limits.
•DO at the start of every journey and at regular intervals during every journey check
that your TentBox is firmly fixed to your roof bars and that all of the locking straps
are securely fastened. Also check that your roof bars are secure to your vehicle. Only
ever check your TentBox in a safe and suitable location.
•DO NOT use your TentBox if there is any visible damage to any part of it or its
components, instead contact us to see how we can help. This is especially applicable
to buckles and fixing parts.
•Understand that secured loads and incorrectly mounted roof bars can come lose
during journeys and can cause serious accidents.
•Make sure that you give due consideration to the change in your vehicle height and
drive behaviour (side-wind sensitivity, corner and braking behaviour).
•You must always consult your vehicle and roof bar manuals to ensure you are
following their advice, these must be always be carried in your vehicle along with
your TentBox safety and fitting instructions.
•Do not use bleach, alcohol or ammonia based cleaning liquids on yourTentBox
otherwise the surface of your TentBox may get damaged
•Please note the following when using your TentBox:
-The height of your vehicle can increase by up to 90cm (dependant on your roof
bars).
-Beware of low entrances, low hanging branches, etc.
-Wind noise may be generated when travelling with a TentBox
-When using an automatic car-wash facility your TentBox and must first be removed.
In addition to these usage instructions, due consideration should also be given to
mounting instructions for your roof bars and the operating instructions of your
vehicle.
For your safety, you should only use tested (e.g. GS-tested) roof bars that are
authorised for usage in conjunction with your vehicle.
In order to avoid generating excessive lifting forces, your TentBox should be
mounted parallel to the line of the road and not at an angle
When climbing in and out of your TentBox always use the ladder with due caution
and never allow children to use it alone. Make sure the ladder hooks are in good
condition, contact us if you need replacements.
Further safety information
Table of contents
Other TentBox Automobile Accessories manuals
Popular Automobile Accessories manuals by other brands
Aries
Aries 4524 installation manual

Alexo Sweden
Alexo Sweden ATS 624-0600 Installation and operating instructions
Lippert Components
Lippert Components SOLERA SLIDER installation manual

SCC
SCC QUICK GRIP 1100 Series Installation and Removal Instructions
Auto Styling
Auto Styling Truckman 8HTCL00AATOH6E Fitting instructions
EZTRUNK
EZTRUNK PHANTOM JK Assembly manual
